Pioneer DVR-A04 Operating Instructions Manual
Dvd-r/rw cd-r/rw writer
Hide thumbs
Also See for DVR-A04:
- Specifications (2 pages) ,
- Operating instructions manual (14 pages) ,
- Service manual (70 pages)
Table of Contents
Advertisement
Available languages
Available languages
Quick Links
Download this manual
See also:
Service Manual
DVD-R/RW CD-R/RW WRITER
LECTEUR DE DVD-R/RW, CD-R/RW
DVD-R/RW-CD-R/RW-WRITER
REGISTRATORE PER DISCHI DVD-R O -RW E CD-R O -RW
GRABADORA DE DISCOS DVD-R/RW Y CD-R/RW
DVR-R/RW, CD-R/RW WRITER
DVR-A04
Operating instructions
Mode d'emploi
Bedienungsanleitung
Istruzioni per l'uso
Manual de instrucciones
Gebruiksaanwijzing
Advertisement
Table of Contents

Related Manuals for Pioneer DVR-A04


Summary of Contents for Pioneer DVR-A04
- Page 1 DVD-R/RW CD-R/RW WRITER LECTEUR DE DVD-R/RW, CD-R/RW DVD-R/RW-CD-R/RW-WRITER REGISTRATORE PER DISCHI DVD-R O -RW E CD-R O -RW GRABADORA DE DISCOS DVD-R/RW Y CD-R/RW DVR-R/RW, CD-R/RW WRITER DVR-A04 Operating instructions Mode d’emploi Bedienungsanleitung Istruzioni per l’uso Manual de instrucciones Gebruiksaanwijzing...
- Page 2 DANGER – VISIBLE AND INVISIBLE LASER RADIATION WHEN OPEN. AVOID DIRECT EXPOSURE TO BEAM.
- Page 3 Product Name: DVD-R/RW CD-R/RW WRITER Model Number: DVR-A04 Responsible Party Name: PIONEER ELECTRONICS (USA) INC. Custormer Support Division Address: 1925 E. DOMINGUEZ ST. LONG BEACH, CA 90810 U.S.A. Phone: (310) 952-2820...
-
Page 4: Important Notice
Thank you for buying this Pioneer product. Please read through these operating instructions so you will know how to operate your model properly. After you have finished reading the instructions, put them away in a safe place for future reference. -
Page 5: Safety Instructions
POWER SOURCES - Operate this product from the type of power source indicated on the marking label. If you are not sure of the type of power available, consult Authorized Pioneer Dealer. OVERLOADING - DO NOT overload wall outlets and extension cords. Doing so can result in fire or electric shock. -
Page 6: About Region Codes
FEATURES • Write Speed CLV 1X and 2X at DVD-R CLV 1X at DVD-RW CLV 4X and 8X at CD-R CLV 4X at CD-RW CLV 4X at High speed CD-RW • Maximum Read Speed CAV 6X at DVD-ROM CAV 24X at CD-ROM •... -
Page 7: Front View
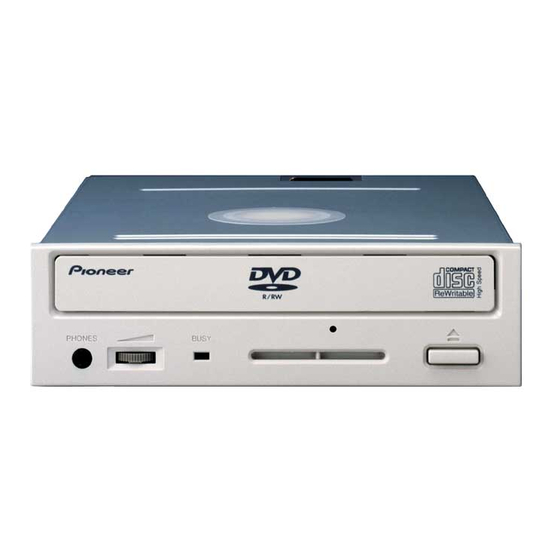
INTERFACE FRONT VIEW PHONES BUSY 1 Disc Tray Open the loading tray by pressing the eject button, then place a CD or DVD disc into the slit with the label facing up. Press the eject button or push the front part of tray to load the tray with the disc. Do not attempt to pull out the disc tray forcibly. -
Page 8: Rear View
INTERFACE REAR VIEW Pin 1 Pin 1 Pin 1 Pin 1 8 Audio Output This is a connector for output of analog audio. This connector is compatible with `Molex 70553`, choose a suitable connection cable. Name Function Left channel audio output. Ground. -
Page 9: Installation
INSTALLATION 1 Turn off the power supply of the personal computer, and remove the cover or the front panel. 2 Remove the blank panel installed on the front of the 5.25 inch slot. 3 Install the fixing slide rails on the drive. (When slide rails are required, please contact your shop or the computer manufacturer.) 4 Insert the drive into the slot. - Page 10 CONNECTIONS Pin 1 Audio Cable IDE Interface cable Power cable DC INPUT +5 G G +12 ÷ Turn off the power supply of the personal computer. ÷ Connect the power cable from the personal computer. At the time of connection, pay attention to the polarity of the cable.
-
Page 11: Specifications
Short-circuit socket x 1 Audio cable x 1 Mounting screw x 4 Operating instructions x 1 NOTE: • Specifications and design subject to possible modifications without notice, due to improvements. Published by Pioneer Corporation. Copyright C 2001 Pioneer Corporation. All rights reserved. - Page 12 Nous vous remercions pour cet achat d’un produit Pioneer. Nous vous demandons de lire soigneusement ce mode d’emploi ; vous serez ainsi à même de faire fonctionner l’appareil correctement. Après avoir bien lu le mode d’emploi, le ranger dans un endroit sûr pour pouvoir s’y référer ultérieurement.
-
Page 13: Instructions De Securite
SOURCES D’ALIMENTATION - Utiliser ce produit avec le type d’alimentation indiqué sur l’étiquette de fabrication. En cas de doute à propos du type d’alimentation disponible, consulter un revendeur Pioneer agréé. SURCHARGE - NE PAS surcharger les prises murales et les rallonges pour ne pas entraîner d’incendie ou de secousse électrique. - Page 14 CARACTERISTIQUES • Vitesse d’écriture Vitesse linéaire constante 1X et 2X pour DVD-R Vitesse linéaire constante 1X pour DVD-RW Vitesse linéaire constante 4X et 8X pour CD-R Vitesse linéaire constante 4X pour CD-RW Vitesse linéaire constante 4X pour CD-RW haute vitesse •...
-
Page 15: Vue Avant
INTERFACE VUE AVANT PHONES BUSY 1 Tiroir du disque Ouvrir le tiroir de chargement en appuyant sur la touche d’éjection, puis placez un CD ou un DVD dans l’emplacement prévu avec l’étiquette tournée vers le haut. Appuyer sur la touche d’éjection ou sur la partie avant du tiroir pour charger le disque. - Page 16 INTERFACE VUE DE LA FACE ARRIERE Broche 1 Broche 1 Broche 1 Broche 1 8 Sortie audio Connecteur pour sortie analogique audio. Ce connecteur est compatible avec la norme « Molex 70553 ». Choisir un câble de connexion approprié. Broche Nom Fonction Sortie audio voie de droite (Left) Terre...
- Page 17 INSTALLATION 1 Mettre l’ordinateur personnel hors tension et retirer le capot ou la face avant. 2 Retirer la plaque masquant de la fente de 5,25 pouces. 3 Poser les glissières de fixation sur le lecteur. (S'adresser au magasin ou au fabricant de l’ordinateur lorsque des glissières sont nécessaires.) 4 Introduire le lecteur dans la fente.
- Page 18 RACCORDEMENT Broche 1 Câble audio Câble d’interface IDE Cordon d’alimentation DC INPUT +5 G G +12 ÷ Mettre l’ordinateur personnel hors tension. ÷ Connecter le cordon d’alimentation de l’ordinateur personnel. Respecter la polarité du cordon lors du raccordement. ÷ Connecter le câble d’interface IDE. Confirmer que la broche 1 du connecteur IDE du lecteur est bien connectée à...
-
Page 19: Fiche Technique
Vis de fixation x 4 Mode d’emploi x 1 REMARQUE: • Les caractéristiques techniques et présentation de ce produit sont sujets à des changements sans préavis pour améliorations. Publication de Pioneer Corporation. C 2001 Pioneer Corporation. Tous droits de reproduction et de traduction réservés. - Page 20 Wir danken lhnen für den Kauf dieses Pioneer-Produkts. Lesen Sie sich bitte diese Bedienungsanleitung durch. Dann wissen Sie, wie Sie lhr Gerät richtig bedienen. Bewahren Sie sie an einem sicheren Platz auf, um auch zukünftig nachschlagen zu können. K015 Ge Das Geräuschaufkommen beträgt weniger als 70 dB.
- Page 21 STROMVERSORGUNG - Betreiben Sie das Gerät nur mit dem Stromversorgungstyp, der auf dem Aufkleber angegeben ist. Wenn Sie sich über die vorliegende Netzspannung nicht sicher sind, sprechen Sie bitte mit Ihrem autorisierten Pioneer-Händler. NETZÜBERLASTUNG - NIEMALS Wandsteckdosen und Verlängerungskabel überlasten! Ein Brand oder Stromschlag können die Folge sein.
- Page 22 LEISTUNGSMERKMALE • Schreibgeschwindigkeit CLV 1X und 2X bei DVD-R CLV 1X bei DVD-RW CLV 4X und 8X bei CD-R CLV 4X bei CD-RW CLV 4X bei Hochgeschwindigkeits-CD-RW • Maximale Lesegeschwindigkeit CAV 6X bei DVD-ROM CAV 24X bei CD-ROM • Puffer-Speicherkapazität: 2 MByte (Schreiben/Lesen) •...
- Page 23 SCHNITTSTELLE VORDERANSICHT PHONES BUSY 1 Disc-Schublade Öffnen Sie die Schublade, indem Sie die Eject-Taste drücken. Legen Sie dann eine CD oder DVD in den Schlitz, wobei die Beschriftung oben liegt. Drücken Sie die Eject-Taste oder drücken Sie vorne an der Schublade, um die Schublade mit der Disc zu laden. Versuchen Sie auf keinen Fall, das Disc-Fach gewaltsam herauszuziehen.
- Page 24 SCHNITTSTELLE RÜCKANSICHT Stift 1 Stift 1 Stift 1 Stift 1 8 Audioausgang An dieser Buchse liegt das analoge Audiosignal an. Diese Buchse ist zu ‘Molex 70553‘ kompatibel. Wählen Sie ein passendes Verbindungskabel. Stift Bezeichnung Funktion Audioausgangssignal, linker Kanal. Masse. Masse. Audioausgangssignal, rechter Kanal.
-
Page 25: Einbau
EINBAU 1 Schalten Sie die Spannungsversorgung des Personal-Computers aus und nehmen Sie die Abdeckung oder die Frontplatte ab. 2 Entfernen Sie die Blende von einem leeren 5,25-Zoll-Laufwerkschacht. 3 Befestigen Sie die Klemmschiebeschienen an das Laufwerk. (Wenn Schiebeschienen benötigt werden, wenden Sie sich an das Geschäft, wo Sie den Computer erworben haben, oder an den Hersteller des Computers.) 4 Schieben Sie das Laufwerk in den Schacht ein. - Page 26 ANSCHLÜSSE Stift 1 Audiokabel IDE-Schnittstellenkabel Spannungskabel DC INPUT +5 G G +12 ÷ Schalten Sie die Spannungsversorgung des Personal-Computers aus. ÷ Schließen Sie das Spannungskabel vom Computer an. Achten Sie dabei auf die richtige Ausrichtung des Steckers. ÷ Schließen Sie das IDE-Schnittstellenkabel an. Vergewissern Sie sich, daß der Stift 1 des IDE-Anschlusses richtig mit dem Stift 1 des Steckers verbunden ist.
-
Page 27: Technische Daten
5 % bis 90 % (keine Kondensation) [Zubehör] 1 Kurzschlußstecker 1 Audiokabel 4 Montageschraube 1 Bedienungsanleitung HINWEIS: Technische Änderungen zum Zweck der Produktverbesserung ohne vorherige Bekanntmachung vorbehalten. Veröffentlicht von Pioneer Corporation. Urheberrechtlich geschützt C 2001 Pioneer Corporation. Alle Rechte vorbehalten. - Page 28 Grazie per aver acquistato questo prodotto Pioneer. Leggere attentamente questo manuale di istruzioni per familiarizzarsi con l’uso dell’apparecchio. Conservare poi il manuale per ogni eventuale futuro riferimento. K015 It La generazione di rumore acustico è inferiore a 70 dB (norme ISO 7779 e DIN 45635).
-
Page 29: Istruzioni Di Sicurezza
Nel caso in cui non si sia sicuri del tipo di energia elettrica disponibile, rivolgersi ad un rivenditore autorizzato Pioneer. SOVRACCARICO - NON sovraccaricare le prese elettriche alla pareti ed i cavi di prolunga. Un eccesso di attacchi elettrici su una sola presa può... -
Page 30: Codici Regionali
CARATTERISTICHE • Velocità di registrazione Velocità lineare costante normale (1x) e doppia (2x) per dischi DVD-R Velocità lineare costante normale (1x) per dischi DVD-RW Velocità lineare costante quadrupla (4x) e ottupla (8x) per dischi CD-R Velocità lineare costante quadrupla (4x) per dischi CD-RW Velocità... -
Page 31: Lato Anteriore
INTERFACCIA LATO ANTERIORE PHONES BUSY 1 Piatto portadischi Aprire la fessura del vano portadischi agendo sul tasto di espulsione ed inserire nella fessura il disco CD o DVD con il lato etichettato rivolto verso l’alto. Per far entrare il disco dentro l’apparecchio premere di nuovo il tasto di espulsione o spingere il lato anteriore del disco stesso. -
Page 32: Lato Posteriore
INTERFACCIA LATO POSTERIORE Polo 1 Polo 1 Polo 1 Polo 1 8 Uscita audio Connettore per uscita audio analogica. Questo connettore è compatibile con lo standard “Molex 70553”. Scegliere un cavo di collegamento adatto allo scopo. Polo Nome Funzione Uscita del canale audio sinistro. Messa a terra Messa a terra Uscita del canale audio destro... -
Page 33: Installazione
INSTALLAZIONE 1 Spegnere l’alimentazione del personal computer, e togliere il coperchio del pannello anteriore dell’apparecchio. 2 Togliere il panello senza indicazioni, che si trova installato sul lato anteriore della fessura da 5,25 pollici. 3 Installare sul drive le guide fisse. In caso di necessità di guide scorrevoli, rivolgersi ad un rivenditore o al fabbricante del computer. - Page 34 COLLEGAMENTI Polo 1 Cavo Audio Cavo dell’interfaccia IDE Cavo di alimentazione DC INPUT +5 G G +12 ÷ Spegnere l’alimentazione del personal computer. ÷ Collegare il cavo di alimentazione proveniente dal personal computer. Effettuare il collegamento facendo attenzione alla posizione delle polarità. ÷...
-
Page 35: Dati Tecnici
÷ Quattro viti per montaggio ÷ Un Istruzioni per l’uso NOTA: I dati tecnici e l’aspetto esterno possono subire variazioni senza preavviso a seguito di • miglioramenti apportati al prodotto. Pubblicato da Pioneer Corporation. Copyright © 2001 Pioneer Corporation. Tutti i diritti riservati. - Page 36 Enhorabuena por la adquisición de este producto Pioneer. Lea completamente este manual de instrucciones para aprender a operar correctamente el aparato. Después de haber terminado la lectura de las instrucciones, guarde el manual en un lugar seguro para poderlo consultar en el futuro.
-
Page 37: Instrucciones De Seguridad
FUENTES DE ALIMENTACIÓN - Haga funcionar este producto con el tipo de alimentación indicada en la etiqueta de características. Si no está seguro del tipo de alimentación disponible, consulte a un distribuidor Pioneer autorizado. SOBRECARGA - NO sobrecargue las tomas de corriente ni los cables de extensión. De lo contrario podría producirse un incendio o descargas eléctricas. - Page 38 CARACTERÍSTICAS • Velocidad de escritura CLV 1X y 2X con DVD-R CLV 1X con DVD-RW CLV 4X y 8X con CD-R CLV 4X con CD-RW CLV 4X con CD-RW de alta velocidad • Velocidad máxima de lectura CAV 6X con DVD-ROM CAV 24X con CD-ROM •...
-
Page 39: Vista Frontal
INTERFAZ VISTA FRONTAL PHONES BUSY 1 Bandeja del disco Abra la bandeja del disco presionando el botón de expulsión, y ponga un disco CD o DVD en la ranura con la etiqueta arriba. Presione el botón de expulsión o empuje la parte frontal de la bandeja para introducir la bandeja con el disco. -
Page 40: Vista Posterior
INTERFAZ VISTA POSTERIOR Contacto 1 Contacto 1 Contacto 1 Contacto 1 8 Salida de audio Es un conector para salida de audio analógico. Este conector es compatible con 'Molex 70553'. Seleccione un cable de conexión adecuado. Contacto Nombre Función Salida de audio del canal izquierdo. Masa. -
Page 41: Instalación
INSTALACIÓN 1 Desconecte la alimentación del ordenador personal, y extraiga la cubierta o el panel frontal. 2 Extraiga el panel de protección instalado delante de la ranura de 5,25 pulgadas. 3 Instale los rieles de deslizamiento de fijación en la unidad. (Cuando sean necesarios los rieles de deslizamiento, póngase en contacto con la tienda o el fabricante del ordenador.) 4 Inserte la unidad en la ranura. - Page 42 CONEXIONES Contacto 1 Cable de audio Cable de la interfaz IDE Cable de alimentación DC INPUT +5 G G +12 ÷ Desconecte la alimentación del ordenador personal. ÷ Conecte el cable de alimentación desde el ordenador personal. Cuando efectúe la conexión, preste atención a la polaridad del cable.
-
Page 43: Especificaciones
÷ Tornillo de montaje x 4 ÷ Manual de instrucciones x 1 NOTA: • Especificaciones y diseño sujetos a posibles modificaciones sin previo aviso por razones de mejora del producto. Publicado por Pioneer Corporation. Copyright © 2001 Pioneer Corporation. Todos los derechos reservados. - Page 44 Hartelijk dank voor de aanschaf van dit Pioneer produkt. Lees de gebruiksaanwijzing aandachtig door zodat u het apparaat op de juiste wijze kunt bedienen. Bewaar de gebruiksaanwijzing voor het geval u deze in de toekomst nogmaals nodig heeft. K015 Du De opwekking van akoestische ruis is minder dan 70 dB.
- Page 45 WATER EN VOCHT - Gebruik dit apparaat NIET in de buurt van water. STROOMVOORZIENING - Gebruik het apparaat uitsluitend op de stroomvoorziening die op het label is aangegeven. Neem contact op met een officiële Pioneer dealer als u niet zeker weet welke stroomvoorziening u hebt.
- Page 46 KENMERKEN • Schrijfsnelheid CLV 1X en 2X voor DVD-R CLV 1X voor DVD-RW CLV 4X en 8X voor CD-R CLV 4X voor CD-RW CLV 4X bij hoge-snelheid CD-RW • Maximale leessnelheid CAV 6X voor DVD-ROM CAV 24X voor CD-ROM • Buffergeheugen: 2 MB (schrijven/lezen) •...
- Page 47 INTERFACE VOORAANZICHT PHONES BUSY 1 Disc-lade Open de disc-lade door op de uitwerptoets te drukken en plaats vervolgens een CD of DVD- disc met het label naar boven in de lade. Druk nogmaals op de uitwerptoets of duw tegen de voorkant van de lade om deze te sluiten.
- Page 48 INTERFACE ACHTERAANZICHT Pin 1 Pin 1 Pin 1 Pin 1 8 Audio-uitgang Deze uitgang stuurt een analoog audiosignaal uit. De connector is compatibel met "Molex 70553". Gebruik een geschikte aansluitkabel. Naam Functie Audio-uitgangssignaal, linker kanaal Aarde Aarde Audio-uitgangssignaal, rechter kanaal 9 Apparaat-configuratiejumper De schakelaar is ingeschakeld (ON) wanneer de jumper is geplaatst.
- Page 49 INSTALLATIE 1 Schakel de personal computer uit en verwijder de afdekkap of het voorpaneel. 2 Verwijder het afdekpaneel van een leeg 5,25-inch stationsvak. 3 Bevestig de montage-schuifrails aan de zijkanten van het station. (Neem contact op met de winkel waar u de computer hebt gekocht of met de fabrikant van de computer indien u niet weet of het gebruik van schuifrails nodig is.) 4 Schuif het station in de opening van de computer.
- Page 50 AANSLUITINGEN Pin 1 Audiokabel IDE interfacekabel Stroomkabel DC INPUT +5 G G +12 ÷ Schakel de personal computer uit. ÷ Sluit de stroomkabel van de computer aan. Let erop dat de stekker correct is uitgelijnd. ÷ Sluit de IDE interfacekabel aan. Let erop dat pin 1 van de IDE connector van het station juist met pin 1 van de kabel wordt verbonden.
-
Page 51: Technische Gegevens
÷ Audiokabel x 1 ÷ Montageschroef x 4 ÷ Gebruiksaanwijzing x 1 OPMERKING: • Wijzigingen in ontwerp en technische gegevens op grond van verbeteringen voorbehouden, zonder voorafgaande kennisgeving. Uitgegeven door Pioneer Corporation. Copyright © 2001 Pioneer Corporation. Alle rechten voorbehouden. - Page 52 ÷ ÷ ÷ ÷ ÷ ÷ ÷ ÷ ÷...
- Page 53 ÷ ÷ ÷ ÷ ÷ ÷ ÷...
- Page 54 ÷ ÷ ÷ ÷ ÷ ÷ ÷ ÷ ÷ ÷ ÷ ÷ ÷ ÷ ÷ ÷ ÷ ÷ ÷ ÷ ÷...
- Page 55 PHONES BUSY...
- Page 56 Pin 1 Pin 1 Pin 1 Pin 1...
- Page 57 ÷ ÷ ÷ ÷...
- Page 58 Pin 1 DC INPUT +5 G G +12 ¶ ¶ ¶ ¶...
- Page 59 SPECIFICATIONS • Ω Ω ÷...
- Page 60 PIONEER ELECTRONICS (USA) INC. 2265 East 220th Street, Long Beach, CA 90810, U.S.A. TEL: 1-310-952-2111 PIONEER EUROPE NV MULTIMEDIA DIVISION PIONEER House, Hollybush Hill, Stoke Poges, Slough SL2 4QP U.K. TEL: 44-1753-789-789 PIONEER ELECTRONICS OF CANADA, INC. Industrial Products Department: 300 Allstate Parkway, Markham, Ontario L3R OP2, Canada TEL: 1-905-479-4411 PIONEER ELECTRONICS AUSTRALIA PTY.