Cisco SPA 514G User Manual
Vodafone one net
Hide thumbs
Also See for SPA 514G:
- Quick user manual (2 pages) ,
- Administration manual (371 pages) ,
- User manual (76 pages)
Table of Contents
Advertisement
Advertisement
Table of Contents

Related Manuals for Cisco SPA 514G


Summary of Contents for Cisco SPA 514G
- Page 1 Vodafone One Net Cisco SPA 514G IP phone user guide...
-
Page 2: Table Of Contents
Using the speakerphone ....................................10 Using wired and wireless headsets ...............................10 Switching between the handset, headset and speakerphone during a call .............11 Chapter 2 – Installing your Cisco SPA 514G IP phone ........................12 Installing your phone ......................................12 Before you start ........................................12 Connecting the handset .....................................12... - Page 3 Using Call pickup ........................................21 Group call pickup functions in two ways: ..............................21 Making an Ad-hoc conference call ................................22 Using the phone directories .....................................22 Using your personal directory ..................................22 Using the Vodafone One Net directory (when available) ......................24 Using the call history lists ....................................24 Viewing call history lists ....................................24 Calling from the call history lists ................................24 Deleting an entry from the call history lists ............................25...
-
Page 4: Chapter 1 - Getting Started
Chapter 1 – Getting started Important information Before using the Cisco SPA 514G for the first time, please make sure you read the instructions on phone safety and disposal, as well as the setup information in this guide. Supported features There are a number of features on the 514G which are not supported with Vodafone One Net but appear on the user menu. -
Page 5: Welcome To Vodafone One Net
It integrates your fixed and mobile phones – and gives you landline numbers on your mobile - so you’ll never miss a business call. This guide is designed to introduce you to the Cisco 514G and the features associated with Vodafone One Net. -
Page 6: Looking After Your Phone
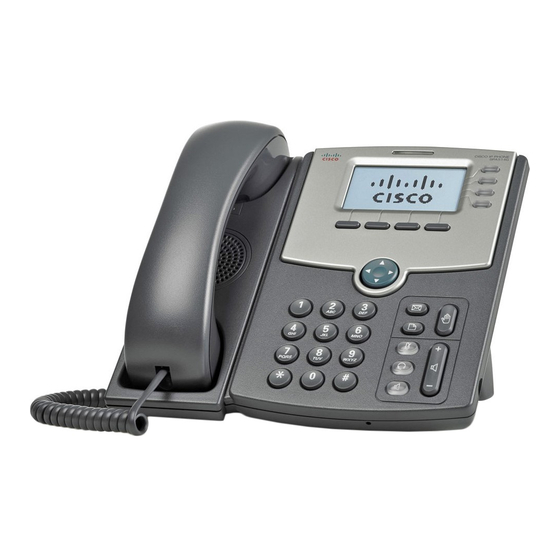
Looking after your phone To keep your Cisco IP phone as good as new, avoid exposure to excessive heat, sun, cold temperatures and water. To clean it, use a slightly moistened paper or cloth towel – don’t spray or pour cleaning solution directly on to the unit. - Page 7 IP phone features Phone feature Description Handset Pick up to answer or make calls Message waiting indicator When this is: Red: you’ve got a new voicemail message Flashing red: you’ve got an incoming call LCD screen Your phone may vary, but the screen typically displays: Date and time Line extensions Soft key options...
-
Page 8: Soft Key Buttons
‘more’ soft key when available. The following table shows some of the typical soft key buttons available on the Cisco 514G (in alphabetical order). You might not have all of them on your phone, and you may have more buttons that aren’t listed here. -
Page 9: Using The Keypad And Menu Buttons
play Play a selected item (e.g. a song or ringtone) previous Move to a previous item in a list redial See a list of recently dialled numbers. See ‘Redialling’ refresh Refresh the screen when you’ve changed your settings, or when you want to update information resume Resume a call that’s on hold save... -
Page 10: Deleting Characters
Deleting characters Use the delChr soft key button to delete the last character entered, or the clear soft key button to remove the whole entry. Using phone hardware and accessories Using the speakerphone With SPA IP Phones you can use a speakerphone during calls – just press the Speaker button when the handset’s on or off the hook to start. -
Page 11: Switching Between The Handset, Headset And Speakerphone During A Call
Switching between the handset, headset and speakerphone during a call You can choose to use your handset, headset or speakerphone during a call, but only one can be used during each call. You can keep the handset on the hook when you use the speakerphone or headset. Here’s how to switch between audio options: Handset to speakerphone –... -
Page 12: Chapter 2 - Installing Your Cisco Spa 514G Ip Phone
Chapter 2 – Installing your Cisco SPA 514G IP phone Installing your phone Your Cisco 514G phone will have been set up by a Vodafone One Net engineer, so it should already be correctly installed and working. However, the information within this section of the guide will help you move a phone to another location or swap it with another device. -
Page 13: Attaching The Desk Stand
Attaching the desk stand Note: If you want to mount the phone to a wall, you don’t need to attach the desk stand. If you’re also attaching a Cisco SPA attendant console, you should attach the console before attaching the desk stand. - Page 14 2. Move the bracket so the phone’s Ethernet and handset ports are still accessible when it’s connected. 3. Push the bracket onto the phone’s base and slide it upwards to lock it in place. 4. Plug in the Ethernet and power cables. Version 2.1 14 of 33...
- Page 15 5. Mount the phone on the wall using screws Version 2.1 15 of 33...
-
Page 16: Chapter 3 - Using Basic Phone Functions
Chapter 3 – Using basic phone functions This chapter will show you how to use the basic functions of your Cisco SPA 514G IP phone, and includes the following sections: Making and answering calls Adjusting the call volume and muting ... -
Page 17: Adjusting Call Volume And Muting
To make a new call when you have one or more calls on hold, you can: Press the ‘newCall’ soft key. If only one call is on hold for the current line this will place the new call on the same line, otherwise the other line will be used (provided there are less than two calls already held on it). -
Page 18: Transferring Calls
Transferring calls You can make two types of call transfers: Assisted – Dial the person you’re transferring to – and speak to them before transferring the call Unassisted (blind) – Transfer the call without speaking to the person you’re transferring it to Making an assisted call transfer 1. -
Page 19: Viewing A List Of Missed Calls
Viewing a list of missed calls When the LCD screen shows a missed call, press the ‘miss’ soft key to view a list of missed calls When the LCD screen doesn’t show a missed call: 1. Press the Setup button. 2. -
Page 20: Forwarding All Calls To A Single Number
Forwarding all calls to a single number 1. In the ‘Call Forward’ screen, scroll to ‘CFWD All Number’ and press ‘edit’. 2. Enter the number you want to forward all calls to - for example, another extension number or an external number –... -
Page 21: Setting Do Not Disturb
Setting Do not disturb Use the Do Not Disturb feature to stop incoming calls coming through to your phone. If voicemail’s set up, incoming calls will be sent straight to voicemail. If voicemail isn’t set up, callers will hear a busy tone or pre- recorded message. -
Page 22: Making An Ad-Hoc Conference Call
2. Press ‘select’ Using the phone directories On the Cisco 514G IP phone, you can store a list of your frequent contacts stored on your phone and access company directory for numbers contained within the One Net directory (when available). - Page 23 Adding a new contact 1. In the ‘Directory’ screen, press ‘New Personal Dir Entry’ or ‘add’. 2. Enter the name of the person you want to add using the keypad - then use the down arrow key to navigate to the next fields. Note: To enter numbers and letters, press ‘alpha’.
-
Page 24: Using The Vodafone One Net Directory (When Available)
Editing a contact 1. In the ‘Directory’ screen, highlight the contact you want to edit. 2. Press ‘edit’. 3. Press ‘save’ when you’ve finished. Using the Vodafone One Net directory (when available) To use the Vodafone One Net directory: 1. Press the ‘dir’ button or the Setup button and choose ‘Directory’, then scroll to ‘One Net Directory'. 2. -
Page 25: Deleting An Entry From The Call History Lists
Deleting an entry from the call history lists 1. Choose the call in the call history list. 2. Press ‘delete’. 3. Press ‘ok’. Saving a call history list number to your personal directory 1. Choose the call in the call history list. 2. -
Page 26: Chapter 4 - Using Advanced Phone Features
Chapter 4 – Using advanced phone features This chapter shows you how to set up and use advanced features on your Cisco SPA 514G IP phone, and contains the following sections: Setting up privacy and security features Creating and using speed dials ... - Page 27 To lock your phone: 1. Press the Setup button. 2. Scroll to ‘Logout’ and press ‘select’. To unlock your phone: 1. Press the Setup button. 2. Scroll to ‘Login’ and press ‘select’. 3. Enter the configured password and press ‘ok’. If you wish to access a sensitive feature when the device is locked, you will be prompted for the password.
-
Page 28: Creating And Using Speed Dials
Creating and using speed dials You can assign unused line buttons on your phone to act as a speed dial. Depending on how your extensions are set up, you can have up to two speed dials in place. When a speed dial’s assigned to a number, that, when pressed on the keypad, dials the number assigned to it. -
Page 29: Customising Your Lcd Screen
Customising your LCD screen You can customize your LCD screen in the ways described below. Changing the LCD screen contrast To adjust the contrast of the LCD screen: 1. Press the ‘Setup’ button. 2. Scroll to ‘LCD Contrast’ and press ‘select’. 3. -
Page 30: Changing The Date And Time
Changing the date and time The date and time for your phone will be set by Vodafone One Net. Restarting your phone Occasionally you may need to restart your phone if the screen locks up. To restart your phone: 1. Press the Setup button 2. -
Page 31: Using Fac Codes
Feature Access Codes (also known as FAC codes). Note: After each code entry, press ‘dial’ to activate. Breakout Code The following Feature Access Code is available and can be initiated from your Cisco SPA 514G. Feature Access Code Behaviour... -
Page 32: Do Not Disturb
ALL incoming calls will get a number not in use tone and drop, they will not go to 1229 voicemail. Do not disturb The following Feature Access Codes are available and can be initiated from your Cisco SPA 514G Feature Access Code Behaviour Activates Do not disturb for the phone you’re calling from. -
Page 33: Call Pickup
In the cases where a subscriber has subscribed to always restrict the Caller ID by default, it is possible to allow Caller ID on a per call basis, by dialling 1470 followed by the target number. Call pickup The following Feature Access Codes are available and can be initiated from your Cisco SPA 514G. Feature Access Code Behaviour...