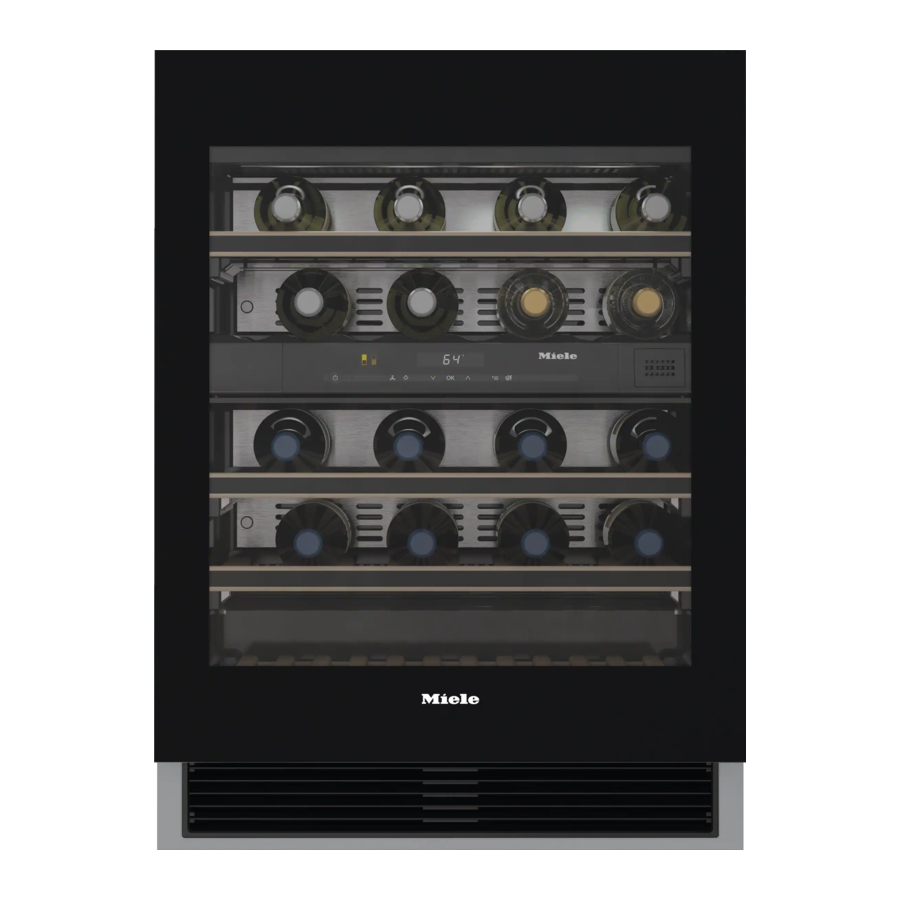
Miele KWT 6322 UG Operating And Installation Instructions
Wine conditioning unit
Hide thumbs
Also See for KWT 6322 UG:
- Operating and installation instructions (80 pages) ,
- Installation instructions manual (24 pages) ,
- Operating and installation instructions (76 pages)
Table of Contents

Related Manuals for Miele KWT 6322 UG


Summary of Contents for Miele KWT 6322 UG
- Page 1 Operating and installation instructions Wine conditioning unit To avoid the risk of accidents or damage to the appliance it is essential to read these instructions before it is installed and used for the first time. en - GB M.-Nr. 09 875 620...
-
Page 2: Table Of Contents
Contents Guide to the appliance ..........5 Door catch . - Page 3 Miele|home ........
-
Page 4: Guide To The Appliance
Guide to the appliance a On/Off sensor for the whole f X sensor for setting a lower appliance temperature b Optical interface g OK sensor for confirming a selection (for Service technicians only) h Y sensor for setting a higher c Sensor for selecting the upper or temperature lower wine conditioning zone... - Page 5 Audible tones For switching on and off keypad tones and the door alarm if it has been activated < Miele|home Only visible when a communication module is fitted and signed on (see "Miele|home") Demo mode For switching off Demo mode...
- Page 6 Guide to the appliance a Push2open door release b Lighting strip (in both wine conditioning zones) c Active charcoal filter d Control panel for the upper and lower Wine conditioning zones/Isolator plate for thermal separation of the zones e Isolator strips for thermal separation of the zones f Wooden shelves with labels (FlexiFrames with Noteboard)
-
Page 7: Door Catch
Door catch The Push2open door catch on your To avoid damage to the door catch: appliance makes it easy to open the door. - do not obstruct the door whilst it is The appliance door is sensitive to opening. pressure. - do not push in or hold onto the door catch whilst the door is closing. -
Page 8: Accessories
Multi-purpose microfibre cloth The microfibre cloth is suitable for removing fingerprints and light soiling from surfaces such as stainless steel, glass, plastic and chrome without the use of chemicals. Optional accessories are available from Miele or via the internet. -
Page 9: Caring For The Environment
Caring for the environment Disposing of the packaging Disposing of your old materials appliance The packaging is designed to protect Electrical and electronic appliances the appliance from damage during often contain valuable materials. They transportation. The packaging materials also contain materials which, if handled used are selected from materials which or disposed of incorrectly, could be are environmentally friendly for disposal... -
Page 10: Warning And Safety Instructions
They contain important notes on installation, safety, use and maintenance. Miele cannot be held liable for non-compliance with these instructions. Keep these instructions in a safe place and ensure that new users are familiar with the contents. - Page 11 The appliance is not suitable for use in areas where there is a risk of explosion. Miele cannot be held liable for damage resulting from improper or incorrect use of the appliance.
- Page 12 Warning and Safety instructions Danger of suffocation. Packaging, e.g. plastic wrappings, must be kept out of the reach of babies and children. Whilst playing, children could become entangled in packaging or pull it over their head and suffocate. Technical safety The coolant system is tested for leaks.
- Page 13 If the electrical connection cable is faulty it must only be replaced by a Miele authorised service technician to protect the user from danger. Do not connect the appliance to the mains electrical supply by a multi-socket adapter or extension lead.
- Page 14 Unauthorised installation, maintenance and repairs can cause considerable danger for the user. Installation, maintenance and repairs must only be carried out by a Miele authorised technician. While the appliance is under guarantee, repairs should only be undertaken by a Miele authorised service technician. Otherwise the guarantee is invalidated.
- Page 15 Do not operate any electrical equipment (e.g. an electric ice cream maker) inside the appliance. Danger of sparking and explosion. Only use genuine original Miele accessories with this appliance. Using spare parts or accessories from other manufacturers will invalidate the guarantee, and Miele cannot accept liability.
- Page 16 Warning and Safety instructions Cleaning and care Do not use any oils or grease on the door seals, as these will cause the seals to deteriorate and become porous with time. Do not use a steam cleaning appliance to clean or defrost this appliance.
- Page 17 Warning and Safety instructions Transporting the appliance Always transport the appliance in an upright position and in its original transport packaging to avoid damage in transit. Danger of injury and damage. The appliance is very heavy and must be transported by two people. Disposal of your old appliance Before disposing of an old appliance, first make the door latch or lock unusable.
-
Page 18: How To Save Energy
How to save energy Normal energy Increased energy consumption consumption Installation site/ In a ventilated room. In an enclosed, unventilated maintenance room. Protected from direct In direct sunlight. sunlight. Not near to a heat source Near to a heat source (radiator, oven). -
Page 19: Switching On And Off
Switching on and off Before using for the first time Operating the appliance A light touch of the finger on the Packaging material sensors is all that is required to operate ^ Remove all packaging material from this appliance. the inside of the appliance. A tone will sound each time a sensor is touched. -
Page 20: Switching Off
Switching on and off Switching off As soon as the set temperature has been reached, the sensor for the respective wine conditioning zone will light up constantly. the alarm symbol ; will go out as soon as the set temperatures have been reached in ^ Touch the On/Off sensor. -
Page 21: Selecting Further Settings
Selecting further settings Certain settings on the appliance can only be selected in settings mode. The door alarm is automatically disabled when the appliance is in ^ By touching the X or Y sensor, you settings mode. can now select whether the safety lock is activated or deactivated: Safety lock 0 0: the safety lock is deactivated... -
Page 22: Audible Tones )
Selecting further settings Audible tones ) The appliance has audible tones such as the sensor tone and the door and temperature alarms. ^ By touching the X or Y sensor you You can switch the sensor tone or the can now select: 0: sensor tone off;... -
Page 23: Display Brightness S
Selecting further settings Display brightness s The display brightness can be adjusted to suit lighting conditions in the room. ^ By touching the X or Y sensor you The display brightness can be adjusted in steps from 1 to 3. The factory default can now alter the brightness of the setting is 3 (maximum brightness). -
Page 24: Temperature And Air Quality
Temperature and air quality Wine keeps on maturing depending on the surrounding conditions. The length Type of wine Recommended of time for which wine can be kept in drinking good condition will therefore depend temperature not only on the temperature but also on Light, fruity reds: +14 °C to +16 °C the air quality. -
Page 25: Setting The Temperature
Temperature and air quality Safety device in case of low ambient Setting the temperature temperatures The temperature can be set in both zones independently of each other. The appliance is equipped with a safety thermostat to protect your wine against ^ Touch the sensor for the zone for a sharp drop in temperature. -
Page 26: Temperature Range
Temperature and air quality The temperature being set will flash in Temperature range the display. In both zones it is possible to set The following information shows in the temperatures between 5 and 20 °C. display when the sensors are touched: Temperature display –... -
Page 27: Air Quality And Humidity
Temperature and air quality Air quality and humidity Dynamic cooling (constant air humidity) m A conventional refrigerator with its low humidity level is not the best place to Dynamic cooling raises the relative store wine. It is very important to store humidity inside the appliance. -
Page 28: Air Filtering With Active Charcoal Filter
Temperature and air quality Switching off Dynamic cooling The appliance uses slightly more energy and is a little noisier when the Dynamic cooling function is switched on. You can switch it off now and then if you wish. ^ Touch the Constant humidity (Dynamic cooling) sensor so that it is no longer lit up yellow. -
Page 29: Temperature And Door Alarm
Temperature and door alarm The unit is equipped with an alarm Switching the alarm off early system so that the temperature in both If the noise disturbs you, you can temperature zones cannot rise or fall switch the alarm off if you wish. unnoticed, thus possibly damaging the wine. -
Page 30: Door Alarm
Temperature and door alarm Door alarm An alarm will sound if the door has been left open for longer than 2 minutes. Both wine conditioning zone sensors will flash in the control panel and the alarm symbol ; will light up in the display. -
Page 31: Feature Lighting
Feature lighting The interior lighting can be set to Setting the brightness of the feature remain on when the door is closed so lighting your wines can be on display at all The brightness of the feature lighting times. can be adjusted. Each zone has its own light so both zones are lit up. -
Page 32: Lighting Duration Of The Feature Lighting
Feature lighting The selected brightness is saved for By touching the sensor both zones. The temperature reappears in the display. When the appliance door is closed, the set brightness takes effect. When the – lighting duration is reduced by 30 appliance door is opened, the interior minutes lighting returns to its normal level. -
Page 33: Storing Wine Bottles
Storing wine bottles Wooden shelves Vibration and movement have a negative effect on the maturing process which can affect the taste of the wine. To avoid disturbing other bottles when removing a bottle of wine, store bottles of the same type beside each other on the same shelf. -
Page 34: Moving The Wooden Shelves
Storing wine bottles Moving the wooden shelves The wooden shelves can be removed and replaced again if required. ^ Slide the wooden shelf back into the appliance as far as it will go d. ^ Push the wooden shelf right back so that it clicks into place at the front. -
Page 35: Adjusting The Wooden Shelves
Storing wine bottles Adjusting the wooden shelves Annotating wooden shelves The slats in the wooden shelves can be For quick and easy identification of the individually adjusted to suit, so that wines in storage, you can use the chalk every bottle is stored in perfect safety supplied to annotate the magnetic regardless of shape or size. -
Page 36: Rack
Storing wine bottles Maximum capacity Rack Place the rack at the very bottom of the appliance (see "Description of the appliance"). Up to 34 Bordeaux bottles (0.75 l) can be stored in the appliance, with 14 in the upper zone and 20 in the lower zone. -
Page 37: Automatic Defrosting
Automatic defrosting Condensate and frost can build up on the back wall of the appliance whilst the compressor is running. These are automatically removed and defrosted by the appliance. -
Page 38: Cleaning And Care
Cleaning and care Before cleaning Make sure that water cannot get into ^ Switch the appliance off. the electronic unit or the lighting. ^ Disconnect it from the mains. Do not use steam cleaning ^ Take any wine bottles out of the apparatus The steam could reach appliance and store them in a cool the electrical components and... -
Page 39: Cleaning The Door, The Interior And Accessories
Clean the appliance regularly at least while. once a month. ^ Use Miele stainless steel conditioning Remove any soiling immediately - do agent (see "Optional accessories") to not allow it to dry on. -
Page 40: Ventilation Gaps
Cleaning and care Ventilation gaps After cleaning ^ The ventilation gaps should be ^ Replace all shelves and accessories cleaned on a regular basis with a in the appliance. brush or vacuum cleaner. A build-up ^ Reconnect to the mains and switch of dust will increase the energy the appliance back on. -
Page 41: Active Charcoal Filter
^ Push the filter in and then release it. The filter will lock into place automatically with an audible click. ^ Remove the filter. Active charcoal filters can be obtained from your Miele dealer, Miele or via the internet at www.miele-shop.com. - Page 42 Active charcoal filter To confirm the filter has been changed ^ Touch the OK sensor to confirm your choice. ^ Touch the settings sensor. The selected setting is applied, the — All symbols available for selection will symbol flashes. appear in the display and the 0 symbol flashes.
-
Page 43: Problem Solving Guide
Problem solving guide Most problems can be corrected without contacting Miele. If, having followed the suggestions below, you still cannot resolve the problem, please contact Miele. To prevent unnecessary loss of temperature it is advisable not to open the door while waiting for the appliance to be serviced. - Page 44 Problem solving guide The compressor runs more frequently and for longer periods of time, the temperature in the appliance drops. Problem Possible cause Remedy ^ Adjust the temperature. The temperature in The temperature setting is the appliance is too too low. low.
- Page 45 A dash is lit up Only temperatures within the range the appliance can up/flashing in the display. display will be shown. ^ Call the Miele Service "F1" to "F3" or "S1" There is a fault. Department. to "S9" appear.
- Page 46 Problem solving guide Interior lighting Problem Possible cause Remedy ^ Call the Miele Service The interior To avoid overheating, the lighting switches itself off Department. lighting is not automatically after approx. working. Do not remove the 15 minutes if the door is left open.
- Page 47 Problem solving guide Other problems Problem Possible cause Remedy This is not a fault. The alarm There is no audible alarm although the tone has been switched off in settings mode (see "Selecting door has been open for a long further settings - Audible tones").
-
Page 48: Noises
Noises Normal noises What causes them Brrrrr ... A humming noise is made by the motor (compressor). This noise can get louder for brief periods when the motor switches on. Blubb, blubb ... A gurgling noise can be heard when coolant is circulating through the pipes. -
Page 49: Miele|Home
Miele|home a Miele|home communication enabled appliance b Miele|home communication module XKM3000Z c Miele|home communication enabled Master appliance with SuperVision functionality d Miele|home Gateway XGW3000 e WiFi router f Connection to a Home automation system g Smartphone, Tablet PC, Laptop h Internet connection... - Page 50 Smartphone can be used within the Further information regarding reception area of a household WLAN Miele|home is available on the internet e to display status information about and in the instruction manuals of the signed on appliances and carry out various components, e.g.
-
Page 51: After Sales / Guarantee
See end of this booklet for contact have been resolved as described in details. this booklet. When contacting your Dealer or Miele, please quote the model and serial number of your appliance. This information is given on the data plate inside your appliance. -
Page 52: Information For Test Institutes
Information for test institutes All tests must be carried out according to relevant standards and directives. In addition, the following information provided by the manufacturer must be observed: – Loading instructions, – Information contained in the Operating and installation instructions. -
Page 53: Information For Dealers
Information for dealers Demo mode r The appliance can be demonstrated in the showroom or at exhibitions in "Demo mode". In this mode the control ^ Leave your finger on the X sensor panel and interior lighting are active but until the r symbol appears in the the compressor remains switched off, display. - Page 54 Information for dealers ^ Touch the X or Y sensors, until 0 appears (means: Demo mode is deactivated). ^ Touch the OK sensor to confirm the choice. The selected setting is applied, the r symbol flashes. ^ Press the settings sensor to leave settings mode.
-
Page 55: Electrical Connection
Electrical connection Electrical connection U.K. If the connection cable has to be replaced, this must be done by a All electrical work should be carried out suitably qualified and competent by a suitably qualified and competent person. person in strict accordance with current local and national safety regulations Do not plug other appliances in behind (BS 7671 in the UK). -
Page 56: Installation
Installation Location This appliance must be built in, This appliance should not be installed otherwise it could tip up. where it is exposed to direct sunlight or directly adjacent to a heat-producing Side-by-side installation appliance such as an oven or a radiator. -
Page 57: Climate Range
Installation Ventilation Climate range The appliance is designed for use The appliance is ventilated via the within a certain climate range (ambient grille in the plinth. temperatures) and should not be used outside this range. The climate range of The air in the appliance plinth gets the appliance is stated on the data warm. -
Page 58: Before Installing The Appliance
Installation Before installing the appliance The cut-out in the plinth facing must be aligned centrally with the appliance. ^ Remove the cable clip from the back of the appliance. ^ Check that all parts at the back of the appliance are unhindered. Carefully remove any hindrance. -
Page 59: Appliance Dimensions
Appliance dimensions Before installation, ensure the building-in niche is the correct size. The specified ventilation cross-sections must be adhered to and the cut-out in the plinth facing must be aligned centrally with the appliance in order to ensure the correct functioning of the appliance. The ventilation grille supplied and foam block supplied must be fitted and used together. -
Page 60: Changing The Door Hinging
Changing the door hinging The door hinging should be changed The second person must by authorised service personnel only. support the door. Caution. When the hinge is Two people are needed for changing subsequently released, the door is the door hinging. no longer secure. - Page 61 Changing the door hinging ^ Unclip upper and lower covers e. ^ Place the door with the outer side upwards on a stable surface. ^ Remove screws f completely. Do not close the hinges. Danger of injury. ^ Replace the hinges in their diagonally opposite corners g.
- Page 62 Changing the door hinging ^ Remove covers j. ^ Replace screws h again. ^ Take off upper retaining bracket k and replace it on the opposite side. ^ Clip covers i back on. Note the position of the notches on the hinges.
- Page 63 Changing the door hinging The second person must support the door. ^ Take off lower retaining bracket l and replace it on the opposite side. ^ Tighten the screws in upper hinge n. ^ Tighten the screws in lower hinge o. ^ The appliance can now be built under.
-
Page 64: Under-Counter Installation
Under-counter installation The following installation parts are Two people are required for installing required: the appliance. – Ventilation grille ^ The appliance must be installed in a – Air filter stable and correctly aligned niche on – Foam block for air intake through the a level surface. - Page 65 Under-counter installation ^ Push the appliance in front of the niche. ^ Screw adjusting feet b to 4 mm less than the height of the niche. The feet can be adjusted with the spanner wrench supplied c or with an allen key d.
- Page 66 Under-counter installation ^ Check the alignment of adjacent furniture housing doors. If adjacent doors vary in height from the wine conditioning unit, see "Aligning the appliance to taller furniture doors". If adjacent furniture doors are the same height as the appliance: ^ Open the door by pushing on the front of the door.
-
Page 67: Aligning The Appliance To Taller Furniture Doors
^ Pull the appliance as far as you need filler panel, which is available from the to out of the niche so that you can tilt Miele Spare Parts Department or from it towards you. your dealer. The filler panel can be fitted above or below the appliance as required. -
Page 68: Push The Appliance Into The Niche
Under-counter installation ^ Loosely hand-screw the bracket with Push the appliance into the the filler panel to the appliance. niche ^ Align the filler panel to the door of the Make sure that the electricity cable wine conditioning unit over the long does not become trapped or slots to give a flush finish. -
Page 69: Securing The Appliance In The Niche
Under-counter installation Securing the appliance in the niche ^ The appliance stands proud of the furniture doors evenly by 2 mm. ^ Open the appliance door. ^ Screw the appliance bottom left and ^ Remove cover a and first screw the right c to the adjacent furniture units. -
Page 70: Adjusting The Lateral Alignment Of The Appliance Door
Under-counter installation ^ Close the door and check that the side edges of the door are aligned with the side walls of the appliance. Adjusting the lateral alignment of the appliance door If the appliance door is not aligned with the housing side walls, the appliance door can be adjusted using the screws underneath the hinges. - Page 71 Under-counter installation ^ Replace door opener i to activate ^ Fit plinth facing g. the door catch. The cut-out in the plinth facing must be aligned centrally with the appliance. ^ Fit ventilation grille h into the plinth facing. As you do this the foam block will be pushed back.
- Page 75 Building 6 / Offices Nos. 6-214 to 6-220 Tel: (01) 461 07 10, Fax: (01) 461 07 97 Dubai E-Mail: info@miele.ie, Internet: www.miele.ie Tel: +971-4-341 84 44 Fax: +971-4-341 88 52 Manufacturer: Miele & Cie. KG E-Mail: info@miele.ae Carl-Miele-Straße 29, 33332 Gütersloh, Germany Internet: www.miele.ae...
- Page 76 KWT 6322 UG en - GB M.-Nr. 09 875 620 / 01...