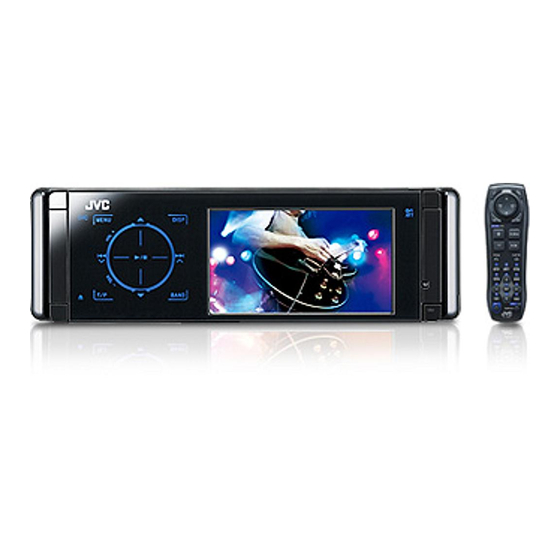
JVC EXAD KD-AVX44 Instructions Manual
Dvd/cd receiver
Hide thumbs
Also See for EXAD KD-AVX44:
- Instructions manual (781 pages) ,
- Installation & connection manual (4 pages) ,
- Instructions manual (225 pages)

Related Manuals for JVC EXAD KD-AVX44


Summary of Contents for JVC EXAD KD-AVX44
- Page 1 DVD/CD RECEIVER KD-AVX44 For canceling the display demonstration, see page 7. For installation and connections, refer to the separate manual. INSTRUCTIONS LVT1798-001A...
- Page 2 Thank you for purchasing a JVC product. Please read all instructions carefully before operation, to ensure your complete understanding and to obtain the best possible performance from the unit. IMPORTANT FOR LASER PRODUCTS 1. CLASS 1 LASER PRODUCT 2. CAUTION: Do not open the top cover. There are no user serviceable parts inside the unit; leave all servicing to qualified service personnel.
-
Page 3: Table Of Contents
How to reset your unit Contents INTRODUCTION Playable disc type ......4 Before operations ......5 OPERATIONS • Your preset adjustments (except for the registered Basic operations—AV menu ..... 6 Bluetooth devices) will also be erased. Basic operations—Control panel ..8 Basic operations—... -
Page 4: Playable Disc Type
Playable disc type Disc type Recording format, file type, etc. Playable DVD Video (Region Code: 4)* DVD Audio DVD-ROM DVD Recordable/Rewritable DVD Video (DVD-R/-RW* , +R/+RW* DVD-VR • DVD Video: UDF bridge DivX/MPEG1/MPEG2 • DVD-VR JPEG • DivX/MPEG1/MPEG2/JPEG/MP3/WMA/WAV/ MP3/WMA/WAV/AAC* AAC: Compliant to ISO 9660 level 1, level 2, MPEG4 Romeo, Joliet DVD+VR... -
Page 5: Before Operations
Before operations Touch pad controls Monitor The lights of the touch pad controls and monitor are How to operate the unit by the touch pad turned off when no operation is done for about 10 controls seconds. You can operate the unit by touching the appropriate The lights are turned on in the following cases: part of the touch pad controls. -
Page 6: Operations Basic Operations-Av Menu
Basic operations— AV menu You can use the menus to set up various settings from <AV Menu>. For details of each menu and setting, see “Menu items.” (☞ pages 48 to 56) AV Menu Enter Setup ⁄ Turn on the power. Select an item. - Page 7 Canceling the display demonstration and setting the clock Setup Display Clock Disc Setup 1 Disc Setup 2 Input AV Menu Clock Time Set Time Format OSD Clock Enter Setup 1:00AM Time Set Hours 3:00PM Setup Exit Display Clock Disc Setup 1 Disc Setup 2 Input Time Set...
-
Page 8: Basic Operations-Control Panel
Basic operations — Control panel 1 Selects sources. 8 • “Disc,” “USB,” “USB iPod,” and “Changer”: Starts “Tuner” = “Disc” = “USB” or ”USB iPod” and pauses playback. = “Changer,” ”iPod,” or ”External Input” = • “Bluetooth”: Starts playback. “Bluetooth” = “AV Input” •... -
Page 9: Changing The Display Information
To tilt the control panel To attach the control panel Touch TILT repeatedly. Changing the display information Available display information varies among the playback sources. Each time you touch DISP, the display changes to show the various information. Ex.: When the playback source is a DVD video disc. Playback picture screen (only for video sources) Source information screen 3:45... -
Page 10: Remote Controller (Rm-Rk252)
Basic operations — Remote controller (RM-RK252) Main elements and features Installing the battery R03/LR03/AAA Insert the batteries into the remote controller by matching the polarity (+ and –) correctly. Caution: Battery shall not be exposed to excessive heat such as sunshine, fire or the like. If the range or effectiveness of the remote controller decreases, replace both batteries. - Page 11 6 • Enters numbers (while holding SHIFT). (☞ pages “Bluetooth”: • 5 / ∞: Selects group/folder. 13, 19 to 22, and 36) • 4 / ¢: • Selects the preset phone number. – Reverse skip/forward skip • “Tuner”: Selects the preset stations. 7 Displays the on-screen bar.
-
Page 12: Listening To The Radio
Listening to the radio TUNER FLAT FM1 P1 87.5 MHz ABC Radio A Band Search for a station—Auto Search. ☞ B Sound mode ( page 46) • Manual Search: Hold either until C Preset no. D Frequency “Manual Search” appears on the monitor, then ☞... -
Page 13: Selecting Preset Stations
Store the station. AV Menu TUNER FLAT FM1 P4 92.5 MHz Enter No Name Mode [Hold] The station selected in step 2 is now stored in preset number 4. Mode Mono Selecting preset stations Title Entry Start On the remote: Local FM stations with the strongest signals are searched and stored automatically in the FM band. -
Page 14: Disc Operations
Disc operations The disc type is automatically detected, and playback starts automatically (for some discs: automatic start depends on its internal program). If a disc does not have any disc menu, all tracks in it will be played repeatedly until you change the source or eject the disc. - Page 15 DIGITAL VIDEO MULTI 0:01:20 CHAP.RPT A Disc type 4 ¢: Touch: Selects chapter. B Audio format Hold: Reverse/forward search ☞ C Sound/surround mode ( pages 22 and 46) 5 ∞: Selects title. D Title no./Chapter no./Playing time DISP: Touch if necessary (☞ page 9). E Playback mode DIGITAL VR-PRG...
- Page 16 FLAT 0:01:20 A PBC indicator lights up when PBC is in use. 4 ¢: Touch: Selects track. ☞ B Sound/surround mode ( pages 22 and 46) Hold: Reverse/forward search C Track no./Playing time DISP: Touch if necessary (☞ page 9) FLAT 0:01:20 Current Track Title...
-
Page 17: Selecting Playback Modes
Selecting playback modes Mode Repeat You can use Repeat or Random playback mode. Random Ex.: To select Track Repeat Repeat Track Folder AV Menu When one of the playback modes is selected, the Enter corresponding indicator lights up on the source Mode information screen. -
Page 18: Prohibiting Disc Ejection
Selecting tracks on the list Operations using the remote controller—RM-RK252 If a disc includes folders, you can display the Folder/ Track (File) Lists, then start playback. Enter <Folder List>. Folder List My Best Cinema Pops My Best2 Favorite Song Cinema2 [Hold] •... - Page 19 Stops playback. Stops playback. Starts or pauses playback. Starts or pauses playback. • Reverse/forward search (No sound • Reverse/forward search (No sound can be heard.) can be heard.) • Slow motion during pause. (No sound • Forward slow motion during pause. can be heard.) (No sound can be heard.) •...
- Page 20 Stops playback. Starts or pauses playback. Reverse/forward search (No sound can be heard.) • Selects track. • Reverse/forward search [Hold] (No sound can be heard.) Selects folder. Selects track (within the same folder). [Twice] Selects folder. Changes the aspect ratio of the playback pictures.
- Page 21 During PBC playback... Stops playback. Selects an item on the menu. Starts playback. (Slide show: each file is Returns to the previous menu. shown for a few seconds.) Shows the current file until you change it if To cancel PBC playback pressed during Slide show.
- Page 22 Enjoying surround sounds You can enjoy multi-channel surround playback through the front, center, surround speakers. • After connecting the center speaker, make sure to activate the center speaker; otherwise, no sound comes out of the center speaker (☞ page 51). •...
- Page 23 To turn on the surround To change the <Dolby PLII Music> setting In step 4 in the left column... Select <Dolby PLII Music>. Surround On Auto AV Menu Through Dolby PLII Movie Dolby PLII Music Enter Enter each sub-screen then select the desired Disc Surround setting.
- Page 24 Operations using the on-screen bar (DVD/VCD/DivX/MPEG1/MPEG2/ JPEG) These operations are possible on the monitor using the remote controller. ☞ Display the on-screen bar. ( page 25) Ÿ Select an item. Make a selection. • When a pop-up menu appears... • For entering time/numbers... To move the entry position: To select a number: ⁄...
- Page 25 On-screen bar T02-C03 TOTAL 1:25:58 Information DVD -V C. RPT TIME TITLE CHAP Operation Above example is of DVD Video. Items shown on the bar vary depending on the disc type. 1 Disc type 5 Time indication 2 • DVD: Audio signal format Elapsed playing time of the disc TOTAL •...
-
Page 26: Dual Zone Operations
Operate the DVD/CD player. Enter Dual Zone * JVC original headphone virtual surround system. This surround will also work for the main source “Disc” if “On/Surround On” is selected as the sub-source. This surround does not work for DivX/MPEG1/MPEG2 discs. - Page 27 1 Current folder (highlighted bar) 2 Current folder no./total folder no. Ex.: CD Text 3 Folder list * If tag data includes “Jacket Picture” (baseline JPEG), it will be displayed. If you press OSD, the playback mode TIME 00:14 T. RPT Track : 6 / 14 selection window appears.
- Page 28 While not playing... Display the Original Program/Play List screen. Display the list screen. ORIGINAL PROGRAM No Date itle 1 25/04/08 4ch 19:00 JVC DVD World 2008 Folder : 144/240 Track 144/198 Page : 4/7 2 17/05/08 8ch 10:30 fol130 fol140 fol150 fol120...
-
Page 29: Usb Operations
• All tracks on the USB device will be played repeatedly until you change the source. BAND: Stops playback. Except for MPEG2 files recorded by JVC Everio camcorder (extension code <.mod>). Connect a USB device. This unit can play back AAC files encoded using “USB”... - Page 30 Caution: • Avoid using the USB device if it might hinder your safety driving. • Do not pull out and attach the USB device repeatedly while “Now Reading...” is flashing on the monitor. • Do not start the car engine if a USB device is connected. •...
-
Page 31: Bluetooth® Operations
• The Bluetooth word mark and logos are owned by the Bluetooth SIG, Inc. and any use of such marks by Victor Company of Japan, Limited (JVC) is under license. Other trademarks and trade names are those of their respective owners. -
Page 32: Connecting/Disconnecting Registered Device
Bluetooth The device remains registered even after you Dial Menu disconnect the device. Use <Phone Connect> (or Device Menu Settings activate <Auto Connect>) to connect the same device from next time on. (☞ pages 55 and 56) Phone Connect Connecting/disconnecting a registered Deviec Menu device Phone Connect... -
Page 33: Making A Call
Deleting a registered device Making a call You can make hands-free calls using the unit. AV Menu The built-in microphone is behind the upper left hand Enter Bluetooth corner of the unit. The sound comes out from the connected speakers. Bluetooth Dial Menu Device Menu... - Page 34 Displays only when the dialed or received number is Select the method to make a call. made through the unit. Dial Menu For copying, ☞ page 35. Redial Received Calls Phonebook For presetting, ☞ page 36. Preset Calls Phone Number 09845671234 You can also enter <Dial Menu>...
- Page 35 How to enter a phone number To copy the phone book You can copy the phone book memory of a cellular Select a number. Move the entry position. phone into the unit. • To delete an unwanted digit, select a blank. AV Menu •...
- Page 36 To call a preset number On the remote: Operate the target cellular phone. Enter the same PIN code (as entered in the above step) on the cellular phone then transfer the phone book memory to the unit. (Refer to the instruction manual supplied with your cellular phone.) On the unit: Finish the procedure.
-
Page 37: Using The Bluetooth Audio Player
Bluetooth Information: – If the sound is not yet restored, connect the device If you wish to receive more information about again. (☞ “Connecting/disconnecting a registered Bluetooth, visit the following JVC web site: <http:// device” on page 32) www.jvc-victor.co.jp/english/car/> OPERATIONS... -
Page 38: Listening To The Ipod
Listening to the iPod You can connect the iPod using the following cable or adapter: Cable/adapter To operate ☞ “When connected with the USB cable” below. To listen to the music USB 2.0 cable (supplied for the iPod) ☞ “When connected with the interface adapter” Interface Adapter for iPod—... - Page 39 Select an item. Repeat EX.: When <Music> is selected in step 2. Music Playlists Artists Albums Songs Podcasts Genres Repeat: One: Functions the same as “Repeat One” of the iPod. • Repeat the procedure to select the desired All: Functions the same as “Repeat track/video.
-
Page 40: When Connected With The Interface Adapter
When connected with the interface adapter iPod FLAT 01 0:01:20 Track Title Artist Name Album Title Selecting a track from the player’s menu ∞: Pauses playback – To resume, touch again Enter the player’s menu. • This mode will be canceled if no operations are A Source name done for about 5 seconds. -
Page 41: Listening To The Cd Changer
DISC 05 DISC 06 [Hold] • Each time you hold the button, you can display It is recommended to use a JVC MP3-compatible CD the other list of the remaining discs. changer with your unit. Select a disc to start playing. - Page 42 Selecting playback modes While playing an MP3 disc, you can select and start playing a track in the disc using the Lists: You can use Repeat or Random playback mode. (select the current disc) = Ex.: To select Track Repeat <Disc List>...
- Page 43 Disc type Repeat Random Track: Repeats current track. Disc: Randomly plays all tracks of the current disc. Disc: Repeats all tracks of the current All: Randomly plays all tracks of all loaded disc. discs. Track: Repeats current track. Folder: Randomly plays all tracks of current folder, then tracks of next folders.
-
Page 44: Listening To Other External Components
Listening to other external components AV-INPUT You can connect an external component to the LINE IN/VIDEO IN plugs. AV-IN FLAT AV-INPUT DISP: Touch if necessary. (☞ page 9) Navigation screen When you connect a Navigation System to the unit, ☞ A Sound mode ( page 46) you can view the navigation screen regardless of... - Page 45 EXT-INPUT You can connect an external component to the CD changer jack on the rear using the Line Input Adapter—KS-U57 (not supplied) or AUX Input Adapter—KS-U58 (not supplied). EXT-IN FLAT EXT-INPUT ☞ A Sound mode ( page 46) ☞ B Assigned title ( page 47) Preparation: Make sure <External Input>...
-
Page 46: Sound Equalization
Sound equalization Edit Store 60.0 Hz Selecting a sound mode Storing your own adjustments You can store your adjustments into <User1>, <User2>, and <User3>. Follow steps ~ and Ÿ on the left. Ÿ AV Menu Select the item you want to adjust. Equalizer Edit Flat... -
Page 47: Assigning Titles To The Sources
Assigning titles to the sources Title Entry A-a-0 AV-In Name AV-INPUT Store ⁄ You can assign titles as follows. Assign a title. FM/AM stations Up to 16 characters—up to 30 Title Entry A-a-0 stations AV-In Name AV-INPUT “AV Input” Up to 16 characters Store “External Input”... -
Page 48: Menu Items
Menu items Menu operations For details of the menu operations, ☞ page 6. Setup Display Clock Equalizer AV Menu Disc Setup 1 Sound Disc Setup 2 Enter Disc Surround Setup • The display indications may Input change according to change Mode of the specifications. - Page 49 Menu items Selectable settings, [reference page] Dimmer Off: Cancels. On: Activates dimmer. Auto: Dims the monitor when you turn on the headlights. Time Set: Touch ¢ to display the time setting screen, then set the Dimmer On/Off times. Bright You can adjust brightness of the monitor. –15 (darkest) to +15 (brightest);...
- Page 50 Menu items Selectable settings, [reference page] Initial 1:00 AM, ☞ [7] Time Set Time Format 12Hours, 24Hours OSD Clock Off: Cancels. On: Displays the clock time while playing back a video source. Menu Language Select the initial disc menu language; Initial English (☞ also page 63). Audio Language Select the initial audio language;...
- Page 51 Menu items Selectable settings, [reference page] D. (Dynamic) Range Compres. You can enjoy a powerful sound at a low volume level while playing (Compression) Dolby Digital software. Auto: Select to apply the effect to multi-channel encoded software. On: Select to always use this function. Speaker Size You can adjust the speaker size setting.
- Page 52 Menu items Selectable settings, [reference page] AV Input You can determine the use of LINE IN and VIDEO IN plugs. Off: Select when no component is connected (“AV Input” is skipped while selecting the source). iPod (Off): Select when connecting the iPod using the USB Audio and Video cable for iPod.
- Page 53 Sound Menu items Selectable settings, [reference page] Fader/Balance Adjust fader—speaker output balance between the front and rear speakers. • Upmost—front only Adjusts fader • Downmost—rear only When using a two-speaker system, set the fader to the center (00). Adjust balance—speaker output balance between the left and right speakers. Adjust balance •...
-
Page 54: Dual Zone
Disc Surround Menu items Selectable settings, [reference page] Surround Off Select to deactivate the surround function. Select to activate the surround function. ☞ [23] Surround On Auto, Through, Dolby PLII Movie, Dolby PLII Music • When you select <Dolby PLII Music>, you can adjust <Panorama> and <Center Width>. - Page 55 Bluetooth Menu items Selectable settings, [reference page] Select one of the call methods, ☞ [34] Redial Received Calls Phonebook Preset Calls Phone Number Voice Dialling Phone Connect/Audio Connect Only for the registered devices. Establish the connection with the registered device, ☞ [32] Phone Disconnect/ Only for the device being connected.
- Page 56 Phone Device/Audio Device: The connected device names Depends on the amplifier gain control. (☞ page 53) If you wish to receive more information about Bluetooth, visit the following JVC web site: <http://www.jvc-victor.co.jp/english/car/> When operating the Bluetooth device, refer also to the instructions supplied with the device.
-
Page 57: References
Maintenance How to clean the connector To keep discs clean Frequent detachment will deteriorate the connectors. A dirty disc may not play correctly. To minimize this possibility, periodically wipe the If a disc does become dirty, wipe it with connectors with a cotton swab or cloth moistened with a soft cloth in a straight line from center alcohol, being careful not to damage the connectors. -
Page 58: More About This Unit
More about this unit Changing the source General • If you change the source, playback also stops without Turning on the power ejecting the disc. • By pressing SRC (source) on the unit, you can also Next time you select “Disc” for the playback source, turn on the power. - Page 59 • This unit can play back files recorded in VBR (variable * <.mod> is an extension code used for the MPEG2 bit rate). files recorded by JVC Everio camcorders. The Files recorded in VBR have a discrepancy in elapsed MPEG2 files with the <.mod> extension code time indication.
- Page 60 Bluetooth operations • If “No USB device“ appears after removing a device, General reattach a device or select another playback source. • While driving, do not perform complicated operation • When the USB device has no playable files, or has not such as dialing the numbers, using phone book, etc.
-
Page 61: Ipod Operations
• These icons indicate the phone type set on the device. performed correctly or as intended. In this case, visit Cellular phone the following JVC web site: – For the USB connection: <http://www.jvc-victor. Household phone co.jp/english/car/> – For the interface adapter connection: <http:// www.jvc.co.jp/english/car/support/ks-pd100/... - Page 62 Characters you can enter for titles About sounds reproduced through the rear terminals In addition to the roman alphabet (A – Z, a – z), you • Speaker out/analog discrete output—LINE OUT can use the following characters to assign titles. (☞ (FRONT/REAR)/CENTER OUT/SUBWOOFER OUT: page 47) Multi-channel signals are emitted for a multi-...
- Page 63 Preset equalizing values Frequency 60.0 Hz 150.0 Hz 400.0 Hz 1.0kHz 2.5kHz 6.3kHz 15.0kHz Sound mode Flat Hard Rock R&B Jazz Dance –02 –01 Country Reggae Classic User1/2/3 Language codes (for DVD/DivX language selection) Code Language Code Language Code Language Code Language Code Language Afar...
-
Page 64: Troubleshooting
Troubleshooting What appears to be trouble is not always serious. Check the following points before calling a service center. Symptoms Remedies/Causes • No sound comes out of the center speaker. • Center speaker is not activated. (☞ page 51) Once you have reset the unit, make sure to activate the speaker again. - Page 65 Symptoms Remedies/Causes • SSM automatic presetting does not work. Store stations manually. (☞ page 13) • Static noise while listening to the radio. Connect the antenna firmly. • Disc can be neither recognized nor played . Eject the disc forcibly. (☞ page 3) •...
- Page 66 Symptoms Remedies/Causes • Noise is generated. • The track played back is not a playable file format (MP3/ WMA/WAV/AAC). Skip to another file. • Do not add the extension code <.mp3>, <.wma>, <.wav>or <.m4a> to non-MP3/WMA/WAV/AAC tracks. • Tracks cannot play back as you have intended Playback order may differ from the one played back using them to play.
- Page 67 Symptoms Remedies/Causes • The unit does not response when you tried to You may have tried to copy the same entries (as stored) to copy the phone book to the unit. the unit. Touch BAND to exit. • “No Audio Device” appears on the monitor. Connect this unit and the Bluetooth audio player correctly.
-
Page 68: Specifications
Specifications Maximum Power Output: Front/Rear: 50 W per channel Continuous Power Output Front/Rear: 20 W per channel into 4 Ω, 40 Hz to (RMS): 20 000 Hz at no more than 0.8% total harmonic distortion Signal-to-Noise Ratio: 70 dB 4 Ω (4 Ω to 8 Ω allowance) Load Impedance: Equalizer Control Range: Frequencies: 60.0 Hz, 150.0 Hz, 400.0 Hz, 1.0kHz,... - Page 69 Screen Size: 3.5 inch wide liquid crystal display 211 200 pixels: 960 (horizontal) × 220 (vertical) Number of Pixel: Drive Method: TFT (Thin Film Transistor) active matrix format Color System: NTSC/PAL Aspect Ratio: 16:9 (wide) Allowable Storage Temperature: –10°C to +60°C Allowable Operating Temperature: 0°C to +40°C USB Standards:...
- Page 70 Having TROUBLE with operation? Please reset your unit Refer to page of How to reset your unit 0208MNMMDWJEIN © 2008 Victor Company of Japan, Limited...