Table of Contents
Advertisement
Thank you for purchasing this product.
For optimum performance and safety, please read these instructions carefully.
Please keep this manual for future reference.
The installation instructions are on page 16.
Please read these instructions carefully before installing.
"EB" indicates the United Kingdom model.
EB
GN
GS
Operating Instructions
Compact Stereo System
Model No.
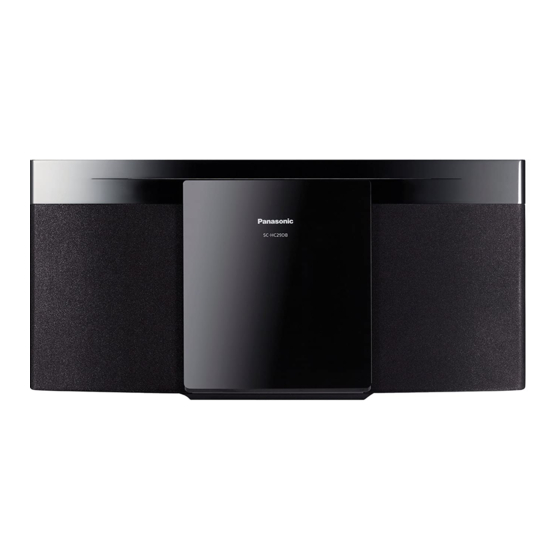
SC-HC29DB
SC-HC29
RQT9869-2B
Advertisement
Table of Contents

Related Manuals for Panasonic SC-HC29DB


Summary of Contents for Panasonic SC-HC29DB
-
Page 1: Operating Instructions
Operating Instructions Compact Stereo System SC-HC29DB Model No. SC-HC29 Thank you for purchasing this product. For optimum performance and safety, please read these instructions carefully. Please keep this manual for future reference. The installation instructions are on page 16. Please read these instructions carefully before installing. -
Page 2: Table Of Contents
Safety precautions These operating instructions are applicable for models SC-HC29DB and SC-HC29. Unless otherwise indicated, illustrations in these operating instructions are of SC-HC29DB. Your system WARNING! and the illustrations can look differently. Unit • To reduce the risk of fire, electric shock or product damage, –... -
Page 3: Caution For Ac Mains Lead
Caution for AC mains lead Supplied accessories (For the AC mains plug of three pins) Check and identify the supplied accessories. For your safety, please read the following text carefully. For the United Kingdom and Ireland This appliance is supplied with a moulded three pin Use numbers indicated in parentheses when asking for mains plug for your safety and convenience. -
Page 4: Making The Connections
Making the connections Connect the AC mains lead. (For the AC mains plug of three pins) Connect the AC mains lead only after all the other READ THE “Caution for AC mains lead” BEFORE connections have been made. CONNECTION. To household mains socket Do not use any other AC mains lead except the supplied one. -
Page 5: Overview Of Controls
Overview of controls Do the procedures with the remote control. You can also use the buttons on the main unit if they are the same. Top view Standby/on switch [`], [1] Mute the sound Press to switch the unit from on to standby mode or To cancel, press the button again. -
Page 6: Preparing The Media
█ Preparing the media Pairing a device Preparation If this system is connected to a Bluetooth device, ® Disc disconnect it (Z“Disconnecting a device”). Press [ ] to select “BLUETOOTH”. Press [USB/CD] to select “CD”. If “PAIRING” is shown, continue with step 4. Press [CD x] (main unit: [x OPEN/CLOSE]) to open Press [PLAY MENU] to select “PAIRING”. -
Page 7: One-Touch Connection (Nfc)
Bluetooth device to establishing a ® connection. Basic playback Android™ device version lower than 4.1 requires the installation of the “Panasonic Music Streaming” app CD USB BLUETOOTH (free of charge). Enter “Panasonic Music Streaming” in the search Play Press [4/9]. -
Page 8: Link Mode
Play menu Input level CD USB BLUETOOTH You can change the input level setting if the sound input Press [PLAY MENU] repeatedly to select level of the Bluetooth transmission is too low. ® “PLAYMODE” or “REPEAT”. Press [PLAY MENU] repeatedly to select Press [R, T] to select the setting and then press “INPUT LEVEL”. -
Page 9: Radio
Radio Improving the sound quality When “FM” is selected Preparation For Australia and New Zealand Press [PLAY MENU] repeatedly to select Press [RADIO/AUX] to select “FM” or “AM”. “FM MODE”. For others Press [RADIO/AUX] to select “FM”. Press [R, T] to select “MONO” and then press [OK]. -
Page 10: Dab/Dab
DAB/DAB+ Secondary service You can listen to secondary services when “ ” is For the United Kingdom and Ireland shown. Preparation Press [RADIO/AUX] to select “DAB/DAB+”. Press [PLAY MENU] repeatedly to select “DAB SECONDARY”. Note: “DAB/DAB+” If you select for the first time, the system will Press [R, T] to select the secondary service and tune automatically. -
Page 11: Clock And Timers
Clock and timers Play timer (Except for Bluetooth ® source) You can set the timer to come on at a certain time to Setting the clock wake you up. This is a 24-hour clock. Preparation Set the clock. Press [SETUP] repeatedly to select “CLOCK”. Press [SETUP] repeatedly to select “TIMER ADJ”. -
Page 12: Sound Effects
Sound effects Others Press [SOUND] repeatedly to select the sound Auto off effect. Press [R, T] to select the setting and then press This system automatically switches off when you do not [OK]. use it for approximately 20 minutes. PRESET EQ “HEAVY”, “SOFT”, “CLEAR”, “VOCAL”... -
Page 13: Troubleshooting
█ Troubleshooting ® Bluetooth Pairing cannot be done. Before requesting service, make the following checks. If • Check the Bluetooth ® device condition. you are in doubt about some of the check points, or if the • The device is out of the 10 m communication range. solutions indicated do not solve the problem, consult Move the device nearer to the system. -
Page 14: Remote Control Code
Main unit displays Remote control code “--:--” When other Panasonic equipment responds to the • You connected the AC mains lead for the first time or there remote control of this system, change the remote control was a power failure recently. Set the clock. -
Page 15: Specifications
Specifications █ █ Amplifier section USB section RMS output power stereo mode USB port Front Ch (both ch driven) USB standard USB 2.0 full speed 10 W per channel (8 Ω), 1 kHz, 10% THD Media file format support MP3 (*.mp3) Total RMS stereo mode power 20 W USB device file system... -
Page 16: Attaching The Unit To A Wall (Optional)
You can use the supplied wall mount brackets to attach this unit to the wall. At least 30 mm Panasonic cannot be held responsible for any property damage and/or serious injury, including death resulting from improper installation or incorrect handling. -
Page 17: About Bluetooth
About Bluetooth Licenses ® MPEG Layer-3 audio coding technology licensed from Panasonic cannot be held responsible for data and/or information that can possibly be compromised during a Fraunhofer IIS and Thomson. wireless transmission. word mark and logos are owned by the The Bluetooth ®... -
Page 18: Limited Warranty (Australia)
If there is a major failure in regard to the product which cannot be remedied then you must notify us within a reasonable period by contacting the Panasonic Customer Care Centre. If the failure in the product is not a major failure then Panasonic may choose to repair or replace the product and will do so in a reasonable period of time from receiving notice from you. - Page 20 Directive for the chemical involved. Manufactured by: Panasonic Corporation Kadoma, Osaka, Japan Importer for Europe: Panasonic Marketing Europe GmbH Panasonic Testing Centre Winsbergring 15, 22525 Hamburg, Germany Panasonic Corporation Web Site: http://panasonic.net RQT9869-2B L0214LC2044 ©...