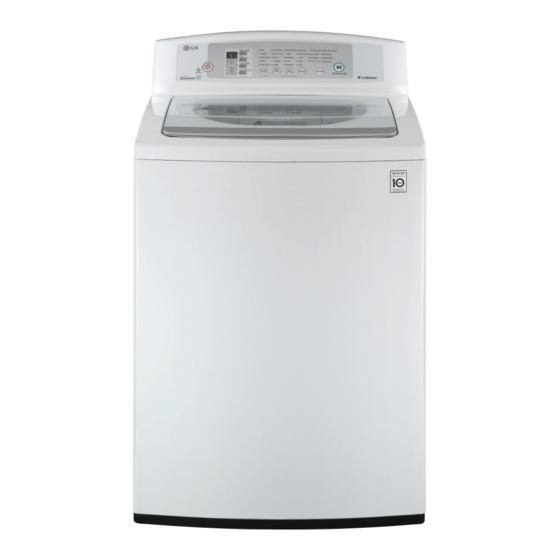
LG WT4801CW Owner's Manual
Washing machine
Hide thumbs
Also See for WT4801CW:
- Owner's manual (108 pages) ,
- Service manual (50 pages) ,
- Specifications (2 pages)
Table of Contents
Advertisement
OWNER'S MANUAL
WASHING MACHINE
Before beginning installation, read these instructions carefully. This will simplify
installation and ensure that the washer is installed correctly and safely.
Leave these instructions near the washer after installation for future reference.
WT4801CW
P/NO :
MFL42065499
www.lg.com
Advertisement
Table of Contents
Troubleshooting

Related Manuals for LG WT4801CW


Summary of Contents for LG WT4801CW
-
Page 1: Washing Machine
OWNER’S MANUAL WASHING MACHINE Before beginning installation, read these instructions carefully. This will simplify installation and ensure that the washer is installed correctly and safely. Leave these instructions near the washer after installation for future reference. WT4801CW www.lg.com P/NO : MFL42065499... -
Page 2: Product Features
PRODUCT FEATURES PRODUCT FEATURES INVERTER DIRECT-DRIVE MOTOR The inverter motor, which is directly connected to the tub, minimizes energy loss and produces little noise and vibration. SMARTDIAGNOSIS™ Should you experience any technical difficulty with your washing machine, it has the capability of transmitting data by phone to the Customer Information Center. -
Page 3: Important Safety Instructions
IMPORTANT SAFETY INSTRUCTIONS IMPORTANT SAFETY INSTRUCTIONS READ ALL INSTRUCTIONS BEFORE USE WARNING For your safety, the information in this manual must be followed to minimize the risk of fire or explosion, electric shock, or to prevent property damage, injury to persons, or death. Your Safety and the safety of others are very important. -
Page 4: Grounding Instructions
IMPORTANT SAFETY INSTRUCTIONS IMPORTANT SAFETY INSTRUCTIONS READ ALL INSTRUCTIONS BEFORE USE WARNING For your safety, the information in this manual must be followed to minimize the risk of fire or explosion, electric shock, or to prevent property damage, injury to persons, or death. BASIC SAFETY PRECAUTIONS WARNING To reduce the risk of fire, electric shock, or injury to persons when using this appliance, follow basic precautions, including the... - Page 5 IMPORTANT SAFETY INSTRUCTIONS IMPORTANT SAFETY INSTRUCTIONS READ ALL INSTRUCTIONS BEFORE USE WARNING For your safety, the information in this manual must be followed to minimize the risk of fire or explosion, electric shock, or to prevent property damage, injury to persons, or death. SAFETY INSTRUCTIONS FOR INSTALLATION WARNING To reduce the risk of fire, electric shock, or injury to persons when using this appliance, follow basic precautions, including the...
-
Page 6: Cleaning, And Disposal
IMPORTANT SAFETY INSTRUCTIONS IMPORTANT SAFETY INSTRUCTIONS READ ALL INSTRUCTIONS BEFORE USE WARNING For your safety, the information in this manual must be followed to minimize the risk of fire or explosion, electric shock, or to prevent property damage, injury to persons, or death. SAFETY INSTRUCTIONS FOR USE, CARE, CLEANING, AND DISPOSAL WARNING To reduce the risk of fire, electric shock, or injury to persons when using this appliance, follow basic precautions, including the... -
Page 7: Table Of Contents
TABLE OF CONTENTS TABLE OF CONTENTS Cycle setting buttons PRODUCT FEATURES Setting options before cycle - Setting the water temperature, WASH TEMP. IMPORTANT SAFETY INSTRUCTIONS - Setting soil level of laundry, SOIL LEVEL - Setting spin speed, SPIN SPEED BASIC SAFETY PRECAUTIONS - Tuning on/off melody and button tones, SIGNAL GROUNDING INSTRUCTIONS ON/OFF... -
Page 8: Introducing Your Washing Machine
Hot and Cold Water Hoses NOTE ü Contact LG Customer Service at 1-800-243-0000 (1-888-542-2623 in Canada) if any accessories are missing or to purchase accessories. ü Always purchase good quality hoses. Leaking caused by poor quality hoses or by improper installation is not covered by the manufacturer’s warranty. -
Page 9: Control Panel Features
INTRODUCING YOUR WASHING MACHINE Control panel features Option Selection Display Button Wash Soil Spin Signal Cycles Start/ Power Temp. Level Speed Selection Selection Pause Button Selection Selection Selection Button Button Button Button Button Button Operation Button Description ü POWER ON/OFF BUTTON - Press to turn the washer ON. -
Page 10: Display
INTRODUCING YOUR WASHING MACHINE Display Estimated time remaining/ error message display (See page 28) Cycle Status Indicator Button Description ü ESTIMATED TIME REMAINING - When the START/PAUSE button is pressed, the washer automatically detects the wash load (weight) and optimizes the washing time based on the selected cycle and options. The display will then indicate the estimated time remaining for the selected wash cycle. -
Page 11: Installation Instructions
INSTALLATION INSTRUCTIONS INSTALLATION INSTRUCTIONS Installation Overview Checking and choosing the Unpacking the washer Connecting the water line proper location Connecting the drain line Leveling the washing Plugging in the power cord machine and grounding Test run WARNING ü Washer is heavy! Two or more people are required when moving and unpacking the washer. Failure to do so can result in back or other injury. -
Page 12: Checking And Choosing The Proper Location
INSTALLATION INSTRUCTIONS Checking and choosing the proper location Install the washing machine on a solid floor that is strong and rigid enough to support the weight of the washing machine, even when fully loaded, without flexing or bouncing. If the floor has too much flex, you may need to reinforce it to make it more rigid. -
Page 13: Unpacking The Washer
INSTALLATION INSTRUCTIONS Unpacking the washer Unfasten the power cord from the back of the washer. After the washer is in the home, remove the carton and Styrofoam® shipping base from the washer. TOOLS YOU WILL NEED • Adjustable Pliers When removing the washer from the carton base, be sure to remove the tub support in the middle of the carton base. -
Page 14: Connecting The Water Lines
INSTALLATION INSTRUCTIONS Connecting the water lines Connect the hoses to the water inlets tightly by hand and then tighten another 2/3 turn with pliers. - Connect the blue hose to the cold water inlet and the Check the rubber seals on both sides of the hose. red hose to the hot water inlet. -
Page 15: Connecting The Drain Line
INSTALLATION INSTRUCTIONS Using a laundry tub Connecting the drain line Clip the end of the hose into the elbow bracket. Secure the drain hose in place to prevent moving and leaking. - Connect the elbow bracket within 4 inches (10 cm) from the end of the drain hose. -
Page 16: Leveling The Washing Machine
INSTALLATION INSTRUCTIONS Leveling the washer machine The washer spins at very high speeds, up to 1,000 RPM. side to side NOTE ü Adjust the leveling feet only as far as necessary to level the washer. Extending the leveling feet more than front to back necessary can cause the washer to vibrate. -
Page 17: Plugging In The Power Cord And Grounding
INSTALLATION INSTRUCTIONS Plugging in the power cord and Test run grounding Check if the washing machine is properly installed and run a test cycle. Make sure to ground the washing machine to prevent a short circuit or an electric shock when plugging in. Load the washing machine with 6 pounds of laundry. -
Page 18: Preparation
PREPARATION PREPARATION Sorting wash loads Precautions for fabric care before wash cycle Read and observe the following to prevent shrinkage or damage to clothes. ◆ Check all pockets to make sure that they are empty. Fabric care labels -Items such as clips, matches, pens, coins, and keys can damage both your washer and your clothes. -
Page 19: Using Detergent/Fabric Softener
PREPARATION Using detergent/fabric softener Loading the dispenser The detergent dispenser drawer of the washing machine has Recommended detergent a dispenser compartment for each detergent type. Add the appropriate detergents into its respective compartments. Make sure to use HE (High-Efficiency) detergent for Top loading washing machines. - Page 20 PREPARATION Main Wash Detergent Compartment Liquid Bleach Compartment This compartment holds laundry detergent for the main wash This compartment holds liquid chlorine bleach, which will be cycle, which is added to the load at the beginning of the dispensed automatically at the proper time during the wash cycle.
-
Page 21: Using Your Washing Machine
USING YOUR WASHING MACHINE USING YOUR WASHING MACHINE Basic operation SORT LAUNDRY AND LOAD WASHER. TURN ON THE WASHER. Press the POWER button to turn on the washer. SELECT CYCLE. Press the cycle selector button to the desired cycle. The display will show the preset WASH TEMP. -
Page 22: Cycle Guide
USING YOUR WASHING MACHINE Cycle guide The cycle guide below shows the options and recommended fabric types for each cycle. =Default setting Delay Extra Fabric Cycle Fabric Type Wash Temp. Soil Level Spin Speed Soak Wash Rinse Softener Cotton/Normal Cotton, linen, towels, Warm Normal High... -
Page 23: Main Cycle
USING YOUR WASHING MACHINE Main cycle Cycle setting buttons You can wash laundry items more thoroughly by selecting the Each cycle has preset settings that are selected wash cycle that best suits the type of items to be washed. automatically. You may also customize the settings using the cycle setting buttons. -
Page 24: Setting Soil Level Of Laundry, Soil Level
USING YOUR WASHING MACHINE Setting soil level of laundry, Tuning on/off melody and button tones, SOIL LEVEL SIGNAL ON/OFF You can wash your laundry more thoroughly by setting the The washing machine plays a melody when the wash cycle proper soil level on the washing machine. is finished. -
Page 25: Setting Fabric Softener Of Laundry, Fabric Softener
USING YOUR WASHING MACHINE Setting fabric softener of laundry, FABRIC Setting customized wash cycle, CUSTOM SOFTENER PROGRAM *Press & hold 3 sec for Extra functions. The fabric softener is dispensed in the final You can add an extra rinse cycle to the default rinse cycle. rinse. -
Page 26: Maintenance
If the filters cannot be cleaned or are damaged, washing machine and faucets. do NOT operate the washer without the inlet filters. - See page 14, Connecting the water lines for details. Contact LG Customer Service or a qualified LG servicer. Turn on the faucets. Press Cold Press RINSE + SPIN. -
Page 27: Cleaning
MAINTENANCE Cleaning the detergent box Cleaning Leaving detergent in the detergent for an extended period of Periodically clean the washing machine to maintain its time or using the washing machine for a long period of time performance and to prevent malfunction. may cause the build-up of scales in the detergent. -
Page 28: Troubleshooting
TROUBLESHOOTING TROUBLESHOOTING Checking error messages If the following message appears on the display, check the following and take the appropriate corrective action. Message Possible Causes Solutions ü ü Water in the washer Drain hose is bent, pinched, or clogged. Make sure the drain hose is free of clogs, kinks, etc., drains slowly or not and is not pinched behind or under the washer. - Page 29 TROUBLESHOOTING Checking error messages (cont.) Message Possible Causes Solutions ü ü The display shows: The washer has detected an out of balance If the washer detects a load that is too far out of load. balance to spin, it will display this code while it is attempting to rebalance the load.
-
Page 30: Normal Sounds You May Hear
TROUBLESHOOTING Normal sounds you may hear The following sounds may be heard while the washer is operating. They are normal. Clicking: • Lid lock relay when the lid locks and unlocks. • The washer will make a series of clicking noises as it changes the cleaning mode. High pitched noise: The wash basket spins faster to remove moisture from the load. - Page 31 TROUBLESHOOTING Problem Possible Causes Solutions ü ü Washer won’t Control panel is asleep This is normal. Press POWER. ü ü Washer is unplugged Make sure cord is plugged securely into a working outlet. operate ü ü Water supply is turned off Turn both hot and cold faucets fully on.
- Page 32 TROUBLESHOOTING Problem Possible Causes Solutions ü ü Incomplete or no dispensing Detergent compartments clogged Make sure that detergent and additives are put in to the of detergent from incorrect filling correct dispenser compartments. If liquid detergent is used, make sure that the liquid detergent cup and insert are in the detergent compartment.
-
Page 33: Specifications
SPECIFICATIONS/USING SMARTDIAGNOSIS™ SPECIFICATIONS Model WT4801CW Description Top-Loading Washer Electrical requirements 120 VAC @ 60 Hz. Max. water pressure 14.5~116 PSI (100~800 kPa) Dimensions 68.6 cm (W) X 71.6 cm (D) X 111.4 cm (H), 133.7 cm (H with lid open) 27”(W) X 28... - Page 34 LG Electronics U.S.A., Inc. (“LG”) warrants your LG Washing Machine (“product”) against defect in materials or workmanship under normal household use, during the warranty period set forth below, LG will, at its option, repair or replace the product. This limited warranty is valid only to the original retail purchaser of the product, is not assignable or transferrable to any subsequent purchaser or user, and applies only when the product is purchased through an LG authorized dealer or distributor and used within the United States (“U.S.”) including U.S.
-
Page 35: Warranty
Should your LG Washer (“Product”) fail due to a defect in material or workmanship under normal home use during the warranty period set forth below, LG Canada will at its option repair or replace the Product upon receipt of proof of original retail purchase. This warranty is valid only to the original retail purchaser of the product and applies only to a Product distributed in Canada by LG Canada or an authorized Canadian distributor thereof. - Page 36 LG Customer Information Center 1-800-243-0000 1-888-542-2623 CANADA This product qualifies for ENERGY STAR in the “factory default (Home Use)” setting. Register your product Online! Changing the factory default settings or enabling other features may increase power consumption that could www.lg.com...