NComputing X350 User Manual
Desktop virtualization kits with vspace
Hide thumbs
Also See for X350:
- Selection manual (2 pages) ,
- User manual (45 pages) ,
- Quick installation manual (2 pages)

Related Manuals for NComputing X350


Summary of Contents for NComputing X350
- Page 1 X350 and X550 Desktop Virtualization Kits with vSpace User Manual www.ncomputing.com...
- Page 2 The EULA and TOU constitute agreements between you and NComputing and are accepted by you by installing and using the product. It is your responsibility to print a copy of the EULA and TOU directly from the installer in order to keep for your records.
-
Page 3: Table Of Contents
Install the Hardware .................... 10 Install the X-series PCI Card ..................10 Connect Peripheral Devices ..................12 Install the NComputing vSpace Software ............13 Installing vSpace 4 and 5 ..................13 Installing vSpace 6 ....................18 Product Registration ................... 21 Offline Registration .................... -
Page 4: Safety Information
X350 and X550 User Manual Safety Information Refer to the following to prevent any physical injury or loss of assets caused by damage to the product. A user must read this User Manual carefully before use and properly follow the instructions. -
Page 5: Regulatory Compliance
For enhancing performance and reliability, we recommend using an FTP or STP cable between the X350 or X550 PCI card and the XD2 devices. This device complies with part 15 of the FCC Rules. -
Page 6: Mic Certification Information
이 기기는 가정용(B 급)으로 전자파적합 등록을 한 기기로서 주로 가정에서 사용 하는 것을 목적으로 하며, 모든 지역에서 사용할 수 있습니다. 제품의 성능 및 신뢰성 향상을 위하여 X350/X550 PCI Card 와 XD2 Access Device 의 연결 시 FTP 혹은 STP Cable 의 사용을 권장 합니다. -
Page 7: Product Overview
One X550 Kit Enables Six Users to Share a PC (Eleven with Two Kits) One X550 kit adds five users to a PC, and an X350 kit adds three users to a PC. Including the first user that works directly on the PC, this means that: ... -
Page 8: Minimum System Requirements
PCI slot. For a single X350 kit with 1-4 users, a host PC should have a minimum of a 2.4 GHz processor or any dual-core processor and 2 GB RAM. For a single X550 kit with up to 6 users, a 3.0 GHz processor or any dual- or quad-core processor with at least 3 GB of... -
Page 9: Access Devices
X350 and X550 User Manual that with host systems as described above, six or more stations can run independent video streams at native DVD resolution (720 x 480). Several stations (3-4) can also run full-screen video (at 1024x768). Of course, performance depends on several factors, including the shared PC specifications, monitor resolution, video file being played and the types of decoders and media player used. -
Page 10: Install The Hardware
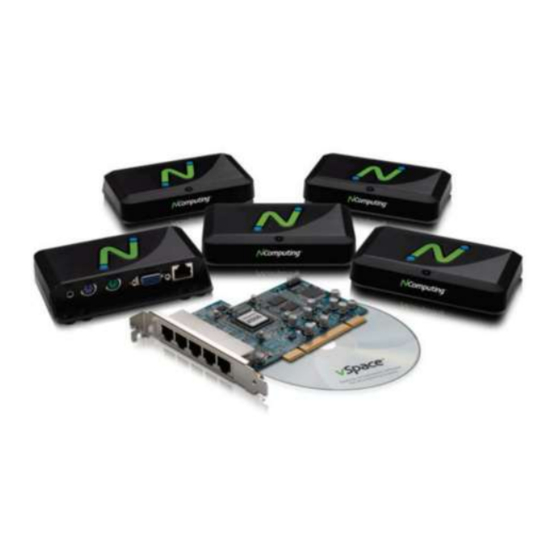
X350 and X550 User Manual Install the Hardware Before attempting to install the X350/X550 kit, verify that your Windows or Linux OS is supported by vSpace, and that the OS is properly installed, updated and all devices viewable in the OS device manager are working properly. Also, check to be sure your package includes one X550 (or X350) PCI card, five (or three) XD2 devices, the vSpace installation CD, and ten (or six) monitor mounting screws. - Page 11 Note that only matched sets of cards are supported. For example, you can use two X550 cards in a PC or two X350 cards. You cannot use both an X350 and an X550 card in the same system.
-
Page 12: Connect Peripheral Devices
PCI card. The signals being sent from the X350/X550 PCI card to the XD2 device are NOT Ethernet. Connect the desired peripheral devices to each XD2 access device. If you plan to use any USB devices, connect these directly to the host PC –... -
Page 13: Install The Ncomputing Vspace Software
1. Turn on the host PC. After Windows starts, it will automatically bring up a dialog box called “Found New Hardware Wizard.” Do not install anything from Windows Update for the X350/X550 PCI card. Simply click “Cancel” on this screen. - Page 14 CD with the latest software version on the NComputing update server. If there is a later version on the NComputing server, a prompt will appear to ask if you want to use the version on the CD or if you want to download the latest version (installation of the latest software is always recommended).
- Page 15 Resetting a forgotten password will require uninstalling and reinstalling the vSpace software. Therefore, the system administrator needs to manage this password carefully. Note: The NComputing Administration Console allows you to administer vSpace software and parameters associated with the access devices on this PC. It will automatically be installed on this system.
- Page 16 My Documents folder. This process will create a record of your system’s configuration but it may take some time to create. This is only necessary if you are specifically asked to do so when interacting with NComputing Technical Support. The vSpace software will then be installed.
- Page 17 X350 and X550 User Manual Note: It is strongly recommended that all users have their own user accounts to enable control of their own settings. If you click on the “Yes” button, the “Local Users and Groups” Windows utility (screen shot shown below) will be displayed on an otherwise blank overlay screen.
-
Page 18: Installing Vspace 6
1. Turn on the host PC. After Windows starts, it will automatically bring up a dialog box called “Found New Hardware Wizard.” Do not install anything from Windows Update for the X350/X550 PCI card. Simply click “Cancel” on this screen. - Page 19 X350 and X550 User Manual 4. At the installer’s "Welcome" screen, click on the "Next" button. 5. At the software End User License Agreement and Terms of Use screens, read the agreements and if you agree, click on the "I agree" checkbox, and then click on the "Next"...
- Page 20 X350 and X550 User Manual Windows Server 2008 user account management screen Windows Server 2003 user account management screen 9. When the License wizard screen is displayed, enter the name of the person that will be maintaining the vSpace software on this system. You must also enter the person’s company, select a location country from the dropdown menu, enter...
-
Page 21: Product Registration
The X350/X550 PCI card contains an embedded hardware license which allows it to support up to three/five access devices. When first installed, the X350/X550 starts a trial license which permits you to use up to three/five attached access devices for the next 30 days. - Page 22 X350 and X550 User Manual Below are some notes regarding installing matched X-series PCI cards and product registration: If you have two matched X-series cards installed in the host PC during product registration, the vSpace registration application will register both cards at the same time.
- Page 23 A screen is displayed that allows you to select what serial number(s) to register. The screen provides a list of X350/X550 PCI card number(s) read directly from the card(s). For each serial number, the screen shows if it is registered or not yet registered. Any...
- Page 24 To register vSpace online, select the “Register online” button. To register offline, select the “Create offline registration file” button. Click the “Next” button to continue. Remember that successful registration is necessary for the X350/X550 card to function past the initial 30 days.
-
Page 25: Offline Registration
NComputing. If the registration system determines that the file is valid and that the X350/X550 is entitled to be activated, you will receive an email within the next 2 or 3 minutes with an attached license file specific to the X350/X550 card(s) and the PC in which it was installed. -
Page 26: Client Access License (Cal) Installation
PC configuration. When making such a change, simply repeat the online or offline registration process. You can reassign your license in this way a maximum of two additional times after your initial registration. If you exceed this limit, you will need to contact NComputing technical support. Page 26... -
Page 27: Uninstalling Vspace
X350 and X550 User Manual Uninstalling vSpace To uninstall the vSpace software, select Start > NComputing vSpace > Uninstall. Follow the prompts and the vSpace software will be removed from the host PC. You will be prompted to restart the host PC to complete the process. - Page 28 The core version number for your vSpace software installation can be found by going to: Start All programs NComputing vSpace vSpace Update Page 28...
-
Page 29: Updating Vspace 6
Help About vSpace Console (note this is typically a subset of the main software version, e.g. 4.4). The version of the graphics driver for the X550/X350 can be found by going to the Device Manager and clicking on Display Adapters X550 Graphic Controller ... -
Page 30: Using The Vspace 4 Or 5 Management Console
Start the management console from the Windows Start menu. The application is called "vSpace Console." You can also start the management console by right-clicking on the NComputing icon in the system tray and selecting "vSpace Management Console" or by simply double- clicking on the NComputing icon in the system tray. - Page 31 X350 and X550 User Manual Send Message to other vSpace users on this system. Send a message to users on the same vSpace PC as this user. From the Start menu, vSpace has the following four commands: Uninstall vSpace: will uninstall the vSpace software...
-
Page 32: Administration Console Interface
The "Local Settings" tree allows you to see and change settings for the host PC. X350/X550 PCI Card Select the "X350 PCI Card" or “X550 PCI Card” item to show information about all the vSpace sessions currently available on that PCI card. - Page 33 Properties: Displays or modifies the properties defined for that particular PCI card. NOTE: All stations attached to the same X350/X550 PCI card will use the same resolution and color depth that is set in the Administration Console. Selecting the Properties option brings up a new window that allows setting the common monitor resolution and color depth.
- Page 34 X350 and X550 User Manual NOTE: Changing the PCI card’s resolution and/or color depth is only allowed from the Administration console on the local system. Properties for cards inside other network systems can be remotely viewed, but resolution/color depth changes cannot be remotely applied.
- Page 35 X350 and X550 User Manual To send a message to the screen of the user session currently running on that station, right-click a station in the left window (or click the message icon in the toolbar). From this window, you can only send messages to stations attached to this PC.
- Page 36 X350 and X550 User Manual If you right-click directly on a “station number,” you can access three tabs of available information. The "Application loaded" tab shows all the applications running on that station’s session. The "Information" tab (displayed in the screen shot below) shows the following information about the selected station’s session:...
- Page 37 X350 and X550 User Manual The “Station Settings” tab shows parameters that can be set for each station. Page 37...
- Page 38 Monitor off: An individual X-series station consumes less than one watt of power, but the monitor attached to it consumes many times that (50-70 watts for an LCD monitor and well over 100 watts for a CRT). Thus the X350/X550 PCI card provides an EXTRA “energy saver” setting that is independently configurable for each access device or station.
- Page 39 X350 and X550 User Manual Information & Settings The "Product Information" item shows information about the installed vSpace software, such as product name, build date, version string and vendor information. (You cannot modify these values.) The "User information" item shows the information entered during the registration process, and double clicking an item brings up a window allowing you to change the value.
- Page 40 X350 and X550 User Manual The "System Settings" item shows the following settings for the vSpace software. Double-click on the name of the setting to adjust it, unless it is read-only, which is specified below. Maximum number of stations (incl. Host): the maximum number of sessions the vSpace software is configured to support.
- Page 41 Disable Send Broadcast Message: sets whether or not the administrator has disabled broadcast messages from the NComputing vSpace icon in the Windows System Tray. You can set this to either “Yes” or “No.” When set to “Yes,” a user cannot access the vSpace console to send a broadcast message.
- Page 42 X350 and X550 User Manual Before PCI Card Registration AFTER PCI Card Registration Page 42...
- Page 43 X350 and X550 User Manual USB-Device Assignment(s) In the "USB-Device Assignment(s)" item, you can control which USB ports on the host PC are connected to which access device (station). To use this function, navigate the tree to select a connected USB device. After selecting a device, the following information will be displayed in the right-hand window.
- Page 44 X350 and X550 User Manual Page 44...
- Page 45 X350 and X550 User Manual When you click on the "Apply" button, changes to the USB-device assignments are saved. To discard changes, simply navigate to another tree item or close the console without clicking on the "Apply" button, but you will be reminded that you may wish to save the settings you made.
-
Page 46: Using The Management Console In Vspace 6
X350 and X550 User Manual Using the Management Console in vSpace 6 Previous versions of the console on vSpace 4 and 5 have been based on the Windows MMC platform, and were limited in their appearance and capabilities. To enable an improved feature set across wider deployment scenarios, vSpace 6 uses a new, independent console architecture. - Page 47 X350 and X550 User Manual Click on “System Settings” to display the System Settings screen, which lets you control the following: Define the disconnected session cleanup timeout Send messages from the NCTray in each session Define whether or not the...
- Page 48 X350 and X550 User Manual The Stations are listed under the Terminal icon and show how each PCI card connects to the stations (access devices) and their associated sessions. To stop or start all sessions at the same time, right-click on the access device icon named “X-series”...
- Page 49 X350 and X550 User Manual To view device-specific configurations, including Auto Logon and Monitor Power-off, expand the Terminals list, right-click on the desired Station and choose “Station Settings.” Check the “Enable Auto Logon” checkbox, type in the desired user credentials and click “OK” to enable this feature (this can also be set from the NC Tray).
-
Page 50: Nctray Interface
PC. In some environments, you may not want every user to access the NCTray. To disable the NCTray for user stations, please refer to the article titled http://www.ncomputing.com/kb/How-to-remove-the-vSpace-6-NCtray-icon-from-the- Windows-SystemTray_305.html in the NComputing Knowledge Base for information. Page 50... -
Page 51: Troubleshooting
Make sure the access device’s cable is connected to the host PC, the host PC is running and the X350/X550 card has been registered. Checking that the X350/X550 PCI Card and software are installed correctly. On the host PC, open the Control Panel and then open the “System” item. Select the “Device Manager”... -
Page 52: Glossary
Access device (XD2): a multi-user computing station using NComputing patented technology. It doesn't use a CPU, VGA or main chipsets. It shares the resources of the host PC using NComputing vSpace software and a PCI card containing a system-on-a- chip (SoC). - Page 53 X350 and X550 User Manual © 2003-2011 NComputing Inc. All rights reserved. NComputing, vSpace, and Numo are registered trademarks of NComputing Inc. – USA. Microsoft, Windows, and Windows Firewall are registered trademarks of Microsoft Corporation. All trademarks are the property of their respective owners.