Table of Contents
Advertisement
LPT0751-001B
COPYRIGHT © 2003 VICTOR COMPANY OF JAPAN, LTD.
SAFETY FIRST ............................................................................... 1
Buttons, Connectors and Indicators ................................................ 3
Basic Connections.......................................................................... 4
Initial Settings .............................................................................. 4
Auto Set Up............................................................................ 4
Language Set .......................................................................... 5
Playback ...................................................................................... 5
Recording..................................................................................... 7
Timer Recording............................................................................ 8
®
V
Timer Programming............................................. 8
Express Timer Programming.................................................... 9
Checking, cancelling or changing programme settings ........... 9
Automatic Satellite Programme Recording .............................. 9
Editing ....................................................................................... 10
Editing with another video recorder or a camcorder ............. 10
Output/Input Set........................................................................ 10
L-1 OUTPUT Setting: ........................................................... 10
L-2 SELECT and L-2 INPUT Setting: ...................................... 10
System Connections .................................................................... 11
Connecting to a satellite receiver .......................................... 11
Connecting/Using a decoder ................................................ 11
Connecting/Using a stereo system ........................................ 11
Subsidiary Settings ..................................................................... 11
Mode Set.............................................................................. 11
Clock Set .............................................................................. 13
Tuner Set .............................................................................. 13
Video Channel Set................................................................ 15
Specifications.............................................................................. 16
SAFETY FIRST
Safety Precautions
The rating plate and the safety caution are on the rear of the unit.
WARNING: DANGEROUS VOLTAGE INSIDE
WARNING: TO PREVENT FIRE OR SHOCK HAZARD, DO NOT
EXPOSE THIS UNIT TO RAIN OR MOISTURE.
CAUTION
When you are not using the recorder for a long period of
time, it is recommended that you disconnect the power cord
from the mains outlet.
Dangerous voltage inside. Refer internal servicing to qualified
service personnel. To prevent electric shock or fire hazard,
remove the power cord from the mains outlet prior to
connecting or disconnecting any signal lead or aerial.
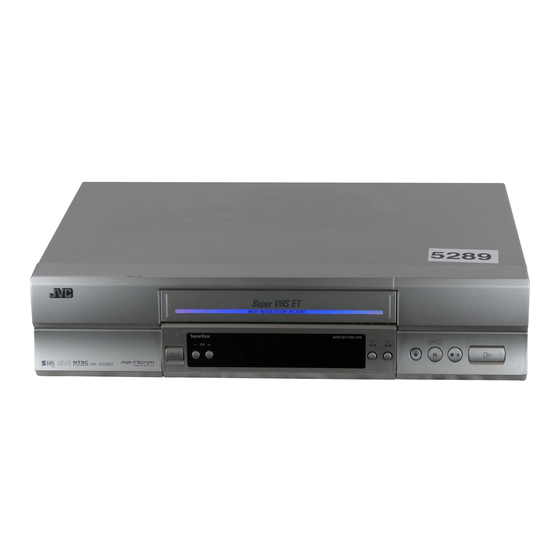
VIDEO CASSETTE RECORDER
HR-S5960E
HR-S5961E
HR-S5962E
HR-S5963E
- 1 -
INSTRUCTIONS
WARNING
There are two different types of SECAM colour systems:
SECAM-L, used in FRANCE (also called SECAM-West), and
SECAM-B, used in Eastern European countries (also called
SECAM-East).
1. This recorder can also receive SECAM-B colour television
signals for recording and playback.
2. Recordings made of SECAM-B television signals produce
monochrome pictures if played back on a video recorder of
SECAM-L standard, or do not produce normal colour
pictures if played back on a PAL video recorder with
SECAM-B system incorporated (even if the TV set is SECAM-
compatible).
3. SECAM-L prerecorded cassettes or recordings made with a
SECAM-L video recorder produce monochrome pictures
when played back with this recorder.
4. This recorder cannot be used for the SECAM-L standard. Use
a SECAM-L recorder to record SECAM-L signals.
IMPORTANT
Please read the various precautions on pages 1 and 2 before
installing or operating the recorder.
It should be noted that it may be unlawful to re-record pre-
recorded tapes, records, or discs without the consent of the
owner of copyright in the sound or video recording, broadcast
or cable programme and in any literary, dramatic, musical, or
artistic work embodied therein.
For Italy:
"It is declared that this product, brand JVC, conforms to the
Ministry Decree n. 548 of 28 Aug.'95 published in the Official
Gazette of the Italian Republic n. 301 of 28 Dec.'95"
The STANDBY/ON 1 button does not completely shut off
mains power from the unit, but switches operating current on
and off. "`" shows electrical power standby and " ! " shows
ON.
Video tapes recorded with this video recorder in the LP (Long
Play) mode cannot be played back on a single-speed video
recorder.
Caution on Replaceable lithium battery
The battery used in this device may present a fire or chemical
burn hazard if mistreated. Do not recharge, disassemble, heat
above 100°C or incinerate.
Replace battery with CR2032. Panasonic (Matsushita Electric)
or Maxell is recommended.
Danger of explosion or Risk of fire if the battery is incorrectly
replaced.
Dispose of used battery promptly.
Keep away from children.
Do not disassemble and do not dispose of in fire.
ENGLISH
Printed in Germany
0203-AH-PJ-JVE
Advertisement
Table of Contents

Related Manuals for JVC HR-S5960E


Summary of Contents for JVC HR-S5960E
-
Page 1: Table Of Contents
For Italy: “It is declared that this product, brand JVC, conforms to the Ministry Decree n. 548 of 28 Aug.’95 published in the Official Gazette of the Italian Republic n. 301 of 28 Dec.’95”... - Page 2 Point the remote control towards the remote sensor on the target component. The maximum operating distance is about 8 m. To operate a JVC TV, use any of the following buttons: TV 1, , TV PR +/– or TV %+/–.
-
Page 3: Buttons, Connectors And Indicators
Cassette loading slot PR+/– Infrared beam receiving window Display panel S-VHS indicator REVIEW indicator VCR indicator Play indicator Record indicator Counter/Remain display** * Each time you press – –:– –, the display panel shows the channel number and the clock time alternatively. -
Page 4: Basic Connections
Basic Connections Check contents Make sure the package contains all of the accessories listed in “Specifications” ( 16). Situate recorder Place the recorder on a stable, horizontal surface. Connect recorder to TV Aerial connector Back of TV 21-pin SCART connector 21-pin SCART cable RF cable (provided) -
Page 5: Basic Playback
With AV connection Press PR – until the display panel shows “1 – –” (or “2 – –”). Now the video channel is set to off. Then press OK. To view picture signals from the recorder, set your TV to its AV mode. -
Page 6: Playback Features
When the tape is not running Rewind/fast-forward Press 3 or 5. Eject the cassette Press 0. You can also eject the cassette when the recorder is turned off. Turn off the recorder Press 1. ATTENTION: In the search, still, slow-motion or frame-by-frame playback mode, the picture will be distorted the noise bars will appear... -
Page 7: Recording
Watching one programme while recording another If your recorder is connected to the TV via the AV connection 4), press TV/VCR. The recorder’s VCR indicator and the TV broadcast being recorded disappear. Once recording is in progress, all you need to do is to set the channel controls on the TV for the station you wish to view. -
Page 8: Timer Recording
“Selecting Soundtrack” ( S-VHS (Super VHS), S-VHS ET or VHS Recording Mode This VCR can record in S-VHS (Super VHS), S-VHS ET or VHS. To record in S-VHS: Set “S-VHS” to “ON” ( 12). Then, insert a cassette marked “S-VHS”. -
Page 9: Express Timer Programming
Express Timer Programming Press PROG to access the Timer Programming Set screen. Press rt to place the pointer (highlighted bar) next to “EXPRESS PROGRAMMING”, then press OK or e. The program screen appears. Press START (number keys “1” and/or “4”), STOP (number keys “2”... -
Page 10: Editing
Editing Editing with another video recorder or a camcorder You can use your recorder as the source player or the recording deck. You can use a camcorder as the source player and your recorder as the recording deck. Refer also to the other components’... -
Page 11: System Connections
L-2 INPUT — VIDEO / S-VIDEO VIDEO: If a connected appliance’s output is compatible only with regular video signals, set to “VIDEO”. S-VIDEO: If a connected appliance’s output is compatible with Y/C signals, set to “S-VIDEO”. You can obtain high-quality S-VHS picture. - Page 12 PICTURE CONTROL — AUTO(NORM) / EDIT / SOFT This function helps you to adjust the playback picture quality according to your preference. AUTO(NORM): Normally select this. Picture quality is adjusted automatically. When “B.E.S.T.” is “OFF”, “NORM” will appear instead of “AUTO”. EDIT: Minimizes picture degradation during editing (recording and playback).
-
Page 13: Clock Set
Clock Set Turn on the recorder and the TV, and set your TV to its AV mode or video channel. Access Main Menu screen, then Initial Set screen Press MENU. Press rt to place the pointer next to “INITIAL SET”, then press OK or e. Access Clock Set screen Press rt to place the pointer next to “CLOCK SET”, then press OK or e. - Page 14 Deleting a channel Access Confirmation screen Perform step 1 1 1 1 of “Manual Channel Set” ( Select position Press rt w e to until the channel you want to delete begins blinking. Delete channel Press &. The channel directly beneath the cancelled one moves up one line.
-
Page 15: Video Channel Set
TV station and ID list STATION NAME 1000 TV1000 NICK 3SAT 3SAT NOVA 9LIV 9LIVE NRK1 NRK2 ADLT ADULT ANIM Animal Planet ORF1 ANT3 ANTENA3 ORF2 PHOE ARTE ARTE POLS PREM BERLIN1 PRIM BBC GROUP PRO7 BBC1 BBC1 RAI1 BBC2 BBC2 RAI2 BBCW... -
Page 16: Specifications
Specifications GENERAL Power requirement : AC 220 V – 240 V Power consumption Power on : 16 W Power off : 3.5 W Temperature Operating : 5°C to 40°C Storage : –20°C to 60°C Operating position : Horizontal only Dimensions (W x H x D) : 400 mm x 94 mm x 270 mm Weight : 3.1 kg Format...