Table of Contents
Advertisement
EN
LPT0889-001A
COPYRIGHT © 2004 VICTOR COMPANY OF JAPAN, LTD.
Dear Customer,
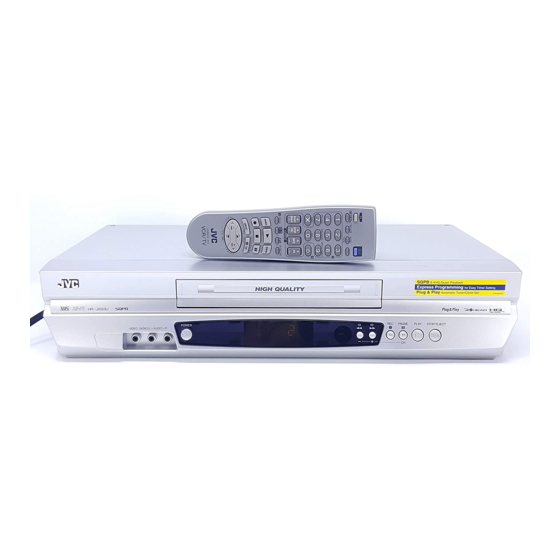
Thank you for purchasing the JVC VHS video cassette recorder. Before use,
please read the safety information and precautions to ensure safe use of
your new VCR.
CAUTIONS
The lightning flash with arrowhead symbol, within an
equilateral triangle, is intended to alert the user to the
presence of uninsulated "dangerous voltage" within the
product's enclosure that may be of sufficient magnitude to
constitute a risk of electric shock to persons.
The exclamation point within an equilateral triangle is
intended to alert the user to the presence of important
operating and maintenance (servicing) instructions in the
literature accompanying the appliance.
WARNING:
TO PREVENT FIRE OR SHOCK HAZARD, DO NOT EXPOSE THIS UNIT TO
RAIN OR MOISTURE.
CAUTION:
This video cassette recorder should be used with AC 120V
To prevent electric shocks and fire hazards, DO NOT use any other power
source.
CAUTION:
TO PREVENT ELECTRIC SHOCK, MATCH WIDE BLADE OF PLUG TO
WIDE SLOT, FULLY INSERT.
ATTENTION:
POUR ÉVITER LES CHOCS ÉLECTRIQUES, INTRODUIRE LA LAME LA PLUS
LARGE DE LA FICHE DANS LA BORNE CORRESPONDANTE DE LA PRISE
ET POUSSER JUSQU'AU FOND.
Note to CATV system installer:
This reminder is provided to call the CATV system installer's attention to Article
820-40 of the NEC that provides guidelines for proper grounding and, in
particular, specifies that the cable ground shall be connected to the grounding
system of the building, as close to the point of cable entry as practical.
NOTE:
Changes or modifications not approved by JVC could void the user's
authority to operate the equipment.
This equipment has been tested and found to comply with the limits for a
Class B digital device, pursuant to Part 15 of the FCC Rules. These limits are
designed to provide reasonable protection against harmful interference in a
residential installation. This equipment generates, uses and can radiate radio
frequency energy and, if not installed and used in accordance with the
instructions, may cause harmful interference to radio communications.
However, there is no guarantee that interference will not occur in a
particular installation. If this equipment does cause harmful interference to
radio or television reception, which can be determined by turning the
equipment off and on, the user is encouraged to try to correct the
interference by one or more of the following measures.
Reorient or relocate the receiving antenna.
Increase the separation between the equipment and receiver.
Connect the equipment into an outlet on a circuit different from that to
which the receiver is connected.
Consult the dealer or an experienced radio TV technician for help.
VIDEO CASSETTE RECORDER
HR-J693U
, 60Hz only.
d
— 1 —
INSTRUCTIONS
Caution on Replaceable lithium battery
The battery used in this device may present a fire or chemical burn hazard if
mistreated. Do not recharge, disassemble, heat above 100°C or incinerate.
Replace battery with CR2032. Panasonic (Matsushita Electric) or Maxell is
recommended.
Danger of explosion or Risk of fire if the battery is incorrectly replaced.
Disposed of used battery promptly.
Keep away from children.
Do not disassemble and do not dispose of in fire.
Declaration of Conformity
Model Number:
HR-J693U
Trade Name:
JVC
Responsible Party:
JVC Americas Corp.
Address:
1700 Valley Road Wayne, N.J. 07470
Telephone Number: 973-317-5000
This device complies with Part 15 of FCC Rules.
Operation is subject to the following two conditions:
(1) This device may not cause harmful interference, and (2) this device must
accept any interference received, including interference that may cause
undesired operation.
Failure to heed the following precautions may result in damage to the VCR,
Remote or video cassette.
1. DO NOT place the VCR ...
... in an environment prone to extreme temperatures or humidity.
... in direct sunlight.
... in a dusty environment.
... in an environment where strong magnetic fields are generated.
... on a surface that is unstable or subject to vibration.
2. DO NOT block the VCR's ventilation openings.
3. DO NOT place heavy objects on the VCR or on the Remote.
4. DO NOT place anything which might spill on the top of the VCR or on the
Remote.
5. AVOID violent shocks to the VCR during transport.
For Customer Use:
Enter below the Model No. and Serial No. which are located on the rear
of cabinet. Retain this information for future reference.
Model No.
Serial No.
● Cassettes marked "VHS" (or "S-VHS") can be used with this video cassette
recorder. However, S-VHS recording is not possible with this model.
● This model is equipped with SQPB (S-VHS QUASI PLAYBACK) that makes it
possible to play back S-VHS recordings with regular VHS resolution.
● HQ VHS is compatible with existing VHS equipment.
ENGLISH
Printed in China
0104MAR-PR-BJ
Advertisement
Table of Contents

Related Manuals for JVC HR-J693U


Summary of Contents for JVC HR-J693U
- Page 1 LPT0889-001A COPYRIGHT © 2004 VICTOR COMPANY OF JAPAN, LTD. Dear Customer, Thank you for purchasing the JVC VHS video cassette recorder. Before use, please read the safety information and precautions to ensure safe use of your new VCR. CAUTIONS The lightning flash with arrowhead symbol, within an equilateral triangle, is intended to alert the user to the presence of uninsulated “dangerous voltage”...
-
Page 2: Important Product Safety Instructions
IMPORTANT PRODUCT SAFETY INSTRUCTIONS Electrical energy can perform many useful functions. But improper use can result in potential electrical shock or fire hazards. This product has been engineered and manufactured to assure your personal safety. In order not to defeat the built-in safeguards, observe the following basic rules for its installation, use and servicing. - Page 3 Point the Remote towards the remote sensor on the target component. The maximum operating distance is about 8 m. To operate a JVC TV, use any of the following buttons: TV POWER, TV INPUT, TV CH+/– or TV VOL +/–.
-
Page 4: Buttons, Connectors And Indicators
Display panel Play indicator Rear Panel AC power cord Cassette loading slot Infrared beam receiving window Timer mode indicator Record indicator Channel and auxiliary input/Clock timer — 4 — PAUSE PLAY STOP/EJECT VCR mode indicator CONTINUED ON NEXT PAGE... -
Page 5: On-Screen Display
“ON”( pg. 14), you can see the current VCR status on the TV screen. Press OSD (OK) again to exit on-screen display. The indications are not recorded even if the VCR is in the recording mode. CH125 12:00 AM STEREO –WARNING–... -
Page 6: Connections And Plug&Play Setting
B Connect the TV antenna cable to the ANT. IN terminal on the rear of the VCR. C Connect the supplied RF cable between the TV OUT terminal on the rear of the VCR and the TV’s antenna input terminal. AV Connection (improves picture quality during tape playback.) If your TV is equipped with audio/video input connectors A Connect the antenna, VCR and TV as shown in the illustration. -
Page 7: Initial Settings
Final preparation for use Turn on the TV. Select the VCR channel 3 or 4 (or AV mode) on the TV. You can now perform basic playback or basic recording. If you connect the TV and the VCR only using the RF connection ( pg. -
Page 8: Setting Clock Manually - Manual Clock Set
To make corrections any time during the process Press OK or blinks, then press The clock set manually will be lost after a power failure occurs. Tuner Setting Turn on the VCR and TV, and select the VCR channel (or AV mode). CENTRAL HAWAII Setting channels automatically —... -
Page 9: Setting Channels Manually - Manual Channel Set
After a power failure occurs, band selection will be reset to “CATV”. Playback Basic Playback MAIN MENU FUNCTION SET Turn on the VCR and TV, and select the VCR channel (or AV TUNER SET INITIAL SET mode). PRESS ( , ), THEN (OK) Load a cassette... -
Page 10: Playback Features
You can also eject the cassette when the VCR is turned off. Turn off the VCR Press POWER (1). Playback Features Turn on the VCR and TV, and select the VCR channel (or AV mode). Adjusting tracking condition — Tracking Adjustment... -
Page 11: Basic Recording
Remote. NOTE: If the tape reaches its end during recording, the recording stops and “ EJECT (0) on the VCR to eject the tape or press REW (3) to rewind the tape. — 11 — or the Number keys. pg. 6), press TV/VCR on the ). -
Page 12: Recording Features
– Recording – Recording Features Turn on the VCR and TV, and select the VCR channel (or AV mode). Specifying recording length — Instant Timer Recording (ITR) During recording, press REC ( ) on the VCR repeatedly until the recording length you want appears on the display panel. The record indicator ( ) on the display panel starts blinking. -
Page 13: To Use The Vcr While It Is In Timer Recording Standby Mode
– Timer Recording – To use the VCR while it is in timer recording standby mode Press TIMER, then press POWER. After you use the VCR, press TIMER again to put the VCR into timer recording standby mode. Checking, canceling or changing... -
Page 14: Other Functions
(on-screen display) appears on the screen. NOTE: When you use this VCR as the playback VCR for editing a tape, be sure to set this function to “OFF”; otherwise, the VCR status information (on-screen display) will be recorded on the edited tape. - Page 15 ( Editing You can use your VCR as the playback or recording VCR. You can use a camcorder as the playback VCR and your VCR as the recording VCR. Refer also to the other components’ instruction manuals for connection and its operations.
-
Page 16: Specifications
Specifications GENERAL Power requirement : AC 120 V Power consumption Power on : 13 W Power off : 1.4 W Temperature Operating : 5°C to 40°C (41°F to 104°F) Storage : –20°C to 60°C (–4°F to140°F) Operating position : Horizontal only Dimensions (W x H x D) : 435 mm x 94 mm x 242 mm (17-3/16"...