Maxtor OneTouch User Manual
External hard drive
Hide thumbs
Also See for OneTouch:
- User manual (84 pages) ,
- Additional information (2 pages) ,
- Quick setup manual (2 pages)

Related Manuals for Maxtor OneTouch


Summary of Contents for Maxtor OneTouch
- Page 1 EXTERNAL HARD DRIVE Maxtor OneTouch User’s Guide English, Français, Deutsch P/N: 20236000...
- Page 2 90 days, whichever is longer. If MAXTOR IS NOT RESPONSIBLE FOR SPECIAL, INCIDENTAL, INDIRECT OR you discover a defect, Maxtor will, at its option, repair or replace the product at no CONSEQUENTIAL DAMAGES RESULTING FROM ANY BREACH OF WARRANTY,...
-
Page 3: Table Of Contents
Adding Rubber Feet to Your OneTouch Drive ....... . 48... - Page 4 English...
-
Page 5: Introduction
You can also use your new drive to make copies of critical files (Firewire and Combo Models) or 127 USB 2.0 drives with as a part of your overall backup solution. By using the Maxtor USB 2.0 hubs OneTouch feature, your drive can create and store a copy •... -
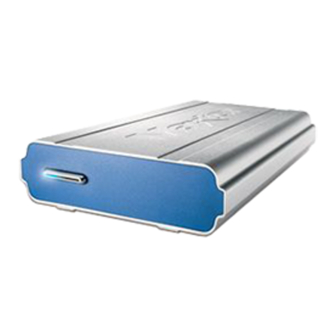
Page 6: Maxtor Onetouch™ Drive Components
(FireWire and Dual Interface models) Vertical Stand Install CD Power adapter Figure 1. OneTouch Drive Features Rubber Feet (See “Adding Rubber Feet to Your OneTouch Drive” on page 48 in chapter 3, for installation instructions) Figure 2. Included in this Kit... -
Page 7: System Requirements
NOTE: USB 1.1 is slower than USB 2 or FireWire • Internet connection (for system updates) USB model includes: For faster operation, add a FireWire port to your PC with Maxtor’s 1394/FireWire PCI Card. Available at http://www.maxstore.com in ‘A’ to ‘B’ USB cable North America. -
Page 8: Handling Precautions
Handle your drive with care! Follow the precautions listed here The following symbols and conventions are used in this guide: or damage to the drive may result and your warranty may become void. Review the “Maxtor Product Warranty” on the inside front Bold Used for menu, command, and keyboard cover for more information. - Page 9 ® Retrospect software, making backup copies with Maxtor OneTouch, or restoring files. Dantz provides free telephone support for the first 30 days and a comprehensive support section on its web site, including the latest software downloads, Knowledge Base (answers to common questions and problems), hardware compatibility and contact information.
- Page 10 English...
-
Page 11: Installing Your Drive
To ensure a successful installation, the following sections. Simply find the section for your follow the steps outlined below. operating system and follow the steps to get your OneTouch Please do not connect the drive to your computer until drive up and running. - Page 12 The Select Program Folder screen will appear. It may take a few seconds for the next screen to appear. 10. You can see the name of the Maxtor program folder and where If a message appears asking you to restart, follow the onscreen it will appear in the Windows Start Menu.
- Page 13 Note: If you do not install the Retrospect program, you will not be able to use it with the OneTouch backup feature described later in this guide. Make your choice and click Next.
- Page 14 2. Plug the smaller end of the USB cable into the USB connection your power source. on the drive. 4. Turn on the Maxtor OneTouch Drive using the power switch on the back of the drive. The two blue lights on the front should illuminate.
- Page 15 FireWire port on the back of the drive. If you did the Full Installation, including Retrospect, we encourage you to proceed to setup the Maxtor OneTouch feature for easy, automated backup of your important files, anytime, at the touch of a button! Simply go to “Windows 2000 and XP: Setting Up the...
- Page 16 If you chose Register Now, go to the next step. If you did the Full Installation, including Retrospect, we encourage you to proceed to the next section to setup the Maxtor OneTouch If you chose Register Later or Already Registered, feature for easy, automated backup of your important files,...
- Page 17 This selection allows you to restore an Your registration information is collected and maintained according application file if it has become damaged. to the Dantz and Maxtor privacy policies located on their respective web sites. This selection does not copy your operating system, registry (Windows) files, or Internet cache files.
- Page 18 English 9. The Step 3 screen is displayed. Select the Maxtor OneTouch Windows 98SE and ME: drive or another drive on your computer as the location to store Installing the Software the copy of your files. Click Next. 1. Turn on your computer You cannot select the same drive to be both the source and destination for your files.
- Page 19 The Select Program Folder screen will appear. Otherwise, the Retrospect Welcome screen will appear. 10. You can see the name of the Maxtor program folder and where it will appear in the Windows Start Menu. You can 15. Click Next. The License Agreement screen should now appear.
- Page 20 3. Plug the standard electrical plug from the power adapter into your power source. Windows 98SE and ME: 4. Turn on the Maxtor OneTouch Drive using the power switch Connecting the Drive on the back of the drive. The two blue lights on the front of The Maxtor OneTouch Drive connects to your computer using the drive should illuminate.
- Page 21 Connecting with the FireWire Cable: the drive, after connecting it to your computer: This section describes how to connect your OneTouch drive using a 1. Your new drive appears in the same way as your other drives FireWire cable. For more information about the FireWire interface, with the name New Volume and a drive letter assigned by the go to http://www.askfor1394.com.
- Page 22 English physically unplugging the device. This supplement also To Connect the FireWire Cable includes an update for the FireWire/1394 drivers. 1. Plug one end of the FireWire cable into any available FireWire port on your computer. Once your drive is installed, look in the System Tray, located at the bottom right of your desktop, for the icon shown in the Laptop Users –...
- Page 23 If you did the Full Installation, including Retrospect, we encourage Click Register Later if you do not want to register at this time. you to proceed to the next section to setup the Maxtor OneTouch feature for easy, automated backup of your important files,...
- Page 24 ‘Chapter 4: Backing up your system.’ Make your choice and click Next. 8. The Step 3 screen is displayed. Select the Maxtor OneTouch drive or another drive on your computer as the location to store the copy of your files. Click Next.
- Page 25 You can select a Custom Installation, using the Easy Install menu, as well as change the location of the installation using 2. Insert the Maxtor Installation CD into your CD-ROM drive. the Install Location menu at the bottom of the screen.
- Page 26 Macintosh OS X: Connecting the Drive Connecting with the USB Cable If you have a OneTouch drive with both USB and FireWire The Maxtor OneTouch Drive connects to your computer using interfaces, do not plug a USB cable into the drive when a either a Firewire or USB interface.
- Page 27 English 3. Depending on the size of your drive and version of OS X, your 4. Click Initialize. next step will vary. Find your version of OS X in the table below to determine your next step. The Disk Utility program opens. (If a second window appears with the message: “A Disk Table 1: Capacity Under 137 GB attempting to mount as Untitled has failed,”...
- Page 28 13. The installation is complete and your Maxtor OneTouch drive is ready to use! Connecting with the FireWire Cable This section describes how to connect your OneTouch drive using a FireWire cable. For more information about the FireWire interface, go to http://www.askfor1394.com.
- Page 29 English 3. Depending on the size of your drive, version of OS X, your next 4. Click Initialize. step will vary. Find your version of OS X in the table below to determine your next step. The Disk Utility program opens. 5.
- Page 30 If you did the Full Installation, including Retrospect Express, we encourage you to go to the next section to setup the Maxtor One- Touch feature for easy, automated backup of your important files, anytime, at the touch of a button!
- Page 31 files, bookmarks, and cookies. This selection is ideal for most users. Your registration information is collected and maintained according to the Dantz and Maxtor privacy policies located on their respective Applications and Documents copies application files in web sites.
- Page 32 8. Make your choice and click Next. Macintosh OS 9: Installing the Software 9. The Step 3 screen is displayed. Select the Maxtor OneTouch 1. Turn on your computer drive or another drive on your computer as the location to store 2.
- Page 33 CD from your computer. 4. Turn on the Maxtor OneTouch Drive using the power switch on 11. Proceed to the next section: Connecting the Drive. the back of the drive. The two blue lights on the front of the drive should illuminate.
- Page 34 Figure 4. Connecting to the USB Port The Maxtor OneTouch button, Power management, and OneTouch Settings utility program are not supported for USB Depending on the size of your drive, it may take several on the Macintosh. You may, however, use your drive as seconds for your Macintosh to recognize the drive.
- Page 35 The installation is complete and your drive is ready to use! Connecting with the FireWire Cable This section describes how to connect your OneTouch drive using a FireWire cable. For more information about the FireWire interface, go to http://www.askfor1394.com.
- Page 36 If you did the Full Installation, including Retrospect Express, we encourage you to proceed to the next section to setup the Maxtor OneTouch feature for easy, automated backup of your important files, anytime, at the touch of a button! 3.
- Page 37 Once the drive is recognized by your computer, you can set up the By registering your new drive, you will have the option of Maxtor OneTouch feature to automatically make a backup copy of receiving product updates, special offers, and important your selected files each time you press the OneTouch button.
- Page 38 55 in chapter 4. Make your choice and click Next. 7. The Step 3 screen is displayed. Select the Maxtor OneTouch drive or another drive on your computer as the location to store the copy of your files. Click Next.
-
Page 39: Formatting Your Drive For Windows
See “Using Your Drive” on page 37 in chapter 3, for information on using your drive for common applications and on using Your Maxtor OneTouch drive was formatted at the factory with the Retrospect Express to make copies of your important files and Windows FAT32 file system. -
Page 40: Installing Drivers Only
8. Click OK when you are ready to format your drive. If you wish to install a complete copy of Retrospect software and the Maxtor OneTouch feature at a later time, you can do so by Formatting time varies based on your system speed, the following the original installation instructions provided in the interface used, and the drive’s capacity. -
Page 41: Using Your Drive
Using Your Drive Connecting and Disconnecting the Drive Once installed, you can use your new Maxtor OneTouch drive in the same way you use the other drives on your computer. Some The FireWire and USB interfaces allow you to hot swap your new of the basic ways you can use your new drive are: Maxtor OneTouch Drive;... - Page 42 English A list of device choices appears. To disconnect the drive from a Macintosh 2. Select the Maxtor drive and follow the on-screen 1. From the desktop, drag the drive icon to the Trash. directions to eject the drive. The drive will disappear from the desktop.
-
Page 43: What Is Maxtor Onetouch
files on the destination drive’s backup folder and will only copy the selected files from the source drive’s folder. Maxtor OneTouch is an easy way to make backup copies of your Use with caution! files. By pressing the button on the front of your drive, your files are copied. -
Page 44: Using Retrospect
English Using Retrospect Archiving files Your Maxtor OneTouch drive includes a full copy of the Dantz Archive is another type of backup you can do with Retrospect. Retrospect software. The Retrospect software includes many Note that using this function will permanently remove files from powerful and convenient features. -
Page 45: Changing Your Maxtor Onetouch Script
Adobe’s website: http://www.adobe.com 2. Click Automate on the left side of the screen. Restoring Files It is easy to restore files that have been backed up using the Maxtor The Automate Overview window will appear. OneTouch feature. -
Page 46: Using The Maxtor Onetouch Utility
4. Select the Maxtor OneTouch script. Using the Maxtor OneTouch Utility 5. Press the Delete key on your keyboard. Your Maxtor OneTouch drive includes a utility that allows you to: A window appears asking: ‘Really forget Script?’ • Find out more information about your drive 6. - Page 47 6. Click Apply to save the change. with the OneTouch button. For example, you could use it to launch an MP3 music program like Musicmatch Jukebox or 7. Now, try it out by pressing the button on your OneTouch even an individual playlist file. drive.
- Page 48 2. Click the OneTouch Button tab. You can launch most any application or file on your computer with the OneTouch button. For example, you could use it to launch a program 3. Click the Default button. like QuickTime or even a specific QuickTime file.
- Page 49 If your selected application does not function properly with sometimes referred to as spin down since the drive’s internal the OneTouch button using the steps outlined above, it may mechanical disks stop spinning. When the drive is in the spin down not be compatible or supported with the OneTouch feature.
-
Page 50: Installing Applications On Your Drive
Installing Applications on Your Drive The slider at the bottom of the screen controls the time You may install and run applications from your OneTouch drive like period of inactivity before the all system hard drives will go any other drive on your system. -
Page 51: Editing Video
This can happen when another storage device is added to or removed from Your Maxtor OneTouch drive provides a great tool for moving large your computer while the drive is not connected to your amounts of data between two systems. -
Page 52: Storing Audio
You can also create and manage an audio library on power switch on the back of the drive. your OneTouch drive. A popular web site to learn more about these audio applications is at http://www.mp3.com. 3. Turn your drive so that the ridges are facing up. -
Page 53: Using Large Capacity Drives With Windows
English Using Large Capacity Drives with Windows When using Windows with drives that have capacities higher than 64 about how the Windows file systems and certain Microsoft utilities GB, there are special considerations. Table 2 gives some information behave when used on drives with capacities greater than 64 GB. Table 2: Considerations for drive capacities greater than 64 GB Windows 98SE Windows Me... -
Page 54: Using Security Lock
English Windows 2000 and XP are limited to creating FAT32 Using Security Lock Note 4: partitions < 32GB, you can format FAT32 partitions > 32GB using Your new drive includes a security locking slot on the back of the 3rd party partitioning software. Windows 2000 and XP can mount drive. -
Page 55: Backing Up Your System
English Backing Up Your System One valuable use of your new Maxtor OneTouch drive is to backup operating system, this product will only support the restoration of user files and does not support under those circumstances your complete system. By using Retrospect Express, you can restoration of the Operating System, drivers, applications or settings. - Page 56 English 2. Go to the View menu and select Details. Macintosh System Information 1. Starting from the desktop, you should be able to see each You should now be able to see the Total Size (or capacity) of drive’s icon. each drive.
- Page 57 English 7. Use this number as a guide to figure out how much space you Backing up your complete system will need on your backup drive to store your complete system. Windows: See below. Macintosh: See page 55. Windows 1. Go to the Start menu and select Programs, then Retrospect, and then Retrospect 6.
- Page 58 This window reminds you to make sure that the drive you plan Retrospect application. to backup to (your Maxtor OneTouch drive) is connected to your system and ready. When the backup finishes, you should see the message: ‘Execution completed successfully.’...
- Page 59 7. Close the EasyScript Backup window. Future backups will happen automatically at the time you specified in your script. All you have to do is leave your computer and Maxtor OneTouch drive on. You don’t even have to open Retrospect! A message will appear asking: ‘Save changes to script?’...
- Page 60 The Retrospect Express Directory window will open. The Choose a Folder window will now appear. 2. Click the Automate tab. 11. Select the drive you plan to back up to (your Maxtor OneTouch The Scripted Retrospect operations section will appear. drive) and click Save.
- Page 61 The Scripts window will appear. This is a reminder to make sure that the drive you plan to use for the next backup (your OneTouch drive) is connected to your 4. Select your script. It will be labelled EasyScript Backup.
- Page 62 Retrospect again. If this still doesn’t work, try creating a new EasyScript. Your modified script has been saved and will run at the next scheduled time as long as your computer is on and your Maxtor OneTouch drive is connected and turned on.
-
Page 63: Disaster Recovery
English Disaster Recovery If disaster has struck and your system software is damaged or The OneTouch drive, in combination with the included Dantz Retrospect software, supports a complete system restore capability completely erased, this chapter provides you with step-by-step (Operating System, drivers, applications, settings and user files) instructions on how to restore your system. - Page 64 Maxtor Knowledgebase online at: http://www.maxtorkb.com. The Tools Overview window will open. NOTE: Do not partition or reformat the Maxtor OneTouch drive that 6. Click Repair Catalog. your system backup is stored on.
- Page 65 English 11. Select your most recent backup set and click OK. A window will appear, asking you to select the ‘Source Snapshot for restore.’ A window will appear asking you: ‘Are there any more disks in 19. Select your Backup Set at the top of the window. the Backup set?’...
- Page 66 Macintosh operating system. For more information, see your Macintosh manual. NOTE: Do not partition or reformat the Maxtor OneTouch drive that your system backup is stored on. Once you get your system running, reinstall Retrospect Express using the Maxtor Install CD.
- Page 67 6. Select Restore an entire disk and click OK. The Restore from Backup window will appear, allowing you to confirm the source (your OneTouch drive) and the destination The ‘Accessing more backup sets’ window will appear asking (your Macintosh hard drive) for the restore.
- Page 68 English how to back up your system. See “Backing Up Your System” on page 51 in chapter 4. By scheduling automated backups, you’re less likely to lose your valuable files in the future.
-
Page 69: Troubleshooting And Faqs
This chapter provides troubleshooting tips and answers frequently asked questions about installing your Maxtor OneTouch drive. General Troubleshooting You can find additional information in the Maxtor Knowledge Base at www.maxtorkb.com or contact Maxtor at www.maxtor.com. Drive does not appear on my system My drive appears to read files significantly faster than it writes files... - Page 70 If the drive documentation that came with the card or contact the still does not appear on your system, visit the Product Support area card’s manufacturer. of the Maxtor web site at www.maxtorkb.com for further assistance.
- Page 71 The About this Mac screen will appear. • If you can’t find your Maxtor drive, try turning the • Click the More Info button. The Apple System drive off, waiting 10 seconds and turning it back on.
- Page 72 In decimal notation, one megabyte (MB) is equal to one million bytes and one gigabyte (GB) is equal to one billion bytes. Here are a few items you can quickly check if your Maxtor We are most accustomed to the decimal system in everyday life.
- Page 73 If you do not see this file, follow the instructions in the “Setting Up the Maxtor OneTouch Feature” in chapter 2. • Select the Maxtor OneTouch entry and then click the Edit The OneTouch feature is not supported for USB on the button.
- Page 74 To check if you have Administrator Privilege for the account you use to “Logon” into Windows, follow these steps: Maxtor drives will run as fast as the host adapter card will allow a. Click the Windows Start button, choose Control Panel.
- Page 75 English b. Double click the User Accounts icon. c. If your account Logon is displayed at the bottom of this window with the description: Computer Administrator, you have the correct administrator privileges to install and run this software. If your system shows another type of account status, contact your IS / Computer Manager for further assistance.
- Page 76 English...
-
Page 77: Glossary
English Glossary Byte – A unit of storage on a drive that holds a single character. FAT32 – A file system that organizes files on the computer. This A byte is equal to 8 bits. file system is standard for Windows 98SE and Me, and is supported under Windows 2000 and XP. - Page 78 External drives, such as the Maxtor Personal Storage 5000 can schedule, such as daily. You may create as many scripts as you be hot-swapped.
-
Page 79: Index
About this Guide on my system extended format Adding Rubber Feet to Combo model includes Installing Your Drive for Mac OS Your OneTouch Drive Setting Up the Maxtor OneTouch Feature Setting Up the Maxtor Administrator Privilege for Windows 71 Editing Video... -
Page 80: Software Agreement
AGREE TO BE BOUND BY THE TERMS OF THIS LICENSE. If you do not agree to be bound by all the terms of this License, Maxtor is authorized Use of the Software. You must reproduce all copyright unwilling to grant you any rights to use the Software, and you ARE NOT notices in the original Software on all copies. - Page 81 Your sole and exclusive remedy in the event of disassembly or reverse engineering of the Software, you must first breach of this warranty will be that Maxtor will, at its option, replace issue a written request to Maxtor for information or assistance and...
- Page 82 Software have been conditioned to a substantial extent Denial Orders. By using the Software, you represent and warrant by the ability of Maxtor to make and enjoy the full protection of the that you are not located in, under the control of, or a national disclaimer and limitation of liability set forth in this License and you resident of any such country or on any such list.
- Page 83 This License may only be modified by a written document license to the Software is granted to any government entity which has been signed by both you and Maxtor. Should any requiring different terms. Use, duplication, or disclosure by the U.S.
- Page 84 © 2003 Maxtor Corporation. All rights reserved. Maxtor and the Maxtor logo are registered trademarks of Maxtor Corporation. Maxtor Personal Storage and Maxtor OneTouch are trademarks of Maxtor Corporation. Dantz, the Dantz logo, and Retrospect are registered trademarks and Retrospect Express is a trademark of Dantz Development Corporation.
- Page 85 (RMA). Une copie du autorisé à modifier, étendre ou compléter cette garantie. reçu ou un contrat de vente portant les numéros de série et de modèle Maxtor appropriés peut être exigé pour le service de garantie. La garantie ne s’applique MAXTOR NE SAURAIT ETRE TENU RESPONSABLE DES DOMMAGES qu’aux produits Maxtor pouvant être identifiés par la marque de fabrique, le...
- Page 86 Des modifications sont régulièrement apportées aux informations ci-incluses. Elles seront intégrées dans les rééditions de cette publication. Maxtor est en droit de réaliser des modifications ou des améliorations sur les produits décrits dans cette publication à...
- Page 87 Utilisation de l’utilitaire Maxtor OneTouch ........
- Page 88 Français...
-
Page 89: Introduction
Grâce à la fonction Maxtor • Evolutivité : possibilité de connecter jusqu’à 63 lecteurs sur OneTouch, il vous suffit d’appuyer sur un bouton pour créer et l’interface FireWire (modèles FireWire et combinés) ou de enregistrer une copie de vos fichiers les plus importants sur votre 127 lecteurs USB 2.0 via des concentrateurs USB 2.0... -
Page 90: Composants Du Lecteur Maxtor Onetouch
Illustration 1. Fonctions du lecteur OneTouch Patins en caoutchouc (pour savoir comment les mettre en place, consulter “Mise en place des patins en caoutchouc sur le lecteur OneTouch”, à la page 51 du chapitre 3) Illustration 2. Contenu du kit... -
Page 91: Configuration Minimale
Pour accélérer le fonctionnement de votre lecteur, ajoutez un pouvez vous procurer un câble adapté dans votre magasin de port FireWire à votre PC avec la carte PCI 1394/FireWire de matériel informatique local. Maxtor. Vous pouvez la commander à l’adresse suivante : http://www.maxstore.com (Amérique du Nord). Introduction... -
Page 92: Précautions De Manipulation
Support Maxtor • Ne pas empiler plus de deux lecteurs. Maxtor propose sur son site Web une section complète de support produit, avec notamment les derniers pilotes, les guides de • Si le lecteur est placé en position verticale, toujours utiliser l’utilisateur et une base de connaissances (réponses aux questions... - Page 93 Retrospect , les copies de sauvegarde avec Maxtor OneTouch ou la restauration de fichiers. Dantz propose un support téléphonique gratuit pendant les 30 jours qui suivent l’achat ainsi qu’une section complète de support produit sur son site Web, avec notamment les derniers logiciels à...
- Page 94 Français...
-
Page 95: Installation Du Lecteur
Français Installation du lecteur ™ Ce chapitre décrit l’installation du lecteur Maxtor OneTouch et du • Installation personnalisée logiciel de sauvegarde Dantz Retrospect ainsi que l’activation du Cette option installe UNIQUEMENT les pilotes Maxtor et le bouton Maxtor OneTouch, qui permet de sauvegarder facilement programme OneTouch Utility. -
Page 96: Installation Du Logiciel
Si un message vous invite à redémarrer l’ordinateur, suivez les instructions affichées à l’écran et redémarrez (n’éjectez pas le 10. Il indique le nom du dossier où se trouve le programme Maxtor CD-ROM d’installation). ainsi que son emplacement dans le menu Démarrer de Windows. - Page 97 Connexion du lecteur 13. Lisez l’accord de licence et cliquez sur J’accepte, puis sur Suivant. Vous pouvez connecter le lecteur Maxtor OneTouch à votre ordinateur à l’aide d’une l’interface FireWire ou USB. Vérifiez de L’écran Informations client s’affiche. quel type d’interface vous disposez sur le lecteur et sur l’ordinateur.
- Page 98 Connexion avec le câble USB lecteurs déjà reliés à votre ordinateur. Retenez cette lettre. Si votre lecteur OneTouch est équipé d’une interface USB et d’une interface FireWire, ne connectez pas un câble USB au Il est préférable d’attribuer un nom à votre nouveau lecteur afin de lecteur s’il est déjà...
- Page 99 3. Dans la section Nom de volume située en haut de la fenêtre, La plupart des ordinateurs portables sont équipés d’un port saisissez le nom de votre lecteur. Par exemple : “Maxtor”. FireWire plus petit (4 broches) et nécessitent donc un câble FireWire spécial (4 broches à...
- Page 100 Retrospect, nous vous invitons à passer à la section l’ordinateur peut prendre jusqu’à deux minutes. suivante et à procéder à la configuration de la fonction Maxtor OneTouch qui permet de simplifier et d’automatiser la sauvegarde Votre nouveau lecteur apparaît de la même façon que vos autres de vos fichiers importants, puisqu’il suffit alors pour cela d’appuyer...
- Page 101 Dantz et de Retrospect s’ouvre. Passez directement à l’étape 5. Maxtor que vous pouvez consulter sur leurs sites Web respectifs. 4. Saisissez les informations requises sur le formulaire. Si vous avez décidé d’envoyer les informations par e-mail, vérifiez que vous êtes connecté...
- Page 102 fichiers. Les lecteurs source et destination doivent être différents. L’écran Félicitations… prêt s’affiche. 10. Pour achever la configuration de Maxtor OneTouch, cliquez sur 7. Sélectionnez le lecteur à partir duquel vous souhaitez copier les Terminer. fichiers et cliquez sur Suivant.
- Page 103 à la section Options d’installation du logiciel, en première page de ce chapitre. 10. Il indique le nom du dossier où se trouve le programme Maxtor ainsi que son emplacement dans le menu Démarrer de Remarque : si vous n’installez pas le programme Retrospect, Windows.
- Page 104 18. Connexion du lecteur Sinon, l’écran Bienvenue dans Retrospect s’affiche. Vous pouvez connecter le lecteur Maxtor OneTouch à votre 15. Cliquez sur Suivant. L’écran Accord de licence devrait s’ouvrir. ordinateur à l’aide d’une interface FireWire ou USB. Vérifiez de quel...
- Page 105 Dans ce cas, redémarrez l’ordinateur. Si votre lecteur OneTouch est équipé d’une interface USB et d’une interface FireWire, ne connectez pas un câble USB au Il est préférable d’attribuer un nom à votre nouveau lecteur afin lecteur s’il est déjà...
- Page 106 Icône logiciel Retrospect, nous vous invitons à procéder à la configuration Débrancher ou de la fonction Maxtor OneTouch qui permet de simplifier et éjecter matériel d’automatiser la sauvegarde de vos fichiers importants, puisqu’il suffit alors pour cela d’appuyer sur un bouton. Allez à la section Si cette icône n’apparaît pas, vous devez installer 1394 Storage...
- Page 107 Français 2. Branchez l’autre extrémité du câble FireWire sur Edition (Mise à jour pour les périphériques de stockage 1394 sous Windows 98 Second Edition) (Q242975). un port FireWire disponible à l’arrière du lecteur. Cliquez sur ce lien et ouvrez l’article correspondant. e.
- Page 108 Retrospect, nous vous invitons à passer à la section Retrospect s’ouvre. Passez directement à l’étape 5. suivante et à procéder à la configuration de la fonction Maxtor OneTouch qui permet de simplifier et d’automatiser la sauvegarde 4. Saisissez les informations requises sur le formulaire.
- Page 109 fichiers. Les lecteurs source et destination doivent être différents. L’écran Félicitations… prêt s’affiche. 9. Pour achever la configuration de Maxtor OneTouch, cliquez sur Terminer. 6. Sélectionnez le lecteur à partir duquel vous souhaitez copier les fichiers et cliquez sur Suivant.
- Page 110 (il s’agit du nom et du mot de passe définis à l’installation du dans leur état actuel. système OS X). Le bouton OneTouch peut ne pas fonctionner si le logiciel Cliquez sur OK. Retrospect est en cours d’exécution. Pour remédier à ce problème, ouvrez le menu Fichier de Retrospect et...
- Page 111 Connexion avec le câble USB ordinateur à l’aide d’une interface FireWire ou USB. Vérifiez de quel Si votre lecteur OneTouch est équipé d’une interface USB et type d’interface vous disposez sur le lecteur et sur l’ordinateur. d’une interface FireWire, ne connectez pas un câble USB au lecteur s’il est déjà...
- Page 112 Français 2. Branchez la plus petite extrémité du câble USB sur la Tableau 2 : Capacité supérieure à 137 Go connexion USB du lecteur. Version du système Message Etape suivante d’exploitation Un message indique qu’OS X n’est pas OS X 10.1 Passez à...
- Page 113 6. Sélectionnez l’onglet Effacer qui se trouve en haut de la et sélectionnez Quitter. fenêtre. 13. L’installation est terminée et votre lecteur Maxtor OneTouch est prêt ! Connexion avec le câble FireWire Cette section indique comment connecter votre lecteur OneTouch avec un câble FireWire.
- Page 114 Français 2. Branchez l’autre extrémité du câble FireWire à un port FireWire Tableau 4 : Capacité supérieure à 137 Go disponible à l’arrière du lecteur. Version du système Message Etape suivante d’exploitation Un message indique FireWire qu’OS X n’est pas en Ports OS X 10.1 Passez à...
- Page 115 Utilitaire de disque et sélectionnez Quitter l’utilitaire de disque. 13. L’installation est terminée et votre lecteur Maxtor OneTouch est prêt ! Si vous avez effectué une installation complète, comprenant le logiciel Retrospect Express, nous vous invitons à passer à la section suivante et à...
- Page 116 • Cliquez sur E-mail pour vous enregistrer par e-mail. Avant de commencer, vérifiez que le CD-ROM d’installation • Cliquez sur Imprimer pour vous enregistrer par courrier Maxtor NE se trouve PAS dans votre lecteur de CD-ROM. postal. Configuration de la fonction du bouton Maxtor •...
- Page 117 fichiers. Les lecteurs source et destination doivent être différents. L’écran Félicitations… prêt s’affiche. 6. Sélectionnez le lecteur à partir duquel vous souhaitez copier les 10. Pour achever la configuration de Maxtor OneTouch, cliquez sur fichiers et cliquez sur Suivant. Terminer. L’écran Etape 2 s’affiche.
- Page 118 Macintosh OS 9 : Connexion du lecteur L’écran d’installation de Retrospect s’ouvre. 6. Cliquez sur Continuer. Vous pouvez connecter le lecteur Maxtor OneTouch à votre ordinateur à l’aide d’une interface FireWire ou USB. Vérifiez de quel L’écran de licence s’affiche.
- Page 119 Illustration 3. Connexion de l’alimentation Le bouton Maxtor OneTouch, la gestion d’alimentation et l’utilitaire OneTouch Settings ne sont pas pris en charge sur 3. Branchez la prise électrique standard du transformateur à votre l’interface USB du Macintosh. Vous pouvez néanmoins vous source d’alimentation.
- Page 120 L’installation est terminée et votre lecteur est prêt ! Connexion avec le câble FireWire Cette section indique comment connecter votre lecteur OneTouch avec un câble FireWire. Pour plus d’informations sur l’interface 3. Saisissez le Nom du lecteur et sélectionnez Mac OS Etendu FireWire, rendez-vous sur le site http://www.askfor1394.com.
- Page 121 Français Avant de connecter le lecteur Selon la taille du lecteur, sa reconnaissance par le Macintosh peut prendre plusieurs secondes. Désactivez le tableau de bord Echange de fichiers : • Dans le menu Apple, sélectionnez Tableaux de bord. Finalement, ce message apparaît : Le dossier Tableaux de bord s’ouvre.
- Page 122 8. Vérifiez que la case Echange de fichiers est cochée. enregistrer Retrospect Express maintenant ?. 9. Cliquez sur Redémarrer. 2. Sélectionnez Enregistrer maintenant, Enregistrer plus tard L’installation est terminée et votre lecteur Maxtor OneTouch est ou Déjà enregistré. prêt ! Si vous avez choisi Enregistrer maintenant, passez à l’étape suivante.
- Page 123 fichiers de favoris, les signets et les conformément aux politiques de confidentialité de Dantz et de cookies. Cette option convient parfaitement à la plupart des Maxtor que vous pouvez consulter sur leurs sites Web respectifs. utilisateurs. Si vous avez décidé d’envoyer les informations par e-mail, vérifiez Applications et documents : sont copiés les documents,...
- Page 124 fichiers. Les lecteurs source et destination doivent être différents. L’écran Félicitations… prêt s’affiche. Utilisation du bouton OneTouch pour la 8. Pour achever la configuration de Maxtor OneTouch, cliquez sur sauvegarde Terminer. Seules les versions actuelles de vos fichiers sont 9.
-
Page 125: Formatage Du Lecteur Pour Windows
Faites une copie de sauvegarde de toutes vos En option pour Windows 98/2000/Me/XP données avant de formater votre lecteur. Votre lecteur Maxtor OneTouch a été formaté en usine avec le système de fichiers FAT32 de Windows. Ce dernier est compatible Formatage du lecteur pour le NTFS avec Mac OS 9 et les versions récentes du système d’exploitation... -
Page 126: Installation Des Pilotes Seuls
Si vous souhaitez installer par la suite la totalité du logiciel Cette section indique comment installer le nouveau lecteur sans Retrospect et la fonction Maxtor OneTouch, il vous suffit de suivre installer le logiciel Retrospect Express. les instructions d’installation initiale correspondant à votre système d’exploitation indiquées à... -
Page 127: Utilisation Du Lecteur
Les interfaces FireWire et USB permettent un remplacement à principales utilisations de votre nouveau lecteur sont les suivantes : chaud de votre nouveau lecteur Maxtor OneTouch ; autrement dit, • Déplacement ou copie de fichiers ou de dossiers depuis les vous pouvez le connecter ou le déconnecter pendant que votre... - Page 128 Français La liste des périphériques s’affiche. Déconnexion du lecteur d’un Macintosh 2. Sélectionnez le lecteur Maxtor et suivez les instructions 1. Depuis le bureau, déplacez l’icône du lecteur vers la qui s’affichent à l’écran pour éjecter le lecteur. corbeille. Le lecteur disparaît du bureau.
-
Page 129: Qu'est-Ce Que Maxtor Onetouch
Qu’est-ce que Maxtor OneTouch ? Si vous modifiez l’emplacement de destination au niveau du script de Maxtor OneTouch ou de tout autre script de duplication dans Maxtor OneTouch constitue la façon la plus simple pour effectuer Retrospect, l’intégralité du contenu du lecteur ou du dossier des copies de sauvegarde de vos fichiers, puisqu’il suffit d’appuyer... -
Page 130: Utilisation De Retrospect
fichiers de sauvegarde ne soient limités qu’à la taille de votre • Gagner du temps et réduire l’espace de stockage nécessaire. disque dur. Pour utiliser la fonction Maxtor OneTouch ou le logiciel Si vous avez installé votre lecteur avec la fonction Maxtor Retrospect, les utilisateurs de Macintosh doivent formater le OneTouch, le logiciel Retrospect est déjà... -
Page 131: Modification Du Script Maxtor Onetouch
CD-ROM : your_disk_name” (Copie de sauvegarde de nom_du_disque) (seules les 9 premières lettres du nom 1. Insérez le CD-ROM d’installation de Maxtor dans votre sont utilisées). lecteur de CD-ROM. 3. Faites glisser le fichier ou le groupe de fichiers à... - Page 132 Pour OS X : reportez-vous à la section “Configuration de L’assistant de configuration Maxtor OneTouch démarre la fonction du bouton Maxtor OneTouch”, à la page 28 et vous pouvez procéder comme indiqué à la section du chapitre 2. Pour OS 9 : reportez-vous à la section “Configuration de la fonction Maxtor OneTouch”...
-
Page 133: Utilisation De L'utilitaire Maxtor Onetouch
La fenêtre Paramètres Maxtor OneTouch s’ouvre. apparaître dans cette fenêtre. 2. La page Informations sur le lecteur s’ouvre. 3. Cliquez sur l’onglet Bouton OneTouch situé en haut de la fenêtre. Vous trouverez sur cette page des informations utiles, notamment : Dans la zone Application de l’écran, figure le... - Page 134 Si vous suivez la procédure indiquée et que l’application Macintosh sélectionnée ne fonctionne pas correctement avec le bouton OneTouch, il se peut qu’elle ne soit pas compatible avec la Informations sur le lecteur : fonction OneTouch ou qu’elle ne soit pas prise en charge.
- Page 135 Vous trouverez sur cette page des informations utiles, Dans la section “Ouvrir…” de l’écran, vous verrez notamment : l’icône Retrospect ainsi que la mention Maxtor OneTouch. C’est en effet le programme qui doit s’ouvrir • Le modèle lorsque vous appuyez sur le bouton de votre lecteur OneTouch.
- Page 136 Français OneTouch, il se peut qu’elle ne soit pas compatible avec la La fonction de gestion d’alimentation permet automatiquement au fonction OneTouch ou qu’elle ne soit pas prise en charge. lecteur d’utiliser moins d’énergie après une période prédéterminée Ouvrez le fichier manuellement pour bien vous assurer que d’inactivité.
-
Page 137: Installation D'applications Sur Le Lecteur
Vous pouvez installer et exécuter des applications sur votre lecteur OneTouch comme sur tous les autres lecteurs de votre système. 4. Sélectionnez un intervalle à l’aide du curseur situé en bas de la fenêtre. -
Page 138: Edition De Vidéos
Le lecteur Maxtor OneTouch comprend un outil très utile pour déplacer de gros volumes de données entre deux systèmes. Pour Edition de vidéos plus d’informations, consultez la base de connaissances en ligne de La capture et l’édition sur un ordinateur de séquences vidéo prises... -
Page 139: Enregistrement De Fichiers Audio
4. Placez deux patins en caoutchouc sur chaque arête sous Les taux de transfert de l’interface USB 1.1 étant faibles, le lecteur. Mettez-en un vers l’avant et l’autre vers Maxtor déconseille de jouer à partir de lecteurs connectés l’arrière de chaque arête. via cette interface. -
Page 140: Utilisation De Lecteurs Haute Capacité Avec Windows
Français Utilisation de lecteurs haute capacité avec Windows Lorsque vous utilisez Windows avec des lecteurs d’une capacité systèmes de fichiers Windows et de certains utilitaires Microsoft supérieure à 64 Go, vous devez prendre en compte certains éléments. lorsqu’ils sont utilisés avec des lecteurs de plus de 64 Go. Le Tableau 2 fournit des informations sur le fonctionnement des Tableau 2 : Eléments à... -
Page 141: Utilisation Du Verrouillage De Sécurité
Français Remarque 2 : Il se peut que FDISK connaisse des problèmes de fonctionnement lorsqu’un lecteur externe a été déconnecté puis reconnecté. Il est recommandé de redémarrer l’ordinateur avant d’exécuter FDISK. Remarque 3 : ScanDisk et Defrag ne fonctionnent pas avec des partitions de disque de plus de 127 Go. - Page 142 Français...
-
Page 143: Sauvegarde Du Système
Français Sauvegarde du système L’une des fonctions les plus utiles de votre nouveau lecteur Maxtor a été effectuée, à condition que cette restauration se fasse conformément à la procédure décrite dans ce chapitre. Si vous devez OneTouch est la sauvegarde du système entier. Vous pouvez utiliser restaurer des données depuis un ordinateur et/ou un système... - Page 144 Français Informations sur le système Windows Informations sur le système Macintosh 1. Cliquez deux fois sur l’icône Poste de travail. 1. Sur le bureau, vous devriez voir l’icône de chaque lecteur. Dans la fenêtre qui s’ouvre, figurent tous les lecteurs Vous devez afficher séparément les informations sur chaque connectés à...
- Page 145 Français 7. Ce chiffre vous servira d’indication pour déterminer l’espace Sauvegarde du système entier nécessaire sur votre lecteur de sauvegarde pour stocker le système entier. Windows : voir ci-après. Macintosh :reportez-vous à la section page 60. Windows 1. Dans le menu Démarrer, sélectionnez Programmes, puis Retrospect et enfin Retrospect 6.
- Page 146 7. Sélectionnez Tous les jours de la semaine ou Une fois par “Sélectionner le disque à ajouter comme périphérique de semaine et cliquez sur Suivant. stockage.” 11. Sélectionnez votre lecteur Maxtor OneTouch et cliquez sur L’écran suivant apparaît avec le message : “Quand souhaitez- Continuer. vous commencer la sauvegarde ?”...
- Page 147 La fenêtre Scripts s’ouvre. s’affiche, cliquez sur Ne pas quitter, assurez-vous que votre lecteur OneTouch est connecté et sous tension et quittez à 4. Sélectionnez votre script. Il porte le nom Sauvegarde nouveau Retrospect. Si le problème se reproduit, essayez de EasyScript.
- Page 148 Le script modifié a été enregistré. Il sera exécuté lors de la “A quelle fréquence souhaitez-vous effectuer la sauvegarde ?” prochaine sauvegarde programmée, à condition que votre ordinateur soit allumé et que le lecteur Maxtor OneTouch soit 6. Sélectionnez Tous les jours ou Une fois par semaine. connecté et sous tension.
- Page 149 3. Assurez-vous que l’option Exécuter maintenant est prête s’affiche, cliquez sur Ne pas quitter, assurez-vous sélectionnée et cliquez sur Exécuter. que votre lecteur OneTouch est connecté et sous tension et quittez à nouveau Retrospect. Retrospect commence à analyser votre système, la fenêtre Sauvegarde immédiate s’ouvre et la sauvegarde démarre.
- Page 150 4. Sélectionnez votre script. Il porte le nom Sauvegarde prête s’affiche, cliquez sur Ne pas quitter, assurez-vous EasyScript. que votre lecteur OneTouch est connecté et sous tension et quittez à nouveau Retrospect. Si le problème se reproduit, 5. Cliquez sur Modifier.
- Page 151 Français Le script modifié a été enregistré. Il sera exécuté lors de la prochaine sauvegarde programmée, à condition que votre ordinateur soit allumé et que le lecteur Maxtor OneTouch soit connecté et sous tension. Sauvegarde du système...
- Page 152 Français...
-
Page 153: Avant De Commencer
Cette opération pourra réussir UNIQUEMENT si vous avez sauvegardé votre système avec Retrospect conformément à la Le lecteur OneTouch, associé au logiciel Dantz Retrospect fourni, procédure décrite au chapitre précédent. prend en charge une capacité de restauration du système entier (système d’exploitation, pilotes, applications, paramètres et fichiers... - Page 154 (correspondant aux différentes lettres de lecteurs). Ces partitions doivent être de taille au égale ou supérieure à celle des partitions 3. Réinstallez le logiciel Maxtor OneTouch, y compris Retrospect. d’origine du système. Pour plus d’informations sur le (Pour plus d’informations, voir à la page 7 du chapitre 4.) partitionnement et le formatage de votre lecteur système,...
- Page 155 Français 10. Cliquez sur OK. 16. Cliquez sur Fermer. Une fenêtre s’ouvre avec le message “Sélectionner le jeu de A présent, vous pouvez restaurer le système. sauvegarde à rétablir.” 17. Cliquez sur Restaurer à gauche de l’écran. 11. Sélectionnez le jeu de sauvegarde le plus récent et cliquez sur La fenêtre “Présentation de la restauration”...
- Page 156 Retrospect. REMARQUE : vous ne devez pas partitionner ou reformater le 25. Redémarrez votre ordinateur. lecteur Maxtor OneTouch sur lequel est enregistrée la sauvegarde Vous devrez peut-être redémarrer plusieurs fois le système. de votre système. Suivez les autres instructions qui s’affichent éventuellement pour achever la restauration du système.
- Page 157 à ouvrir un fichier de catalogue existant La fenêtre Restaurer à partir d’une sauvegarde s’affiche et ou à en recréer un. vous permet de confirmer la source (lecteur OneTouch) et la destination (disque dur Macintosh) de la restauration. 7. Cliquez sur Ouvrir.
- Page 158 Français 14. Ouvrez le menu Fichier et sélectionnez Quitter pour quitter Retrospect. 15. Redémarrez votre Macintosh. Si la restauration a réussi, vous devriez retrouver tous les fichiers que vous aviez sauvegardés. Si ce n’est pas le cas, assurez-vous que vous avez bien compris comment sauvegarder le système. Voir “Sauvegarde du système”, à...
-
Page 159: Dépannage Et Faq
Mon lecteur semble lire les fichiers nettement plus vite qu’il ne les écrit connaissances Maxtor à l’adresse suivante : www.maxtorkb.com. Mon lecteur indique une capacité inférieure à celle qui est mentionnée Vous pouvez également contacter Maxtor sur le site sur l’étiquette de la boîte www.maxtor.com. -
Page 160: Dépannage - Généralités
Consultez la documentation fournie support produit du site Web Maxtor à l’adresse suivante : avec la carte ou adressez-vous à son fabricant. www.maxtorkb.com. -
Page 161: Mon Lecteur Semble Lire Les Fichiers Nettement Plus Vite Qu'il Ne Les Écrit
• Cliquez sur l’onglet Périphériques et Volumes. toujours pas monté, essayez de l’éteindre et de le rallumer. • Selon le disque dur Maxtor utilisé, votre lecteur Procédez comme suit pour ouvrir le programme Apple Maxtor doit apparaître sous la forme d’un rectangle System Profiler. -
Page 162: Mon Lecteur Indique Une Capacité Inférieure À Celle Qui Est Mentionnée Sur L'étiquette De La Boîte
(affichée en mégaoctets en base 2) par 1 048 576 pour Le bouton Maxtor OneTouch peut ne pas fonctionner si le logiciel connaître la valeur décimale équivalente correspondant à la Retrospect Express est en cours d’exécution. -
Page 163: Mon Lecteur Ne Peut Pas Copier Ou Sauvegarder Les Lecteurs Réseau
• Sélectionnez l’entrée Maxtor OneTouch puis cliquez sur le bouton Modifier. La copie de sauvegarde OneTouch ne fonctionne pas si le logiciel Retrospect n’est pas en mesure de localiser le lecteur source ou le Confirmez que le lecteur source et le lecteur de destination lecteur de destination. -
Page 164: Mon Macintosh Indique Que Le Lecteur Est "Illisible" (Mac Os 9)
Macintosh OS) différentes. Le partitionnement facilite la gestion des fichiers. L’un des usages les plus courants du Les lecteurs Maxtor fonctionnent à la vitesse autorisée par la partitionnement consiste à installer le système d’exploitation carte adaptateur hôte (jusqu’au taux de transfert continu sur une partition et les applications sur une autre. -
Page 165: Mes Fichiers De Sauvegarde Retrospect Semblent Être Limités À 4 Go
Si votre système affiche un autre type de compte, demandez informations actualisées et connaître la solution à ce problème, de l’aide au responsable du service informatique. faites une recherche sur le mot-clé “Canon” dans la base de connaissances Maxtor à l’adresse suivante : www.maxtorkb.com. Dépannage et FAQ... - Page 166 Français...
-
Page 167: Glossaire
Français Glossaire Arrêt : Se rapporte à la rotation du mécanisme du disque. FAT32 : Système de fichiers chargé de l’organisation des Lorsqu’un disque s’arrête, il cesse de tourner, ce qui permet fichiers sur l’ordinateur. Ce système est installé en standard sous d’économiser de l’énergie. - Page 168 Les lecteurs Mbps : (Mégabits par seconde) Pour décrire les taux de transfert externes, tels que Maxtor Personal Storage 5000 peuvent être de données, correspond à un million de bits par seconde. remplacés à chaud.
-
Page 169: Index
Mise en place des patins en Maxtor Comment partitionner un lecteur ? fonction de 6, 13, 20, 27, 33, 34 caoutchouc sur le lecteur OneTouch composants du lecteur bouton-poussoir Modification du script Utilisation de lecteurs haute Composants du lecteur OneTouch... - Page 170 LA CONVENTION DE LICENCE DE LOGICIEL SUIVANTE (LA Maxtor ne vous accorde aucun droit sur le logiciel à part les droits "LICENCE") PORTANT SUR UNE COPIE SOUS LICENCE DU LOGICIEL qui vous sont accordés dans le cadre de cette licence restreinte.
- Page 171 Garantie limitée. Pour une période de quatre-vingt-dix (90) jours mesure où elle peut être interdite sans que soit enfreinte la suivant la date à laquelle le logiciel vous est livré, Maxtor garantit directive de la CE sur la protection juridique des programmes que le support sur lequel le logiciel est distribué...
- Page 172 10. Restriction à l'exportation. Vous convenez et affirmez que ni le FOURNISSEURS NE SERONT EN AUCUN CAS TENUS logiciel ni les données techniques reçus de Maxtor, ni le produit RESPONSABLES NI N'ASSUMERONT UNE QUELCONQUE direct en découlant, ne seront exportés des États-Unis sauf si cela RESPONSABILITÉ...
- Page 173 écrit qui aura été signé par grâce à des fonds privés et sans aucun fond public. Toute vous et Maxtor. Au cas où une disposition de cette licence serait utilisation, modification, reproduction, mise en marché, exécution, affichage ou divulgation du logiciel par une entité...
- Page 174 © 2003 Maxtor Corporation. Tous droits réservés. Maxtor et le logo Maxtor sont des marques déposées de Maxtor Corporation. Maxtor Personal Storage et Maxtor OneTouch sont des marques commerciales de Maxtor Corporation. Dantz, le logo Dantz et Retrospect sont des marques déposées et Retrospect Express est une marque commerciale de Dantz Development Corporation.
- Page 175 Betriebssysteme von Windows und Apple Macintosh Ihren Anforderungen entspricht oder dass der Betrieb oder die Leistung des Programms Um die Garantieleistung zu erhalten, müssen die Produkte in der original Maxtor- störungs- und fehlerfrei verlaufen. Kein Händler, Vertreter oder Mitarbeiter von Verpackung oder einer von Maxtor genehmigten Verpackung ordentlich verpackt Maxtor ist berechtigt, irgendwelche Änderungen, Erweiterungen oder Zusätze an...
- Page 176 Gesetzgebung variieren können. Die hier gegebenen Informationen unterliegen regelmäßigen Änderungen - die in überarbeiteten Ausgaben dieser Veröffentlichung enthalten sein werden. Maxtor kann die in dieser Veröffentlichung beschriebenen Produkte jederzeit und ohne vorherige Ankündigung verändern oder verbessern. Dieses Produkt ist gemäß...
- Page 177 Das Maxtor OneTouch-Dienstprogramm ........47...
- Page 178 Deutsch...
-
Page 179: Einleitung
Deutsch Einleitung Vielen Dank, dass Sie sich für ein Produkt von Maxtor entschieden • USB 1.1 und 2.0 haben. Ihr Maxtor OneTouch ist eine externe Festplatte, die (Bei USB- und Combo-Modellen) zusätzliche Speicherkapazität zum Speichern und Verwalten von ® ®... - Page 180 Deutsch OneTouch-Festplattenkit Inhalt dieses Kits Im Lieferumfang der Maxtor OneTouch-Festplatte sind die in Vor der Installation Ihrer neuen Festplatte sollten Sie die in Abbildung 2 gezeigten Komponenten enthalten. Bitte machen Sie Abbildung 1 gezeigten Ausstattungsmerkmale überprüfen. sich vor der Installation mit jeder Komponente vertraut.
-
Page 181: Systemanforderungen
• Internetanschluss (für System-Updates) ‚A’ nach ‚B’ USB-Kabel Sie können Ihr System mithilfe der 1394/FireWire-PCI-Adapterkarte Der als ‚A’ gekennzeichnete Stecker von Maxtor um einen FireWire-Steckplatz erweitern, um wird an Ihren Computer angeschlos- Kabelstecker Kabelstecker Betriebsabläufe zu beschleunigen. Innerhalb Nordamerikas können sen, der als ‚B’... -
Page 182: Vorsichtsmaßnahmen Bei Der Handhabung
Maxtor-Support könnte. Maxtor bietet einen umfangreichen Produktsupport auf seiner • Entfernen Sie keine Kabel oder Netzstecker, bevor die Website, einschließlich Informationen zu den neuesten Treibern, Festplatte nicht ordnungsgemäß über das Betriebssystem Benutzerhandbücher sowie die Wissensdatenbank „Knowledge... - Page 183 Deutsch Weitere Telefonnummern für Unterstützung außerhalb der USA finden Sie auf der Support-Website von Maxtor unter Kontakt. Falls Sie nicht über einen Internetanschluss verfügen, rufen Sie die folgende Telefonnummer an: +353-1-204-1111 (Europa, Naher Osten und Afrika) 01801 62 98 67 (in Deutschland)
- Page 184 Deutsch...
-
Page 185: Installieren Ihrer Festplatte
• Benutzerdefinierte Installation Festplatte, der Backup-Software Retrospect von Dantz sowie die Bei dieser Variante werden NUR die Maxtor-Treiber und das Aktivierung der Maxtor OneTouch-Taste, mit der Sie Ihre Daten OneTouch-Dienstprogramm installiert. jederzeit schnell und einfach sichern können. Für eine einwandfreie Installation gehen Sie wie im Folgenden beschrieben vor. - Page 186 Rechte für Windows“ auf Seite 79 unter Kapitel 6. 1. Schalten Sie Ihren Computer ein. 6. Klicken Sie auf Weiter. 2. Legen Sie die Installations-CD-ROM von Maxtor in Ihr Die Lizenzvereinbarung wird angezeigt. Laufwerk ein. Nach wenigen Sekunden wird der Maxtor- Installations-bildschirm eingeblendet.
- Page 187 Hinweis: Wenn Sie die Retrospect-Software nicht installieren, aufgefordert werden, Ihren Computer neu zu starten. Wenn können Sie diese auch nicht mit der OneTouch-Backup-Funktion dem so ist, wählen Sie: ‘Ja, Computer jetzt neu starten und verwenden, die in diesem Handbuch noch beschrieben wird.
- Page 188 Anschließen der Festplatte FireWire-Anschluss anzuschließen, gehen Sie zu „Anschließen per FireWire-Kabel“ auf Seite 11. Die Maxtor OneTouch-Festplatte wird an die Firewire- oder an die USB-Schnittstelle Ihres Computers angeschlossen. Prüfen Sie, Anschließen per USB-Kabel über welchen Schnittstellentyp Ihre Festplatte und Ihr Computer verfügen.
- Page 189 Tastendruck eine automatische Sicherung wichtiger Dateien vornehmen können! Nähere Informationen finden Sie Ihre noch namenlose Festplatte erscheint als neuer Datenträger unter „Windows 2000 und XP: Einrichten der Maxtor OneTouch- mit einem vom Betriebssystem zugewiesenen Funktion“ auf Seite 12. Laufwerksbuchstaben. Welcher Laufwerksbuchstabe zugewiesen Anschließen per FireWire-Kabel...
- Page 190 Schließen Sie das andere Ende des FireWire-Kabels an einem der beiden FireWire-Anschlüsse auf der Rückseite der Festplatte an. einen Namen für die Festplatte ein. Zum Beispiel: „Maxtor“. Wird die Festplatte unter Windows 2000 oder XP eingesetzt, empfiehlt Maxtor eine Neuformatierung, um optimale Leistung zu erhalten.
- Page 191 Ihre Registrierinformationen werden entsprechend den • Klicken Sie auf E-Mail, um sich per E-Mail zu registrieren Datenschutz-richtlinien von Dantz und Maxtor, die auf den jeweiligen Websites einsehbar sind, erfasst und gespeichert. • Klicken Sie auf Drucken, um sich per Brief zu registrieren.
- Page 192 Sie auf Weiter. angezeigt. Das Dialogfenster Schritt 2 wird angezeigt. 10. Klicken Sie auf Fertigstellen, um die Einrichtung der Maxtor OneTouch-Funktion abzuschließen. 8. Wählen Sie die zu kopierenden Dateitypen aus: Wenn Sie gleich eine erste Sicherung anlegen möchten, Nur Dokumente kopiert ausschließlich von Ihnen erstellte...
- Page 193 Die Lizenzvereinbarung wird angezeigt. 1. Schalten Sie Ihren Computer ein. 7. Nachdem Sie die Lizenzvereinbarung sorgfältig gelesen haben, 2. Legen Sie die Installations-CD-ROM von Maxtor in Ihr CD- klicken Sie auf Ja. ROM-Laufwerk ein. Nach wenigen Sekunden wird das Maxtor- Installationsprogramm geöffnet.
- Page 194 Der Bildschirm Programmordner auswählen erscheint. fahren Sie jetzt mit „Anschließen des FireWire-Kabels“ auf Seite 18 fort. 10. Der Name des Maxtor-Programmordners wird angezeigt sowie die Position des Ordners im Startmenü von Windows. Sie Andernfalls erscheint jetzt der Begrüßungsbildschirm von können diese Einstellungen ändern.
- Page 195 5. Prüfen Sie, welcher Anschluss (USB oder FireWire) auf Ihrem System verfügbar ist. Wenn Sie Ihre Festplatte über FireWire Die Maxtor OneTouch-Festplatte wird an die FireWire- oder an die anschließen möchten, finden Sie nähere Informationen unter USB-Schnittstelle Ihres Computers angeschlossen. Prüfen Sie, „Anschließen per FireWire-Kabel“...
- Page 196 Festplatte und wählen Sie Eigenschaften. Das Fenster Eigenschaften wird geöffnet. 4. Geben Sie im Abschnitt Bezeichnung oben im Dialogfenster einen Namen für die Festplatte ein. Zum Beispiel: „Maxtor“. USB- 5. Damit ist die Installation abgeschlossen und Ihre Maxtor Anschluss...
- Page 197 Deutsch d. Sie Suche sollte als Ergebnis einen Artikel ausgeben: Nur Windows 98SE: Update for 1394 Storage Peripherals in Windows 98 (Wenn Sie mit Windows Me arbeiten, fahren Sie mit dem Second Edition (Q242975) (Update für 1394- nächsten Abschnitt fort: „So schließen Sie das FireWire-Kabel an“) Speichergeräte in Windows 98 Second Edition).
- Page 198 2. Stecken Sie das andere Ende des FireWire-Kabels in einen 5. Geben Sie im Abschnitt Bezeichnung oben im Dialogfenster verfügbaren FireWire-Anschluss an der Rückseite der einen Namen für die Festplatte ein. Zum Beispiel: „Maxtor“. Festplatte. 6. Damit ist die Installation abgeschlossen und Ihre Maxtor OneTouch-Festplatte ist einsatzbereit! Wenn Sie sich für die vollständige Installation einschließlich...
- Page 199 Dokumente, darunter die zuletzt verwendeten Dokumente Ihre Registrierungsinformationen werden entsprechend den (Favoriten), Bookmarks und Cookies. Diese Option eignet sich Datenschutzrichtlinien von Dantz und Maxtor, die auf den jeweiligen für die meisten Benutzer. Websites einsehbar sind, erfasst und gespeichert. Anwendungen und Dokumente kopiert neben Dokumenten zusätzlich Anwendungsdateien.
- Page 200 Der Bildschirm Herzlichen Glückwunsch… einsatzbereit wird Software angezeigt. 1. Schalten Sie Ihren Computer ein. 9. Klicken Sie auf Fertigstellen, um die Einrichtung der Maxtor 2. Legen Sie die Installations-CD-ROM von Maxtor in Ihr OneTouch-Funktion abzuschließen. CD-ROM-Laufwerk ein. Wenn Sie gleich eine erste Sicherung anlegen möchten, Nach wenigen Sekunden sollte das Symbol für die Installations-...
- Page 201 Das Installationsprogramm von Retrospect Express wird gestartet. Festplatte 7. Klicken Sie auf Weiter. Die Maxtor OneTouch-Festplatte wird an die Firewire- oder an die USB-Schnittstelle Ihres Computers angeschlossen. Prüfen Sie, Die Lizenzvereinbarung wird angezeigt. welcher Schnittstellentyp an Ihrer Festplatte und Ihrem Computer verfügbar ist, um festzulegen, welche Verbindungsmöglichkeit...
- Page 202 2. Verbinden Sie das kleinere Ende des USB-Kabels mit dem USB- Stromversorgung an. Anschluss der Festplatte. 4. Schalten Sie die Maxtor OneTouch-Festplatte mit dem Netz- schalter auf der Rückseite ein. Die beiden blauen Leucht- anzeigen an der Vorderseite der Festplatte sollten aufleuchten.
- Page 203 Deutsch 5. Wählen Sie Ihre neue Festplatte aus der Liste auf der linken Tabelle 1: Kapazität unter 137 GB Seite aus. Öffnen Sie das Apple Vergewissern Sie sich, dass Sie die neue Festplatte Festplattendienst- Die Festplatte wird ausgewählt haben. Das Dienstprogramm wird alle Daten auf programm, das sich auf als Unbenannter der Festplatte löschen.
- Page 204 Sie Beenden aus. Abbildung 8. Anschluss an die FireWire-Schnittstelle 3. Die nächsten Schritte variieren und hängen von der 13. Damit ist die Installation abgeschlossen und Ihre Maxtor Speicherkapazität Ihrer Festplatte und der OS X-Version ab. OneTouch-Festplatte ist einsatzbereit! Suchen Sie Ihre OS X-Version in der nachfolgenden Tabelle, um Ihre weitere Vorhergehensweise zu bestimmen.
- Page 205 Deutsch 4. Klicken Sie auf Initialisieren. Tabelle 3: Kapazität unter 137 GB Das Festplattendienstprogramm wird geöffnet. OS X kann den OS X 10.1 Datenträger nicht Weiter zu Schritt 4. 5. Wählen Sie Ihre neue Festplatte aus der Liste auf der linken lesen.
- Page 206 12. Öffnen Sie im Festplattendienstprogramm das Menü Festplattendienstprogramm und wählen Sie Festplattendienstprogramm beenden aus. 13. Damit ist die Installation abgeschlossen und Ihre Maxtor OneTouch-Festplatte ist einsatzbereit! Wenn Sie sich für die vollständige Installation einschließlich Retrospect Express entschieden haben, sollten Sie im nächsten...
- Page 207 Registrierung wünschen. Ihre Registrierinformationen werden entsprechend den Durch die Registrierung Ihrer neuen Festplatte haben Sie Datenschutz-richtlinien von Dantz und Maxtor, die auf den jeweiligen die Möglichkeit, Produkt-Updates, Sonderangebote und Websites einsehbar sind, erfasst und gespeichert. wichtige Informationen über andere Data-Storage-Lösungen von Maxtor zu beziehen.
- Page 208 Deutsch 10. Klicken Sie auf Fertigstellen, um die Einrichtung der Maxtor Das Dialogfenster Schritt 2 wird angezeigt. OneTouch-Funktion abzuschließen. 7. Wählen Sie die zu kopierenden Dateitypen aus: 11. Öffnen Sie das Menü Retrospect Express und wählen Sie Nur Dokumente kopiert ausschließlich von Ihnen erstellte...
- Page 209 Festplatte 7. Lesen Sie die Lizenzvereinbarung sorgfältig durch und klicken Sie auf Akzeptieren, um fortzufahren. Die Maxtor OneTouch-Festplatte wird an die Firewire- oder an die USB-Schnittstelle Ihres Computers angeschlossen. Prüfen Sie, Der Bildschirm Retrospect Express installieren wird welcher Schnittstellentyp an Ihrer Festplatte und Ihrem Computer angezeigt.
- Page 210 Retrospect Sicherheitskopien Ihrer Dateien bzw. des gesamten Systems anlegen. Anschließen über USB-Kabel Bei OneTouch-Festplatten, die sowohl mit USB- als auch mit So schließen Sie das USB-Kabel an FireWire-Schnittstellen ausgestattet sind, können nicht beide 1. Verbinden Sie den flachen Stecker des USB-Kabels mit einem Schnittstellen gleichzeitig genutzt werden.
- Page 211 Damit ist die Installation abgeschlossen und Ihre Festplatte ist einsatzbereit! Anschließen über FireWire-Kabel Der folgende Abschnitt beschreibt den Anschluss Ihrer OneTouch- 3. Geben Sie einen Namen für Ihre Festplatte ein und wählen Sie Festplatte über ein FireWire-Kabel. Weitere Informationen zur aus dem Dropdown-Menü...
- Page 212 Deutsch 2. Stecken Sie das andere Ende des FireWire-Kabels in einen der Wenn bereits ein USB-Kabel angeschlossen ist, kann kein FireWire-Kabel an die Festplatte angeschlossen werden. beiden FireWire-Anschlüsse auf der Rückseite der Festplatte. Die Festplatte kann jeweils nur über eine Schnittstelle betrieben werden.
- Page 213 Schritt 4 - Einrichten der Maxtor OneTouch-Funktion. Retrospect Express entschieden haben, sollten Sie im nächsten Abschnitt die Maxtor OneTouch-Funktion einrichten, mit der Sie 3. Geben Sie die erforderlichen Informationen in das Formular ein. jederzeit durch simplen Tastendruck eine automatische Sicherung wichtiger Dateien vornehmen können!
- Page 214 Nur Dokumente kopiert ausschließlich von Ihnen erstellte Ihre Registrierinformationen werden entsprechend den Dokumente, darunter die zuletzt verwendeten Dokumente Datenschutzrichtlinien von Dantz und Maxtor, die auf den jeweiligen (Favoriten), Bookmarks und Cookies. Diese Option eignet sich Websites einsehbar sind, erfasst und gespeichert.
- Page 215 Der Bildschirm Herzlichen Glückwunsch… einsatzbereit wird Datensicherung angezeigt. Es werden nur die neuesten Versionen Ihrer Dateien 8. Klicken Sie auf Fertigstellen, um die Einrichtung der Maxtor gespeichert. Sicherheitskopien, die mithilfe der Standard OneTouch-Funktion abzuschließen. OneTouch-Funktion erstellt werden, beinhalten keine früheren Versionen Ihrer Dateien, die seit der letzten 9.
- Page 216 Formatierung Ihrer Festplatte mit dem Dateisystem NTFS unter Optional für Windows 98/2000/Me/XP Windows 2000 und XP. Ihr Maxtor OneTouch Modell wurde bereits werkseitig mit dem Bei einer Formatierung werden alle Daten auf der Windows-Dateisystem FAT32 formatiert. Dieses Dateisystem ist Festplatte gelöscht. Erstellen Sie deshalb Sicherungskopien mit Mac OS 9 und den aktuellen Windows-Betriebssystemen Ihrer Daten, bevor Sie Ihre Festplatte formatieren.
-
Page 217: Installation Der Treiber Ohne Software
„Macintosh OS X: Anschließen der Festplatte“ auf Seite 23. Nachträgliche Installation von Retrospect Installation der Treiber ohne Software Um die Software Retrospect und die Maxtor OneTouch-Funktion zu Der folgende Abschnitt beschreibt die notwendigen Schritte zur Installation Ihrer neuen Festplatte ohne die Software Retrospect einem späteren Zeitpunkt zu installieren, befolgen Sie die... - Page 218 Deutsch...
-
Page 219: Benutzung Der Festplatte
Deutsch Benutzung der Festplatte Nach der Installation können Sie Ihre neue Maxtor OneTouch-Fest- Tabelle 1: OneTouch-Leuchtanzeigen platte genau wie alle anderen Festplatten Ihres Systems einsetzen. Abwechselndes Aufblinken Befehlsverarbeitung/Datenübertragung Zu den Einsatzmöglichkeiten Ihrer neuen Festplatte gehören: Eine aus, die andere blinkt Energiesparmodus •... -
Page 220: Was Ist Maxtor Onetouch
FireWire- oder dem USB-Kabel. Daraufhin erscheint eine Auswahlliste. Kurz darauf erkennt der Computer, dass die Festplatte 2. Wählen Sie die Maxtor-Festplatte aus und befolgen angeschlossen ist, und das Laufwerkssymbol erscheint Sie die Bildschirmanweisungen zum Entfernen der auf der Arbeitsoberfläche des Macintosh. - Page 221 Maxtor OneTouch-Festplatte?“ beschrieben). Sie können sogar festlegen, wie die Dateien auf dem Ziellaufwerk beim Duplizieren ersetzt werden. Wenn Sie das Ziel im Maxtor OneTouch-Skript oder einem anderen Duplizieren-Skript in Retrospect ändern, wird für das betreffende Archivieren von Dateien Laufwerk oder den Ordner standardmäßig das Verhalten „Den...
-
Page 222: Zum Gebrauch Von Retrospect
Zum Gebrauch von Retrospect und auf das Ziellaufwerk kopiert. Wenn das Ziellaufwerk verloren geht oder beschädigt wird, geht damit auch die einzige Kopie Ihrer Ihre Maxtor OneTouch -Festplatte wird mit einer voll funktions- Dateien verloren. fähigen Kopie der Software Retrospect Express von Dantz geliefert. -
Page 223: Ändern Ihres Maxtor Onetouch-Skripts
Sie es kostenlos von der Website von Adobe und FAQs. herunterladen: http://www.adobe.de Ändern Ihres Maxtor OneTouch-Skripts Wiederherstellung von Dateien Mit der OneTouch-Funktion von Maxtor können Dateien, von denen Windows eine Sicherungskopie existiert, leicht wiederhergestellt werden. 1. Öffnen Sie Retrospect. So stellen Sie Dateien wieder her: 2. - Page 224 Der Einrichtungsassistent für Maxtor OneTouch wird Der Einrichtungsassistent für Maxtor OneTouch wird gestartet. Befolgen Sie nun die Anweisungen unter gestartet. Für OS X: Siehe „So richten Sie die Maxtor „Einrichten der Maxtor OneTouch-Funktion“ (Kapitel 2). OneTouch-Taste ein“ auf Seite 28 unter Kapitel 2; für OS 9: Siehe „So richten Sie die Maxtor OneTouch-Taste...
-
Page 225: Das Maxtor Onetouch-Dienstprogramm
Playlist-Datei. Ihre Maxtor OneTouch -Festplatte wird mit einem Dienstprogramm geliefert, mit dem Sie: 1. Doppelklicken Sie auf das Symbol Maxtor OneTouch auf Ihrem Desktop. • Informationen zu Ihrer Festplatte anzeigen können. • Ihre OneTouch-Taste so konfigurieren können, dass sie eine Das Fenster Maxtor OneTouch Einstellungen wird andere Anwendung startet oder eine Datei öffnet. - Page 226 Fenster Öffnen geöffnet wurde, zurück: stellen Sie im Menü Dateityp „Alle Dateien” bzw. „(*.*)“ ein, damit Sie einzelne Dateien auswählen können. Wenn Sie können die OneTouch-Funktion jederzeit wieder auf das Sie diese Einstellung nicht vornehmen, werden keine ursprüngliche Skript zurücksetzen. Dateinamen angezeigt.
- Page 227 System gespeicherte Anwendung bzw. Datei auswählen Die meisten Anwendungen oder Dateien auf Ihrem Computer können. können Sie auch mithilfe der OneTouch-Taste starten bzw. öffnen. Sie könnten mit der Taste zum Beispiel ein Programm wie 5. Suchen Sie die Anwendung bzw. Datei aus, die Sie mit QuickTime oder sogar eine bestimmte QuickTime-Datei starten.
- Page 228 Herunterfahren-Modus befindet, leuchtet eine der beiden blauen OneTouch-Festplatte drücken. Leuchtanzeigen während die andere blinkt. So setzen Sie die Einstellungen der OneTouch-Taste zurück: Einstellen der Energiesparfunktion: Windows Sie können die OneTouch-Funktion jederzeit wieder auf das 1. Öffnen Sie das Dienstprogramm Maxtor OneTouch.
- Page 229 1. Wählen Sie aus dem Menü Apple die Option 4. Klicken Sie auf die Schaltfläche Übernehmen. Systemeinstellungen aus. 5. Klicken Sie auf OK, um das OneTouch-Dienstprogramm Das Fenster Systemeinstellungen wird geöffnet. zu schließen. 2. Klicken Sie auf das Symbol Energie sparen. Das Symbol Einstellen der Energiesparfunktion: Macintosh ähnelt einer Glühbirne.
-
Page 230: Installieren Von Anwendungen Auf Ihrer Festplatte
13 GB pro einstündigem Video sehr umfangreich. Für empfohlen. Sie können jedoch Daten für viele andere beste Ergebnisse bei der Bearbeitung von Videos empfiehlt Maxtor Anwendungen speichern und auf diese über eine USB 1.1- deshalb die Verwendung einer FireWire-Schnittstelle. -
Page 231: Verschieben Von Daten Zwischen Zwei Systemen
Mit der Maxtor OneTouch-Festplatte können große Datenmengen problemlos zwischen zwei Systemen verschoben werden. Weitere Die Verwendung von Computern zum Abspielen von Musikdateien Informationen finden Sie in der Knowledge Base von Maxtor unter: ist sehr beliebt. Hier können Sie unzählige Ihrer Lieblingslieder http://www.maxtorkb.com speichern und abspielen. -
Page 232: Anbringen Von Gummipads An Ihrer Onetouch-Festplatte
Deutsch Anbringen von Gummipads an Ihrer OneTouch-Festplatte Wenn Sie vorhaben, Ihre Festplatte auf einen Tisch zu stellen, können Sie an der Festplatte vier im Lieferumfang enthaltene Gummipads anbringen, die sowohl die Tischoberfläche als auch Ihre Festplatte schützen. So bringen Sie die Gummipads an: 1. -
Page 233: Verwendung Von Festplatten Großer Kapazität Unter Windows
Deutsch Verwendung von Festplatten großer Kapazität unter Windows Bei der Verwendung von Festplatten mit einer Kapazität über 64 GB und bestimmter Programme von Microsoft bei Verwendung von unter Windows sind einige Punkte zu beachten. Tabelle 2 listet die Festplatten mit einer Kapazität über 64 GB auf. Verhaltensweisen der verschiedenen Dateisysteme von Windows Tabelle 2: Hinweise zum Gebrauch von Festplatten mit Kapazitäten über 64 GB Windows 98SE... -
Page 234: Verwendung Einer Sicherheitssperre
Deutsch Verwendung einer Sicherheitssperre Hinweis 2: FDISK läuft möglicherweise nicht mehr einwandfrei, nachdem ein externes Laufwerk entfernt und wieder angeschlossen wurde. Ein Neustart des Computers vor der Verwendung der FDISK-Funktion wird Ihre neue Festplatte verfügt über eine Sicherheitssperre, welche empfohlen. mit den meisten Sicherheitssperrenkabeln, inkl. -
Page 235: Anlegen Einer Systemsicherung
Deutsch Anlegen einer Systemsicherung Ihre neue Maxtor OneTouch-Festplatte ist ideal für das Anlegen wurde. Wie das im Einzelnen funktioniert, wird in diesem Kapitel beschrieben. Wenn Sie die Daten auf einem anderen Computer und/ vollständiger Systemsicherungen geeignet. Mithilfe von Retrospect oder einem anderen Betriebssystem wiederherstellen müssen, ist Express können Sie Ihr System jederzeit vollständig sichern und im... - Page 236 Deutsch 1. Klicken Sie auf das Symbol Arbeitsplatz. 4. Verwenden Sie diese Zahl als Richtlinie für den Speicherplatz, der im Fall einer vollständigen Systemsicherung mindestens Das Fenster wird geöffnet und alle Festplatten bzw. Laufwerke auf der Sicherungsfestplatte verfügbar sein muss. Ihres Systems werden angezeigt.
- Page 237 Deutsch Anlegen einer vollständigen Das Ergebnis gibt den Gesamtspeicherbedarf für eine vollständige Systemsicherung für den Fall an, dass der Speicherplatz Ihres Systemsicherung Systems komplett belegt ist. 7. Verwenden Sie diese Zahl als Richtlinie für den Speicherplatz, Windows: Siehe unten. der im Fall einer vollständigen Systemsicherung mindestens Macintosh: Siehe Seite 62.
- Page 238 Wählen Sie eine Platte, die als Speicher zu Backup-Set 7. Wählen Sie Täglich oder Wöchentlich aus und klicken Sie auf hinzugefügt werden soll. Weiter. 11. Wählen Sie Ihre Maxtor OneTouch-Festplatte und klicken Sie Im nächsten Fenster wird die Meldung angezeigt: Wann sollen auf Weiter. die Backups durchgeführt werden? Das Fenster Neues Segment zu Backup-Set hinzufügen...
- Page 239 Die nächsten Sicherungen erfolgen automatisch an den Terminen, die Sie in Ihrem Skript angegeben haben. Voraussetzung ist, dass 6. Ändern Sie Ihr Sicherungs-Skript nach Bedarf. zu den betreffenden Zeiten Ihr Computer und die Maxtor OneTouch-Festplatte angeschaltet sind. Retrospect müssen Sie 7. Schließen Sie das Fenster EasyScript-Backup.
- Page 240 Termin ausgeführt. Voraussetzung für die Ausführung ist, Wie oft möchten Sie das Backup durchführen? dass der Computer und die Maxtor OneTouch-Festplatte zum geplanten Termin angeschlossen und eingeschaltet sind. 6. Wählen Sie entweder Täglich oder Wöchentlich. Wenn Sie sich für die Backup-Option Wöchentlich Anlegen einer vollständigen...
- Page 241 Dateien sichert, die seit der letzten Voraussetzung ist, dass zu den betreffenden Zeiten Ihr Computer Sicherung geändert wurden. Weitere Informationen zu und die Maxtor OneTouch-Festplatte angeschaltet sind. Retrospect Backup-Strategien finden Sie in der Online-Hilfe von müssen Sie dafür nicht mehr öffnen!
- Page 242 Diese Meldung weist Sie darauf hin, dass für die nächste Das Retrospect Express Hauptfenster wird angezeigt. Ausführung des Skripts zum geplanten Zeitpunkt die Sicherungsfestplatte (Ihre Maxtor OneTouch-Festplatte) und 2. Klicken Sie auf die Registerkarte Automatisch. der Computer verbunden und betriebsbereit sein müssen. Zur Das Fenster Automatisch wird angezeigt.
- Page 243 Sie versuchen, ein neues EasyScript zu erstellen. Das geänderte Skript wird gespeichert und zum nächsten geplanten Termin ausgeführt. Voraussetzung für die Ausführung ist, dass der Computer und die Maxtor OneTouch-Festplatte zum geplanten Termin angeschlossen und eingeschaltet sind. Anlegen einer Systemsicherung...
- Page 244 Deutsch...
-
Page 245: Notfall-Wiederherstellung
Retrospect eine vollständige Sicherungskopie Ihres _________________________________________ Systems angelegt haben. Informationen hierzu finden Sie im vorherigen Kapitel. Die OneTouch-Festplatte ermöglicht zusammen mit der Software Retrospect von Dantz die vollständige Systemwiederherstellung (Betriebssystem, Treiber, Anwendungen, Einstellungen und Was wird bei einer vollständigen Systemwiederherstellung wieder Benutzerdateien) auf dem ursprünglichen Computersystem (mit dem... - Page 246 Systems sein. Informationen darüber, wie Sie Ihre Systemfestplatte partitionieren und formatieren können, 2. Installieren Sie Ihr Betriebssystem. finden Sie in der Maxtor Knowledge Base unter: 3. Installieren Sie die Maxtor OneTouch-Software einschließlich http://www.maxtorkb.com. Retrospect. (Einzelheiten unter Seite 7 unter Kapitel 4.)
- Page 247 Backup-Set-Daten gespeichert sind“ erscheint. erscheinen. 9. Wählen Sie die Festplatte aus, auf der Sie die Sicherungskopie 16. Klicken Sie auf Schließen. Ihres Systems angelegt haben (Ihre Maxtor OneTouch- Festplatte). Im nächsten Schritt können Sie die Systemwiederherstellung starten. 10. Klicken Sie auf OK.
- Page 248 Partitionen des ursprünglichen Systems sein. Informationen darüber, wie Sie Ihre Systemfestplatte partitionieren Die Systemwiederherstellung wird gestartet. und formatieren können, finden Sie in der Maxtor Knowledge Base unter: http://www.maxtorkb.com. Dies kann einige Minuten dauern. HINWEIS: Die meisten Macintosh-Computer sind werkseitig mit Nach erfolgter Wiederherstellung wird folgende Meldung jeweils nur einer Partition pro Festplatte vorkonfiguriert.
- Page 249 Sie auf, eine vorhandene Katalogdatei zu öffnen oder Das Fenster Wiederherstellen vom Backup wird angezeigt. eine Katalogdatei wiederherzu-stellen. Bestätigen Sie hier die Quelle (Ihre OneTouch-Festplatte) und das Ziel (Ihre Macintosh-Festplatte) für die Wiederherstellung. 7. Klicken Sie auf Öffnen. 12. Klicken Sie auf Wiederherstellen.
- Page 250 Deutsch Nachdem Retrospect den Vorgang abgeschlossen hat, wird folgende Meldung angezeigt: Ausführung erfolgreich abgeschlossen. Sie können sich vergewissern, ob alle Ihre Dateien ordnungsgemäß wiederhergestellt wurden, indem Sie im Menü Fenster die Option Protokoll auswählen und das Wiederherstellungsprotokoll einsehen. 14. Beenden Sie Retrospect, indem Sie im Menü Datei die Option Beenden auswählen.
-
Page 251: Fehlersuche Und Faqs
Deutsch Fehlersuche und FAQs Kapitelinhalte Das folgende Kapitel enthält Tipps zur Fehlersuche und Antworten auf die häufigsten Fragen, die bezüglich der Installation des Maxtor OneTouch-Modells gestellt werden. Allgemeine Fehlersuche Weitere Informationen finden Sie in der Knowledge-Base von Mein System zeigt das Laufwerk nicht an. -
Page 252: Allgemeine Fehlersuche
Lesen Sie in das Laufwerk immer noch nicht von Ihrem System erkannt, sollten diesem Fall die Dokumentation der Schnittstellenkarte oder Sie bezüglich weiterer Unterstützung die Produkt-Support-Seite auf wenden Sie sich an den Hersteller der Karte. der Website von Maxtor unter www.maxtorkb.com einsehen. - Page 253 • Klicken Sie auf die Registerkarte Geräte und Volumes. Befolgen Sie die Anweisungen zum Öffnen des Apple System Profiler. • Je nachdem, welche Festplatte von Maxtor Sie einsetzen, wird die Festplatte in einem der beiden In OS X oder neuer: Abschnitte USB oder FireWire in Form eines Dreiecks angezeigt.
-
Page 254: Meine Festplatte Liest Dateien Anscheinend Wesentlich Schneller, Als Sie Sie Schreibt
4. Die OneTouch-Funktion funktioniert nicht. Binärformat) mit 1.048.576 multiplizieren, um den entsprechenden Dezimalwert zu erhalten. Im Folgenden einige Punkte, die Sie überprüfen sollten, wenn die Maxtor OneTouch-Funktion nicht funktioniert. Die Maxtor OneTouch-Taste funktioniert möglicherweise nicht, wenn Retrospect Express läuft. So beheben Sie dieses Problem:... - Page 255 Funktion“ unter Kapitel 2. Die OneTouch-Sicherheitskopie funktioniert nicht, wenn Retrospect das Quelllaufwerk bzw. das Ziellaufwerk nicht finden kann. So • Wählen Sie den Eintrag Maxtor OneTouch aus und klicken testen Sie, ob dieses Problem vorliegt: Sie auf die Schaltfläche Bearbeiten.
-
Page 256: Ich Kann Mit Meiner Festplatte Keine Kopie Oder Sicherung Von Einem Netzlaufwerk Herstellen
Systems betreiben, liegt die Datenübertragungsrate ungefähr volumes that OS X can read. To use the unreadable volumes bei 1MB pro Sekunde. Maxtor rät von der Installation von click Initialize.” (Die von Ihnen angeschlossene Festplatte Anwendungen auf einer Festplatte unter Verwendung der USB enthält keine Volumes, die OS X lesen kann. -
Page 257: Ich Erhalte Eine Meldung, Die Besagt, Dass Ich Ein Hochgeschwindigkeitsgerät An Einem Anschluss Mit Niedriger Datenübertragungsrate Betreibe (Windows Xp)
Informationen finden Sie unter „So formatieren Sie Ihre Festplatte für Windows“ auf Seite 38 unter Kapitel 3. Die Festplatten von Maxtor laufen mit der maximal von der Hostadapterkarte unterstützten Geschwindigkeit (mit einer 14. Beim Erfassen von Videodaten von meinem Canon- maximalen Übertragungsrate von 480 Mb/s). - Page 258 Deutsch Sie über die Administrator-Rechte, die für die Installation und Ausführung dieser Software erforderlich sind. Wenden Sie sich für weitere Hilfe an Ihren Systemverwalter, wenn Ihr Benutzerkonto zu einer anderen Gruppe gehört.
-
Page 259: Glossar
Deutsch Glossar Anschluss Ein Anschluss oder Steckplatz am Motherboard, der zusammenhängend bleiben, wodurch sich die Leistung der Controllerkarte oder dem Gehäuse, an dem Peripheriegeräte wie Festplatte erhöht. ein USB- oder ein FireWire-Socket angeschlossen werden Externe Festplatte Ein externes Peripheriegerät, das einen können. - Page 260 Sie können so viele Skripte angeschlossen oder entfernt werden, während der Computer anfertigen, wie Sie wollen. und die Geräte laufen. Externe Festplatten wie die Maxtor Personal Storage 5000 können per Hot-Swap angeschlossen Startlaufwerk Das Laufwerk, von dem aus das werden.
-
Page 261: Index
Deutsch Index Ziffern Einrichten der Maxtor OneTouch- Kitbauteile 1394-Schnittstelle Funktion Speichern von Audiodaten Anschluss 10, 16, 23, 30 Energiesparfunktion Spiele Laptop-Kabel Entfernen der Festplatte bei einem Systemanforderungen Laufwerkskapazität Macintosh-System Über diese Anleitung Service und Support Lieferumfang Combo-Modell Entfernen der Festplatte bei einem Administrator-Rechte für Windows... -
Page 262: Software-Lizenzvereinbarung
Maxtor räumt Ihnen eine persönliche, autorisierte Privatzwecke und in Übereinstimmung mit den nicht-exklusive Lizenz zur Verwendung der Software ein. Dieses Lizenzbedingungen. Recht zur Verwendung ist nur auf einen Computer beschränkt, der direkt oder indirekt mit einem oder mehreren Maxtor OneTouch... - Page 263 Material, Handelsgeheimnisse und Übertragung der Software an Dritte. Bei einer Übertragung sind sonstiges Eigentum von Maxtor und seinen Lieferanten. Es ist Sie verpflichtet, die Verwendung der Software einzustellen und die Ihnen untersagt und Sie sind nicht berechtigt, andere dazu zu...
- Page 264 Abgesehen vom Vorstehenden stellt Ihnen Maxtor die Software VERWENDUNG ODER DEN FOLGEN DER VERWENDUNG DER „wie sie ist“ zur Verfügung. Weder Maxtor noch seine Zulieferer SOFTWARE ENTSTANDEN SIND. DIES GILT UNABHÄNGIG oder Händler garantieren, dass die in der Software enthaltenen DAVON, WORAUF DER ANSPRUCH BASIERT Funktionen Ihren Anforderungen genügen, die Verwendung der...
- Page 265 11. Offentliche Behörde: Eingeschränkte Rechte. Diese Software ist die Software als auch sonstige technische Informationen, die Sie mit BESCHRÄNKTEN RECHTEN versehen. Die Software ist ein von Maxtor erhalten haben sowie deren unmittelbare Produkte nur kommerzielles, auf dem offenen Markt lizenziertes gemäß der geltenden US-amerikanischen Gesetze und Softwareprodukt und wurde ausschließlich mit privaten...
- Page 266 Begriffe richten sich ausschließlich nach der Fassung in englischer Sprache. Änderungen der Lizenz bedürfen der Schriftform und müssen sowohl von Ihnen als auch von Maxtor unterzeichnet werden. Für den Fall, dass eine Bestimmung dieses Lizenzvertrages von einem zuständigen Gericht als rechtswidrig angesehen wird, bleiben die verbleibenden Bestimmungen dieses Lizenzvertrages in vollem Umfang wirksam.
- Page 267 ©2003 Maxtor Corporation. Alle Rechte vorbehalten. Maxtor und das Logo von Maxtor sind eingetragene Warenzeichen der Maxtor Corporation. Maxtor Personal Storage und Maxtor OneTouch sind Warenzeichen der Maxtor Corporation. Dantz, das Logo von Dantz und Retrospect sind eingetragene Warenzeichen und Retrospect Express ist ein Warenzeichen der Dantz Development Corporation.