Table of Contents
Advertisement
VHS
VideoCD COMBO
•
HR - VCD1
TV
VCD
VHS
1
2
3
DISC 1
4
5
6
DISC 2
7
8
9
DISC 3
10
0
+10
OSD
PROGRAM
REPEAT VIDEO INTRO
MPX
TRACKING
ON/OFF
CANCEL
RANDOM
HIGHLIGHT
RETURN
KARAOKE SEARCH
PREV
SELECT
NEXT
REW
PLAY
FF
REC
STOP
PAUSE/STILL
TV VOL
TV
TV
SP/LP
PROG
PROG
MANUAL
SEARCH
/
POWER
TV/VIDEO
TV VOL
STANDBY
KEY CONTROL
KARAOKE NORMAL PBC OFF
PAL
NTSC
VIDEO CD
GRAPHICS
COMPACT
VHS VideoCD COMBO HR-VCD1
DIGITAL VIDEO
3
3
DISC
2
2
DISC
3
-
DISC
1
1
DISC
TRIPLE TRAY
SELECT
VOCAL
VIDEO
REPLACE
INTRO
VOCAL
STILL
MASKING
RETURN
MPX
PREV
NEXT
NTSC/PAL CONVERTIBILITY
VCD NUMBER
.
INSTRUCTIONS
KEY CONTROL
VHS CONTROL
DOWN
NORMAL
UP
WIRELESS MIC
MIC 1
MIC 2
DIGITAL ECHO
MIX VOL
/
SP / LP / EP
LIVE RECORDING
VIDEO (MONO) L AUDIO R
MIN
MAX
VCD
FRONT AV
MIN
MAX
MIN
MAX
OFF
ON
S.ST
CD REC
SPATIALIZER
'
PlayBack
Control
'
COMPACT
GRAPHICS
DIGITAL VIDEO
PAL NTSC
LPT0002–0G2A
Advertisement
Table of Contents

Related Manuals for JVC HR-VCD1


Summary of Contents for JVC HR-VCD1
- Page 1 STANDBY KEY CONTROL DISC KARAOKE NORMAL PBC OFF VOCAL REPLACE NTSC VOCAL MASKING VIDEO CD NTSC/PAL CONVERTIBILITY GRAPHICS COMPACT VHS VideoCD COMBO HR-VCD1 DIGITAL VIDEO INSTRUCTIONS DISC KEY CONTROL VHS CONTROL TRIPLE TRAY SELECT DOWN NORMAL WIRELESS MIC VIDEO INTRO...
-
Page 2: Table Of Contents
Table of Contents Thank you for purchasing this JVC VHS To ensure optimum performance of this unit, please read this instruction manual thoroughly. Precautions ... 3 General Information ... 4 Controls, Indicators and Terminals ... 5 Front panel ... 5 Wireless remote control ... -
Page 3: Precautions
Although this model is equipped with a built-in head cleaner which automatically cleans the heads, reducing the likelihood of dirty heads, if such troubles are encountered please consult the nearest JVC dealer. Auto Head Cleaner A built-in head cleaner automatically cleans the video heads and head drum whenever a tape is loaded or unloaded to reduce head clogging. -
Page 4: General Information
General Information Care and handling of compact discs How to handle CDs When handling a compact disc, do not touch the surface of the disc (reflective silver side –– the side without the label). Since compact discs are made of plastic, they are easily damaged. -
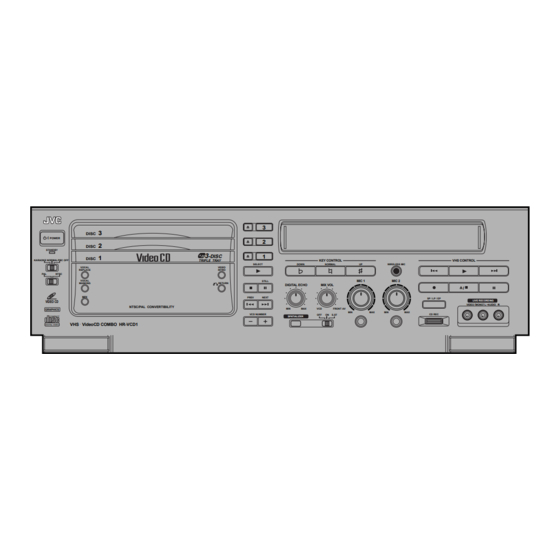
Page 5: Controls, Indicators And Terminals
VOCAL MASKING VIDEO CD NTSC/PAL COMPATIBILITY GRAPHICS COMPACT VHS VideoCD COMBO HR-VCD1 DIGITAL VIDEO POWER button / STANDBY indicator DISC 1 to DISC 3 trys Open/Close buttons (Disc number 1 to 3) DISC 1 through DISC 3 buttons with indicators KEY CONTROL buttons p.25... -
Page 6: Wireless Remote Control
Controls, Indicators and Terminals (cont’d) Wireless remote control DISC 1 DISC 2 DISC 3 PROGRAM REPEAT VIDEO INTRO TRACKING ON/OFF CANCEL RANDOM HIGHLIGHT RETURN KARAOKE SEARCH PREV SELECT NEXT PLAY STOP PAUSE/STILL TV VOL SP/LP PROG MANUAL SEARCH TV VOL TV/VIDEO KEY CONTROL Installing Batteries... -
Page 7: Tv Multi-Brand Remote Control
¶ Press the TV button on the remote control. OSD button NOTE: MUTE • If your TV is a JVC, you don’t have to set the code in step 1. button Go to step 2. SET TV BRAND CODE TV VOL Refer to the chart below. -
Page 8: Display Panel
Controls, Indicators and Terminals (cont’d) Display panel NTSC DISC TRACK [VCD display] Disc number indicator Key control indicator Colour system indicator Type of disc indicator Track number indicator Total number of tracks indicator Each indicator in this area lights when the corresponding function is activated. -
Page 9: Connections
Connections Make sure that the power to the Player and TV is off before making the following connections. OUT1 OUT2 WIRELESS MIC ANT. AUDIO R NT8C3.58 AUDIO L NTSC ON PAL TV NTSC4.43 FREQ VIDEO ADJUST How to connection Connect the TV’s VIDEO input and AUDIO input termi- nals to the Player's VIDEO output and AUDIO output terminals. -
Page 10: Basic Playback (Video Cd)
STANDBY DISC KARAOKE NORMAL PBC OFF VOCAL REPLACE NTSC VOCAL MASKING VIDEO CD NTSC/PAL COMPATIBILITY GRAPHICS COMPACT VHS VideoCD COMBO HR-VCD1 DIGITAL VIDEO PREV/NEXT buttons MODE switch DISC 1 DISC 2 DISC 3 PROGRAM REPEAT VIDEO INTRO TRACKING ON/OFF CANCEL... - Page 11 Basic Playback (Video CD) (cont'd) In order to operate by remote control, first press the VCD button. Preparation for playing Turn on the television set, amplifier or receiver to which the Player is connected, and then select the proper channel and mode to operate the Player, and set the sound volume to a reasonable level.
- Page 12 DISC STANDBY DISC KARAOKE NORMAL PBC OFF VOCAL REPLACE NTSC VOCAL MASKING VIDEO CD NTSC/PAL COMPATIBILITY GRAPHICS COMPACT VHS VideoCD COMBO HR-VCD1 DIGITAL VIDEO DISC 1 DISC 2 DISC 3 PROGRAM button PROGRAM REPEAT VIDEO INTRO TRACKING ON/OFF CANCEL RANDOM...
-
Page 13: Various Unique Functions
Various Unique Functions In order to operate by remote control, first press the VCD button. Display of operations status Press the OSD button on the remote control. By pressing the OSD button, the following information may be easily and quickly displayed or vanished on the television screen. Time, Disc mode, Echo effect, Key control, Program, Repeat, Random, Multiplexing, Vocal replace, Vocal masking (Remote control) - Page 14 Various Unique Functions (cont'd) In order to operate by remote control, first press the VCD button. Repeating tracks It is possible to repeat all discs or only a single track. Preparation This function is controlled by the remote control. Operation By pressing the REPEAT button, channel REPEAT modes are cycled as shown below.
- Page 15 Various Unique Functions (cont'd) In order to operate by remote control, first press the VCD button. Programming during VIDEO INTRO Operation 1. Press the PROGRAM button on the remote control so that PROGRAM is lit in the display. 2. Press the disc button you want to play, and enter 1 on the keypad.
-
Page 16: Playback Control Function
Playback Control Function Playing Video CDs with Playback Control function This Player provides a Playback Control function which uti- lizes a procedure (menu selection) programmed in a video CD. The playback operation procedure may differ depending on the disc you use. The Playback Control function is described below and in the figure. - Page 17 Playback Control Function (cont'd) Video CD with Playback Control function What is Playback Control function? The Playback Control function, ushering a new video CD age, allows you to enjoy menu-driven operation and high-resolution still images having a resolution four times greater than moving pictures.
-
Page 18: The Video Cassette
DIGITAL ECHO MIX VOL PREV NEXT VIDEO CD NTSC/PAL CONVERTIBILITY FRONT AV GRAPHICS VCD NUMBER S.ST COMPACT SPATIALIZER VHS VideoCD COMBO HR-VCD1 DIGITAL VIDEO DISC POWER DISC STANDBY DISC DISC KARAOKE NORMAL PBC OFF TRIPLE TRAY KEY CONTROL SELECT DOWN... -
Page 19: Playback Features
Playback Features In order to operate by remote control, first press the VHS button. Slow motion playback Slow motion playback is 1/6 of the normal playback speed. The sound will be cut during slow motion playback. During playback: Press the Pause 8 button for 2 seconds. 7 Press the Play 3 button to return to the normal playback speed. -
Page 20: Recording
NTSC/PAL CONVERTIBILITY GRAPHICS FRONT AV VCD NUMBER S.ST COMPACT SPATIALIZER VHS VideoCD COMBO HR-VCD1 DIGITAL VIDEO SPATIALIZER lamp SPATIALIZER switch Select the desired audio with the SPATIALIZER switch. 7 The SPATIALIZER lamp lights up when “ON” or “S.ST” is selected. -
Page 21: Karaoke Features
Karaoke Features Connecting to Hi-Fi stereo system FM tuner Stereo amplifier Television Speaker VIDEO IN If you have a Hi-Fi stereo system, you can connect your Player to it so that the sound can be heard through your Hi-Fi system. Please make these additional connections: Hi-Fi audio connection Connect the AUDIO OUT “L”... -
Page 22: Installing Batteries
Karaoke Features (cont’d) Microphone MIC select switch FREQ. screw To MIC input terminal 1 or 2 on the front panel. Connector cable or Antenna cable Installing Batteries Unscrew and remove the battery compartment cap. How To Use To use as a wired microphone Insert the connector cable to the end of the Microphone as illustrated and turn it clockwise to fix. - Page 23 Karaoke Features (cont’d) OUT1 OUT2 WIRELESS MIC ANT. AUDIO R NT8C3.58 AUDIO L NTSC ON PAL TV NTSC4.43 FREQ VIDEO ADJUST If there is interference when using the micro- phone Follow the steps below to re-adjust the frequency of the micro- phone and your Player.
- Page 24 Karaoke Features (cont’d) Follow steps 1 and 2 of “To use as a wireless micro- phone”. ( p.22) Press the Player’s WIRELESS MIC button to make the button light. WIRELESS MIC button KEY CONTROL NORMAL WIRELESS MIC MIC 1 MIC 2 MIX VOL SP / LP / EP FRONT AV...
- Page 25 NTSC VOCAL MASKING VIDEO CD NTSC/PAL COMPATIBILITY GRAPHICS COMPACT VHS VideoCD COMBO HR-VCD1 DIGITAL VIDEO VOCAL MASKING button Vocal replace Preparation This function is used for multiplex sound discs and tape. Operation 1. Press the VOCAL REPLACE button during play or stop.
-
Page 26: Editing
FRONT AV GRAPHICS VCD NUMBER S.ST COMPACT SPATIALIZER VHS VideoCD COMBO HR-VCD1 DIGITAL VIDEO Preparation Connect the player’s AUDIO and VIDEO OUT connectors to the recorder’s AUDIO and VIDEO IN connectors. Select the recorder’s external input mode. When this unit is beside the recorder, there is no need for any operations. -
Page 27: Cd Recording
VOCAL MASKING VIDEO CD NTSC/PAL COMPATIBILITY GRAPHICS COMPACT VHS VideoCD COMBO HR-VCD1 DIGITAL VIDEO Preparation Set the MODE switch of the Player either to “PBC OFF” or “KARAOKE”. Set the MIX VOL knob on the player's front panel to the center or VCD position. -
Page 28: Live Recording
DISC POWER DISC STANDBY DISC KARAOKE NORMALPBC OFF VOCAL REPLACE NTSC VOCAL MASKING VIDEO CD GRAPHICS COMPACT VHS VideoCD COMBO HR-VCD1 DIGITAL VIDEO SELECT button DISC POWER DISC STANDBY DISC KARAOKE NORMALPBC OFF VOCAL REPLACE NTSC VOCAL MASKING VIDEO CD... - Page 29 Editing (cont'd) Live recording Preparation Set the MODE switch of the Player either to “PBC OFF” or “KARAOKE”. Operation Connect the equipment as shown in the illustration on the left. Load a cassette. Insert the cassette to be recorded in the Player. Place the disc to be played on the disc tray of the Player.
-
Page 30: Troubleshooting
Troubleshooting Symptoms No power is applied to the Player. Remote control does not function. Disc tray does not come out when OPEN/ CLOSE button is pressed. Sound is distorted or noise is generated. Image is garbled. Sound is intermittent. Image is garbled. No image is displayed on the monitor. -
Page 31: Specifications
Specifications GENERAL Power requirements Rating ... AC 110 – 240 V, 50/60 Hz Operating ... AC 90 – 260 V, 50/60 Hz Power consumption ... 25 W Temperature Operating ... 5 C to 40 C Storage ... –20 C to 60 C Dimensions (W x H x D) ... - Page 32 VICTOR COMPANY OF JAPAN, LIMITED Printed In Japan COPYRIGHT 1997 VICTOR COMPANY OF JAPAN, LTD. 0897 MNV * SW * YP...