Table of Contents
Advertisement
Advertisement
Table of Contents
Troubleshooting

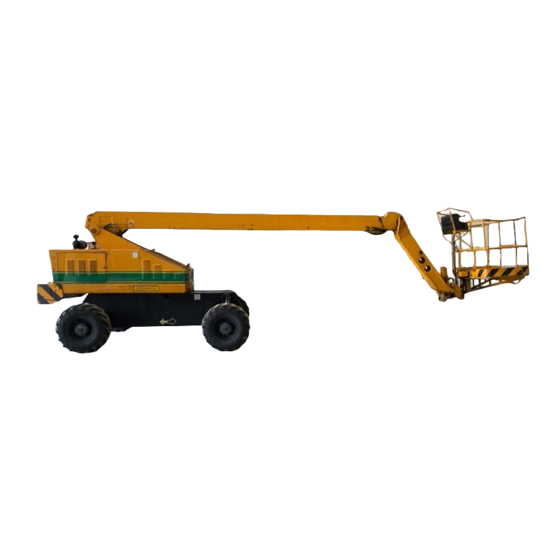
Related Manuals for JLG 40H


Summary of Contents for JLG 40H
- Page 1 Service and Maintenance Manual Model 40H+6 3120240 October 11, 2001 ANSI...
-
Page 3: Hydraulic System Safety
• USE ONLY APPROVED, NONFLAMMABLE CLEANING SOLVENTS. Relieve system pressure by cycling the applicable control several times with the engine stopped and ignition on, to direct any line pressure back into the reservoir. Pressure 3120240 – JLG Lift –... -
Page 4: Effectivity Changes
EFFECTIVITY CHANGES REVISON LOG Aug, 1985 -Original Issue Nov. 1985 -Revised Oct. 1998 -Revised Aug. 1999 -Revised October 11, 2001 -Revised – JLG Lift – 3120240... -
Page 5: Table Of Contents
Drive Brake, Mico. (Machines Built From May 1992 To S/n 33476) (See Figure 2-44.) ..2-79 2.31 Swing Brake, Mico. (Machines Built From May 1992 To S/n 33476) (See Figure 2-45.)..2-81 3120240 – JLG Lift –... - Page 6 Vickers All Hydraulic Machines Pressure Settings (Sheet 1 of 4)......2-51 – JLG Lift – 3120240...
-
Page 7: List Of Tables
Platform Assembly Troubleshooting..........3-2 3120240 – JLG Lift –... - Page 8 Electrical Assembly Troubleshooting..........3-16 (INTENTIONAL BLANK PAGE) – JLG Lift – 3120240...
-
Page 9: Section 1. Specifications
(5.5 L) w/0 Filter. Battery - 1000 cold cranking Amps, 210 min- Low RPM 2000. utes reserve capacity,12 VDC. High RPM 3000. Fuel Consumption Low RPM - 2.03 GPH (7.68 LPH). Alternator - 60 Amp, belt drive. 3120240 – JLG Lift –... -
Page 10: Hydraulic Pump
10 Microns Nominal. Steer System. Hydraulic Filter - On-line (Racine Valve Only). Tires - 12.5 x 15, 12 ply rating, 72 PSI. (5 Bar). Toe-in, adjust for 1/4 in. (6.35 mm) overall. Return - Non-Bypass Type. – JLG Lift – 3120240... -
Page 11: Performance Data
SECTION 1 - SPECIFICATIONS 10 Microns Nominal. Machine Stowed Height. Model 40H (2WD) - 7 ft., 10 in. (2.39 M). PERFORMANCE DATA. Model 40H (4WD) - 7 ft., 10 in. (2.39 M). Machine Stowed Length. Travel Speed. Model 40H (2WD) - 25 ft.,2 in. (7.67 M). - Page 12 -15° F - +70° F. 10W-30 any remaining diesel fuel. Aside from JLG recommendations, it is not advisable (-26°C. to +21°C.) to mix oils of different brands or types, as they may -15° F - +85° F.
-
Page 13: Torque Chart
SECTION 1 - SPECIFICATIONS Figure 1-1. Torque Chart. 3120240 – JLG Lift –... -
Page 14: Lubrication Chart. (Sheet 1 Of 2)
SECTION 1 - SPECIFICATIONS Figure 1-2. Lubrication Chart. (Sheet 1 of 2) – JLG Lift – 3120240... -
Page 15: Lubrication Chart. (Sheet 2 Of 2)
NOTE: Lubrication intervals are based on machine operations under normal conditions. for machines used in multi shift opera- tions and /or exposed to hostile environments or conditions, lubrication frequencies must be increased accordingly. Figure 1-2. Lubrication Chart. (Sheet 2 of 2) 3120240 – JLG Lift –... -
Page 16: Pressure Settings
Lift Down - 1200 psi. (82.74 Bar). Swing - 1100 psi. (75.85 Bar). Accessory. Main Relief - 3200 psi. (220.64 Bar). Sequence Cartridge - 450 psi. (31.03 Bar). Pressure Reducing - 600 psi. (41.37 Bar). – JLG Lift – 3120240... -
Page 17: Cylinder Specifications
(4WD) Telescope 3.00 174.18 2.00 (2 Section Boom) Telescope 3.00 110.31 2.00 (3 Section Boom) Steer (2WD) 3.00 8.06 1.25 Steer (4WD) 3.00 9.81 1.50 Extend-A-Reach Lift 3.00 12.687 2.00 Slave 3.50 7.25 1.75 3120240 – JLG Lift –... -
Page 18: Major Components Weights
In addition, the last five digits of the serial number are stamped on top of the fly and base end of the boom and on the left side of the turntable. – JLG Lift – 3120240 1-10... -
Page 19: Serial Number Locations
SECTION 1 - SPECIFICATIONS Figure 1-3. Serial Number Locations. 3120240 – JLG Lift – 1-11... - Page 20 SECTION 1 - SPECIFICATIONS intentional blank page – JLG Lift – 3120240 1-12...
-
Page 21: Section 2 - Procedures
3. If bearing is found to be serviceable, apply a light order to function properly. coat of oil and wrap it in clean (waxed) paper. Do not 3120240 – JLG Lift –... -
Page 22: Lubrication Information
NOTE: Metal particles may appear in the oil or filters of new the specified intervals. When recommended lubricants are machines due to the wear-in of meshing compo- not available, consult your local supplier for an equivalent that meets or exceeds the specifications listed. nents. – JLG Lift – 3120240... -
Page 23: Cylinders - Theory Of Operation
Lubrication Chart. 5. Refer to Table 1-1 for recommendations for viscosity ranges. CYLINDERS - THEORY OF OPERATION. 6. JLG recommends Mobilfluid 424 hydraulic oil, which has an SAE viscosity of 10W-30 and a viscosity index of 152. Systems Incorporating Double Acting... -
Page 24: Boom Chains. (See Figure 2-1)
The load drop check prevents any drop of a suspended JLG Industries, Inc. requires a complete boom disassem- load before upward movement. bly, per instructions outlined in the 2-11 boom disassem- b ly, ever y tw o year s. -
Page 25: Inspection Procedures
NENTS. DAMAGE AND/OR BREAKAGE OF THESE ITEMS COULD THE BOOM ASSEMBLY AND COULD CAUSE SERIOUS INJURY OR RESULT IN UNCONTROLLED EXTENSION OR RETRACTION OF DEATH TO PERSONNEL OPERATING THE JLG BOOM LIFT. Figure 2-1. Typical Three Section Boom Assembly. Inspection Procedures. -
Page 26: Wear Pads
Fatigue and ultimate strength failures on JLG Lifts are incurred as a result of severe abuse as design specs are well within the rated lifting capacity of these chains. -
Page 27: Cylinder Checking Procedure
If leakage continues at a rate of 4. If no repairs are necessary or when repairs have 6-8 drops per minute or more, cylinder repairs must been made, carefully reconnect hydraulic hoses to be made. the appropriate ports. 3120240 – JLG Lift –... - Page 28 SECTION 2 - PROCEDURES Figure 2-2. Boom Positioning and Support, Cylinder Repair. – JLG Lift – 3120240...
-
Page 29: Cylinder Repair
EXTREME CARE SHOULD BE TAKEN WHEN REMOVING THE CYL- and run cylinder through one complete cycle to INDER ROD, HEAD, AND PISTON. AVOID PULLING THE ROD OFF- check for leaks. CENTER, WHICH COULD CAUSE DAMAGE TO THE PISTON AND CYLINDER BARREL SURFACES. 3120240 – JLG Lift –... -
Page 30: Cleaning And Inspection
Dress applicable surfaces as nec- NOTE: Prior to cylinder assembly, ensure that the proper essary. cylinder seal kit is used. See your JLG Parts Manual. 8. Inspect cylinder head inside diameter for scoring or Apply a light film of hydraulic oil to all components other damage and for ovality and tapering. - Page 31 (See air to atmosphere. Retighten the bleeder port plug. Table 2-2 for Torque Specifications). Disconnect the hydraulic power source and remove 9. Remove the cylinder rod from the holding fixture. plug from retract port. 3120240 – JLG Lift – 2-11...
-
Page 32: Cylinder Removal And Installation
8. Remove the cap screws securing the trunnion pins from each side of the boom. 9. Using a suitable slide hammer, remove the trunnion pins attaching the telescope cylinder to the mid boom. – JLG Lift – 3120240 2-12... - Page 33 40 ft. lbs. (2.76 Bar). See wheel, or rod end, of the cylinder and install the cyl- Section 2-6 Boom Chains for correct torquing proce- inder into the boom assembly. dure. 3120240 – JLG Lift – 2-13...
-
Page 34: Boom Maintenance
1. Remove hydraulic lines, electrical cables, carrier tube, power track from right side of boom assembly. NOTE: Step (2) applies to 3 Section Boom Only. 2.11 BOOM MAINTENANCE. 2. Remove the telescope cylinder, extension chain Removal. assembly – JLG Lift – 3120240 2-14... - Page 35 21. Remove the bolts, washers and bar from the trun- NOTE: Steps 10, thru 15 apply to 3 Section Boom Only. nion pins which secure the cylinder base to the 3120240 – JLG Lift – 2-15...
- Page 36 Replace bearings as necessary, ensuring they are installed flush with sheave surface. NOTE: Step 2 applies to 2 Section Boom Only. – JLG Lift – 3120240 2-16...
- Page 37 Place the chain block weldment in position at sheave groove throughout installation). the aft end of the fly section; secure the weldment by installing the bolts and washers. NOTE: Step 22 apply to 2 Section Boom Only. 3120240 – JLG Lift – 2-17...
- Page 38 Place clevis bolt on bottom plate and place top or install all clamping or securing apparatus to plate onto clevis assembly. Secure clevis bolt with clevis pins, washers and new cotter pins. the hoses or cables, as necessary. – JLG Lift – 3120240 2-18...
-
Page 39: Tilt Alarm Switch
SWITCH ADJUSTMENT PROCEDURE. Adjust switch to trip when boom reaches 0 degrees +0 1. Park the machine on a flat, level surface. Ensure machine is level and tires are filled to rated pressure. degrees /-3 degrees. 3120240 – JLG Lift – 2-19... -
Page 40: Governor Checks And Addco Adjustment, Ford
Set idle speed contact high engine limit switch at 2400 RPM. Shut at 1000 RPM using idle adjustment screw on carbu- off all switches and controllers. Reconnect propor- retor. Shut off engine. tional dump valve wire. – JLG Lift – 3120240 2-20... -
Page 41: Throttle Checks And Precision Governor Adjustments, Addco (See Figure 2-6.)
To accomplish this the throttle rod be set richer or leaner, or the amount of putoff may must first be disconnected. need to be varied somewhat. 3120240 – JLG Lift – 2-21... -
Page 42: Electric Governor And Adjustments - Ford Engines
Actuator on its mounting plate so that the 8. With engine speed switch set to LOW ENGINE, desired direction of rotation is on the desired side to when footswitch is depressed engine should imme- match the fuel system direction of travel. – JLG Lift – 3120240 2-22... - Page 43 Needle bearings on the butterfly shaft are available on many industrial carburetors to deal with this problem. Any tendency on the butterfly stick must be corrected. 3120240 – JLG Lift – 2-23...
- Page 44 5000 RPM) shut the engine off. The ideal gain setting will provide a 4 Pin Connector compromise between quick response and good stability. Pin: This will usually show up as 1 to 3 engine pulsation’s – JLG Lift – 3120240 2-24...
- Page 45 RPMS before adjusting the governor. On the 800 series, this should be 1000 RPMS. Do not set the RPMS above 1100 RPMS as this will cause engine shut down problems that will be similar to dieseling 3120240 – JLG Lift – 2-25...
- Page 46 SECTION 2 - PROCEDURES – JLG Lift – 3120240 2-26...
- Page 47 The High 5. Carefully adjust Gain. You are looking for the best Engine speed must be set before setting the over- compromise between quick response and good sta- speed. 3120240 – JLG Lift – 2-27...
-
Page 48: Troubleshooting
Governor is unable to move fuel system freely with the engine running. You should see 5 - 30 (not enough Actuator force available). If Gover- VDC. nor doesn’t move fuel system to on far enough – JLG Lift – 3120240 2-28... -
Page 49: Throttle Checks And Adjustments - Deutz F2L511 Engine. (See Figure 2-8.)
Automatic Choke Adjustment Procedure or operate a bang-bang function. Just activate foot- (For all JLG 1.IL and 2.3L Ford carbureted engines) switch to get low engine. 3120240 – JLG Lift –... - Page 50 SECTION 2 - PROCEDURES Figure 2-6. Precision Governor Adjustment, Ford. (Sheet 1 of 2). – JLG Lift – 3120240 2-30...
- Page 51 SECTION 2 - PROCEDURES Figure 2-7. Precision governor Adjustment, Ford. (Sheet 2 of 2) 3120240 – JLG Lift – 2-31...
- Page 52 SECTION 2 - PROCEDURES Figure 2-8. Addco Actuator Adjustments, F2L511. – JLG Lift – 3120240 2-32...
-
Page 53: Throttle Checks And Adjustments Wisconsin Engine. (See Figure 2-9.)
Activate footswitch. Turn on HIGH ENGINE switch. Hold drive controller in full drive position. Adjust slide pin to contact high engine limit switch at 2400 RPM. Shut off all switches and controllers. Recon- nect proportional dump valve wire. 3120240 – JLG Lift – 2-33... - Page 54 SECTION 2 - PROCEDURES Figure 2-9. Addco Actuator Adjustments, VG4D. – JLG Lift – 3120240 2-34...
-
Page 55: Throttle Checks And Adjustments - Deutz F3L912 Engine. (See Figure 2-10.)
Just activate foot- or operate a bang-bang function. Just activate foot- switch to get low engine. switch to get low engine. 3120240 – JLG Lift – 2-35... - Page 56 SECTION 2 - PROCEDURES Figure 2-10. Addco Actuator Adjustments, F3L912. – JLG Lift – 3120240 2-36...
- Page 57 SECTION 2 - PROCEDURES Figure 2-11. Addco Actuator Adjustments, F3L1011. 3120240 – JLG Lift – 2-37...
-
Page 58: Pressure Setting Procedures
To Present are shown in Figure 2-28,and 2-29. Valve are shown in Figure 2-18, 2-19, 2-20, h. Extend - A - Reach Valve Pressure and Speed and2-21. Settings Model 40H+6 are shown in Figure 2-30. – JLG Lift – 3120240 2-38... - Page 59 SECTION 2 - PROCEDURES Figure 2-12. Racine Proportional Valve Pressure Setting.(Machines Built Prior To Mid 1987) (Sheet 1 of 2) 3120240 – JLG Lift – 2-39...
- Page 60 SECTION 2 - PROCEDURES Figure 2-13. Racine Proportional Valve Setting.(Machines Built Prior To Mid 1967) (Sheet 2 of 2) – JLG Lift – 3120240 2-40...
- Page 61 SECTION 2 - PROCEDURES Figure 2-14. Vickers Proportional Valve Pressure Setting, Machines Built To Present (Sheet 1 of 4) Updated 9/15/00 3120240 – JLG Lift – 2-41...
- Page 62 SECTION 2 - PROCEDURES Figure 2-15. Vickers Proportional Valve Pressure Setting, Machines Built To Present. (Sheet2 of 4) Updated 9/15/00 – JLG Lift – 3120240 2-42...
- Page 63 SECTION 2 - PROCEDURES Figure 2-16. Vickers Proportional Valve Pressure Setting, Machines Built To Present. (Sheet 3 Of 4) 3120240 – JLG Lift – 2-43...
- Page 64 SECTION 2 - PROCEDURES Figure 2-17. Vickers Proportional Valve Pressure Setting, Machines Built To Present. (Sheet 4 of 4) – JLG Lift – 3120240 2-44...
- Page 65 SECTION 2 - PROCEDURES Figure 2-18. Vickers Proportional Valve Pressure Setting, Machines Built Prior To 1989 With Accessory Valve. (Sheet 1 of 4). 3120240 – JLG Lift – 2-45...
- Page 66 SECTION 2 - PROCEDURES Figure 2-19. Vickers Proportional Valve Pressure Setting, Machines Built Prior To 1989 With Accessory Valve. (Sheet 2 of 4) – JLG Lift – 3120240 2-46...
- Page 67 SECTION 2 - PROCEDURES Figure 2-20. Vickers Proportional Valve Pressure Setting, Machines Built Prior To 1989 With Accessory Valve. (Sheet 3 Of 4) 3120240 – JLG Lift – 2-47...
- Page 68 SECTION 2 - PROCEDURES Figure 2-21. Vickers Proportional Valve Pressure Setting, Machines Built Prior To 1989 With Accessary Valve. (Sheet 4 Of 4) – JLG Lift – 3120240 2-48...
- Page 69 SECTION 2 - PROCEDURES Figure 2-22. Solenoid Valve Pressure Settings. (Machines Built Prior To 1992 With Steering Wheel) 3120240 – JLG Lift – 2-49...
- Page 70 SECTION 2 - PROCEDURES Figure 2-23. Pressure And Flow Settings (Machines Built Prior To May 1992 With Steering Wheel). – JLG Lift – 3120240 2-50...
-
Page 71: Vickers All Hydraulic Machines Pressure Settings (Sheet 2 Of 4)
SECTION 2 - PROCEDURES Figure 2-24. Vickers All Hydraulic Machines Pressure Settings (Sheet 1 of 4). 3120240 – JLG Lift – 2-51... - Page 72 SECTION 2 - PROCEDURES Figure 2-25. Vickers All Hydraulic Machines Pressure Settings (Sheet 2 of 4). – JLG Lift – 3120240 2-52...
- Page 73 SECTION 2 - PROCEDURES Figure 2-26. Vickers All Hydraulic Machines Pressure Settings (Sheet 3 of 4). 3120240 – JLG Lift – 2-53...
- Page 74 SECTION 2 - PROCEDURES Figure 2-27. Vickers All Hydraulic Machines Pressure Settings (Sheet 4 of 4). – JLG Lift – 3120240 2-54...
-
Page 75: Solenoid Valve Pressure Settings, Machines Built Before 1995. (Sheet 1 Of 2)
SECTION 2 - PROCEDURES Figure 2-28. Solenoid Valve Pressure Settings, Machines Built Before 1995. (Sheet 1 of 2) 3120240 – JLG Lift – 2-55... -
Page 76: Solenoid Valve Pressure Settings, Machines Built From 1995 To Present. (Sheet 2 Of 2)
SECTION 2 - PROCEDURES Figure 2-29. Solenoid Valve Pressure Settings, Machines Built from 1995 To Present. (Sheet 2 of 2) – JLG Lift – 3120240 2-56... -
Page 77: Extend-A-Reach Valve Pressure And Speed Settings Model 40+6
SECTION 2 - PROCEDURES Figure 2-30. Extend-A-Reach Valve Pressure and Speed Settings Model 40+6. 3120240 – JLG Lift – 2-57... -
Page 78: Racine Proportional Air Gap Adjustment
31, use a depth mike or other measuring instru- ment to determine the distance from the end of Figure 2-31. Racine Proportional Air Gap Adjustment, Machines Built Prior To Mid 1987. – JLG Lift – 3120240 2-58... -
Page 79: Swing Bearing
NOTE: This check is designed to replace the existing bear- a. Fully extend boom at horizontal. ing bolt torque checks on JLG Lifts in service. This b. At the position indicated on "b" of Figure 2-32, try check must be performed after the first 50 hours of to insert the.0015”... -
Page 80: Wear Tolerance
Attach an adequate support sling to the boom and draw all slack from sling. Prop or block the boom if feasible. c. From underside of the machine frame, remove bolts and lockwashers which attach – JLG Lift – 3120240 2-60... -
Page 81: Swing Bearing Tolerance Measuring Point
Ensure that all turntable and bearing attachment opposed bolts or clamps to secure the bearing holes are aligned, and install four diametrically to the frame. Tighten the bolts or clamps evenly opposed clamps or bolts and nuts to secure the 3120240 – JLG Lift – 2-61... -
Page 82: Swing Bearing Torquing Sequence
STRUCTURAL LINK BETWEEN THE FRAME AND TURNTABLE, IT IS IMPERATIVE THAT SUCH REPLACEMENT HARDWARE MEETS 1. Outer Race - 80 ft. lbs. (109 NM) wet. JLG SPECIFICATIONS. USE OF GENUINE JLG HARDWARE IS HIGHLY RECOMMENDED. 2. Inner Race - 170 ft. lbs. (231 NM) wet. -
Page 83: Torque Hub, 2W/D. (See Figure 2-36.)
Thrust washer may stick to bottom of carrier. 7. Remove retaining ring 12 from spindle 2 and lift hub from spindle. EYE PROTECTION SHOULD BE WORN DURING RETAINING RING REMOVAL. 8. Remove inside bearing cone 10 and bearing shim 3120240 – JLG Lift – 2-63... - Page 84 SECTION 2 - PROCEDURES Figure 2-36. Torque Hub Assembly, 2/WD. – JLG Lift – 3120240 2-64...
- Page 85 Place sixteen needle rollers into cluster gear bearing cup 9. bore. j. Place spacer into opposite side of cluster gear 6. Place bearing shim 11 over end of spindle and and against needle rollers. against bearing cone. 3120240 – JLG Lift – 2-65...
-
Page 86: Torque Hub 4Wd. (See Figure 2-37.)
20. Pace cover assembly over ring gear with oil level 13. Remove bearing cone 6 from hub 7. check plug in cover located approximately 90 degrees from oil fill plug in hub. 14. Remove hub 7 from spindle/brake 1. – JLG Lift – 3120240 2-66... - Page 87 Dress applicable surfaces or replace compo- nents as necessary. 9. Inspect cover for cracks or other damage, and o- ring sealing area for burrs or sharp edges. Dress applicable surfaces or replace cover as necessary. 3120240 – JLG Lift – 2-67...
-
Page 88: Torque Hub 4/Wd
SECTION 2 - PROCEDURES Figure 2-37. Torque Hub 4/WD. – JLG Lift – 3120240 2-68... - Page 89 Use a flat object to ensure that ter gear bore. seal is pressed evenly and is flush with hub face. i. Place sixteen needle rollers into cluster gear bore. 4. Lower hub onto spindle 1 with large open end up. 3120240 – JLG Lift – 2-69...
- Page 90 1/8 in. from its inside edge. Install thrust waster 39 into counterbore 15. 23. Place o-ring 23 into cover assembly counterbore. Use petroleum jelly or grease to hold o-ring in place. – JLG Lift – 3120240 2-70...
-
Page 91: Swing Drive Brake, Mico (Machines Built Prior To May 1992). (See Figure 2-39.)
1500 POUNDS (681 KG). THE FOUR CAPSCREWS SHOULD BE from housing. LOOSENED EVENLY TO RELIEVE THIS FORCE. IF A HYDRAULIC PRESS IS AVAILABLE (3000 LBS (1362 KG) MINIMUM), THE Figure 2-39. Swing Brake Assembly - Mico (Machines Built Prior To May 1992). 3120240 – JLG Lift – 2-71... -
Page 92: Drive Brake, Mico. (Machines Built Prior To May 1992)(See Figure 2-40.)
COVER CAN BE HELD IN POSITION WHILE REMOVING THE CAP- pipe plug 3, and bleeder screw 13 in end cover. SCREWS AND LOCKWASHERS. 2. Tap cover with a soft mallet in order to dislodge bearing 32 from cover. – JLG Lift – 3120240 2-72... -
Page 93: Drive Brake Assembly - Mico (Machines Built Prior To May 1992)
DISC 15,19 AND FRICTION DISCS 17 SHOULD REMAIN DRY DUR- 2. Install new bearing 48 on male end of shaft 39 and ING INSTALLATION. NO OIL RESIDUE SHOULD BE ALLOWED TO press until it shoulders on shaft. CONTAMINATE DISC SURFACES. 3120240 – JLG Lift – 2-73... - Page 94 Torque capscrews to 55 ft. lbs. (75 NM). NOTE: If available, a hydraulic press will simplify installation of end cover on housing. Clamp cover in position while tightening capscrews. – JLG Lift – 3120240 2-74...
-
Page 95: Swing Drive Brake, Ausco (Machines Built Prior To May 1992). (See Figure 2-41.)
3 when pressing shaft into bearing. 7. Install gasket 2. Align properly. After installing all the remaining internal components of the brake, install bearing 18. Properly support the shaft when press- ing the bearing onto shaft. 3120240 – JLG Lift – 2-75... -
Page 96: Swing Brake Assembly - Ausco (Machines Built Prior To May 1992)
SECTION 2 - PROCEDURES Figure 2-41. Swing Brake Assembly - Ausco (Machines Built Prior to May 1992). – JLG Lift – 3120240 2-76... -
Page 97: Drive Brake, Ausco. (Machines Built Prior To May 1992) (See Figure 2-43.)
6. Install bolts 23. Tighten sequentially one turn at a grooves. Back-up rings will be damaged and should time, until power plate 20 is properly seated. Torque not be removed if replacement is not planned. to 50-60 ft. lbs. (68-81 NM). 3120240 – JLG Lift – 2-77... -
Page 98: Drive Brake, (Machines Built Prior To May 1992)
SECTION 2 - PROCEDURES Figure 2-42. Drive Brake, (machines Built Prior to May 1992). – JLG Lift – 3120240 2-78... -
Page 99: Drive Brake, Mico. (Machines Built From May 1992 To S/N 33476) (See Figure 2-44.)
NOTE: Bearings may be re-used if, after thorough inspec- exceed 2000 psi (137 Bar) unless two additional tion, they are found to be in good condition. bolts are used for supplemental clamping. 3120240 – JLG Lift – 2-79... -
Page 100: Drive Brake, Mico. (Machines Built From May 1992 To Machine S/N 33476)
SECTION 2 - PROCEDURES Figure 2-43. Drive Brake, Mico. (Machines Built From May 1992 To Machine S/N 33476) – JLG Lift – 3120240 2-80... -
Page 101: Swing Brake, Mico. (Machines Built From May 1992 To S/N 33476) (See Figure 2-45.)
14. If hydrostatic bench testing is performed on the tion, they are found to be in good condition. brake assembly, release pressure should not exceed 2000 psi (137 Bar) unless two additional Assembly. bolts are used for supplemental clamping. 3120240 – JLG Lift – 2-81... - Page 102 SECTION 2 - PROCEDURES Figure 2-44. Swing Brake, Mico. (Machines Built From May 1992 To Machine S/N 33476) – JLG Lift – 3120240 2-82...
-
Page 103: Drive Brake, Mico. (Machines Built From S/N 33476 To Present) (See Figure 2-46.)
NOTE: Bearings may be re-used if, after thorough inspec- exceed 2000 psi (137 Bar) unless two additional tion, they are found to be in good condition. bolts are used for supplemental clamping. 3120240 – JLG Lift – 2-83... - Page 104 SECTION 2 - PROCEDURES Figure 2-45. Drive Brake, Mico. (Machines Built From S/N 33476 To Present) – JLG Lift – 3120240 2-84...
-
Page 105: Swing Brake, Mico.(Machines Built From S/N 33476 To Present) (See Figure 2-46.)
NOTE: Bearings may be re-used if, after thorough inspec- exceed 2000 psi (137 Bar) unless two additional tion, they are found to be in good condition. bolts are used for supplemental clamping. 3120240 – JLG Lift – 2-85... - Page 106 SECTION 2 - PROCEDURES Figure 2-46. Swing Brake, Mico. (Machines Built From S/N 33476 to Present) – JLG Lift – 3120240 2-86...
-
Page 107: Controllers
9. Use suitable containers to retain any residual both bleeders on the lockout cylinder of the elevated hydraulic fluid, place containers under each lockout wheel purging any air. cylinder. 3120240 – JLG Lift – 2-87... -
Page 108: Oscillating Axle Lockout Test
4. Place DRIVE control lever to FORWARD position any further operation. and carefully drive machine up ascension ramp until left front wheel is on top of block. Figure 2-47. Basket Rotator Brake. – JLG Lift – 3120240 2-88... -
Page 109: Basket Rotator Brake. (See Figure 2-48.)
THE HAYES PUMP COUPLING, IT IS NECESSARY TO LUBRICATE THE SPLINES OF THE COUPLING ANY TIME THE COUPLING IS DISASSEMBLED OR REPLACED. LUBRICATE THE SPLINES WITH TEXACO CODE 1912 PUMP COUPLING GREASE ONLY. NO OTHER LUBRICANT IS RECOMMENDED. 3120240 – JLG Lift – 2-89... -
Page 110: Preventive Maintenance And Inspection Schedule
Industries. 14. Check for condition of element; replace as neces- sary. JLG IN DUSTR IE S RE QUIRES TH AT A COMPLE TE ANN UAL 15. Check for proper inflation. INSP ECTION BE PERFORME D IN ACCORDANCE WITH THE 16. Clean or replace suction screen. -
Page 111: Preventive Maintenance And Inspection Schedule
1, 5, 6, 13 Steer Components 4, 6 Lockout Cell. (If Equipped) *** 5, 13 Front Axle Pin (If Equipped) Hydraulic Hoses Placards and Decals 1, 2 Wheel Bearings ** Swing Bearing/Pinion Gear 9, 12 3120240 – JLG Lift – 2-91... -
Page 112: Capacity Indicator
AN ACCURATE READING OF THE CAPACITY INDICATOR GAGE. Installation Procedure 1. Clean and dry fly boom top surface before installing the tape. 2. install tape on center of fly boom to dimensions shown in table. Figure 2-49. Capacity Indicator Dial – JLG Lift – 3120240 2-92... -
Page 113: Section 3. Troubleshooting
It should be noted that there is no substitute for a thor- ough knowledge of the equipment and related systems. 3120240 – JLG Lift –... - Page 114 Clean, repair, or replace line or fitting. Slave cylinder not functioning properly. Repair or replace cylinder. Electrical failure. See proper wiring diagram. Orifice plugged. Clean orifice. Platform Will Not Adjust “Down” To Level. See: Platform will not adjust “up” to level. – JLG Lift – 3120240...
-
Page 115: Boom Assembly Troubleshooting
Binding lift cylinder or boom pivot pin. Repair or replace cylinder or pin. Boom will not lower. See: Boom will not raise. Pressure relief valve not functioning properly. Re-adjust or replace valve. Holding valve not functioning properly. Re-adjust or replace valve. 3120240 – JLG Lift –... - Page 116 Repair or replace valve. Restricted or broken supply line on valve bank or Clean or replace line. hydraulic pump. Telescope cylinder not functioning properly. Repair or replace cylinder. Hydraulic pump not functioning properly. Repair or replace pump. – JLG Lift – 3120240...
- Page 117 (s) as required. Sheared shaft on swing motor/brake. Repair or replace motor/brake. Pressure reducing valve in swing circuit malfunc- Repair or replace pressure reducing valve. tioning. No electric power to valve. See proper wiring diagram. 3120240 – JLG Lift –...
- Page 118 Repair or replace swing control lever. Worn or broken teeth on swing gear or swing motor Replace gear(s) as required. pinion. Swing brake not functioning properly. Repair or replace swing brake. Restrictor valves plugged. Clean or replace restrictor valve. – JLG Lift – 3120240...
-
Page 119: Turntable Assembly Troubleshooting
Clogged fuel filter. Replace fuel filter. Restricted or broken fuel line. Clean or replace fuel line. Automatic choke out of adjustment. Adjust choke. Battery discharged. Charge battery, replace if defective. Fuel pump not working. Replace fuel pump. 3120240 – JLG Lift –... - Page 120 Engine improperly timed. Time engine. Dirty fuel filter (diesel). Replace filter. Fuel line pinched (diesel). Replace fuel line. Throttle governor not working properly. Repair or replace governor. Engine surges. Governor not adjusted properly. Correctly adjust governor. – JLG Lift – 3120240...
-
Page 121: Chassis Assembly Troubleshooting
Oscillating Axle will not hold properly. Air in oscillating axle hydraulic system. See bleeding procedure in section 2. Cam Valve Stuck or leaking. Repair or replace cam valve. Lockout cylinder leaking. Repair or replace cylinder. 3120240 – JLG Lift –... - Page 122 Air in wheel brake circuit. Bleed circuit. determine and correct cause. Damaged wiring on control switch. Repair or replace wiring. Control switch not functioning properly. Replace switch. Determine cause and repair or replace. Brake(s) not releasing. – JLG Lift – 3120240 3-10...
- Page 123 Check for correct spring and shims in end cap. command is removed. Sticking spool due to contamination. Remove end cap and check spool freedom. Ramp set too high in controller. Adjust controller. Sticking control handle. Repair or replace controller. 3120240 – JLG Lift – 3-11...
- Page 124 Repair or replace linkage as required. Hydraulic pump not functioning properly. Repair or replace pump. Steer cylinder not functioning properly. Repair or replace cylinder. Spindle pins tight or need lubrication. Repair or lubricate spindles. – JLG Lift – 3120240 3-12...
- Page 125 Reset, repair or replace valves as required. properly. Steer linkages loose/spindle bushings worn. Tighten linkage/replace bushing. Steer wheel toe-in not set properly. Adjust toe-in for 1/4 in. (6.35 mm) overall. Swivel coupling leaking. Repair or replace swivel coupling. 3120240 – JLG Lift – 3-13...
-
Page 126: Hydraulic Assembly Troubleshooting
Clean, repair or replace line. Air entering system through broken line or fitting. Repair or replace line or fitting. Broken pump drive shaft/pump coupling. Repair or replace pump/pump coupling. Splines worn in drive disc. Replace drive disc. – JLG Lift – 3120240 3-14... - Page 127 Restricted or broken hydraulic line or fitting. Clean, repair, or replace line or fitting. Pump motor solenoid not functioning properly. Replace solenoid. Pump motor not functioning properly. Repair or replace motor. Low pilot pressure. Reset valve as required. 3120240 – JLG Lift – 3-15...
-
Page 128: Electrical Assembly Troubleshooting
Faulty starter switch. Replace switch. INSTRUMENTS AND INDICATORS. Travel warning horn inoperative. Circuit breaker open. Determine and correct cause; reset circuit breaker. Damaged wiring in horn circuit. Repair or replace wiring. Damaged horn. Replace horn. – JLG Lift – 3120240 3-16... - Page 129 Adjust limit switch to activate (close) with boom at horizontal and below. High engine solenoid malfunctioning. Repair or replace solenoid valve. Drive pressure switch malfunctioning. Replace pressure switch. Electrical malfunctioning. See proper wiring diagram. Defective engine governor. Repair or replace governor. 3120240 – JLG Lift – 3-17...
- Page 130 Two speed drive solenoid valve malfunctioning. Repair or replace solenoid valve. Drive pressure switch malfunctioning. Replace pressure switch. Valve orifice plugged. Unplug valve orifice. Defective drive motor. Repair or replace motor. Grade too steep. Check tractability of machine. – JLG Lift – 3120240 3-18...
- Page 131 SECTION 3 - TROUBLESHOOTING INTENTIONAL BLANK PAGE 3120240 – JLG Lift – 3-19...
-
Page 132: Wiring Diagram - Dual Fuel (Ford Or Wisconsin)
SECTION 3 - TROUBLESHOOTING Figure 3-1. Wiring Diagram - Dual Fuel (Ford Or Wisconsin) – JLG Lift – 3120240 3-20... -
Page 133: Wiring Diagram - 110V Generator (Ford)
SECTION 3 - TROUBLESHOOTING Figure 3-2. Wiring Diagram - 110v Generator (Ford). 3120240 – JLG Lift – 3-21... -
Page 134: Wiring Diagram - 110V Generator (Deutz)
SECTION 3 - TROUBLESHOOTING Figure 3-3. Wiring Diagram - 110v Generator (Deutz). – JLG Lift – 3120240 3-22... -
Page 135: Wiring Diagram - Platform Console (W/All Hydraulic Controls)
SECTION 3 - TROUBLESHOOTING Figure 3-4. Wiring Diagram - Platform Console (W/all Hydraulic Controls). 3120240 – JLG Lift – 3-23... -
Page 136: Wiring Diagram - Platform Console Standard (Sheet 1 Of 2)
SECTION 3 - TROUBLESHOOTING Figure 3-5. Wiring Diagram - Platform Console Standard (Sheet 1 Of 2). – JLG Lift – 3120240 3-24... -
Page 137: Wiring Diagram - Platform Console Standard (Sheet 2 Of 2)
SECTION 3 - TROUBLESHOOTING Figure 3-6. Wiring Diagram - Platform Console Standard (Sheet 2 Of 2). 3120240 – JLG Lift – 3-25... -
Page 138: Wiring Diagram - Standard (Deutz F2L511/F3L912 & Wisconsin Engine W/ Standard Controls) (Sheet 1 Of 2)
SECTION 3 - TROUBLESHOOTING Figure 3-7. Wiring Diagram - Standard (Deutz F2l511/f3l912 & Wisconsin Engine W/ Standard Controls) (Sheet 1 Of 2). – JLG Lift – 3120240 3-26... -
Page 139: Engine W/ Standard Controls) (Sheet 2 Of 2)
SECTION 3 - TROUBLESHOOTING Figure 3-8. Wiring Diagram - Standard (Deutz F2l4511/f3l912 & Wisconsin Engine W/ Standard Controls) (Sheet 2 Of 2). 3120240 – JLG Lift – 3-27... -
Page 140: Engine W/ Hydraulic Controls) (Sheet 1 Of 2)
SECTION 3 - TROUBLESHOOTING Figure 3-9. Wiring Diagram - Standard (Deutz F2l511/f3l912 & Engine W/ Hydraulic Controls) (Sheet 1 Of 2). – JLG Lift – 3120240 3-28... -
Page 141: Engine W/ Hydraulic Controls) (Sheet 2 Of 2)
SECTION 3 - TROUBLESHOOTING Figure 3-10. Wiring Diagram - Standard (Deutz F2l511/f3l912 & Wisconsin Engine W/ Hydraulic Controls) (Sheet 2 Of 2). 3120240 – JLG Lift – 3-29... -
Page 142: Wiring Diagram - Standard (Deutz F3L1011 Engine W/ Standard Controls) (Sheet 1 Of 2)
SECTION 3 - TROUBLESHOOTING Figure 3-11. Wiring Diagram - Standard (Deutz F3l1011 Engine W/ Standard Controls) (Sheet 1 Of 2). – JLG Lift – 3120240 3-30... -
Page 143: Wiring Diagram - Standard (Deutz F3L1011 Engine W/ Standard Controls) (Sheet 2 Of 2)
SECTION 3 - TROUBLESHOOTING Figure 3-12. Wiring Diagram - Standard (Deutz F3l1011 Engine W/ Standard Controls) (Sheet 2 Of 2). 3120240 – JLG Lift – 3-31... -
Page 144: Wiring Diagram - Standard (Deutz F3L1011 Engine W/ Hydraulic Controls) (Sheet 1 Of 2)
SECTION 3 - TROUBLESHOOTING Figure 3-13. Wiring Diagram - Standard (Deutz F3l1011 Engine W/ Hydraulic Controls) (Sheet 1 Of 2). – JLG Lift – 3120240 3-32... -
Page 145: Wiring Diagram - Standard (Deutz F3L1011 Engine W/ Hydraulic Controls) (Sheet 2 Of 2)
SECTION 3 - TROUBLESHOOTING Figure 3-14. Wiring Diagram - Standard (Deutz F3l1011 Engine W/ Hydraulic Controls) (Sheet 2 Of 2). 3120240 – JLG Lift – 3-33... -
Page 146: Wiring Diagram - Standard (Ford Lrg425 Dis Engine W/ Standard Controls) (Sheet 1 Of 2)
SECTION 3 - TROUBLESHOOTING Figure 3-15. Wiring Diagram - Standard (Ford Lrg425 Dis Engine W/ Standard Controls) (Sheet 1 Of 2). Updated 10/98 – JLG Lift – 3120240 3-34... -
Page 147: Wiring Diagram - Standard (Ford Lrg425 Dis Engine W/ Standard Controls) (Sheet 2 Of 2)
SECTION 3 - TROUBLESHOOTING 1282459-A Figure 3-16. Wiring Diagram - Standard (Ford Lrg425 Dis Engine W/ Standard Controls) (Sheet 2 Of 2). Updated 10/98 3120240 – JLG Lift – 3-35... -
Page 148: Wiring Diagram - Standard (Ford Dis Engine W/ Hydraulic Controls) (Sheet 1 Of 2)
SECTION 3 - TROUBLESHOOTING Figure 3-17. Wiring Diagram - Standard (Ford Dis Engine W/ Hydraulic Controls) (Sheet 1 Of 2). – JLG Lift – 3120240 3-36... -
Page 149: Wiring Diagram - Standard (Ford Dis Engine W/ Hydraulic Controls) (Sheet 2 Of 2)
SECTION 3 - TROUBLESHOOTING Figure 3-18. Wiring Diagram - Standard (Ford Dis Engine W/ Hydraulic Controls) (Sheet 2 Of 2). 3120240 – JLG Lift – 3-37... - Page 150 SECTION 3 - TROUBLESHOOTING INTENTIONAL BLANK PAGE – JLG Lift – 3120240 3-38...
- Page 152 England Fax: (49) 421 693 5035 Fax: (61) 2 65 810122 Phone: (44) 870 200 7700 Fax: (44) 870 200 7711 JLG Latino Americana Ltda. JLG Europe B.V. JLG Industries (Norge AS) JLG Polska Rua Eng. Carlos Stevenson, Jupiterstraat 234 Sofeimyrveien 12 UI.