WAGNER W 140 P Training Manual
Airless
Hide thumbs
Also See for W 140 P:
- Manual (11 pages) ,
- Operating instructions manual (27 pages) ,
- Brochure & specs (22 pages)
Table of Contents
Advertisement
Advertisement
Table of Contents

Related Manuals for WAGNER W 140 P


Summary of Contents for WAGNER W 140 P
- Page 1 Wagner Product Training...
- Page 2 As with any power tool, you need to exercise a level of care to ensure user safety. Wagner products used correctly are very safe, and meet all of the necessary safety requirements. There has not been a reported case of skin injection injury in over 10 years,...
- Page 3 Safety Considerations and Recommendations – cont. 1. Before using the equipment, read and observe the safety instructions detailed in the Users Manual. 2. Make sure the electrical lead is in good working condition. 3. Spray materials emerge from the nozzle tip under high pressure. Never point the spray stream towards human beings or animals.
- Page 4 Safety Considerations and Recommendations – cont. 5. No sources of ignition are to be in the immediate area when spraying eg. open flame, cigarettes, sparks, glowing wires and hot surfaces. 6. The spray gun is not a toy. Keep out of reach of children. 7.
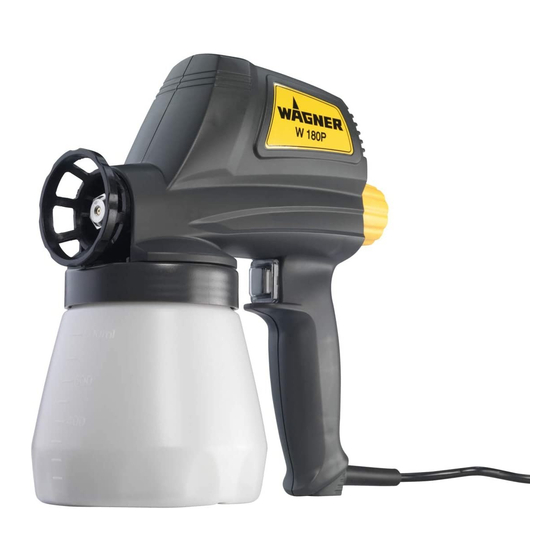
- Page 5 Power Painter Airless Sprayers W 140 P W 180 P W 400 SE...
- Page 6 Power Painter Airless Sprayers Paints & Materials Water diluted primers, water diluted paints, wood preservatives, polishes, stains, aluminium paints and cavity sealers. W400 SE also undercoats, interior wall emulsion paints and interior wall latex paints. Ideal for small to medium redecoration and renovation jobs around the...
- Page 7 Air Spray Process Paint is drawn into the gun by venturi and is a atomized by injected air. The fan can be manipulated by air introduced around the fan. Because the paint is both picked up and atomized by air the paint leaves the nozzle in form of a fine mist.
- Page 8 Airless Spray Process Paint is drawn into the gun by vacuum and is pressurised. It is forced trough a small orifice causing it to atomise. The paint is delivered to the job by pressure only, therefore there is little overspray although you do get fallout.
- Page 9 Functional Principle of Electric Hand Spray Guns The heart of the airless unit is the piston which causes atomisation by high pressure. The oscillator pushes the piston forwards. As soon as the piston spring moves the piston backwards, a vacuum is set up in the pump cylinder and this sucks in the spraying material.
- Page 10 Power Painter Introduction Power Painters let you paint quickly and smoothly. The drawing below shows the set of typical components. Refer to the selection chart for model specific components. Optional accessories may include a backpack container, additional spray tips, or a packet of Cleaner/Lubrication depending on model.
- Page 11 How it works • Power Painters utilise an airless piston pump in the head of the unit to spray paint. Airless refers to a method of spraying paint utilising high pressure to atomise paint by forcing it through a small tip (orifice) opening. •...
- Page 12 Definitions • Speed some models have more than one speed which allows the user to adjust the width of the spray. • Tip (Orifice) size depends on the material being applied. The shape of the tip determines the shape of the spray pattern. Standard pattern is round unless equipped with the optional “Wide Angle”...
- Page 13 When to use Power Sprayers Power Sprayers are classified as painting tools. They are designed to cut labor time, minimise waste, and improve the surface quality. Power Sprayer Applications include: • Roofing • Timber Fence • Casual Doors • Pergola / Gazebo •...
- Page 14 Getting started Prepare the spraying surface area and surrounding areas. The spray result depends heavily on the smoothness and cleanliness of the surface to be sprayed. The surface should be carefully prepared and kept free of dust. Ensure that you cover all areas that are not to be sprayed.
- Page 15 Prepare the spray material Paints are usually sold in a spreadable, undiluted state. The paint usually needs to be diluted for use with the spray gun. To thin the material you are using, try Paint Easy™ Paint Conditioner for water based paints. It thins the paint by adding a specially formulated material for a finer spray.
- Page 16 Handling table for viscosity...
- Page 17 Swirl Valves Spring Sealing Block Head...
- Page 18 Using the Container 1. Fill container with the material to be sprayed. 2. Place a few drops of household oil down the intake (center) and return (back) openings in the pump housing. 3. Push the suction set securely into the intake (center) opening on the bottom of the pump housing.
-
Page 19: Selecting The Proper Tip
Selecting the proper tip Your sprayer comes with a variety of spray tips depending on the model: a wide angle tip, a round tip, and a stain tip (optional). Wide angle tip The wide angle tip produces a wide pattern that can be adjusted horizontally or vertically. - Page 20 Selecting the proper tip – cont. Round tips The round tip produces a round pattern. Use a round tip if the surface you are spraying is too small for use with the wide angle tip. The round tip comes in 3 sizes. Use the size that works best for the type of material you are spraying.
- Page 21 Selecting the proper tip – cont. Stain tip The stain tip is an option included with some models. It has a specially designed opening for use with thin materials such as thin stains, sealers and waterproofers, and can be adjusted to reduce overspray. If you did not receive a stain tip and will be spraying one of these materials, the tip can be purchased at your local retailer.
- Page 22 Adjusting the spray tip 1. Make sure the spray gun is unplugged. 2. Loosen the tip by turning the tip counter clockwise. 3. Turn the adjusting arm so that it is pointing down for a horizontal pattern. 4. Turn the adjusting arm so that it is pointing to the side for a vertical pattern.
- Page 23 Regulating the spray amount The spray pattern is controlled by the flow knob on the back of the sprayer and by the thickness of the material being sprayed. Turning the flow knob counterclockwise increases the amount of material flow. Turning the flow knob clockwise decreases the amount of material flow. To adjust the pattern: 1.
-
Page 24: Adjusting The Spray Pattern
Adjusting the spray pattern A bad spray pattern will concentrate the paint in the center of the spray and go on blotchy. A good spray pattern has an even amount of material throughout the pattern in a fine spray and will go on smoothly. Always practice spraying on a piece of scrap wood or cardboard to test your spray pattern. - Page 25 How to spray - Distance Once you have achieved a good spray pattern on your test piece of wood or cardboard, it is time to begin spraying your work. The key to a good job is an even coating over the entire surface. This is done by using even strokes. Always begin spraying outside of the spray area to avoid interruptions inside the spraying area.
- Page 26 How to spray – Technique The sprayer should be triggered by turning it on and off with each stroke. This will save paint and avoid paint buildup at the end of the stroke. Do not trigger the sprayer continuously or during the middle of a stroke. This will result in an uneven spray and splotchy coverage.
- Page 27 How to spray – Technique cont. The spray gun should be worked as evenly as possible during the spray operation. Accelerating or slowing down during the spray operation can cause an uneven spray pattern, spattering or dripping. Keep the sprayer perpendicular to the surface, otherwise one end of the pattern will be thicker than the other.
- Page 28 Short term clean up Dried paints and stains act like glue and cause moving pieces to stick. Taking the time to properly clean and maintain your sprayer helps it last longer and work right every time. Short-term cleanup If you are leaving a project for a few hours or overnight: Wipe the spray tip carefully before storing for a few hours and again before returning to spray.
- Page 29 Long term clean up Long-term cleanup Cleaning the container: If you used the 940ml container: 1. Unplug the sprayer. 2. Pour the remaining material back into the original container. 3. Fill the 800 ml container half full of solvent appropriate to the type of material sprayed.
- Page 30 Long term clean up - cont. Long-term cleanup If you used the suction extension: 1. Unplug the sprayer. 2. Remove the suction set from the material container and submerge into a container of the solvent appropriate to the type of material sprayed. 3.
- Page 31 Long term clean up - cont. Long-term cleanup Cleaning the pump housing: 1. Make certain the sprayer is unplugged. 2. Turn the spray tip counterclockwise until it is removed. Be careful not to lose the swirl valve. 3. Pull out the swirl valve. 4.
- Page 32 Storage Assembling the sprayer 1. Slide the spring onto the front end of the piston. 2. Insert the piston into the back end of the pump housing. 3. Insert the pump housing assembly into the front of the sprayer. 4. Place the locking nut onto the motor housing. 5.
- Page 33 Storage - cont. Lubricating the sprayer 1. Turn the sprayer upside down while the container is off. 2. Pour a small amount of standard household oil into both the intake and return openings on the pump housing. 3. Plug in the sprayer. 4.
- Page 34 Maintenance Parts of your sprayer wear out with use and require regular replacement. They include the swirl valve, piston and spring. These parts are not covered by your sprayer warranty. More abrasive materials such as acrylic paints and stains cause these parts to wear out faster than less abrasive materials such as oil- based paints and stains, thin stains and sealers.
- Page 35 Maintenance – cont. Replacing the piston and spring The average life of a piston and spring will vary depending on the types of material being sprayed. Replace the piston if the sprayer takes longer than 2 minutes to prime when well lubricated, or if there is an excess amount of material leaking and you have tried all of the troubleshooting suggestions listed in this manual.
- Page 36 Maintenance – cont. Replacing the piston and spring Slide the spring onto the front end of the new piston. Insert the piston into the back end of the pump housing. 10. Insert the pump housing assembly into the front of the sprayer. 11.
- Page 37 • What Kind of Paint Can I Use? – The Wagner Power Painters are designed to spray a wide variety of materials. All of the Power Painters will spray semi-transparent stains, clear sealers, oil paints, many acrylic paints and other thin-bodied materials.
- Page 38 Frequently asked questions – cont. • How Do I Spray with a Power Painter? – We recommend that you practice on a piece of scrap wood or cardboard. The key to a good job is an even coating over the entire surface. This is done by using even strokes at a constant speed keeping the gun at right angles to the surface and at a distance of 25 to 30 cm.
-
Page 39: Troubleshooting
Troubleshooting Problem Cause Correction Spray gun buzzes and does not work Piston stuck Disassemble pump and clean with thinner Send spray gun to Approved Service Agent Defective drive Spray gun does not suck in No valve in pump Insert valve Suction tube loose in the conical bore Adjust suction tube Venting hole in pump housing clogged... - Page 40 Handy Hints Clean the spray gun after every use. Proper cleaning and maintenance ensures the sprayer will continue to operate correctly every time. When the job is finished empty any unused paint from the container and clean it with the appropriate thinner. For water based paints warm soapy water is best. Fill the container with appropriate thinner and spray through the gun for 20 seconds.
- Page 41 Handy Hints – cont. Replace the spring on the piston, slide the piston back into the housing and ensure the spring fits onto the housing. Slide the complete housing assembly back into the drive housing. Turn the control knob all the way anti-clockwise to relieve some of the spring tension, then screw on the locking nut being careful not to damage the thread.
- Page 42 Handy Hints – cont. To assure trouble free service from the sprayer, always remember these simple steps. Strain old paint before using. Be sure paint suction tube is tightly inserted. Thin paint properly Use the correct swirl valve and spray tip for the paint. Watch for wear of the swirl valve and spray tip.
- Page 43 Handy Hints – cont. Piston - The piston should be checked regularly for wear marks. Improper cleaning may cause scoring marks on the piston. Improper cleaning and poor paint preparation can cause the piston to seize. Do not continue to press the trigger of the gun when a low humming is heard, as this will burn out the motor.
- Page 44 Application...
- Page 45 Power Sprayer Accessories Jet Nozzle Flexible Extension Suction Set Swirl Valves...
- Page 46 Swirl Valve Swirl valves are a critical part of your spray gun and are subject to the most wear. Water based paints are abrasive and can wear a swirl valve very quickly. To tell if your swirl valve is worn, look at the sealing block – it should be clean and the edges not rounded or ‘furred’.
- Page 47 Flexible Extension Nozzle The flexible nozzle extension flexes to all sides. It is ideal for overhead work and horizontal surfaces. It should only to be used with the guard assembly and should not to be used with flat jet nozzles.
- Page 48 Suction Set A Suction System Extension is used for drawing paint directly from the paint containers. This allows a greater volume of paint to be sprayed without refill. Suction height is about 1.8m. The suction system container should not be used with paints containing solvents.
-
Page 49: Using The Suction Extension
Using the suction extension The suction extension includes a hose set, dual hose fitting, pump housing locking collar, suction set hose adapter, and a container clip. It allows you to attach the sprayer to a larger container such as 4 or 20 litres paint can or an optional backpack. - Page 50 Using the suction extension – cont. 5. Slide the intake hose (the hose with the writing on it) through the container clip. You may need to pull the hoses slightly apart. 6. Press the suction set hose adapter onto the suction set. 7.
- Page 51 Cleaner Lubricant Wagner’s cleaner lubricant is recommended for use when changing colors of paint, overnight cleaning and long term storage. For Cleaning when changing paint colors or storing overnight: Empty paint container and clean thoroughly with warm soapy water. Fill container with 1 litre of clear warm water.
- Page 52 Jet Nozzle (Engine Nozzle) The jet nozzle produces a sharp concentrated jet and is best for high pressure removal of stubborn dirt, e.g. in cleaning engines, machinery or vehicles etc.