Table of Contents
Advertisement
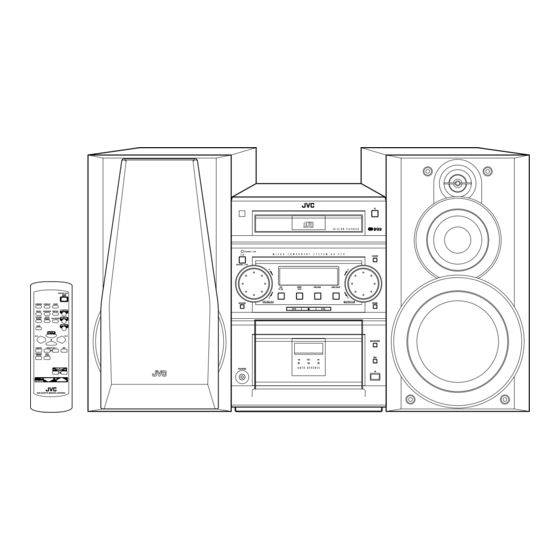
MICRO COMPONENT SYSTEM
UX-P7R
STANDBY/ON
DIMMER
DISPLAY
SLEEP
MD/AUX
PROG
RANDOM
REPEAT
SOUND
AUTO
FM/AM
MODE
PRESET
FM MODE
TAPE
CD
CD
CANCEL
MULTI KEY
SET
DISPLAY
PTY
MODE
/EON
AHB PRO
LEVEL
VOLUME
RM-SUXP7R REMOTE CONTROL
— Consists of CA-UXP7R and SP-UXP7.
STANDBY / ON
STANDBY
/
ON
AHB PRO
SOUND
PHONES
SP-UXP7
CA-UXP7R
INSTRUCTIONS
COMPACT
DIGITAL AUDIO
C D - R / R W P L A Y B A C K
M I C R O
C O M P O N E N T
S Y S T E M
U X · P 7 R
CLOCK
CD
TAPE
FM/AM
MD/AUX
/
VOLUME
TIMER
REV .MODE
REC
REC
A U T O R E V E R S E
SP-UXP7
For Customer Use:
Enter below the Model No. and Serial No.
which are located either on the rear, bot-
tom or side of the cabinet. Retain this
information for future reference.
Model No.
Serial No.
GVT0055-008A
[B]
Advertisement
Table of Contents

Related Manuals for JVC CA-UXP7R


Summary of Contents for JVC CA-UXP7R
- Page 1 MICRO COMPONENT SYSTEM UX-P7R — Consists of CA-UXP7R and SP-UXP7. STANDBY/ON DIMMER DISPLAY SLEEP MD/AUX PROG RANDOM REPEAT SOUND AUTO FM/AM MODE PRESET FM MODE TAPE CANCEL MULTI KEY DISPLAY MODE /EON AHB PRO LEVEL VOLUME RM-SUXP7R REMOTE CONTROL SP-UXP7...
- Page 2 IMPORTANT for the U.K. DO NOT cut off the mains plug from this equipment. If the plug fitted is not suitable for the power points in your home or the cable is too short to reach a power point, then obtain an appro- priate safety approved extension lead or consult your dealer.
-
Page 3: Safety Instructions
“SOME DOS AND DON’TS ON THE SAFE USE OF EQUIPMENT” This equipment has been designed and manufactured to meet international safety standards but, like any electrical equipment, care must be taken if you are to obtain the best results and safety is to be assured. Do read the operating instructions before you attempt to use the equipment. - Page 4 Introduction We would like to thank you for purchasing one of our JVC products. Before operating this unit, read this manual carefully and thoroughly to obtain the best possible performance from your unit, and retain this manual About This Manual This manual is organized as follows: •...
-
Page 5: Table Of Contents
Contents Location of the Buttons and Controls ... 3 Front Panel ... 3 Remote Control ... 5 Getting Started ... 6 Supplied Accessories ... 6 Putting the Batteries into the Remote Control ... 6 Connecting Antennas ... 6 Connecting Speakers ... 7 Connecting Other Equipment ... -
Page 6: Location Of The Buttons And Controls
Location of the Buttons and Controls Become familiar with the buttons and controls on your unit. Front Panel Front Panel STANDBY / ON STANDBY AHB PRO SOUND PHONES COMPACT DIGITAL AUDIO C D - R / R W P L A Y B A C K M I C R O C O M P O N E N T S Y S T E M... - Page 7 Display Window [ DAILY REC SLEEP ] CLOCK PRGM RANDOM See pages in the parentheses for details. Front Panel 1 Remote sensor (STANDBY/ON) button and STANDBY/ON lamp (9, 16, 21) 3 AHB (Active Hyper Bass) PRO + / – control (10) 4 SOUND button (10) 5 CD 3/8 (play/pause) button (9, 14, 19) Pressing this button also turns on the unit.
-
Page 8: Remote Control
Remote Control STANDBY/ON DIMMER DISPLAY SLEEP MD/AUX PROG RANDOM REPEAT SOUND AUTO FM/AM FM MODE MODE PRESET TAPE CANCEL MULTI KEY DISPLAY MODE /EON AHB PRO LEVEL VOLUME RM-SUXP7R REMOTE CONTROL COMPACT DIGITAL AUDIO C D - R / R W P L A Y B A C K STANDBY M I C R O C O M P O N E N T... -
Page 9: Getting Started
Getting Started Supplied Accessories Make sure that you have all the following items. The number in the parentheses indicates the quantity of the pieces supplied. • AM loop antenna (1) • FM antenna (1) • Remote control (1) • Batteries (2) •... -
Page 10: Connecting Speakers
AM (MW/LW) antenna ANTENNA AM EXT AM LOOP COAXIAL AM loop antenna (supplied) Connect the AM loop antenna to the AM LOOP terminals as illustrated. • If the AM loop antenna wire is covered with vinyl, remove the vinyl by twisting it as shown in the diagram. -
Page 11: Connecting Other Equipment
To remove the speaker grilles The speaker grilles are removed as the illustrations below. Holes To remove the speaker grille, inserting your fingers at the top of the speaker grille, pull towards you. Then pull the bottom towards you. To attach the speaker grille, put the projections of the speaker grille into the holes of the speaker. -
Page 12: Common Operations
Common Operations Turning On the Power When you press the play button — CD 3/8, TAPE 2 3, or the source selecting button — FM/AM, and MD/AUX, the unit automatically turns on and starts playback if the source is ready. To turn on the unit, press (STANDBY/ON). -
Page 13: Adjusting The Volume
Adjusting the Volume You can adjust the volume level only while the unit is turned on. The volume level can be adjusted between “VOLUME 0” and “VOLUME40.” When using the remote control, press VOLUME + to increase the VOLUME volume or press VOLUME – to decrease it. -
Page 14: Listening To Fm And Am (Mw/Lw) Broadcasts
Listening to FM and AM (MW/LW) Broadcasts Tuning in a Station Press FM/AM. The unit automatically turns on and tunes in the previously tuned station (either FM or AM — MW/LW). • Each time you press the button, the band alternates between FM and AM (MW/LW). -
Page 15: Receiving Fm Stations With Rds
Receiving FM Stations with RDS RDS (Radio Data System) allows FM stations to send an additional signal along with their regular program signals. For example, the stations send their station names, as well as information about what type of program they broadcast, such as sports or music, etc. -
Page 16: Switching To A Program Type Of Your Choice Temporarily
Switching to a Program Type of Your Choice Temporarily By receiving EON (Enhanced Other Networks) data sent by FM RDS stations, the EON function allows the unit to switch temporarily to a broadcast program of your choice (TA, NEWS, and INFO) from a different station. •... -
Page 17: Playing Back Cds (Cd/Cd-R/Cd-Rw)
Playing Back CDs (CD/CD-R/CD-RW) This unit has been designed to playback the following CDs: • CD • CD-R • CD-RW Continued use of irregular shape CDs (heart-shape, octagonal, etc.) can damage the unit. General Notes In general, you will have the best performance by keeping your CDs and the mechanism clean. -
Page 18: Programming The Playing Order Of The Tracks - Program Play
Programming the Playing Order of the Tracks — Program Play You can arrange the order in which tracks play before you start playing. You can program up to 20 tracks. Load a CD. • If the current playing source is not the CD player, press CD 3/8, then 7 before going to the next step. -
Page 19: Playing At Random - Random Play
Playing at Random — Random Play The tracks will play in no particular order when you use this mode. On the remote control ONLY: To use Random play mode, press RANDOM before or during playing. The RANDOM indicator lights up on the display. RANDOM The tracks are played at random. -
Page 20: Playing Back Tapes
Playing Back Tapes You can play back type I, type II, and type IV tapes without changing any settings. Playing Back a Tape Press 0 for cassette deck. Put a cassette in with the exposed part of the tape down. Close the cassette holder gently. -
Page 21: Recording
Recording IMPORTANT: • It should be noted that it may be unlawful to re-record pre-recorded tapes, records, or discs without the consent of the owner of copyright in the sound or video recording, broadcast or cable programme and in any literary, dramatic, musical, or artistic embodied therein. -
Page 22: Cd Direct Recording
CD Direct Recording Everything on the CD goes onto the tape in the order it is on the CD, or according to the order you have made for Program play. On the unit ONLY: Put a recordable cassette in with the exposed part of the tape down. -
Page 23: Using The Timers
Using the Timers There are three timers available — Daily Timer, Recording Timer and Sleep Timer. Before using the timers, you need to set the clock built in the unit (see page 9). When you press TIMER on the unit for more than 3 seconds, the display alternates between “ADJUST”... -
Page 24: Using Sleep Timer
Press TIMER to complete the timer setting. Press (STANDBY/ON) to turn off the unit (on standby) if you have set the timer with the unit turned • When the timer turns on the unit, the timer ( ) indicator and the selected timer mode indicator (DAILY or REC) start flashing. -
Page 25: Additional Information
Additional Information Description of the PTY codes: NEWS: News. AFFAIRS: Topical program expanding or enlarging upon the news — debate, or analysis. INFO: Program the purpose of which is to impart advice in the widest sense. SPORT: Program concerned with any aspect of sports. EDUCATE: Educational programs. -
Page 26: Maintenance
Maintenance To get the best performance of the unit, keep your discs, tapes, and mechanism clean. Handling discs • Remove the disc from its case by holding it at the edge while pressing the center hole lightly. • Do not touch the shiny surface of the disc, or bend the disc. -
Page 27: Specifications
Specifications UX-P7R (CA-UXP7R and SP-UXP7) Amplifier Output Power SUBWOOFERS: 110 W (55 W + 55 W) at 6 (MAX.) 70 W (35 W + 35 W) at 6 (10 % THD) MAIN SPEAKERS: 36 W (18 W + 18 W) at 6 (MAX.) - Page 28 VICTOR COMPANY OF JAPAN, LIMITED 0301MWMMDWJEM...