Table of Contents
Troubleshooting

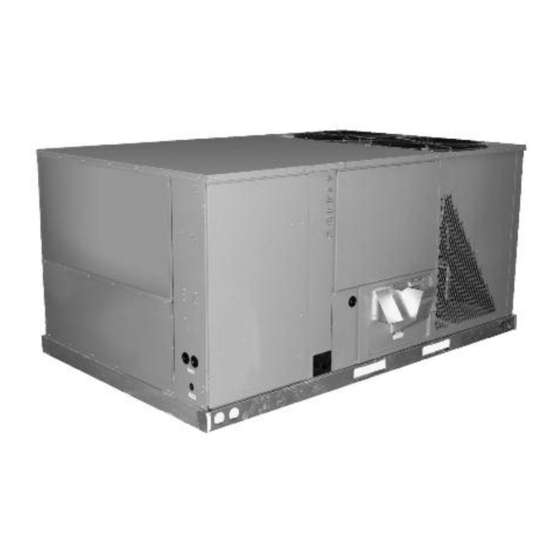
Related Manuals for Rheem RKKL Series


Summary of Contents for Rheem RKKL Series
-
Page 1: Installation Instructions
INSTALLATION INSTRUCTIONS FOR COMBINATION HEATING AND COOLING ROOFTOP UNITS RKKL- SERIES 7.5, 10 AND 12.5 TON [26.4, 35.2 AND 44.0 kW] Featuring Industry Standard R-410A ISO 9001:2008 92-23577-105-01 SUPERSEDES 92-23577-105-00... -
Page 2: Table Of Contents
TABLE OF CONTENTS SAFETY INFORMATION ..........3 Checking Product Received . -
Page 3: Safety Information
SAFETY INFORMATION WARNING USE ONLY WITH TYPE OF GAS APPROVED FOR THIS UNIT. REFER TO THE UNIT RATING PLATE. WARNING INSTALL THIS UNIT ONLY IN A LOCATION AND POSITION AS SPECIFIED IN THE LOCATION REQUIREMENTS AND CONSIDERATIONS SECTION OF THESE INSTRUCTIONS. PROVIDE ADEQUATE COMBUSTION AND VENTILA- TION AIR TO THE UNIT SPACE AS SPECIFIED IN THE VENTING SECTION OF THESE INSTRUCTIONS. - Page 4 WARNING THIS UNIT MAY BE USED TO HEAT THE BUILDING OR STRUCTURE DURING CONSTRUCTION IF THE FOLLOWING INSTALLATION REQUIREMENTS ARE MET. INSTALLATION MUST COMPLY WITH ALL INSTALLATION INSTRUC- TIONS INCLUDING: • PROPER VENT INSTALLATION; • FURNACE OPERATING UNDER THERMOSTATIC CONTROL; •...
-
Page 5: Checking Product Received
This booklet contains the installation and operating instructions for your combination gas heat- WARNING ing/electric cooling unit. There are some precautions that should be taken to derive maximum satisfaction from it. Improper installation can result in unsatisfactory operation or dangerous THE MANUFACTURER’S WARRAN- conditions. - Page 6 2. Quick Reference Guide For R-410A • R-410A refrigerant operates at approximately 60% higher pressure (1.6 times) than R-22. Ensure that servicing equipment is designed to operate with R-410A. • R-410A refrigerant cylinders are pink. • R-410A, as with other HFC’s is only compatible with POE oils. •...
-
Page 7: Unit Dimensions
Unit Dimensions COMPRESSOR IMPORTANT: THIS ACCESS UNIT MUST BE MOUNTED LEVEL IN BLOWER BOTH DIRECTIONS ACCESS TO ALLOW WATER TO DRAIN FROM THE CONDENSER CONDENSER SEC- COIL ELECTRICAL (RIGHT SIDE) TION AND CONDEN- ACCESS SUPPLY SATE PAN. RETURN REAR SIDE ST-A1154-01-00 FIGURE 2 CABINET DIMENSIONS... - Page 8 FIGURE 3 (BOTTOM VIEW) SUPPLY AND RETURN DIMENSIONS FOR DOWNFLOW APPLICATIONS RIGHT SIDE LEFT SIDE FRONT SIDE Illustration ST-A0738-02 FIGURE 4 SUPPLY AND RETURN DIMENSIONS FOR HORIZONTAL APPLICATIONS (SIDE VIEW – REAR) COMPRESSOR ACCESS RIGHT LEFT SIDE SIDE Illustration ST-A0736-02-X1 *RECOMMENDED DUCT DIMENSIONS ARE 26"...
- Page 9 FIGURE 5 ST-A1154-02-00 FIGURE 6 ROOFCURB INSTALLATION Illustration ST-A0801-17...
-
Page 10: General Data
GENERAL DATA - RKKL MODELS NOM. SIZES 7.5, 10 AND 12.5 TON [26.4, 35.2 AND 44.0 kW] Model RKKL-Series B090CL15E B090CL22E B090CM15E B090CM22E Cooling Performance CONTINUED Gross Cooling Capacity Btu [kW] 87,000 [25.49] 87,000 [25.49] 87,000 [25.49] 87,000 [25.49] EER/SEER 11.2/NA 11.2/NA 11.2/NA... - Page 11 GENERAL DATA - RKKL MODELS NOM. SIZES 7.5, 10 AND 12.5 TON [26.4, 35.2 AND 44.0 kW] Model RKKL-Series B090CN15E B090CN22E B090DL15E B090DL22E Cooling Performance CONTINUED Gross Cooling Capacity Btu [kW] 87,000 [25.49] 87,000 [25.49] 87,000 [25.49] 87,000 [25.49] EER/SEER 11.2/NA 11.2/NA 11.2/NA...
- Page 12 GENERAL DATA - RKKL MODELS NOM. SIZES 7.5, 10 AND 12.5 TON [26.4, 35.2 AND 44.0 kW] Model RKKL-Series B090DM15E B090DM22E B090DN15E B090DN22E Cooling Performance CONTINUED Gross Cooling Capacity Btu [kW] 87,000 [25.49] 87,000 [25.49] 87,000 [25.49] 87,000 [25.49] EER/SEER 11.2/NA 11.2/NA 11.2/NA...
- Page 13 GENERAL DATA - RKKL MODELS NOM. SIZES 7.5, 10 AND 12.5 TON [26.4, 35.2 AND 44.0 kW] Model RKKL-Series B090YL22E B090YM22E B090YN22E Cooling Performance Gross Cooling Capacity Btu [kW] 87,000 [25.49] 87,000 [25.49] 87,000 [25.49] EER/SEER 11.2/NA 11.2/NA 11.2/NA Nominal CFM/AHRI Rated CFM [L/s] 2800/2925 [1321/1380] 2800/2925 [1321/1380] 2800/2925 [1321/1380]...
- Page 14 GENERAL DATA - RKKL MODELS NOM. SIZES 7.5, 10 AND 12.5 TON [26.4, 35.2 AND 44.0 kW] Model RKKL- Series B120CL15E B120CL22E B120CM15E B120CM22E Cooling Performance Continued -> Gross Cooling Capacity Btu [kW] 123,000 [36.04] 123,000 [36.04] 123,000 [36.04] 123,000 [36.04] EER/SEER 11.2/NA 11.2/NA...
- Page 15 GENERAL DATA - RKKL MODELS NOM. SIZES 7.5, 10 AND 12.5 TON [26.4, 35.2 AND 44.0 kW] Model RKKL- Series B120DL15E B120DL22E B120DM15E B120DM22E Cooling Performance Continued -> Gross Cooling Capacity Btu [kW] 123,000 [36.04] 123,000 [36.04] 123,000 [36.04] 123,000 [36.04] EER/SEER 11.2/NA 11.2/NA...
- Page 16 GENERAL DATA - RKKL MODELS NOM. SIZES 7.5, 10 AND 12.5 TON [26.4, 35.2 AND 44.0 kW] Model RKKL-Series B120YL22E B120YM22E B151CL15E B151CL25E Cooling Performance CONTINUED Gross Cooling Capacity Btu [kW] 123,000 [36.04] 123,000 [36.04] 156,000 [45.71] 156,000 [45.71] EER/SEER 11.2/NA 11.2/NA 11.1/NA...
- Page 17 GENERAL DATA - RKKL MODELS NOM. SIZES 7.5, 10 AND 12.5 TON [26.4, 35.2 AND 44.0 kW] Model RKKL-Series B151CM15E B151CM25E B151DL15E B151DL25E Cooling Performance CONTINUED Gross Cooling Capacity Btu [kW] 156,000 [45.71] 156,000 [45.71] 156,000 [45.71] 156,000 [45.71] EER/SEER 11.1/NA 11.1/NA 11.1/NA...
-
Page 18: General Data
GENERAL DATA - RKKL MODELS NOM. SIZES 7.5, 10 AND 12.5 TON [26.4, 35.2 AND 44.0 kW] Model RKKL-Series B151DM15E B151DM25E B151YL25E B151YM25E Cooling Performance Gross Cooling Capacity Btu [kW] 156,000 [45.71] 156,000 [45.71] 156,000 [45.71] 156,000 [45.71] EER/SEER 11.1/NA 11.1/NA 11.1/NA 11.1/NA... -
Page 19: Electrical Data
ELECTRICAL DATA - RKKL MODELS ELECTRICAL DATA - RKKL SERIES B090CL B090CM B090CN B090DL B090DM B090DN B090YL B090YM B090YN Unit Operating Voltage 187-253 187-253 187-253 414-506 414-506 414-506 518-632 518-632 518-632 Range Volts 208/230 208/230 208/230 Minimum Circuit 40/40 40/40... - Page 20 ELECTRICAL DATA - RKKL SERIES B120CL B120CM B120DL B120DM B120YL B120YM B151CL B151CM B151DL B151DM B151YL B151YM Unit Operating Voltage 187-253 187-253 414-506 414-506 518-632 518-632 187-253 187-253 414-506 414-506 518-632 518-632 Range Volts 208/230 208/230 208/230 208/230 Minimum Circuit...
-
Page 21: Installation
II. INSTALLATION A. GENERAL 1. INSTALLATION — Install this unit in accordance with The American National Standard Z223.1-latest edition booklet entitled “National Fuel Gas Code,” and the requirements or codes of the local utility or other authority having jurisdiction. Additional helpful publications available from the “National Fire Protection Association”... -
Page 22: Outside Installation
FIGURE 7 OUTSIDE SLAB INSTALLATION. CLOSET DISTRIBUTION SYSTEM. SLAB FLOOR CONSTRUCTION. ST-A1111-03 C. OUTSIDE INSTALLATION WARNING THESE UNITS ARE DESIGNED CERTIFIED FOR OUTDOOR INSTALLATION ONLY. INSTALLATION INSIDE ANY PART OF A STRUCTURE CAN RESULT IN INADEQUATE UNIT PERFORMANCE AS WELL AS PROPERTY DAMAGE. INSTALLATION INSIDE CAN ALSO CAUSE RECIRCULATION OF FLUE PROD- UCTS INTO THE CONDITIONED SPACE RESULTING IN PERSONAL INJURY OR DEATH. -
Page 23: Cover Panel Installation/Conversion Procedure
To attach exhaust/combustion air inlet hood: 1. Remove screws securing blower access panel and remove access panel. For location of blower access panel, see Figure 5. 2. Remove exhaust/combustion air inlet hood from the carton, located inside the blower compartment. 3. -
Page 24: Clearances
FIGURE 9 CLEARANCES ST-A1111-03 G. CLEARANCES The following minimum clearances must be observed for proper unit performance and serviceability. Reference Figure 9. Recommended Location Clearance 48” A - Front 18” B - Condenser Coil 18” C - Duct Side 18”* D - Evaporator End 60”... -
Page 25: Return Air
FIGURE 10A FIGURE 10B FLAT ROOFTOP INSTALLATION, ATTIC OR DROP CEILING DISTRIBUTING FLAT ROOFTOP INSTALLATION, ATTIC OR DROP CEILING DISTRIBUTING SYSTEM. MOUNTED ON ROOFCURB. CURB MUST BE LEVEL. SYSTEM. MOUNTED ON ROOFCURB. CURB MUST BE LEVEL. ST-A1111-03 ST-A1111-03 Place the unit as close to the conditioned space as possible allowing clearances as indi- cated. -
Page 26: Gas Supply, Condensate Drain And Piping
FIGURE 11 LIFTING DETAIL o C G ⁄ CORNER WEIGHTS BY PERCENTAGE CAPACITY TONS [kW] 10 [35.2] SEE TABLE 7.5 [26.4] I-744 12.5 FIGURE 12 FIGURE 13 ROOFCURB ROOFCURB A074302 A074302 III. GAS SUPPLY, CONDENSATE DRAIN AND III. PIPING A. GAS CONNECTION IMPORTANT: Connect this unit only to gas supplied by a commercial utility. - Page 27 2. Connect the gas line to the gas valve supplied with unit. Routing can be through the gas pipe opening shown in Figures 7 or 10 or through the base as shown in Figure 3. Size the gas line to the furnace adequate enough to prevent undue pressure drop and never less than 1/2”.
-
Page 28: Lp Conversion
FIGURE 14 SUGGESTED GAS PIPING ROOF OR GROUND LEVEL INSTALLATION FROM GAS METER UNIT GAS SUPPLY CONNECTION MANUAL GAS SHUT-OFF VALVE Factory supplied grommet must be utilized. B. LP CONVERSION WARNING THIS UNIT IS EQUIPPED AT THE FACTORY FOR USE ON NATURAL GAS ONLY. CONVERSION TO LP GAS REQUIRES A SPECIAL KIT SUPPLIED BY THE DIS- TRIBUTOR OR MANUFACTURER. -
Page 29: Condensate Drain
TABLE 3 METER TIME IN MINUTES AND SECONDS FOR NORMAL INPUT RATING OF FURNACES EQUIPPED FOR NATURAL OR LP GAS METER HEATING VALUE OF GAS BTU PER CU. FT. INPUT SIZE 1000 1040 1100 2500 BTU/HR CU. FT. MIN. SEC. MIN. SEC. MIN. SEC. MIN. SEC. MIN. SEC. 40,000 30 15 0 15... -
Page 30: Wiring
FIGURE 15 CONDENSATE DRAIN DO NOT OVERTIGHTEN DRAIN FITTING • Drain line must be routed to an acceptable drain or outdoors in accordance with local codes. • Do not connect condensate drain line to a closed sewer pipe. • Drain line may need insulation or freeze protection in certain applications. IV. -
Page 31: Hook-Up
WARRANTY MAY BE JEOPARDIZED IF ALUMINUM WIRE IS CONNECTED TO UNIT CONTACTOR. Special instructions apply for power wiring with aluminum conductors: Warranty is void if connections are not made per instructions. Attach a length (6” or more) of recommended size copper wire to the unit contactor ter- minals L1, L2 and L3 for three phase. - Page 32 FIGURE 17 FIGURE 18 WIRE FROM ZONE THERMOSTAT TYPICAL THERMOSTAT WIRING TO BE ROUTED BEHIND SHIELD MAIN AS SHOWN. GAS VALVE AND CONNECTED TO INTEGRAT- ED FURNACE CONTROL LOW VOLTAGE TERMINAL STRIP EXTERNAL PIPING SUPPLIED BY OTHERS POWER WIRES FROM DISCONNECT EXTERNAL TO CONTACTOR GAS VALVE...
-
Page 33: Furnace Section Controls And Ignition System
V. FURNACE SECTION CONTROLS AND IGNITION SYSTEM NORMAL FURNACE OPERATING SEQUENCE This unit is equipped with a two stage integrated direct spark ignition control. NORMAL HEAT MODE A. Call For First Stage (low fire) Only: 1. Zone thermostat contacts close, a call for first stage (low fire) heat is initiated. 2. -
Page 34: Operating Instructions
2. Upon a loss of flame, each inducer will complete a 5 second postpurge and the indoor blower will complete a 90 second delay off. 3. Control in the stand by mode with solid red LED. The integrated control is a four-ignition system. After a total of four cycles without sensing main burner flame, the system goes into a 100% lockout mode. -
Page 35: Burners
TO SHUT DOWN FURNACE 1. Set the thermostat to the lowest setting. 2. Turn off all electric power to the appliance if service is to be performed. 3. Remove control door. 4. Move control knob to the “OFF” position. 5. Replace control door. WARNING SHOULD OVERHEATING OCCUR OR THE GAS SUPPLY FAIL TO SHUT OFF, SHUT OFF THE MANUAL GAS VALVE TO THE APPLIANCE... -
Page 36: Furnace Section Maintenance
7. IMPORTANT: Replace all blower doors and compartment cover after servicing the unit. Do not operate the unit without all panels and doors securely in place. 8. Do not allow snow or other debris to accumulate in the vicinity of the appliance. FURNACE SECTION MAINTENANCE The unit’s furnace should operate for many years without excessive scale build-up in flue passageways;... -
Page 37: Lubrication
LUBRICATION IMPORTANT: DO NOT attempt to lubricate the bearings on the blower motor or the induced draft blower motor. Addition of lubricants can reduce the motor life and void the warranty. The blower motor and induced draft blower motor are prelubricated by the manufacturer and do not require further attention. -
Page 38: Replacement Parts
Re-assembly 1. Reconnect fan motor wires per the wiring diagram attached to the back of the cover. 2. Close the filter control and replace the blower/evaporator coil access panels. 3. Replace the control box cover. 4. Restore electrical power to the unit and check for proper operation, especially the condenser fan motor. - Page 42 FIGURE 19 COOLING TROUBLE SHOOTING CHART WARNING DISCONNECT ALL POWER TO UNIT BEFORE SERVICING. CONTACTOR MAY BREAK ONLY ONE SIDE. FAIL- URE TO SHUT OFF POWER CAN CAUSE ELECTRICAL SHOCK RESULTING IN PERSONAL INJURY OR DEATH. SYMPTOM POSSIBLE CAUSE REMEDY Unit will not run •...
- Page 43 FIGURE 20 FURNACE TROUBLESHOOTING GUIDE (COMBINATION HEATING AND COOLING UNITS WITH DIRECT SPARK IGNITION) WARNING HAZARDOUS VOLTAGE DISCONNECT POWER BEFORE LINE VOLTAGE CON- SERVICING. NECTIONS SERVICE MUST BE BY A TRAINED, QUALIFIED SERVICE TECHNICIAN. START SET THERMOSTAT TO CALL FOR HEAT SET FAN SWITCH TO AUTO •...
-
Page 44: Troubleshooting
NOTE: IF THE SYSTEM GOES INTO LOCKOUT, WAIT 30 SECONDS AND RESET THE SYSTEM. REPLACE SENSOR MAIN BURNER FLAME SUSTAINED • CHECK FLAME SENSOR POSITION AND CONDITION • CLEAN FLAME SENSOR WITH STEEL WOOL • CHECK FLAME SENSOR WIRES AND CONNECTIONS REPLACE IGNITION CON- TROL •... -
Page 45: Wiring Diagrams
FIGURE 21... - Page 46 FIGURE 22...
- Page 47 FIGURE 23...
- Page 48 FIGURE 24...
- Page 49 FIGURE 25...
- Page 50 FIGURE 26...
-
Page 51: Charge Chart
FIGURE 27 RKKL SYSTEM CHARGE CHART... - Page 52 FIGURE 28 RKKL SYSTEM CHARGE CHART SYSTEM CHARGE CHART - REFRIGERANT 410A 10 TON, CIRCUIT 1 92-102259-20-00...
-
Page 53: Charge Chart
FIGURE 29 RKKL SYSTEM CHARGE CHART BOTH COMPRESSORS MUST BE OPERATING BEFORE CHECKING REFRIGERANT CHARGE. RETURN AIR TEMPERATURE MUST BE WITHIN COMFORT CONDITIONS BEFORE FINAL REFRIGERANT CHECK! - Page 56 CM 1110...