Riso ComColor 9050 Basic Manual
Comcolor series
Hide thumbs
Also See for ComColor 9050:
- Troubleshooting manual (42 pages) ,
- User manual (176 pages) ,
- Administrator's manual (34 pages)

Related Manuals for Riso ComColor 9050


Summary of Contents for Riso ComColor 9050
- Page 1 Please start by reading this guide. It describes suggested applications and basic operations. Applicable Printer models 9050/9050R 7050/7050R/7010/7010R 3050/3050R/3010/3010R 050-36029-201 050-36301-106...
- Page 2 Options and functions vary depending on the model. ComColor ComColor ComColor ComColor ComColor ComColor ComColor ComColor ComColor ComColor 9050 9050R 7050 7050R 7010 7010R 3050 3050R 3010 3010R 314 mm × 548 mm 314 mm × 548 mm 310 mm × 544 mm 210 mm ×...
- Page 3 About This Guide (1) No part of this guide may be reproduced in whole or in part without the permission of RISO KAGAKU CORPORATION. (2) The contents of this guide may undergo changes without prior notice to reflect improvements in the product.
- Page 4 Please read before using for the first time or if you are unsure of operations. Features This machine is an inkjet printer that is network- compatible and performs high-speed, full color printing. In addition to printing from a computer, you can combine the machine with various options to use functions such as a copier and scanner.
-
Page 5: About This Guide
About This Guide This guide is designed to be read before using the machine for the first time or if you are unsure of operations. It is written for quick reference and in an easy-to-understand way. Basic operations and workflows for suggested applications using the machine are described using the operation panel and computer screens. - Page 6 I can’t let anyone else see this printout! PIN code (See p. 30, p. 62, p. 70.) You can set a PIN code to a job to perform the printing without it being seen by other people. The printout is started when you enter the PIN code on the machine’s touch panel.
- Page 7 This seems wasteful... Save to folder (See p. 32, p. 42, p. 70.) RISO Console (See p. 74.) By saving a job in the folder, you can save its settings and You can check the machine’s status and settings from your use them for printing whenever you want.
-
Page 8: Table Of Contents
•••••••••••••••••••••••••••••••••••••• Scanning Operations ••••••••••••••••••••••••••••••••••••••••• Additional Features••••••••••••••••••••••••••••••••••••••••••• Managing Jobs Printer Mode Screens •••••••••••••••••••••••••••••••••••••••• Job Operations ••••••••••••••••••••••••••••••••••••••••••••••••• Using the RISO Console RISO Console Screens •••••••••••••••••••••••••••••••••••••••• RISO Console Operations ••••••••••••••••••••••••••••••••••• Maintenance Routine Care •••••••••••••••••••••••••••••••••••••••••••••••••••• Installing the Printer Driver •••••••••••••••••••••••••••••••• ComColor Series Basic Guide 02... -
Page 9: Preparations For Use
Preparations for Use ComColor Series Basic Guide 02... -
Page 10: Read This First
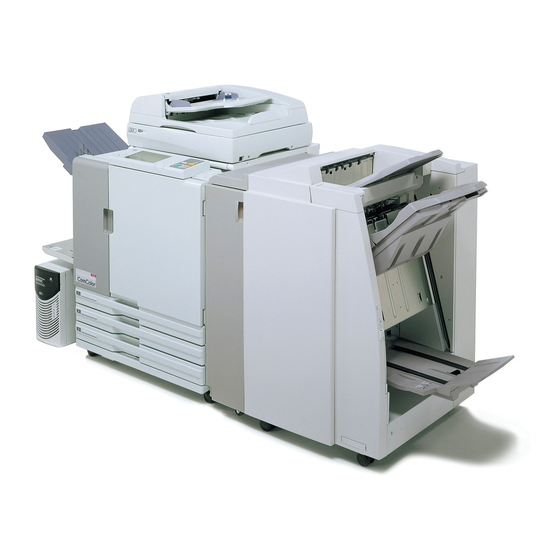
Read This First Component Names ● The ComColor 9050 is shown in this illustration. ① Face Down Tray ③ Front Cover The printouts are output here face Down. When the optional Open when paper is jammed or when replacing an ink face down offset tray is installed, the machine stacks each cartridge. -
Page 11: Main Power Switch
Printouts are ejected face-up. • With the RISO auto-control stacking tray, the paper guides adjust automatically to fit the paper size. • With the wide stacking tray, move the paper guides (sides and end) to match the size of the paper for printing. -
Page 12: Booklet Tray
Finisher If you connect the optional multifunction finisher, you can staple or punch the printed paper or create a booklet. ① Top Tray ④ Booklet Tray The printouts are output here when punching is performed. Booklets and 2-fold printouts are output here. ②... -
Page 13: Error Lamp
Preparations for Use >> Read This First Operation Panel Various operations and settings can be performed using the operation panel. You can also identify the machine status or errors such as paper jamming from the lamp colors and whether the lamps light up or flash. -
Page 14: Entering Text
Basic Touch Panel Information This section describes basic information to know when using the touch panel. Selecting Buttons Confirming or Canceling Settings To select a button on the touch panel, touch the button When [OK] is displayed on a settings screen, you must with your finger. - Page 15 Preparations for Use >> Read This First Logging In Lock icons in the upper left corner of mode buttons indicate that you must log in to access those modes. Changing Login Passwords Login passwords can be changed. Lock icon Once you are logged in, press [Status] on the mode screen.
-
Page 16: Touch Panel Screens
Use together with the hard keys to set functions or perform operations. The touch panel is designed for user- friendly settings or operations. Simply touch the buttons on the screen. Touch Panel Screens The screens displayed vary depending on the optional equipment connected and settings details. Mode Screen This is the first screen displayed. - Page 17 Preparations for Use >> Touch Panel Screens Mode Screens Pressing a mode button on the mode screen will switch to that mode screen. Printer Mode Screen Manage or check print jobs (jobs stored in shared or personal folders on the machine, or jobs sent from a computer).
-
Page 18: Operations From Computers
The printer driver must be installed on any computers you will print from. Using the RISO Console Using the RISO console enables you to check and manage machine settings and print jobs from computers. (See p. 74.) ComColor Series Basic Guide 02... -
Page 19: Paper And Originals
Preparations for Use >> Paper and Originals How you handle the originals and the paper will significantly affect the copy and print output. It is also important to know the correct handling methods and conditions, because doing so will prevent problems such as Paper and Originals paper jamming. -
Page 20: Loading Paper
Load the paper. Loading Paper When using paper with different characteristics on the front Load paper in the feed trays and the standard tray. and back sides, load the printing side face-down. Do not load too many sheets. We recommend loading the feed trays with types of paper you will use most often. -
Page 21: In The Standard Tray
Preparations for Use >> Paper and Originals Move the guides against the edges of the paper, and In the Standard Tray push the lever to lock. Open the standard tray until it stops. Set the paper feed pressure adjustment lever. Spread the guides. - Page 22 Adding or Switching Paper in the Standard Closing the Standard Tray Tray Remove the loaded paper. Press the standard tray descent button when loading additional sheets or when switching paper. Note that the standard tray is automatically lowered when all paper is removed. Press the standard tray descent button to lower the standard tray.
- Page 23 ● The RISO auto-control stacking tray is shown in this illustration. When using the wide stacking tray, manually adjust the paper guides’ (side and end) positions to fit the paper size.
- Page 24 Fold up the paper arranger. Lower the paper guides (side) inward, and then close the stacking tray. Loading Orientation of Originals and Paper When you are copying on letterhead paper, envelopes, or similar media that already has a logo printed on it, the orientation of the original and paper is important.
-
Page 25: Usable Originals
Preparations for Use >> Paper and Originals Usable Originals When you connect the optional scanner, you can copy or scan an original by placing it on the platen glass or in the ADF to be read. If you use an original that is not compatible with this machine, it may result in problems such as paper jamming, soiling or malfunctions. -
Page 26: Loading Originals
In the ADF Loading Originals The ADF enables continuous scanning of up to On the Platen Glass approximately 100 sheets (80 g/m (21-lb bond)) of originals. Place one original at a time on the glass surface after Adjust the original guides to match the width of opening the original cover. -
Page 27: Printing
Printing ComColor Series Basic Guide 02... -
Page 28: Printer Driver Screens
When printing data from a computer, you can perform various settings with the printer driver. Click [Properties] (or [Preferences]) in the printing dialog box of each application to display the setting screen of the printer driver. Printer Driver Screens • The printer driver must be installed on any computers you will print from. -
Page 29: Layout Tab
Printing >> Printer Driver Screens Layout Tab Complete settings on this tab to print multiple pages per sheet, or to print images rotated. [Imposition] [Layout order] Select the type of layout-specifically, how originals are arranged for Specify the order in which originals are arranged on a single sheet. printing. -
Page 30: Finishing Tab
Finishing Tab Complete finishing settings on this tab, such as for collation and booklets. [Collate] [Binding side] Specify whether to print originals page by page or in sets. Specify the position for binding. Details can be specified in [Details]. [Slip sheet] [Staple] Specify whether to insert a sheet between printouts. -
Page 31: Advanced Tab
[Save/Call setting], [Entry/Clear], and [Restore default] [Continuous output] See “Basic Tab” (p. 26). When you have connected an optional multifunction finisher or RISO auto-control stacking tray, and when [Auto] is selected in [Output tray], this option will switch the output tray automatically when the tray is full. -
Page 32: Printing Operations
Click [Properties] (or [Preferences]) in the printing dialog box of the source application. To hide the job names usually displayed on the machine and in the RISO console, select [Hide job name]. After input is finished, click [OK]. Complete other settings as needed. - Page 33 Printing >> Printing Operations In the printing dialog box, click [OK] (or [Print]). Click the [Advanced] tab. On the touch panel of the machine, select the job Select [Print and pause] and enter the number of you sent and press the [START] key. copies.
-
Page 34: Printing Multiple Pages Per Sheet
Check how the job was printed. To continue, use the After input is finished, click [OK]. controls on the touch panel. Complete other settings as needed. Printing Multiple Pages Per Sheet Multiple pages can be printed on a single sheet. In the printing dialog box, click [OK] (or [Print]). - Page 35 Printing >> Printing Operations In the [Output] pull-down menu, select either [Print In the printing dialog box, click [OK] (or [Print]). & Save to folder] or [Save to folder]. • Jobs stored in job folders can be accessed on the folder screen in printer mode.
- Page 36 Select the angle of rotation in the [Rotate] pull- Complete the print settings on each tab. down menu. Click [Entry/Clear]. After input is finished, click [OK]. Complete other settings as needed. Enter a name in [Name] and click [Entry]. In the printing dialog box, click [OK] (or [Print]). •...
- Page 37 Printing >> Printing Operations Click the [Finishing] tab. Select [Stamp Page/Date] and click [Details]. Specify [Stamp position] for the page number and Select [Paper folding] in the [Booklet binding] pull- date, and then click [OK]. down menu. Complete other settings as needed. In the printing dialog box, click [OK] (or [Print]).
-
Page 38: Additional Features
You can combine different functions of this machine to make it even more useful. Combine different functions from the list below to find the methods that best suit your objectives. For details on each function, see “Printer Driver Additional Features Screens”... -
Page 39: Copying
Copying ComColor Series Basic Guide 02... -
Page 40: Copy Mode Screens
You can use the copy function if you connect the optional scanner. This section describes the copy mode screen of the touch panel. Copy Mode Screens • The screens displayed vary depending on what optional equipment has been connected and how you have completed settings. •... -
Page 41: Feed Tray
Copying >> Copy Mode Screens ③ [Feed tray] ④ [Original] Select and specify the tray to use for copying. Specify the types of originals. [Auto] [Line/Photo] The feed tray is selected automatically during copying. Available Settings optimized for originals with both text and photos or trays are indicated by [Auto] in [Tray selection]. - Page 42 ⑥ [Duplex/Simplex] ⑦ [Entry] Specify settings for duplex and simplex copying. Up to four frequently used functions can be registered. These functions are displayed as buttons at the bottom of the screen. [Original] Specify sides of the original to scan. [Output] Specify whether to produce duplex or simplex copies.
-
Page 43: Functions Screen
Copying >> Copy Mode Screens Selections Screen Shows registered selection buttons. [Entry] Up to 16 frequently used functions can be registered for display on one convenient screen. Functions Screen Shows all function buttons available in copy mode. Advanced copying functions can be completed on this screen. -
Page 44: Check Setting
[Check setting] [Additional copies] Check current settings, restore the default settings set by the Print another copy of the previous copy job. administrator. These buttons are grayed out when you have executed Current settings can also be registered as the default settings auto reset, or if you have logged out. - Page 45 Copying >> Copy Mode Screens [ADF scan & pause] [Book shadow erase] Use when copying a quantity of originals that cannot be When scanning originals in book format, erase the center loaded at one time in the ADF. After the first set of originals shadow.
-
Page 46: Image Quality
[Stamp Page/Date] [Gamma control] Stamp the page number and date at a specified position. Adjust the gamma value of colors, as desired. [Image control] Specify advanced image processing settings for scanned originals. [OFF], [ON] To add the page number or date on copies, select [ON]. If not, select [OFF]. -
Page 47: Add Cover
Copying >> Copy Mode Screens ● [Collate] [Program] Specify the type of collation. Specify settings for the number of copies and sets, collating, [Auto] slip sheets, and other options for 60 groups. Quickly print [Sort] is automatically specified when originals are scanned with the exactly the number of copies of the number of sets you ADF. -
Page 48: Output Tray
Example: 60-page original, [Fold], and [Separate books] OFF [Paper folding] When you have connected an optional multifunction finisher, copies can be folded. [Booklet] Example: 60-page original, [Fold], and [Separate books] ON Automatically arrange pages on copies to create booklets. When you have connected an optional multifunction finisher, you can also specify stapling and folding. -
Page 49: Head Cleaning
Copying >> Copy Mode Screens [Paper guide control] [Head cleaning] When you have connected an optional RISO auto-control Clean the ink heads. stacking tray, adjust the position of the paper guides on the tray. [Normal cleaning] Head cleaning that is useful in preventing clogging. -
Page 50: Copying Operations
You can make copies from a wide variety of formats, such as printouts and books. You can also use the duplex function or imposition function to save paper, or you can use the booklet function to make a booklet. Use in accordance with your objectives. - Page 51 Copying >> Copying Operations Press [OK]. Copying Multiple Originals Per Sheet Multi-page originals or multiple images of the same original can be copied onto a single sheet. You can save even more paper by combining this feature with others, such as duplex copying. Load the original.
-
Page 52: Creating Booklets
Complete the [Original orientation] setting. Creating Booklets Automatically arrange pages on copies to create booklets as follows. When you have connected an optional multifunction finisher, you can also specify stapling and folding. Load the original. Load the original on the platen glass or in the ADF. Press [OK]. -
Page 53: Collated Copying
Copying >> Copying Operations Complete the [Separate books] and [Center margin] When you are using the platen glass, a confirmation message may be displayed regarding scanning the next original. settings. Load the next original and press [Scan]. After all originals are [Separate books] is not available when you have scanned, press [Print]. - Page 54 Complete the [Slip sheet] setting. Press the [START] key. To insert slip sheets, load the paper to use as slip sheets in advance, into the tray selected in [Feed When you are using the platen glass, a confirmation message tray]. may be displayed regarding scanning the next original.
- Page 55 Copying >> Copying Operations Enter the number of copies. Press [No Entry]. Use the numeric keys for input. Check the settings details on the [Setting entry] screen, and then press [Register]. Press the [START] key. • To rename registered button labels, press [Rename] and enter the name.
-
Page 56: Additional Features
You can combine different functions of this machine to make it even more useful. Combine different functions from the list below to find the methods that best suit your objectives. For details on each function, see “Copy Mode Additional Features Screens”... -
Page 57: Scanning
Scanning ComColor Series Basic Guide 02... -
Page 58: Scanner Mode Screens
You can use the scanner function if you connect the optional scanner. This section describes the scanner mode screen of the touch panel. Scanner Mode Screens • The screens displayed vary depending on what optional equipment has been connected and how you have completed settings. •... -
Page 59: Job Name
[Internal HDD] type or edit the owner name. Save scanned images on the machine’s hard disk drive. Scanned jobs can be downloaded from the RISO console. ④ [File format] For details, see “Downloading Scanned Images” (p. 78). Specify the format, compression, and resolution of scanned images. -
Page 60: Color Mode
⑤ [Reproduction size] ⑦ [Color mode] Specify scanning at enlarged or reduced sizes. Specify color or monochrome scanning. [Reproduction size] is available only when you specified [Auto] [200dpi] or [300dpi] as the [File format] resolution. Color or monochrome scanning is selected automatically. [Full color] [Auto] Scan in color. -
Page 61: File Format
Format for PC ● Printable in this machine The following three file formats can be used on a This is an original RISO format that is used to print computer. in this machine. • These files can be stored in folders on the machine or in an external controller. -
Page 62: Scanning Operations
Data from paper originals scanned with the machine in scanner mode can be downloaded to a computer, saved on a USB flash drive*, or sent as an e-mail attachment. A USB port may not be provided, depending on Scanning Operations the machine. - Page 63 Scanning >> Scanning Operations Select the destination on the [Directory] screen, and On the confirmation screen, select [Format for PC] then press [OK]. and press [OK]. Also at this time, select [PDF], [TIFF], or [JPEG] as the format. Networked computers must be registered in This screen may not be displayed, depending on advance.
- Page 64 Enter a PIN code on the [PIN code] screen and press Assigning PIN Codes to Scanning Jobs [OK]. When saving scanned jobs on the machine’s hard disk As the PIN code, specify a number up to eight digits. drive, you can assign PIN codes. Assigning PIN codes to scanned jobs ensures privacy of the jobs, because the PIN code must be entered to access the job.
-
Page 65: Additional Features
Scanning >> Additional Features You can combine different functions of this machine to make it even more useful. Combine different functions from the list below to find the methods that best suit your objectives. For details on each function, see “Scanner Mode Screens”... - Page 66 ComColor Series Basic Guide 02...
-
Page 67: Managing Jobs
Managing Jobs ComColor Series Basic Guide 02... -
Page 68: Printer Mode Screens
You can print jobs, check job settings, and perform other operations on printer mode screens. Jobs are grouped by status and listed on the [Active], [Waiting], [Finished], and [Folder] screens. Printer Mode Screens • The screens displayed vary depending on what optional equipment has been connected and how you have completed settings. •... - Page 69 Managing Jobs >> Printer Mode Screens Waiting Screen Lists jobs awaiting further user action. Jobs appear on this list under the following conditions. • They have a PIN code • The administrator has assigned the jobs to this list • When an IC card reader has been connected (but under some settings, jobs may be printed without appearing on this screen) Selecting a job and pressing the [START] key moves the job to...
-
Page 70: Job List
Folder Screen Lists jobs saved in the job folder. Selecting a job and pressing the [START] key displays the job on the [Active] screen, after which the job will be printed. ① Select folder button ④ Job list Indicates the currently selected job folder. On this screen, check the job and owner name, saved date, Pressing the button will display the [Select folder] screen, and other details. - Page 71 Managing Jobs >> Printer Mode Screens Functions Screen Displays user-adjustable settings. The following functions are used in other modes besides printer mode. They are described in Chapter 3, “Copying,” in “Functions Screen” (p. 41). • Head cleaning • Paper guide control •...
-
Page 72: Job Operations
You can perform operations for jobs that you saved to the folder, or you can print a job that you sent after assigning it with a PIN code. You can also change the settings of a job that you sent or delete it. Job Operations Basic Workflow Check and manage... -
Page 73: Deleting Jobs
Managing Jobs >> Job Operations Press [Print]. Adjust the image position and press [OK]. Otherwise, press the [START] key. For PIN code jobs, the confirmation screen is Press [Print]. displayed. Enter the PIN code and press [OK]. Otherwise, press the [START] key. Repositioning Images before Printing Reposition the image to be printed as follows. - Page 74 Change the settings in [Paper size] and [Paper type] Specifying Paper Settings as needed, and then press [OK]. Change feed tray settings as follows. For details, see “Feed tray” (p. 39). On the [Functions] screen, press [Feed tray]. Press [Close]. Press the button of the tray for settings adjustment.
-
Page 75: Using The Riso Console
Using the RISO Console ComColor Series Basic Guide 02... -
Page 76: Riso Console Screens
If you connect this machine to a network, you can use a Web browser to check its status and settings. This section describes the RISO console screen. RISO Console Screens • The screens displayed vary depending on the operating system used and the optional equipment connected. - Page 77 Using the RISO Console >> RISO Console Screens ● ● [User] [License Info.] Indicates information about the user currently logged in. Indicates the license information of the system in the Also enables you to change the password. machine. This screen is displayed when a user is logged in.
- Page 78 [Waiting] Print selected jobs. Indicates jobs awaiting further user action. Waiting jobs cannot be printed from the RISO console. [Copy to] Manage these jobs from the touch panel on the machine. To copy selected jobs to another folder, select the destination in this pull-down menu.
- Page 79 Using the RISO Console >> RISO Console Screens Scanner Allows you to download scanned jobs saved on the machine’s hard disk drive. [Download] Download selected jobs to the computer. [Delete], [Details] See [Active] under “Printer (p. 76). ” ComColor Series Basic Guide 02...
-
Page 80: Riso Console Operations
If you access via the RISO console, you can check the machine’s status and settings from your computer and perform job operations without having to actually go to the machine. RISO Console Operations Basic Workflow Enter the machine’s IP Check, set up, and... - Page 81 Using the RISO Console >> RISO Console Operations Click [Download]. Click [Folder]. Click [Save]. Select a job to print. Specify the destination folder and file name, and then click [Save]. Click [Print]. Printing Jobs Stored in Folders Print the jobs stored in job folders as follows.
- Page 82 ComColor Series Basic Guide 02...
-
Page 83: Maintenance
Maintenance ComColor Series Basic Guide 02... -
Page 84: Routine Care
Routine care is important to give the best possible results when using this machine. Perform daily maintenance so that you do not suddenly run out of ink or paper and have to reorder in a rush, and Routine Care to get the best printing quality results. - Page 85 • Using ink other than RISO ink may prevent optimal printer performance. Malfunctions and reductions in performance as a result of using Non-RISO ink not covered by the product warranty or service contract. • Do not remove the ink cartridge until the ink replacement message is displayed.
-
Page 86: Installing The Printer Driver
If you want to send data from a computer to print on this machine, you must first install the printer driver onto the computer. Install by following the procedure below. Installing the Printer Driver • Log on as a user with administrator privilege. •... - Page 87 Maintenance >> Installing the Printer Driver When the message for printing a test page is Click [Finish]. displayed, click [Yes]. Confirm that the test page is printed correctly and click [OK]. Remove the CD-ROM from the computer. After ejection, keep the CD-ROM in a safe place. Click [Show “Readme”...
- Page 88 As an ENERGY STAR Partner, RISO KAGAKU ® CORP. has determined that this product meets the ENERGY STAR guidelines for energy ® efficiency. ComColor Series Basic Guide 02...
- Page 89 ComColor and FORCEJET are trademarks of RISO KAGAKU CORPORATION. is a registered trademark of RISO KAGAKU CORPORATION in Japan and other countries. All other product names and company names written in this guide are trademarks or registered trademarks of their respective companies.
- Page 90 Please contact following for supplies and service: Copyright © 2009 RISO KAGAKU CORPORATION Printed in Japan...