Table of Contents
Advertisement
Advertisement
Table of Contents

Related Manuals for Olympus UFL-3


Summary of Contents for Olympus UFL-3
- Page 1 UFL-3...
- Page 2 Information for Your Safety IMPORTANT SAFETY INSTRUCTIONS When using your photographic equipment, basic safety precautions should always be followed, including the following: • Read and understand all instructions before using. • Close supervision is necessary when any flash is used by or near children.
-
Page 3: Introduction
Thank you for purchasing an Olympus product. Please read this instruction manual carefully and use the product safely and correctly. Please keep this instruction manual for reference after reading it. Introduction Unauthorized copying of this manual in part or in full, except for private use, is prohibited. -
Page 4: Safety Precautions
For customers in North and South America Declaration of Conformity This device complies with Part 15 of FCC Rules and Industry Canada licence-exempt RSS standard(s). Operation is subject to the following two conditions: (1) This device may not cause harmful interference. (2) This device must accept any interference received, including interference that may cause undesired operation. - Page 5 WARNING Never use the flash in front of the eyes especially for infants or children within 1 m. It may cause permanent vision impairment, etc. Keep the flash and batteries out of the reach of infants and children. There is the possibility of the occurrence of the following types of accidents: •...
-
Page 6: Battery Handling Precautions
Do not place this product at locations with abnormally high or abnormally low temperatures or at locations with extreme temperature changes. The product may deteriorate or may cause a fire. Do not alter the battery compartment or try to insert any foreign objects into it. Do not store the flash at the locations subject to vibrations. - Page 7 Do not use solder, transform, modify or dismantle the batteries. There is the risk of destroying the terminal safety valve and the scattering of internal contents. It may cause a fire or an explosion. Do not connect the batteries to a power socket or car cigarette lighter. It could cause a fire or an explosion etc.
- Page 8 If NiMH batteries are not charged within the specified time, stop charging them and do not use them. Please read the manual carefully to use the rechargeable batteries. Do not use batteries if they are cracked or broken. It may cause an explosion or overheating.
-
Page 9: About O-Ring
About O-ring Please note the following points to use the O-ring. When sealing this product, make sure that no hairs, fibers, sand particles or other foreign matter stick not only to the O-ring, but also to the contact surface. Even a single hair or a single grain of sand may cause water leakage. - Page 10 • Places where there are open fires. • Places where water is deeper than 75 m. • Places subject to vibrations. • Places where high temperatures exist or high humidity and/or where extreme differences in temperatures exist. • Places where volatile chemicals are stored or used. Do not apply excessive force on the arm mount.
-
Page 11: Table Of Contents
Contents Introduction................2 Please read the following items before use......2 SAFETY PRECAUTIONS............3 Battery handling precautions ..........5 About O-ring ................8 Handling the product ............. 8 1. Name of the Parts ............12 Flash..................12 Checking the package contents............12 2. - Page 12 Drying the flash..............27 Perform maintenance on the O-ring ........27 Replace consumable products ..........27 8. Appendix ................28 Q & A on the use of the UFL-3 ..........28 Troubleshooting..............32 Specifications ..............33 EN 11...
-
Page 13: En 1. Name Of The Parts
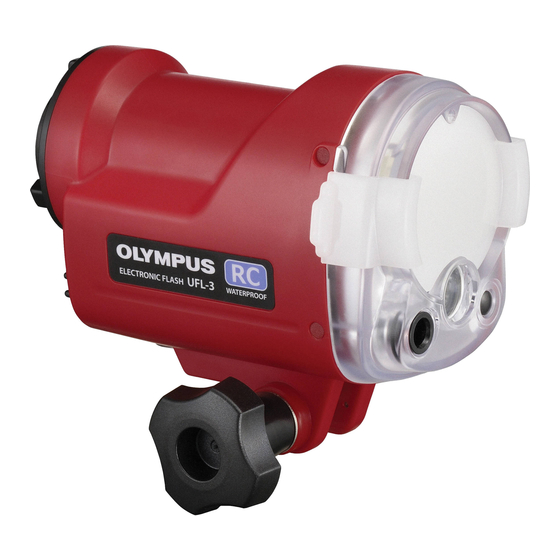
1. Name of the Parts Flash 1 Light emitting part 3 Fiber-optic cable socket 2 Target light 4 Arm mount knob Checking the package contents The items listed at the right are included with the electronic flash. Contact your local service station or dealer if accessories should be missing or damaged. - Page 14 button 3 Battery cap • The target light turns on when press 4 Light level dial this button. The target light turns off 5 Mode dial when press this button again. 6 Ready/TTL lamp • The target light turns off when the •...
-
Page 15: Maintaining The Waterproof Function
2. Maintaining the Waterproof Function This product is sealed with an O-ring. Maintenance of the waterproof function is required even before using this product underwater for the first time. For handling the O-ring, refer to P.8. Removing the O-ring Open the battery cap (gP.17) and remove the O-ring from the battery cap. -
Page 16: Removing Any Sand, Dirt, Etc
Removing any sand, dirt, etc. After visually checking that dirt, sand, and other foreign matter has been removed from the O-ring, check for damage and cracks by squeezing the entire circumference of the O-ring lightly with your fingertips. Using a clean cloth free of fibers or a lint-free cotton swab, remove any foreign matter attached to the grooves of the O-ring. -
Page 17: Applying Grease To The O-Ring
Applying grease to the O-ring Make sure there is no dirt on your fingers Apply the specified or on the O-ring; then squeeze about grease. 10 mm of grease onto your fingertip. Using two fingers and a thumb, spread Spread the grease over the grease over the O-ring while rubbing it the O-ring. -
Page 18: Inserting The Batteries
3. Inserting the Batteries Usable batteries (sold separately) Always use one of the following battery combinations: AA alkaline batteries/AA NiMH batteries • Manganese batteries are not to be used. Inserting the batteries While installing and exchanging batteries make sure to wipe off the any water from flash and always use dry hands. - Page 19 6 Align the round mark and “a” on the battery cap with the OPEN( position, insert the battery cap into the flash. mark 7 Turn “a” clockwise to the LOCK position. Turn until you hear the sound of it clicking into place. CAUTION •...
-
Page 20: Mounting The Flash
4. Mounting the Flash Attaching to an arm Attach the flash to the arm. When attaching the arm to the camera, make sure to read the arm’s instruction manual on how to attach the arm. 1 Loosen the arm mount knob by turning in an counterclockwise direction. 2 Place part A in the space between the arm mount. -
Page 21: Connecting To A Camera's Underwater Case
Connecting to a camera’s underwater case Connect the flash to the camera’s underwater case. Use the underwater fiber optic cable (optional) for connection. Underwater fiber optic cable • Insert the plugs of the underwater fiber optic cable into the connectors on the camera’s underwater case and on the flash’s fiber optic cable, all the way in until the black rod of the connector to be inserted completely. -
Page 22: Using As Ttl (Auto-Modulating) Flash
5. Using as TTL (auto-modulating) flash When using the flash with a camera equipped with a wireless RC flash function, it can be used as the TTL (auto-modulating) flash. The light quantity of this flash can be controlled automatically by the setting of the flash mode, correction of the light emission amount and so forth on the camera. -
Page 23: Shooting
Shooting Using with RC A mode Operates according to the setting of the A group of the RC mode on the camera. 1 Turn the mode dial to set “RC A”. 2 Set the camera’s RC mode to ON and set the camera’s built-in flash so as to allow it to be emitted. -
Page 24: Using As Slave Flash
6. Using as Slave Flash When using the flash with a camera that is not equipped with a wireless RC flash function, use as a manual flash. Set the amount of light emission manually. 1 Turn the mode dial to set “Manual”. 2 Turn the light level dial to set the light level (GNo.). -
Page 25: Using The Diffuser
Using the diffuser Use of the diffuser is highly recommended for shooting short camera-to- subject distances. Attaching the diffuser 1 Attach the included diffuser strap to the strap eyelets on the diffuser and the flash. Strap eyelet 2 Align the grooves on the top and bottom of the diffuser with the protrusions on the reflector. -
Page 26: Detaching The Diffuser
Detaching the diffuser Pinch in and pull up on the tabs (A) simultaneously to remove the tabs from the side grooves. Tabs (A) CAUTION • Do not try to forcibly remove the diffuser with the tab on only one side as doing so may cause breakage. -
Page 27: Handling After Shooting
7. Handling After Shooting Cleaning the flash with pure water After using this flash, seal it again with the battery cap and rinse it with pure water as soon as possible. After use in salt water, the flash should be immersed for an extended period of time in a bowl of pure water to remove any salt water or salt residues. -
Page 28: Drying The Flash
Replace the O-ring even before a year has passed if it shows signs of damage, cracking or loss of elasticity. Note : Please use original Olympus silicone O-ring grease and the O-rings. These products can be purchased at an Olympus service station. EN 27... -
Page 29: Appendix
8. Appendix Q & A on the use of the UFL-3 What cautions must be observed when taking off the battery cap? Pay attention to the following points: 1 Take the cap off in a place where it is safe from spray and the scattering of sand. - Page 30 How to handle the flash after use? Refer to P.28. What are the causes for entry of water? The main causes for the entry of water are shown below. Please check them most carefully. 1 Forgetting to install the O-ring 2 The O-ring is partly or completely outside the groove 3 Damage, deterioration, or deformation of the O-ring 4 Sand, fibers, hair or other foreign matter on the O-ring...
- Page 31 O-ring will be damaged or that its deterioration will be accelerated. 2 Use the original Olympus silicone O-ring grease (white cap). The grease of other companies are not suitable for this silicone O-ring, and use of such grease may cause deterioration of the surface and impairment of the waterproof function.
- Page 32 Do not try to repair, disassemble or modify the flash yourself. Repair, disassembly or modification by you or third parties not authorized by Olympus invalidates the guarantee. What are the model numbers of the UFL-3 accessories? The following accessories are being sold. O-ring for the battery cap (POL-U1)
-
Page 33: Troubleshooting
You can use the RC mode only with cameras compatible with the Olympus wireless RC flash system. With other cameras you may be able to use the electronic flash as slave flash if the camera’s built-in flash can be set to slave flash mode or manual flash mode. -
Page 34: Specifications
Specifications MODEL NO. UFL-3 Type Electronic flash for the Olympus underwater- use digital camera Guide Number (land shooting, flash intensity at FULL) Firing angle Equivalent to image angle of 24 mm (35mm conversion) lens (land shooting) Flash emission count AA alkaline batteries: Approx.