Table of Contents
Advertisement
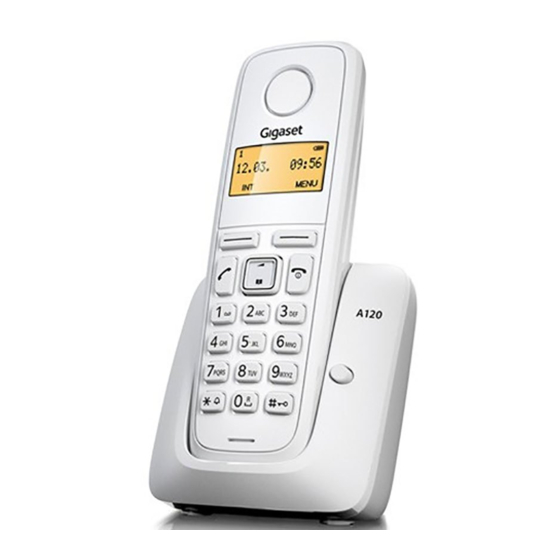
Gigaset A120/A220/A220A
The handset at a glance
1 Charge status of the batteries:
= e V U
(flat to full)
=
flashes: batteries almost
flat
e V U
flashes: charging
2 Answering machine icon
(A220A only)
3 Display keys
4 End call key and On/Off key
5 Talk key/Handsfree key
(handsfree mode A220/A220A only)
u
6 Control key (
)
7 Directory key (press down on
the control key)
8 Key 1
Open the answering machine
(A220A only)/network mailbox
9 Star key
Ringers on/off (press and hold);
with an open connection: switch
from pulse dialling to tone dial-
ling (press briefly)
10 Key 0/recall key
Consultation call (flash): press
and hold
11 Hash key
Keypad lock on/off (press and
hold); toggles between upper/
lower case and digits; inserts a
dialling pause (press and hold)
12 Microphone
A120
A220/A220A
Issued by
Gigaset Communications GmbH
Frankenstr. 2a
D-46395 Bocholt
1
1
±
1
2
11.12.
INT
3
4
5
6
7
8
9
10
11
12
The base station at a glance
Version: 20.04.2012
© Gigaset Communications GmbH 2012
Subject to availability.
All rights reserved. Rights of modification reserved.
www.gigaset.com
This user guide is made from 100 % recycled paper.
Please note
New messages in the calls list/
answering machine list/network
mailbox list (
cated in the display by the mes-
sage New messages.
Display keys:
V
Pressing a key launches the function
that appears above that key in the
11:56
display.
MENU
Display Function when pressed
INT
MENU
"
U
T
˜
OK
Registration/paging key:
Search for handsets (press briefly,
¢
"Paging"
Register handsets
(press and hold
¢
page 6) are indi-
Call other registered
¢
handsets
page 9.
Open main/submenu
(see menu overview
¢
page 15).
Go back one menu level.
Scroll up/down or adjust
u
volume with
.
Move cursor to left/right
u
with
.
Backspace deletes one
character at a time.
Confirm menu function
or save entry.
page 8)
¢
page 9).
Advertisement
Table of Contents

Related Manuals for Gigaset A120


Summary of Contents for Gigaset A120
- Page 1 8) Register handsets ¢ (press and hold page 9). Version: 20.04.2012 Issued by © Gigaset Communications GmbH 2012 Gigaset Communications GmbH Subject to availability. All rights reserved. Rights of modification reserved. Frankenstr. 2a D-46395 Bocholt www.gigaset.com This user guide is made from 100 % recycled paper.
-
Page 2: Safety Precautions
Do not use the devices in environments with a potential explosion hazard (e.g., paint shops). If you give your Gigaset to a third party, make sure you also give them the user guide. Remove faulty devices from use or have them repaired by our Service team, as these could interfere with other wireless services. -
Page 3: Connecting The Base Station
Inserting the batteries and closing the battery cover Warning ¢ Use only the rechargeable batteries recommended by Gigaset Communications GmbH ( page 11), i.e. never use conventional (non-rechargeable) batteries as this could result in significant health risks and personal injury. For example, the batteries could explode. -
Page 4: Activating/Deactivating The Handset
However, if a handset is not registered with the base (Register HS or Put into base is displayed), please register ¢ the handset manually ( page 9). ◆ If you have purchased multiple devices, you can upgrade your Gigaset to a cordless PABX by registering all A120/ ¢ A220 handsets at the same base ( page 9). ◆... -
Page 5: Accepting A Call
In handsfree mode, you activate the loudspeaker so that you can hear the caller without having to hold the handset to your ear. During a call and when listening to the answering machine (Gigaset A220A only) you activate or deactivate handsfree mode by pressing the handsfree key ¢... -
Page 6: Calls List/Answering Machine List/Network Mailbox List
Dialling with the directory s ¤ u ¤ b (select entry) Using other functions s ¤ u ¤ (select entry) MENU : The following functions can be selected with New Entry/Show Number/Edit Entry/Use Number/Delete Entry/Send Entry/Delete List/Send List/Shortcut Sending the directory to another handset Prerequisites: ◆... -
Page 7: Operating The Answering Machine (A220A Only)
Operating the answering machine (A220A only) The answering machine is operated from the handset. You can record your own announcement messages using the handset. The pre-recorded announcement is used if no personal announcement is available. If the memory is full, Memory full! appears in the display and the answering machine switches itself off automatically. It activates again automatically when you delete old messages. -
Page 8: Network Mailbox
Deleting an individual message ˜ During playback: Press key or the display key Deleting all old messages During playback or pause: ¤ u ¤ MENU Delete all old OK (Confirm the security prompt) Accepting a call from the answering machine You can accept a call while the answering machine is recording the caller's message: ¤... -
Page 9: Registering Handsets Manually
Registration takes approx. 1 minute. Handsets are assigned the lowest available internal number (1-4). If the internal numbers 1–4 are already assigned to other devices, the number 4 will be overwritten. De-registering handsets You can de-register all other registered handsets from each of the registered Gigaset handsets. ¤ u ¤ u ¤... -
Page 10: Setting The Alarm Clock
Setting the alarm clock Activating/deactivating the alarm clock ‰ ¤ u ¤ ¤ ¤ MENU Alarm Clock Activation OK ( = on) ¤ ¤ When activated: (Set the wake-up time) When the alarm clock rings, press any key to switch it off for 24 hours. If the alarm clock is set, the wake-up icon will appear on the screen and the wake-up time will be displayed instead of the date. -
Page 11: Operating The Base Station On The Pabx/Router
Operating the base station on the PABX/router Operating on the router When operating the Gigaset on an analogue port of a router you can reduce problems with echoes by activating the ¢ Echo mode ( page 16). If you have no problems with echoes, this function should be deactivated. -
Page 12: Questions And Answers
A copy of the Declaration of Conformity is available at this Internet address: www.gigaset.com/docs Customer Service & Assistance Do you have any questions? As a Gigaset customer, you can find help quickly in this User Manual and in the service sec- tion of our Gigaset online portal www.gigaset.com/service. -
Page 13: For Southern Africa
Manufacturer warranty (Middle East) On the purchase of your new Gigaset product, we guarantee that this equipment is a genuie manufacturer’s product and extend the following warranty: We guarantee this product against manufacturing defects for two full years from the date of purchase, unless specified otherwise. -
Page 14: Service Centres (Midde East)
Service Centres (Midde East) Saudi Arabian Service Centers: Customer Service Hotline UAE Ahmed Abdulwahed Trading Co. TEL: 00971-4-4458255 / 00971-4-4458254 Jeddah Service Center Service Collection Point Al-Amal Plaza, Hail Street, www.technocare-prodigy.com Jeddeh, Saudi Arabia, KARAMA Tel: 02-6500282 Ext. 209 Sea Shell Electronics Riyadh Service Center Opp. -
Page 15: Our Environmental Mission Statement
Our environmental mission statement We, Gigaset Communications GmbH, bear social responsibility and are actively committed to a better world. Our ideas, technologies and actions serve people, society and the environment. The aim of our global activity is to secure sustain- able life resources for humanity. - Page 16 Activation page 10 ¢ Wake-up time page 10 Audio Settings Handset Volume Can be set to one of 5 levels. (Gigaset A120) Handset Volume Earpiece/Speaker (Gigaset A220/ A220A) Ringer Volume 5 levels + "crescendo" available. Ringer Melody External Calls/Internal Calls/Alarm Clock...
- Page 17 Gigaset Communications GmbH Frankenstr. 2a, D-46395 Bocholt © Gigaset Communications GmbH 2012 Subject to availability. All rights reserved. www.gigaset.com...