
Related Manuals for Bryant Programmable Thermidistat


Summary of Contents for Bryant Programmable Thermidistat
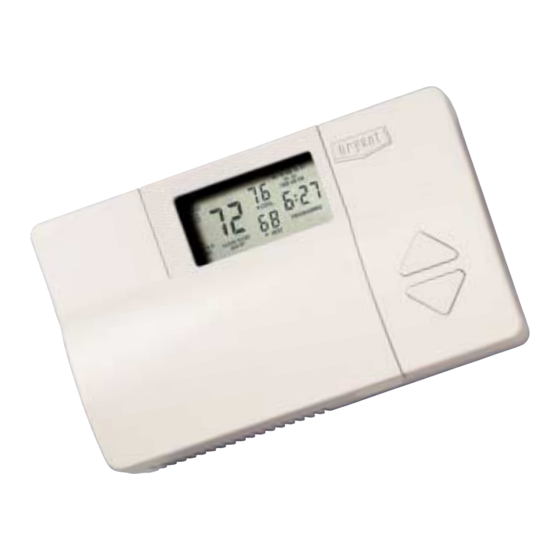
- Page 1 COMFORT CONTROL COMFORT CONTROL Programmable Thermidistat ™ Control Homeowner’s Guide...
- Page 2 Combining the brains of a computer and the simplicity of a garage door opener in an attractively designed package, Bryant makes enjoying the comfort of your home easier than ever. Just follow the instruc- tions in this guide, then relax knowing your Thermidistat Control is in command of your comfort.
- Page 3 Simple, Convenient Control. Bryant puts your family’s comfort at your fingertips with simple instructions, responsive push buttons and an easy-to-read, lighted display. Once set, the thermidistat control accurately monitors indoor conditions and reliably meets your desired comfort levels. Plus, you have the convenience of temporarily bypassing your settings without disrupting your permanent comfort schedule.
-
Page 4: Table Of Contents
TABLE OF CONTENTS PROGRAMMING THE THERMIDISTAT CONTROL Checking current humidification Setting the current day........1 and dehumidification settings.......19 Setting the current time ........1 Clean filter feature..........20 Setting the mode operation ........2 Vacation feature setup ........21 Setting the fan operation ........3 Vacation feature operation ......24 Personalize your comfort........5 AUTO CHANGEOVER.........25... -
Page 5: Programming The Thermidistat Control
PROGRAMMING THE THERMIDISTAT CONTROL Setting the current day Press the CHANGE DAY button. The day of the week will change. Press the UP or DOWN buttons Stop on the desired day. The Thermidistat until the correct time is displayed. To quickly Control then follows the program schedule advance to the proper time, press and hold for that day. -
Page 6: Setting The Mode Operation
PROGRAMMING THE THERMIDISTAT CONTROL Setting mode operation When the correct time appears on the display, Press MODE button. press the HOLD/END button. NOTE: If you choose not to press the HOLD/END When the MODE button is pressed, the words button, the word TIME will stop flashing after 15 seconds. -
Page 7: Setting The Fan Operation
PROGRAMMING THE THERMIDISTAT CONTROL Continue to press the MODE button until you reach the desired setting. COOL, Setting the fan operation Press the FAN button to switch between ON and AUTO fan settings. When the ON mode is selected, the fan runs and AUTO continuously for improved air circulation. - Page 8 PROGRAMMING THE THERMIDISTAT CONTROL NOTE: If the indoor humidity level is above the dehumidify setting, the fan will shut off for 5 minutes after the air conditioner shuts off. During this period, a triangle next to the word ON will flash. When the AUTO mode is selected, the fan runs only as needed to maintain your indoor temperature settings.
-
Page 9: Personalize Your Comfort
PROGRAMMING THE THERMIDISTAT CONTROL Personalize Your Comfort heating temperature, and cooling temperature in the appropriate blank. Before you program your Thermidistat Once completed, this chart will be your Control, take a moment to plan your guide during programming. temperature schedule. Each day of the week is divided into 4 time periods: NOTE: Your Thermidistat Control requires your WAKE, DAY, EVENING, and SLEEP. -
Page 10: Setting Your Comfort Schedule
PROGRAMMING THE THERMIDISTAT CONTROL HUMIDITY SETTINGS Setting your comfort schedule Before you begin programming, refer to page 5 of this manual to plan your personal comfort schedule. SUGGESTED SETTINGS Humidify– Press the PROGRAM button. The word PROGRAMMING appears on the De-humidify –... - Page 11 PROGRAMMING THE THERMIDISTAT CONTROL Above the clock, the word WAKE, DAY, EVE, or SLEEP will appear. The day to be programmed is displayed with a 2-letter abbreviation: MO, TU, WE, TH, FR, SA, or SU. Using your personalized comfort schedule as a guide, press the UP and NOTE: Your Thermidistat Control will always start DOWN buttons to set the time for the the programming process in the current time...
- Page 12 PROGRAMMING THE THERMIDISTAT CONTROL NOTE: Pressing the SET TIME/TEMP button The word COOL flashes on the display. allows you to select between HEAT, COOL, and TIME settings. Press the UP and DOWN buttons to adjust the heating temperature setting to match your personalized comfort schedule.
- Page 13 PROGRAMMING THE THERMIDISTAT CONTROL NOTE: During programming, if you have not touched a button or made an entry within 3 min- Press the PROGRAM button to utes, the programming mode will automatically advance to the next time period. Following shut off. Anything you have programmed will be your personalized comfort schedule, enter saved.
-
Page 14: Copying A Daily Schedule
PROGRAMMING THE THERMIDISTAT CONTROL Copying a daily schedule Press the COPY PREVIOUS DAY Typically, your Monday through Friday button. comfort schedule will be the same. That’s The previous day’s schedule will be entered why the Thermidistat Control includes a into the new day. COPY PREVIOUS DAY button. - Page 15 PROGRAMMING THE THERMIDISTAT CONTROL humidification off, press the MODE button until ”OF“ appears on the display. If the dhu indicator is displayed, press the HUMIDITY button again to display the hu indicator. (See suggested settings on page 6) NOTE: To change between humidify (hu) and dehumidify (dhu), press the HUMIDITY button.
- Page 16 PROGRAMMING THE THERMIDISTAT CONTROL NOTE: With the FAN indicator on, you will realize c. AUTO and FAN displayed — combines maximum humidification, but the air may feel cold the features of a and b. because the heat source is not always on. With the FAN indicator off, you will conserve water and electricity with adequate humidification.
-
Page 17: Setting The Dehumidification Level
PROGRAMMING THE THERMIDISTAT CONTROL e. Humidify setting only displayed — humidify setting does not change according Press the HUMIDITY button to to outdoor temperature. enter the humidification programming mode. The current indoor humidity (large number) is displayed along with the humidify (hu) or dehumidify (dhu) setting indicator and the current dehumidify set point (small number). -
Page 18: Setting The "Cool To Dehumidify" Function
PROGRAMMING THE THERMIDISTAT CONTROL Press the HOLD/END button to exit. Setting the “cool to dehumidify” With the dehumidify setting function displayed, press the UP or DOWN button to This setting allows a standard comfort adjust the dehumidify setting. Dehumidify system to provide moderate levels can be set from 50% to 90%. - Page 19 PROGRAMMING THE THERMIDISTAT CONTROL Press the HUMIDITY button until Press the MODE button until the ”dhu“ is displayed. COOL icon is displayed. Press the HOLD/END button to exit. Press the UP or DOWN buttons to raise or lower the dehumidify setting. Dehumidification can be set from 50% to 90%.
-
Page 20: Operating The Thermidistat Control
OPERATING THE THERMIDISTAT CONTROL Changing your comfort schedule Overriding your comfort schedule There are 2 ways to override the existing program. Press the PROGRAM button to begin the programming process. Pressing the HOLD/END button. Make necessary changes by By pressing the HOLD/END button, the following previous sections. -
Page 21: Checking The Outdoor Temperature And Indoor Humidity
OPERATING THE THERMIDISTAT CONTROL program cycle. Pressing HOLD will not temporarily change the other temperature permanently alter your set program. setting as needed. The Thermidistat Control will automatically restore the comfort sched ule settings at the next programmed time. Checking the outdoor temperature and indoor humidity Pressing the UP or DOWN buttons. -
Page 22: Checking Current Programmed Time And Temperature Settings
OPERATING THE THERMIDISTAT CONTROL Checking current programmed time The outdoor temperature will appear on and temperature settings the display. Press the PROGRAM button. The current time and temperature settings for the current day and time period are Then, the indoor humidity will be displayed. displayed for you to check. -
Page 23: Checking Current Humidification And Dehumidification Settings
OPERATING THE THERMIDISTAT CONTROL Press the PROGRAM button again Press the HOLD/END button to to advance to the next time period for the exit the program mode. same day. Continue this process to review all Checking current temperature settings for the day. The Thermidistat Control will display cur- rent temperature. -
Page 24: Clean Filter Feature
OPERATING THE THERMIDISTAT CONTROL The current indoor humidity (large number) is Clean filter feature displayed along with the humidify or Your Thermidistat Control reminds you dehumidify settings (small number). when it’s time to change or clean your filter by displaying the CLEAN FILTER indicator. -
Page 25: Vacation Feature Setup
OPERATING THE THERMIDISTAT CONTROL Vacation feature setup The OUT indicator is displayed. The vacation feature allows a separate set of temperature and humidity settings to be stored for vacation and recalled with a single button press. The vacation feature is preprogrammed for you with vacation settings for temperature and humidity. - Page 26 OPERATING THE THERMIDISTAT CONTROL Press the UP or DOWN button to Press the UP or DOWN button to adjust the setting for the flashing mode. adjust the setting for the flashing mode. Press the SET TIME/TEMP button until the Press the HUMIDITY button to other mode indicator flashes.
- Page 27 OPERATING THE THERMIDISTAT CONTROL Press the HUMIDITY button to display the second setting — either humidify or dehumidify. If you wish to change this setting, press the UP or DOWN button to adjust the setting. Press the MODE button to select the vacation humidify or dehumidify mode.
-
Page 28: Vacation Feature Operation
OPERATING THE THERMIDISTAT CONTROL The OUT indicator is displayed, and your system will automatically follow your Press the MODE button to select temperature and humidity settings. the vacation humidify or dehumidify mode. Press the HOLD/END button to end. NOTE: In dehumidify, you may enter a setting, Press the VACATION button when choose “cool to dehumidify,”... -
Page 29: Auto Changeover
AUTO CHANGEOVER Your Thermidistat Control provides NOTE: If auto changeover is not necessary in your complete, automatic control over heating area of the country, your installer may and cooling with auto changeover. Auto disable the AUTO mode. changeover means your system will automatically heat or cool as needed to maintain your temperature set points. -
Page 30: Smart Recovery
SMART RECOVERY Smart recovery is a feature of your new energy efficient than simply allowing the Thermidistat Control designed to save ener- system to operate at full capacity until the gy by gradually adjusting temperatures. desired temperature has been met. NOTE: The Thermidistat Control will start adjusting When it’s time for a programmed the temperature 1.5 hours before the scheduled... -
Page 31: What If
WHAT IF… AUXILIARY HEAT indicator is displayed… NOTE: This indicator does not reflect a problem with your system. The AUXILIARY HEAT indicator appears on the heat pump version of the Thermidistat HOLD indicator is displayed… Control only. It is displayed when your The HOLD indicator reminds you that system is operating on auxiliary heat. -
Page 32: The Out Indicator Is Displayed
WHAT IF… OUT Indicator is displayed… operating, the word HEAT preceded by a small triangle is displayed below the heating set The OUT indicator reminds you that your point. If the equipment turn on is being system is in vacation mode. This function delayed, the triangle and the word will flash. - Page 33 WHAT IF… You have a system error message… The display may appear as follows: --, E3, E4, E5, or E6 indicates a problem with the indoor air sensor E3 indicates a problem with the outdoor air temperature sensor E4, E5, or E6 indicates internal failure...
-
Page 34: Warranty
WARRANTY This Thermidistat Control includes a 1-year limited warranty. For detailed warranty information, please refer to the All Product Limited Warranty Card included in your information packet. This Thermidistat Control is also eligible for manufacturer’s extended system warranties. Ask your deal- er for details on extended warranties for longer-term protection. -
Page 35: Common Terms And Where To Find Them
COMMON TERMS AND WHERE TO FIND THEM Auxiliary Heat .........Pg. 27 cooling schedule, you move to the next day by pressing the CHANGE DAY button. Most heat pump systems require a This button also advances the day of the supplemental heating source, called week on the display. - Page 36 COMMON TERMS AND WHERE TO FIND THEM day. This schedule includes 4 time Dehumidification Level ....Pg. 13 periods per day, and can feature a different The amount of moisture to be removed from your home. You can check your comfort schedule each day of the week. actual humidity level and your desired Copy Previous Day ......Pg.
- Page 37 COMMON TERMS AND WHERE TO FIND THEM Fan.............Pg. 3 Humidification Level .......Pg. 10 The amount of moisture desired in your Your system’s fan can run continuously home to be supplied by the humidifier. You or only as called for during heating or can check the actual humidity level and cooling.
- Page 38 COMMON TERMS AND WHERE TO FIND THEM Outdoor Temperature ......Pg. 17 DOWN buttons to change the temperature settings for the remainder of the current Your Thermidistat Control not only registers period. the indoor temperature, but it may also be equipped to register and display the out- Power Outage........Pg.
- Page 39 COMMON TERMS AND WHERE TO FIND THEM Control. To activate the program function, Temperature Sensors......Pg. 12 press the PROGRAM button. Temperature sensors measure the current indoor or outdoor temperatures which Reset Filter........Pg. 20 are displayed on the Thermidistat Control. The reset filter function turns off the CLEAN FILTER indicator and restarts the Temperature Settings ......Pg.
- Page 40 Time of Day ........Pg. 5 When programming the Thermidistat Control, time of day refers to the 4 time periods available, including WAKE, DAY, EVE, and SLEEP. Time of day also refers to the time shown on the Thermidistat Control’s display. Up and Down Buttons.......Pg.
- Page 41 NOTES...
- Page 42 NOTES...
- Page 43 NOTES...
- Page 44 Manufacturer reserves the right to discontinue, or change at any time, specifications or designs without notice and without incurring obligations. 7310 West Morris Street, Indianapolis, IN 46231 Copyright 1997 Bryant Heating and Cooling Systems Form: OM17-24 Replaces: OM17-16 Printed in the U.S.A.