Table of Contents
Advertisement
Installer:
Leave this manual with the
appliance.
Consumer: Retain this manual for future
reference.
WARNING: If not installed, operated and
maintained in accordance with the manufactur-
er's instructions, this product could expose you
to substances in fuel or from fuel combustion
which can cause death or serious illness.
INSTALLATION INSTRUCTIONS
OWNER'S MANUAL
AND
GRAVITY VENTED
SINGLE WALL FURNACE
MODEL
HW250GW0XX1(N,P)-1
HW350GW0XX1(N,P)-1
WARNING: If the information in these in-
structions are not followed exactly, a fire or ex-
plosion may result causing property damage,
personal injury or loss of life.
— Do not store or use gasoline or other flamma-
ble vapors and liquids in the vicinity of this or
any other appliance.
— WHAT TO DO IF YOU SMELL GAS
• Do not try to light any appliance.
• Do not touch any electrical switch; do not
use any phone in your building.
• Immediately call your gas supplier from a
neighbor's phone. Follow the gas suppli-
er's instructions.
• If you cannot reach your gas supplier, call
the fire department.
— Installation and service must be performed
by a qualified installer, service agency or the
gas supplier.
Reverso en español
Page 1
Advertisement
Table of Contents

Related Manuals for HouseWarmer HW250GW0XX1(N,P)-1


Summary of Contents for HouseWarmer HW250GW0XX1(N,P)-1
-
Page 1: Installation Instructions
Reverso en español INSTALLATION INSTRUCTIONS OWNER'S MANUAL GRAVITY VENTED SINGLE WALL FURNACE MODEL HW250GW0XX1(N,P)-1 HW350GW0XX1(N,P)-1 WARNING: If the information in these in- structions are not followed exactly, a fire or ex- plosion may result causing property damage, personal injury or loss of life. — Do not store or use gasoline or other flamma- ble vapors and liquids in the vicinity of this or any other appliance. -
Page 2: Table Of Contents
TABLE OF CONTENTS SECTION PAGE Tools and Materials ....................... 3 Important Safety Information ....................4 Safety Information for Users of LP Gas ................5 Introduction ........................... 6 Specifications......................... 6 Recommended Vent Configuration ..................7 Gas Supply ..........................8 Clearances ..........................9 Location - All Models......................9 Ventilation and Combustion Air .................. -
Page 3: Tools And Materials
TOOLS AND MATERIALS NEEDED FOR INSTALLATION CENTER PUNCH TAPE MEASURE FLAT SCREWDRIVER PHILLIPS SCREWDRIVER ADJUSTABLE WRENCH HAMMER DRILL SNIPS Figure 1 HARDWARE PACKAGE Replacement screws, nuts, and washers can be purchased at most hardware stores. For ordering replacement parts see page 22. Figure 2 23800-5-0909 Page 3... -
Page 4: Important Safety Information
IMPORTANT SAFETY INFORMATION THIS IS A HEATING APPLIANCE DO NOT OPeRATe THIS APPLIANCe WITHOUT OUTeR CASING INSTALLeD. • Do not put anything around the furnace that will • Due to high temperatures the appliance should be located out of traffic and away from furniture and draperies. obstruct the flow of combustion and ventilation air. • Children and adults should be alerted to the hazards of •... -
Page 5: Safety Information For Users Of Lp Gas
SAFETY INFORMATION FOR USERS OF LP-GAS Propane (LP-Gas) is a flammable gas which can cause fires by point with the members of your household. Someday when and explosions. In its natural state, propane is odorless and there may not be a minute to lose, everyone's safety will depend colorless. You may not know all the following safety precau- on knowing exactly what to do. -
Page 6: Introduction
INTRODUCTION Introduction Installation in Residential Garages Vented wall furnace is shipped ready to install in a 2" x 4" stud wall, Gas utilization equipment in residential garages shall be installed with studs 16" (406 mm) center to center. Always consult your local so that all burners and burner ignition devices are located not less Building Department regarding regulations, codes or ordinances than 18"... -
Page 7: Recommended Vent Configuration
RECOMMENDED VENT CONFIGURATION Note: No vent equipment supplied with furnace. 4" Oval (all parts purchase locally) 1. Type B-1 oval pipe 2. Single story type B-1 gas vents require a baseplate and one pair of ceiling plate spacers. 3. Multi-story type B-1 gas vents require a baseplate, one pair of ceiling plate spacers at the first floor ceiling and one pair of fire stop spacers at each successive ceiling level. -
Page 8: Gas Supply
GAS SUPPLY Check all local codes for requirements, especially for the size and type of gas supply line required. Recommended Gas Pipe Diameter Pipe Length Schedule 40 Pipe Tubing, Type L Inside Diameter Outside Diameter Nat. L.P. Nat. L.P. 0-10 feet 1/2”... -
Page 9: Clearances
CLEARANCES In selecting a location for installation, it is necessary to provide adequate accessibility clearances for servicing and proper installation. Clearances to combustible surfaces is 4" (102 mm) from sides, 12" (305 mm) to top, 1 1/2" (38 mm) from floor. NOTE: Minimum distance of 1 1/2"... -
Page 10: Ventilation And Combustion Air
VENTILATION AND COMBUSTION AIR Wall furnaces shall be installed in a location in which the facilities for ventilation permit satisfactory combustion of gas and proper venting under normal conditions. In buildings of conventional frame, brick, or stone construction without tight storm windows and doors, infiltration is normally adequate to provide air for combustion and draft hood dilution. -
Page 11: Rough-In Instructions
ROUGH-IN INSTRUCTIONS Provide an opening in the wall 14 1/2" (368 mm) wide and 66 3. Attach baseplate (not supplied with furnace) to header plate 1/4" (168.3 cm) high measured from top of floor plate (See with sheet metal screws at each end. Figure 14 and Figure 19). - Page 12 ROUGH-IN INSTRUCTIONS 7. Position header plate at height shown in Figure 18. Attach enough vent pipe so that when installed in wall opening the vent pipe will extend above the ceiling plate by at least 6" 8. Locate rear edge of nailing flange at the back of the 2" x 4" (152 mm).
-
Page 13: Finishing Instructions
FINISHING INSTRUCTIONS Plastering (Figure 19) In new construction use only plain (not perforated) gypsum lath around furnace and vent pipe so that plaster "Keys" will not project into wall space. Use wood strips nailed to inside of studs and top of bottom plate. These must be removed before installation of furnace. - Page 14 FINISHING INSTRUCTIONS Place outer casing onto header. ATTACH HERE IF BLOWER IS INSTALLED Figure 24 3. Align clearance holes on outer casing bottom with screw holes on casing brackets by adjusting slots on casing brackets. 4. Complete tightening casing bracket screws from Step 1 to inner casing at this time.
-
Page 15: Removing The Outer Casing
REMOVING THE OUTER CASING 2. Open casing door. Remove two (2) screws that attach bottom When optional blower is not installed. At the top of the of outer casing to inner casing. outer casing, remove one (1) screw from the center clearance slot that attaches the outer casing to the header assembly. -
Page 16: Thermostat Location
THERMOSTAT LOCATION CAUTION — Do not run wire behind flanges of Header Plate or Connect thermostat wires to gas valve as shown in Figure 31. in any location where it might be damaged. Millivolt wall thermostats are specially designed for use on self- generating systems. -
Page 17: Piezo Pilot Ignitor
OPTIONAL THERMOSTAT BRACKET INSTALLATION Attach the thermostat bracket to the outer casing with two (2) 8. Attach thermostat to bracket with two (2) 8 x 3/8" Phillips 8 x 3/8" Phillips screws. screws. Figure 34 Replace the outer casing. 6. Remove cover of thermostat from base. Figure 37 9. -
Page 18: Lighting Instructions
LIGHTING INSTRUCTIONS FOR YOUR SAFETY READ BEFORE LIGHTING WARNING: If you do not follow these instructions exactly, a fire or explosion may result causing property damage, personal injury or loss of life. A. This appliance has a pilot which must be lighted by • If you cannot reach your gas supplier, call the fire hand. -
Page 19: Vent Safety Shutoff System
VENT SAFETY SHUTOFF SYSTEM This appliance must be properly connected to a venting system. This appliance is equipped with a vent safety shutoff system. Warning: Operation of this wall furnace when not connected to a properly installed and maintained venting system or tampering with the vent safety shutoff system can result in carbon monoxide (CO) poisoning and possible death. -
Page 20: Proper Main Burner Flame
PROPER MAIN BURNER FLAME The correct flame will be a short blue inner flame with a much larger light blue outer flame. The burner does not have a primary air adjustment. The flame will be proper if the factory-set pressure and orifice are used. -
Page 21: Troubleshooting
TROUBLESHOOTING Service must be performed by a Qualified Installer, Service If Pilot Does Not Remain "On" After Releasing Gas Control Agency, or the Gas Supplier. Knob Follow instructions and hold gas control knob down longer GENERAL All furnaces have been fire-tested to check for and harder. -
Page 22: Parts List
PARTS LIST ATTENTION: When ordering parts, it is very important that part number and description of part coincide. I n d e x I n d e x Part No. Description Part No. Description GWT-049 AIR SHUTTeR BOTTOM - HW350GW LPG WFA-115 HEADER GASKET GWT-014... -
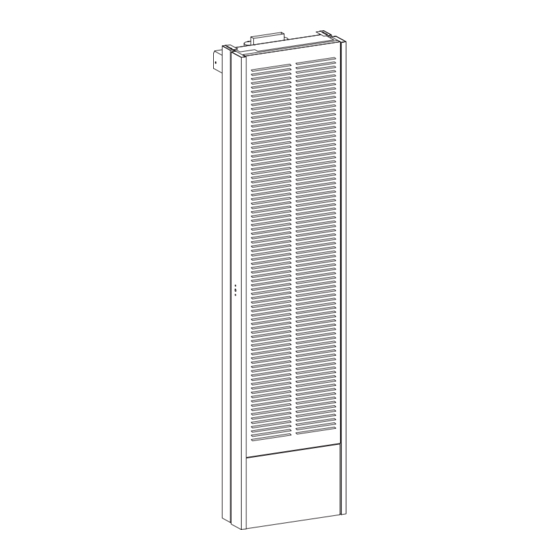
Page 23: Parts View
PARTS VIEW Figure 44 23800-5-0909 Page 23... -
Page 24: Warranty Information
How To Get Service Service under this warranty must be obtained by contacting Housewarmer. (Call area code 877-459-1583, Technical Support Group, empire Comfort Systems, Inc.) Provide the Customer Service Representative with the model number, serial number, type of gas and purchase verification information.