GE 23 Owner's Manual And Installation
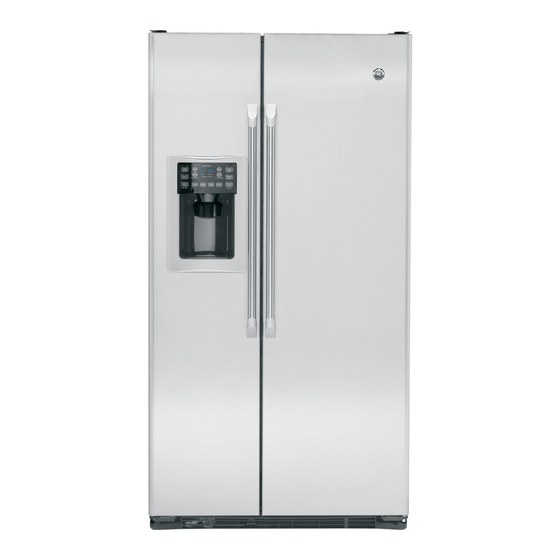
Profile side by side refrigerators
Hide thumbs
Also See for 23:
- Owner's manual and installation (144 pages) ,
- User manual (112 pages) ,
- Manual (89 pages)
Table of Contents
Advertisement
www.GEAppliances.com
Safety Instructions
. . . . . . . . . . .2-4
Owner's Manual
and Installation
Operating Instructions
Models 23, 25, 26, 27 and 29
Automatic Icemaker . . . . . . . . . . .12
Care and Cleaning . . . . . . . . . .14, 15
Crispers and Pans . . . . . . . . . . . . .11
Ice and Water Dispenser . . . . . . . .13
Profile Côte à Côte
Refrigerator Doors . . . . . . . . . . . .10
Réfrigérateurs
Replacing the Light Bulbs . . . . . . .16
Shelves, Bins and Racks . . . . . . . .8, 9
Temperature Controls . . . . . . . . . . .5
Manuel d'utilisation
™
. . . . . . . . . . . . . . . . . . .6
et d'installation
Water Filter . . . . . . . . . . . . . . . . . . .7
La section française commence à la page 44
Installing the Refrigerator . . . .26-29
Moving the Refrigerator . . . . .22-25
Profile Lado a Lado
Preparing to Install
Refrigeradores
the Refrigerator . . . . . . . . . . . . . . .21
Trim Kits and Panels . . . . . . . .17-20
Water Line Installation . . . . . .30-32
Manual del propietario
e instalación
. . . . . . .33-36
Normal Operating Sounds . . . . . .33
La sección en español empieza en la página 82
Consumer Support
Consumer Support . . . . .Back Cover
Performance Data Sheet . . . . . . . .40
Product Registration . . . . . . . .37, 38
Treatment Device Certificate . . . . .41
Warranty (Canadian) . . . . . . . . . . .42
Write the model and serial
numbers here:
Model # ______________________
Serial # ______________________
Find these numbers on a label inside
the refrigerator compartment at the
top on the right side.
200D2600P024
49-60239
12-02 JR
Advertisement
Table of Contents

Related Manuals for GE 23


Summary of Contents for GE 23
-
Page 1: Table Of Contents
Owner’s Manual and Installation Operating Instructions Models 23, 25, 26, 27 and 29 Automatic Icemaker ...12 Care and Cleaning ..14, 15 Crispers and Pans . - Page 2 IMPORTANT SAFETY INFORMATION. READ ALL INSTRUCTIONS BEFORE USING. WARNING! Use this appliance only for its intended purpose as described in this Owner’s Manual. SAFETY PRECAUTIONS When using electrical appliances, basic safety precautions should be followed, including the following: This refrigerator must be properly installed Keep fingers out of the “pinch point”...
-
Page 3: Use Of Extension Cords
www.GEAppliances.com DANGER! RISK OF CHILD ENTRAPMENT PROPER DISPOSAL OF THE REFRIGERATOR Child entrapment and suffocation are not problems Refrigerants of the past. Junked or abandoned refrigerators are All refrigeration products contain refrigerants, still dangerous…even if they will sit for “just a few which under federal law must be removed prior days.”... -
Page 4: How To Connect Electricity
IMPORTANT SAFETY INFORMATION. READ ALL INSTRUCTIONS BEFORE USING. WARNING! HOW TO CONNECT ELECTRICITY Do not, under any circumstances, cut or remove the third (ground) prong from the power cord. For personal safety, this appliance must be properly grounded. The power cord of this appliance is equipped with This provides the best performance and also a 3-prong (grounding) plug which mates with prevents overloading house wiring circuits which... -
Page 5: Temperature Controls
Although the Air Tower and the Air Tunnel can be removed, doing so will affect temperature performance. (For removal instructions, on-line, 24 hours a day, contact us at GEAppliances.com or call 800.GE.CARES. In Canada, contact us at www.geappliances.ca or call 1.800.361.3400.) -
Page 6: Turbocool
About TurboCool ™ How it Works TurboCool rapidly cools the refrigerator How to Use compartment in order to more quickly Press TurboCool. The TurboCool cool foods. Use TurboCool when adding a indicator light will come on; however, large amount of food to the refrigerator the refrigerator temperature display compartment, putting away foods after they will still show the current setting. -
Page 7: Water Filter
To order additional filter cartridges it to the left. Do not pull down on the in the United States, visit our Website, cartridge. A small amount of water www.GEAppliances.com, or call GE Parts may drip down. and Accessories, 800.626.2002. Filter Bypass Plug... -
Page 8: Shelves, Bins And Racks
About the shelves, bins and racks. Not all features are on all models. Refrigerator Door Bins and Freezer Door Tilt-Out Bins Snugger Large Bins The snugger helps prevent tipping, spilling or sliding of small items stored on the door The larger refrigerator door bins and shelf. - Page 9 www.GEAppliances.com Not all features are on all models. Slide-Out Spillproof Shelf The slide-out spillproof shelf allows you to reach items stored behind others. The special edges are designed to help prevent spills from dripping to lower shelves. To remove: Press tab and pull shelf Slide the shelf out until it reaches the stop, forward to remove then press down on the tab and slide the...
-
Page 10: Refrigerator Doors
About the refrigerator doors. Refrigerator Doors The refrigerator doors may feel different The resistance you feel at the stop than the ones you are used to. The special position will be reduced as the door door opening/closing feature makes sure is loaded with food. -
Page 11: Crispers And Pans
About the crispers and pans. www.GEAppliances.com Not all features are on all models. Fruit and Vegetable Crispers Excess water that may accumulate in the bottom of the drawers should be wiped dry. On some models, the bottom drawer has full extension slides that allow full access to the drawer. -
Page 12: Automatic Icemaker
About the automatic icemaker. A newly installed refrigerator may take 12 to 24 hours to begin making ice. Automatic Icemaker Special notes about dispenser models: On dispenser models, to Dispenser models have a tilt-out ice bin. access ice or reach the The icemaker will produce seven cubes The bin can be tilted out as shown in power switch:... -
Page 13: Ice And Water Dispenser
About the ice and water dispenser. (on some models) www.GEAppliances.com On some models To Use the Dispenser Select CUBED ICE , CRUSHED ICE Dispenser Light or WATER This pad turns the night Press the glass gently against the top of the light in the dispenser on dispenser cradle. -
Page 14: Care And Cleaning
Value, Servistar, HWI and other leading The dispenser cradle (on some models). stores. It is also available through GE Parts Before cleaning, lock the dispenser by and Accessories, 800.626.2002. Order part pressing and holding the LOCK CONTROL number WX10X15. - Page 15 www.GEAppliances.com Behind the Refrigerator Be careful when moving the refrigerator When pushing the refrigerator back, make sure away from the wall. All types of floor you don’t roll over the power cord or icemaker coverings can be damaged, particularly supply line (on some models). cushioned coverings and those with embossed surfaces.
-
Page 16: Replacing The Light Bulbs
Replacing the light bulbs. Setting either or both controls to 0 does not remove power to the light circuit. Refrigerator Compartment—Upper Light Unplug the refrigerator. After replacing the bulb with an appliance bulb of the same or lower The bulbs are located at the top of the wattage, replace the light shield and compartment, inside the light shield. -
Page 17: Trim Kits And Panels
Some models are equipped with trim kits that allow you to install door panels. You can order pre-cut black, white, bisque or stainless steel decorator panels from GE Parts and Accessories, 800.626.2002, or you can add wood panels to match your kitchen cabinets. - Page 18 Trim kits. Dimensions for Custom Wood Panels Freezer Panel Freezer Panel Without Dispenser With Dispenser Fresh Food Panel 1/8″ 1/8″ 1/8″ (3 mm) (3 mm) (3 mm) 5/16″ (8 mm) 5/16″ 5/16″ (8 mm) (8 mm) ″ ⁄ (45.4 cm) ″...
-
Page 19: Inserting The Door Panels
Inserting the door panels. Read these instructions completely and carefully. Insert the Freezer Panel and Fresh Food Panel. Carefully push the freezer panel in until it slides If your model has a dispenser, this step only applies into the slot behind the door handle. Push the filler to the fresh food panel and top freezer panel. - Page 20 Inserting the door panels. Install the Side Trim. These pieces are tucked inside the refrigerator door Hold the Side Trim against the front face of the handle. decorator panels and fit the Side Trim under the Top Trim. Make sure the magnetically attached Do not remove the protective film on the outside of the Side Trim is fitted correctly and that you are Side Trim until the Side Trim is installed.
-
Page 21: Installation Instructions
Installation Refrigerator Instructions Models 23, 25, 26, 27 & 29 Questions? Call 800.GE.CARES (800.432.2737) or Visit our Website at: www.GEAppliances.com In Canada, call 1.800.361.3400 or Visit our Website at: www.geappliances.ca BEFORE YOU BEGIN PREPARATION WATER SUPPLY TO THE ICEMAKER Read these instructions completely and carefully. -
Page 22: Moving The Refrigerator
Installation Instructions MOVING THE REFRIGERATOR LOADING THE RERIGERATOR If the refrigerator must go through any entrance that is less than 38″ ONTO A HAND TRUCK wide, the doors must be removed. Leave all tape and door pads on doors Proceed to Step 3. until the refrigerator is in its final location. - Page 23 Installation Instructions DISCONNECT THE POWER CLOSE THE FREEZER AND COUPLING (on some models) REFRIGERATOR DOORS If the refrigerator has a water dispenser, there is a power line (harness) from the cabinet into the bottom hinge on the freezer door that must be disconnected. To disconnect, pull apart at the coupling.
- Page 24 Installation Instructions MOVING THE REFRIGERATOR (CONT.) REMOVE THE REMOVE THE FREEZER DOOR (cont.) REFRIGERATOR DOOR (cont.) As one person slowly lifts the freezer door Remove the two 5/16” hex head screws, up and off the bottom hinge, the second then lift the hinge straight up to free the person should carefully guide the water hinge pin.
-
Page 25: Replacing The Doors
Installation Instructions REMOVE THE REPLACING THE DOORS REFRIGERATOR DOOR (cont.) To replace the doors, simply reverse steps 3 through 8. Lift the refrigerator door up and off the bottom hinge. However, please note the following: If the refrigerator has a refreshment •... -
Page 26: Installing The Refrigerator
⁄ CLEARANCES 36″ Allow the following clearances for ease (91.4 cm) of installation, proper air circulation and plumbing and electrical connections: 23′ 25,′ 27′ and 29′ 24″ (61 cm) Sides 1/8″ (4 mm) 1/8″ (4 mm) 1″ (25 mm) 1″ (25 mm) Back 1/2″... - Page 27 If you are using copper tubing, place a compression nut and ferrule (sleeve) onto the end of the tubing coming from the house cold water supply. If you are using the GE SmartConnect ™ tubing, the nuts are already assembled to the tubing.
-
Page 28: Level The Refrigerator
(CONT.) PUT THE REFRIGERATOR LEVEL THE REFRIGERATOR IN PLACE (cont.) Move the refrigerator to its final location. To adjust the rollers on 23′ models: Turn the front LEVEL THE REFRIGERATOR roller adjusting The refrigerator can be leveled by screws clockwise... - Page 29 Installation Instructions REPLACE THE BASE GRILLE START THE ICEMAKER Replace the grille by installing the two Set the icemaker power switch to the Phillips head screws. I (on) position. The icemaker will not begin to operate until it reaches its operating temperature of 15°F (–9°C) or below.
-
Page 30: Water Line Installation
Reverse Osmosis Water System, the only cut square. approved installation is with a GE RVKit. For To determine how much tubing you need: other reverse osmosis water systems, follow measure the distance from the water valve on the manufacturer’s recommendations. - Page 31 • A GE water supply kit (containing tubing, CHOOSE THE VALVE LOCATION shutoff valve and fittings listed below) is...
- Page 32 Make sure the tubing is fully inserted into the valve. Tighten the compression nut securely. Vertical Cold Water Pipe Saddle-Type For plastic tubing from a GE Shutoff Valve SmartConnect ™ Refrigerator Tubing kit, insert the molded end of the tubing into...
-
Page 33: Troubleshooting Tips
Normal operating sounds. www.GEAppliances.com Newer refrigerators sound different from older refrigerators. Modern refrigerators have more features and use newer technology. Do you hear what I hear? These sounds are normal. HUMMM... WHOOSH... The new high efficiency compressor may run faster You may hear the fans spinning at high speeds. -
Page 34: Before You Call For Service
Before you call for service… Troubleshooting Tips Save time and money! Review the charts on the following pages first and you may not need to call for service. Problem Possible Causes What To Do Refrigerator does not Refrigerator in defrost cycle. •... - Page 35 www.GEAppliances.com Problem Possible Causes What To Do Frequent “buzzing” sound •Set the power switch to the 0 (off) position. Keeping it Icemaker power switch is in the. I (on) position but the water in the I (on) position will damage the water valve. supply to the refrigerator has not been connected.
-
Page 36: Replacing The Light Bulbs
Before you call for service… Problem Possible Causes What To Do No water or ice cube • Call a plumber. Supply line or shutoff production valve is clogged. •Replace filter cartridge or remove filter and install plug. Water filter clogged. Dispenser is LOCKED. -
Page 37: Product Registration
You can rest easy, knowing that all your valuable household products are protected against expensive repairs. 800.626.2224 Place your confidence in GE and call us in the U.S. toll-free at for more information. *All brands covered, up to 20 years old, in the continental U.S. -
Page 38: Serial Number
Month Year * Please provide your e-mail address to receive, via e-mail, discounts, special offers and other important communications from GE Appliances (GEA). Check here if you do not want to receive communications from GEA’s carefully selected partners. GE Appliances... - Page 39 Notes. www.GEAppliances.com...
-
Page 40: Performance Data Sheet
Performance Data Sheet SmartWater Filtration System GWF / HWF Cartridge This system has been tested according to NSF/ANSI 42/53 for reduction of the substances listed below. The concentration of the indicated substances in water entering the system was reduced to a concentration less than or equal to the permissible limit for water leaving the system, as specified in NSF/ANSI 42/53.* (100% safety factors built in for unmetered usage) Standard No. -
Page 41: State Of California Water
Certificate Number 00 - 1434 Date Issued: May 30, 2000 Date Revised: February 9, 2001 GE Smart Water Filtration Systems - GWF06 GWF06 GE Smart Water Filtration Systems - GWF Hotpoint Refrigerator Systems - HWF General Electric Appliances Cysts (protozoan) -
Page 42: Warranty (Canadian)
CONSUMER WARRANTY (for customers in Canada) Your refrigerator is warranted to be free of defects in material and workmanship. What is covered How Long Warranted Parts Labour (From Date of Sale) Repair or Replace at Camco’s Option Compressor Ten (10) Years Ten (10) Years Five (5) Years Sealed System (including... -
Page 43: Refrigerator Warranty
Any part of the refrigerator which fails due to a defect in materials or workmanship. From the date of the During this full one-year warranty, GE will also provide, free of charge, all labor and in-home original purchase service to replace the defective part.