
Related Manuals for Goodmans GV102ZRH Series


Summary of Contents for Goodmans GV102ZRH Series
- Page 1 GV102ZRH Series HD Digital TV Recorder User Guide IMPORTANT: Please read all instructions carefully before use and keep for future reference.
- Page 2 Introduction Thank you for buying this HD Digital TV Recorder. You may already be familiar with using a similar unit, but please take time to read these instructions. They are designed to familiarise you with the unit’s many features and to ensure you get the very best from your purchase. In this manual the HD Digital TV Recorder will be referred to as the ‘digital box’.
-
Page 3: Table Of Contents
The above images are for illustrative purposes only and may differ to the items supplied. Contents Your HD DigitalTV Recorder ..4 Troubleshooting .......35 Getting started ......6 Specifications ......36 Daily use .........14 Warnings .........37 Advanced features ....19 Guarantee .......38 Settings ........28 Goodmans disclaimer ....39... -
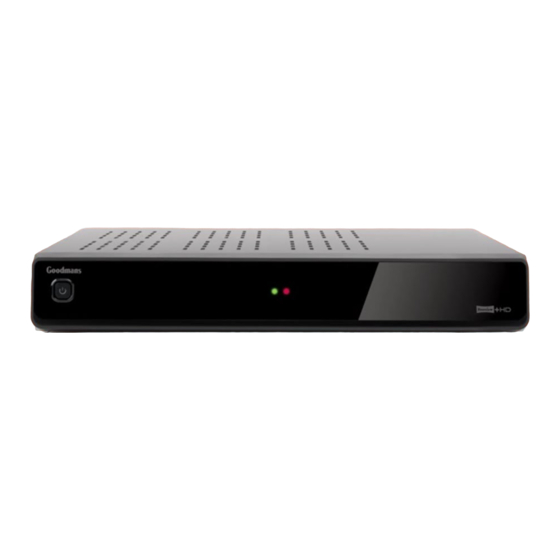
Page 4: Your Hd Digitaltv Recorder
Your HD Digital TV Recorder Front view RECORD INDICATOR POWER ON-OFF INDICATOR IR INDICATOR POWER ON-OFF SWITCH Rear view Manufactured under license from Dolby Laboratories. Dolby and the double-D symbol are trademarks of Dolby Laboratories. GV102ZRH32 0.1A 320GB Freeview + HD Digital Recorder POWER SUPPLY: DC 12V POWER ADAPTOR MAX POWER CONSUMPTION: 13W... - Page 5 Your HD Digital TV Recorder Remote control FAV (Favourites List): MUTE: Turns your TV Displays the list of your sound on/off favourite channels POWER: Switches the main HOME: Press unit to standby to return to BBC1 at any time SWAP: Switches between previous and currently ONLINE: Display the online menu watched TV channels...
-
Page 6: Getting Started
Getting Started Connecting up to your TV Your digital box connects to your TV via an HDMI connection. There are three cables to be connected as shown below. Cable 1. Connect the aerial cable between the RF IN socket on your digital box and your external aerial wall socket. - Page 7 Getting Started Connecting up your digital box to your router You will need an internet broadband router. If you are not ready to complete this stage of the setup at this time, you can skip this step and continue with setting up your digital box. Connecting to the internet enables you to use smart services.
-
Page 8: Connecting Power
Getting Started Connecting Power Before connecting power to the digital box, check that the mains voltage on the rating plate is the same as the voltage in your area. Plug the power connector on the power supply into the 12V DC IN connector on the rear panel of the digital box. - Page 9 Getting Started Fitting the batteries in the remote Alkaline batteries are recommended for best performance. Referring to the diagram below, unclip the battery compartment lid and lift it away. Fit the two type AAA batteries supplied into the battery compartment, observing the polarity shown below and embossed in the base of the compartment.
- Page 10 Getting Started Installation Easy install (recommended) When you first connect your digital box to a TV and turn it on, the ‘First Time Installation’ screen will be displayed. Easy install is the recommended option as it will attempt to find the optimal settings for your TV and digital box.
- Page 11 Getting Started number keys (0 to 9) on the remote control. Press OK to confirm your selection, or Press the OK button to skip this stage. The PIN can be set later. DON’T FORGET! Remember to make a note of your PIN for later use.
- Page 12 Getting Started Advanced install The Easy install is the recommended installation option. However you may want to choose the ‘Advanced’ option to manually select the specific aspect ratio or display resolution of your screen. DON’T FORGET! You can re-run the install process again at any time. To carry out an ‘Advanced’...
- Page 13 Getting Started The ‘Tuning’ function will be selected, showing the number of TV and Radio channels currently stored in the digital box. For a first time install, these will both be 0. 10. Press the OK Button. The system will scan for TV and Radio channels and updates the number of channels found.
-
Page 14: Daily Use
Daily Use Your digital box has some functions you DON’T FORGET! If the delay will use everyday, and others that you between pressing 5 and 1 is too only use occasionally. long, then the digits will not be read You can find commonly used functions as 51. -
Page 15: Pausing Live Tv
Daily Use Using the Channel List Press the V- Button to decrease the volume. The Channel List contains all the channels found during installation and A symbol will be displayed in the top is displayed in a single column format in right of the screen to indicate the numerical order. - Page 16 Daily Use You can Fast Forward (up to the current Recording time) and Rewind to any time from the The Record button is used to record time you started viewing the channel. programmes while watching Live TV or from within the Guide. The amount you can Rewind can be set with the ‘Timeshift Amount’...
- Page 17 Daily Use Playing a recording Subtitles Press the LIBRARY Button on the Subtitles, if present, can be set to be remote control to open the Library. displayed (overlay the TV picture) or not displayed. Use the ‚ and Buttons to select the recording you wish to play.
- Page 18 Daily Use Press the i Button again to display Press the OK Button to confirm your an extended information: selection. • A synopsis of the programme If not appropriate (for example when viewing a photograph or any other • Programme start and finish times media type that has no soundtrack), •...
-
Page 19: Advanced Features
Advanced Features Main menu to watch now, set a reminder for a later event, record live programmes or plan a The Main menu is a list of items future recording, and view information arranged in a column located on the left about selected programmes. - Page 20 Advanced Features preview window the YELLOW button. Repeat as required • Guide table: A variable two-hour window in the next 7 days organised • To step forward 24 hours, press the by time and date. Shows programme BLUE Button. Repeat as required. names, times and content information Navigate to and watch a •...
- Page 21 Advanced Features you will be asked if you want to series will be marked with the icon and record in standard definition (SD) or will be recorded when next broadcast. in high definition (HD). If you selected ‘Stop series’, then the current recording will stop and the icon DON’T FORGET! HD requires more will be removed from the programme...
- Page 22 Advanced Features The ‘Record icon’ will be placed Resolving recording conflicts alongside the programme cell in the If you try to record two programmes table. where the broadcast times overlap, the ‘Conflict Management’ window will be The programme will start to be recorded displayed.
- Page 23 Advanced Features Accessing the Library The Library lists recorded programmes and scheduled recordings in a four column list and shows the following information: • Programme Name • Channel Number and Name 1. Use the ‚, , ƒ and „ Buttons •...
- Page 24 Advanced Features The recording will playback now Use the ‚, , ƒ and „ Buttons according to the option selected. to navigate to the recording you wish to play. ‘Play from time’ option Press the OK button. You may know the time in a recording The recording will start to play from the that you would like to start playback beginning.
- Page 25 Advanced Features Deleting a recording When you wish to permanently remove a recording from the hard disk: Use the ‚, , ƒ and „ Buttons to navigate to the recording you wish to delete. Press the RED Button (Delete). 1. Press the LIBRARY Button on the A message box will open named remote control to open the library.
- Page 26 Advanced Features Sorting the library contents When the Library is displayed, press the BLUE Button (Sort). The list will be mirrored top-to-bottom. Press the BLUE Button again to return to the previous order. Library coloured buttons Channel list Press the LIBRARY Button on the The channel list function displays a list remote control to open the library...
- Page 27 Advanced Features watch. The favourites list is created Use the ‚and Buttons to select by selecting specific channels from the ‘New favourite’. main channel list and adding them to Press the OK Button. your favourites list. It will be called and Use the ‚, , ƒ...
-
Page 28: Settings
Settings Settings menu Use the ƒ and „ Buttons to adjust the setting from the available The Settings Menu functions let you presets, or where the setting is configure your digital box to your ‘Launch’, press the OK Button to optimal viewing preferences. -
Page 29: Language Settings
Settings If you have connected your digital box Language settings to a surround sound system using the S/PDIF output, or to an AV receiver using HDMI then select ‘Bitstream’. Screen size This allows you to set the aspect ratio output by your digital box to your TV. The available options are: Letterbox 4:3, Pan and Scan 4:3, Widescreen 4:3 and Audio language... -
Page 30: Parental Settings
Settings Old Irish and Welsh, see above. To set a new PIN of your choice: Use the ‚ and Buttons to select Parental settings ‘Set System PIN’. A panel opens asking you to enter your new PIN. Press the OK Button. - Page 31 Settings This symbol appears in the programme select ‘Always Ask’ and you will be descriptor panel to alert you that the asked at the time of selecting the programme may be unsuitable for recording. viewing by children’ The programme The available options are: Record may contain bad language, violence or Entire Series, Record Single Event Only, other adult material.
-
Page 32: System Settings
Settings The available options are: 5 seconds, 15 message box will be displayed seconds, 30 seconds and 60 seconds. informing you that formatting the hard disk drive will delete all Automatic hard drive space recordings from the hard drive. management Use the ƒ... - Page 33 Settings Channel retune Button to see the lists of channels found. Launch this function when you want to scan for channels at any time after Press the GREEN (View Channels) First Time Installation, for example if you Button again to hide the lists. have moved the digital box to another To accept the channels found and location where the channel frequencies...
- Page 34 Settings Have this information available if you The ‘Manual search’ window will be need to contact the customer helpline. displayed. Revert to default settings Use the ‚, , ƒ and „ Buttons to navigate and edit the Channel This function allows you to return your number and Frequency for the digital box to its default factory settings.
-
Page 35: Troubleshooting
Troubleshooting Troubleshooting Please note indoor aerials are not recommended for use with this product (this includes loft aerials) otherwise you may experience problems with reception or picture break-up on some channels. Problem Possible cause What to do Standby light not lit. Mains adaptor Connect mains adaptor. -
Page 36: Specifications
Specifications Specifications Tuner and channel • RF input connector (IEC-TYPE, IEC169-2, female) • RF output connector (IEC-TYPE, IEC169-2, male) Decoder Transport stream • MPEG-2/4 ISO/IEC 13818 • MAX. 15Mbit/s Profile level Input rate • MPEG-2 /4 MPML Video format • 4:3/16:9 Switchable Audio format •... -
Page 37: Warnings
Warnings Warnings Safety Tips • Refer repairs to this digital box to If smoke, abnormal noise or odor comes qualified service personnel only. out of this digital box, unplug from the mains supply immediately and contact • Do not disassemble this digital box. the retailer. Never try to repair the • There are dangerous-voltage parts digital box on your own. Always contact inside that may cause electric shock the dealer for repairs. -
Page 38: Guarantee
Guarantee The digital box is guaranteed for twelve months from the date of original purchase. If any defect due to faulty materials or workmanship, contact the Goodmans Helpline. Have your receipt of purchase on hand. The guarantee is subject to the following provisions: • It is only valid within the boundaries of the country of purchase. -
Page 39: Goodmans Disclaimer
Goodmans range, we cannot guarantee them. Any software updates that we do make available may be done so in a number of different ways e.g. they may... - Page 40 Goodmans Disclaimer Exclusions In view of the above, there are certain things for which we exclude our liability and certain things for which we do not, as explained below. What we don’t exclude: • We do not exclude or limit our liability for any of the following: • death or personal injury caused by our negligence, fraud or fraudulent misrepresentation; • defective products under the Consumer Protection Act 1987; or • any other matter for which it would be illegal or unlawful for us to limit, exclude or attempt to exclude our liability.
- Page 41 Goodmans Disclaimer Your privacy We do not collect or process any of your personal data using this product nor do we store or access any ‘cookies’ on its hard drive. However, the third party services that you access using this product may collect, store and process personal information about you and may also use features such as cookies.
- Page 42 0871 230 1777 GV102ZRH-Series 110313-Rev0...