Table of Contents
Advertisement
professional
www.chamberlainanz.com
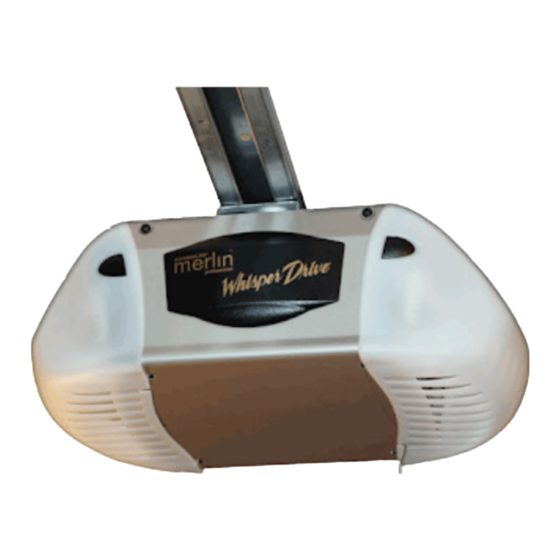
MT3850
Sectional Garage Door Opener
INSTALLATION AND OPERATING INSTRUCTIONS
Owner's Copy: Keep these Instruction for Future Reference.
Please read this manual and the enclosed safety materials carefully!
Periodic checks of the opener are required to ensure safe operation.
Advertisement
Table of Contents

Related Manuals for Chamberlain Merlin Whisper Drive MT3850


Summary of Contents for Chamberlain Merlin Whisper Drive MT3850
- Page 1 MT3850 Sectional Garage Door Opener INSTALLATION AND OPERATING INSTRUCTIONS Owner’s Copy: Keep these Instruction for Future Reference. Please read this manual and the enclosed safety materials carefully! Periodic checks of the opener are required to ensure safe operation.
-
Page 2: Table Of Contents
START BY READING THESE IMPORTANT SAFETY INSTRUCTIONS WARNING • Failure to comply with the following instructions may result in serious personal injury or property damage. • Read and follow all instructions carefully. • The garage door opener is designed and tested to offer safe service provided it is installed and operated in strict accordance with the instructions in this manual. -
Page 3: Preparing The Door
Preparing your garage door Before you begin: To prevent possible SERIOUS INJURY or DEATH: • Disable locks. • ALWAYS call a qualified door technician if garage door binds, • Remove any ropes connected to garage door. sticks, or is out of balance. An unbalanced garage door may not •... -
Page 4: Planning
Planning Identify the type and height of your garage door. Survey your garage area to see if any of the conditions below apply to your installation. Additional materials may be required. You may find it helpful to refer back to this page and the accompanying illustrations as you proceed with the installation of your opener. -
Page 5: Hardware Provided
Carton Inventory Your garage door opener and rail are packed in two separate cartons. The MT3850 Opener Carton contains the opener, it’s fitting hardware and accessories. The Rail Carton contains the rail and it’s hardware as illustrated below. If anything is missing, carefully check the packing material. -
Page 6: Assembly Section
ASSEMBLY STEP 1 Assemble the Sectional Rail (if used) Rail Section If using 1-Piece Rail Proceed to Step 5 Rail Assembly To avoid installation difficulties, do not run the garage door opener until instructed to do so. Brace • Place rail pieces on flat surface for assembly (all four sections are interchangeable). - Page 7 ASSEMBLY STEP 4 Assemble the Header Sleeve • Install the carriage bolt through the header sleeve Carriage Bolt bracket. Spring • Install the flat washer and spring assembly onto the Header Sleeve carriage bolt. Assembly • Insert carriage bolt of header sleeve assembly into slot Flat Washer cut into pulley bracket.
- Page 8 ASSEMBLY STEP 7 Set Belt Tension • Thread spring nut onto the carriage bolt until finger tight. Insert a screwdriver tip into one of the slots of the nut ring and brace it firmly against the header sleeve. • Place an open end wrench on the square end of the spring nut, slightly rotate nut about 1/4 turn clockwise until nut ring is released against header sleeve.
-
Page 9: Installation Section
INSTALLATION STEP 1 Unfinished Determine the Header Bracket Ceiling OPTIONAL Location CEILING MOUNT HEADER BRACKET Header Wall Timber brace To prevent possible SERIOUS INJURY or DEATH: Vertical Centreline • Header bracket MUST be RIGIDLY fastened to structural of Garage Door support on header wall or ceiling, otherwise garage door might Timber Brace Structural... -
Page 10: Install The Header Bracket
INSTALLATION STEP 2 Install the Header Bracket Wall Mount NOTE: Refer to vertical centre and horizontal lines created in Step 1 for proper placement of header Header Bracket Centre Line bracket. Horizontal Line (C Doors) Wall mount: Centre the header bracket on the vertical centre line with the bottom edge of the header bracket on 200mm the horizontal line (with the arrow pointing toward the... -
Page 11: Attach The Rail To The Header Bracket
INSTALLATION STEP 3 Attach the Rail to the Header Bracket • Position the opener on the garage floor below the header bracket. Use foam packing material as a protective base. NOTE: If the door spring is in the way you’ll need Header Wall help. - Page 12 INSTALLATION STEP 4 Position the Opener To prevent scratching or marking the garage door, rest garage door opener rail on piece of wood placed on top section of door. Follow instructions which apply to your door type as illustrated. Sectional Door (A) or Tracked Tilt Door (B) You will need a 50mm piece of timber or similar spacer to gauge the distance between door and rail.
-
Page 13: Hang The Opener
INSTALLATION STEP 5 Hang the Opener To avoid possible SERIOUS INJURY from a falling garage door opener, fasten it SECURELY to structural supports of the garage. Three representative installations are shown. Yours may Concrete anchors MUST be used if installing ANY brackets into be different. -
Page 14: Fasten The Door Bracket
INSTALLATION STEP 6 Fasten the Door Bracket Fiberglass, aluminum or lightweight steel garage doors WILL REQUIRE reinforcement (not provided) BEFORE installation of Follow the instructions which apply to your door type as door bracket. Contact your door manufacturer for reinforcement illustrated below or on the following page. - Page 15 ONE-PIECE TILT DOORS (B,C) • Centre the door bracket on the top of the door, in line with the header bracket as shown. Mark either the left Fiberglass, aluminum or lightweight steel garage doors WILL and right, or the top and bottom holes. REQUIRE reinforcement (not provided) BEFORE installation of •...
-
Page 16: Connect Door Arm To Trolley
INSTALLATION STEP 7 Figure 1 Connect Door Arm to Trolley Follow instructions which apply to your door type as illustrated below and on the following page. Outer Trolley SECTIONAL DOORS ONLY Ring Fastener Make sure garage door is fully closed. Pull the Clevis Pin emergency release handle to disconnect the outer trolley from the inner trolley. - Page 17 INSTALLATION STEP 8 Install the C198 LCD Motion Detecting Control To prevent possible SERIOUS INJURY or DEATH from electrocution: • Be sure power is NOT connected BEFORE installing door There are 2 screw terminals on the back of the door control. control.
-
Page 18: Install The Protector System (Ir Beams)
INSTALLATION STEP 9 Install The Protector System To protect small children, install The Protector Figures 1, 2 and 3 show recommended assembly of System™ no higher than 100mm above the floor. bracket(s) and "C" wrap based on the wall installation of Disconnect power to the garage door opener before the sensors on each side of the door shown above, or on installing The Protector System™. -
Page 19: Install The Lights
Lamps as they may cause damage to the lens cover. If unsure 1/2 minutes when power is connected. check the Chamberlain web page for details. Then the lights will turn OFF. NOTE: Lights do not turn on in battery mode. -
Page 20: Install The Battery And Connect Electric Power
ANY service or maintenance. 2 seconds, indicates the opener is activating the door and is operating off the battery. • Use only Chamberlain part # 041A6357-1 for replacement • A flashing LED with beep, sounding every 30 seconds, battery. -
Page 21: Adjustment Section
ADJUSTMENT STEP 1 Program the Travel Limits • NEVER use force adjustments to compensate for a binding or NOTE: Travel limits regulate the points at which the sticking garage door. door will stop when moving up or down. Follow the •... -
Page 22: Setting The Force
ADJUSTMENT STEP 2 Setting the Force • Too much force on garage door will interfere with proper operation of safety reversal system. The force setting button is located on the left panel • NEVER use force adjustments to compensate for a binding or of the opener. -
Page 23: Test The Safety Reversal System
ADJUSTMENT STEP 3 Test the Safety Reversal System • Safety reversal system MUST be tested every month. • After ANY adjustments are made, the safety reversal system TEST MUST be tested. Door MUST reverse on contact with 40mm obstacle on the floor. •... -
Page 24: Lcd Motion Detecting Control
(Lang) Language Feature USING THE C198 LCD MOTION Press this side button to toggle between the three languages – DETECTING CONTROL English, Spanish and French. Degrees F/C Feature Press this side button to toggle the temperature units between Fahrenheit and Celsius. Motion Sensing ON/OFF Push Bar... -
Page 25: Wireless Programming
WIRELESS PROGRAMMING To Add or Reprogram a Hand-held Remote Control Activate the opener only when door is in full view, free of obstruction and properly adjusted. No one should enter or leave garage while door is in motion. Do not allow children to operate push button(s) or remote(s). - Page 26 WIRELESS PROGRAMMING Adding C840 (keypad) KEYLESS DEVICE PROGRAMMING Indicator Light Push Orange button Black twice to enter Button unit into Force Adjustment Mode Orange Button Activate the opener only when door is in full view, free of obstruction and properly adjusted. No one should enter or leave garage while door is in motion.
- Page 27 TROUBLE SHOOTING (ONBOARD DIAGNOSTICS) 4 Flashes: Safety reversing sensors slightly misaligned (dim or flashing LED). Your opener is equipped with a self diagnostic program which can provide trouble status through as series of flashes of the Indicator Light under the Symptom: Sending indicator light glows steadily, Lens Cover.
-
Page 28: Troubleshooting
TROUBLE SHOOTING 1. Opener doesn't operate from either door control or remote: 10. Opener strains: • Does the opener have electric or battery power? Plug Door may be unbalanced or springs are broken. Close lamp into outlet. If it doesn't light, check the fuse box or door and use manual release rope and handle to the circuit breaker. -
Page 29: Replacement Parts
REPLACEMENT PARTS 041A5414-9 Hardware bag 083A0011 041A2828 Grease Release rope and handle 171A0028 041A5800 Outer trolley 041B4494-1 Bell wire 041A6398 Inner trolley repair kit 012C0810 End bracket 30mm steel 183D0177 Segmented rail sections 183D0178 Segmented rail braces 178B0034B Straight arm 012B0906 Door bracket plate One Piece Rails... -
Page 30: Accessories
OPENER ASSEMBLY PARTS If the supply cord is damaged, it must be replaced by the manufacturer, its service agent or similarly qualified persons in order to avoid hazard. 041A5845 041A7124-1 Belt Pulley cover Line cord and sprocket 041A7125 041B4375-3 Light socket 108D0079 Terminal block Light lens... -
Page 31: Using Your Garage Opener
They will turn off automatically after 2-1/2 minutes or provide constant light when the Light feature on the LCD Motion SPECIAL NOTE: Chamberlain strongly recommends Detecting Control is activated. Bulb size is E27. Bulb power is that The Protector System (IR Beams) be installed 40 watts maximum. -
Page 32: Warranty
Zealand Limited (Seller) warrants to the original from breach of law or contract or for negligence, exceed the purchaser of the Merlin MT3850 Garage Door Opener cost of repairing or replacing the Unit or refunding the (Unit) that it is free from defects in material and/or purchase price of the Unit.