
Related Manuals for Whirlpool 30" ELECTRIC MODULARDOWNDRAFT COOKTOP


Summary of Contents for Whirlpool 30" ELECTRIC MODULARDOWNDRAFT COOKTOP
- Page 1 SERVICE MANUAL for the 30 " ELECTRIC MODULAR DOWNDRAFT COOKTOP February, 1996 Printed in U.S.A. LIT 4321972...
- Page 2 THIS MANUAL CONTAINS INFORMATION NECESSARY FOR INSTALLING AND SER- VICING THE FOLLOWING WHIRLPOOL 30 " ELECTRIC MODULAR DOWNDRAFT COOKTOP, MODEL: RC8700ED RC8720ED THE MANUAL IS DESIGNED TO BE USED ONLY BY QUALIFIED SERVICE PERSON- NEL. THE SERVICE INFORMATION IS OR- GANIZED TO HELP YOU EASILY FIND WHAT YOU NEED.
-
Page 3: Table Of Contents
Cooking Products Service Manual 4321973 Original April, 1996 © 1996 Whirlpool Corporation Page iii Table of Contents Page Important Safety Information ....................... iv Installation Highlights ........................1-1 Before You Start ..........................1-1 Cooktop Dimensions ........................1-1 Cutout Dimensions ........................1-2 Clearance Dimensions ........................1-2 Tools & Material You Will Need ....................1-3 Venting Requirements ........................1-4... -
Page 4: Important Safety Information
IMPORTANT SAFETY INFORMATION This service manual is intended for factory-service WARNING technicians only. We recommend that customers DO NOT service their own units, because of the complexity and risk of high-voltage electrical shock. Fire Hazard The following information is used throughout this Do not obstruct the flow of combustion and manual, and should be read carefully. -
Page 5: Installation Highlights
Cooking Products Service Manual 4321972 Original April, 1996 © 1996 Whirlpool Corporation Page 1-1 INSTALLATION HIGHLIGHTS BEFORE YOU START Proper installation is your responsibility. Make The location where the cooktop is installed sure that you have everything necessary to should be away from strong draft areas, such properly install the cooktop. -
Page 6: Cutout Dimensions
CUTOUT DIMENSIONS countertop 27-7/8 " (73.3 cm) 5 " (12.7 cm) cutout width Install rear 20-7/8 " wall junction 17 " (53.2 cm) box in shaded (43.2 cm) cutout depth area. Darker shaded area is preferred. 15/16 " (2.4 cm) minimum 1-7/8 "... -
Page 7: Tools & Material You Will Need
Cooking Products Service Manual 4321972 Original April, 1996 © 1996 Whirlpool Corporation Page 1-3 TOOLS & MATERIAL YOU WILL NEED ILLUSTRATION DESCRIPTION Phillips screwdriver Metal cutters Gloves Caulk gun with weatherproof caulk Electric or hand drill Pliers Safety glasses Measuring tape... -
Page 8: Venting Requirements
VENTING REQUIREMENTS For the quietest and most efficient operation: WARNING • Use 26-gauge minimum galvanized, or 25- gauge minimum, aluminum metal duct. Poor-quality pipe fittings can reduce air Fire Hazard flow. (Note: Local codes may require a The venting system must terminate outdoors. heavier-gauge material.) Flexible metal Do not end the ductwork in an attic, wall, duct is not recommended. - Page 9 Cooking Products Service Manual 4321972 Original April, 1996 © 1996 Whirlpool Corporation Page 1-5 Determine the best type of venting method to are shown below, and on the following page. use. The cooktop can be vented through the Make sure that there is proper clearance within rear wall, or through the floor.
- Page 10 12 " (30.5 cm) 6 " round 5 " to 6 " round metal transistion minimum PVC sewer concrete 6 " round metal duct pipe slab 6 " round PVC coupling wall cap 6 " round sewer pipe window well Seal the space be- tween the outside of 6 "...
- Page 11 Cooking Products Service Manual 4321972 Original April, 1996 © 1996 Whirlpool Corporation Page 1-7 Chart The cooktop is equipped with a dual-range To use the following chart, list the number of blower. The blower is factory-set to operate at each piece, and the length of straight ductwork the “Low”...
- Page 12 6 " Round Duct System Equivalent Length 30- 6 " Round Duct System Equivalent Length feet (9.1 m) Or Less Greater Than 30-feet (9.1 m) Set Blower To “Low” Range Set Blower To “High” Range Example: Example: blower at “high” range blower at “low”...
- Page 13 Cooking Products Service Manual 4321972 Original April, 1996 © 1996 Whirlpool Corporation Page 1-9 CHANGING THE RANGE SETTING 2. Rotate the blower to the proper angle needed for your installation. The blower IMPORTANT NOTE: This cooktop is equipped can be swiveled 90˚. To rotate the blower: with a dual-range blower.
-
Page 14: Installing The Cooktop
INSTALLING THE COOKTOP To install the cooktop, refer to the following 2. Connect the duct system (if necessary, steps. see pages 1-4 through 1-9 for ducting re- quirements). 1. Lift the cooktop from the shipping carton and remove the shipping materials, hard- NOTE: It may be easier to connect the cooktop ware package, and printed material. -
Page 15: Electrical Supply Requirements
Cooking Products Service Manual 4321972 Original April, 1996 © 1996 Whirlpool Corporation Page 1-11 ELECTRICAL SUPPLY REQUIREMENTS • A time-delay fuse, or circuit breaker, is WARNING recommended. The fuse must be sized as per local codes in accordance with the elec-... -
Page 16: Electrical Connections
ELECTRICAL CONNECTIONS 2. Remove the junction box cover from the WARNING junction box inside the cabinet. 3. Remove the cooktop junction box cover Electrical Shock Hazard located on the right side of the cooktop. An electrical ground is required on this 4. - Page 17 Cooking Products Service Manual 4321972 Original April, 1996 © 1996 Whirlpool Corporation Page 1-13 Wiring To A Cabinet Or A Wall-Mounted Junction Box GROUNDED NEUTRAL UNGROUNDED NEUTRAL 1. Connect the bare and white appliance cable 1. Connect the white appliance cable wire to wires to the white (neutral) power supply the white (neutral) power supply wire.
- Page 18 Wiring To The Cooktop Junction Box GROUNDED NEUTRAL UNGROUNDED NEUTRAL 1. Connect the bare and white appliance cable 1. Connect the white appliance cable wire to wires to the white (neutral) power supply the white (neutral) power supply wire. wire. 2.
-
Page 19: Venting Operation Check
Cooking Products Service Manual 4321972 Original April, 1996 © 1996 Whirlpool Corporation Page 1-15 VENTING OPERATION CHECK 1. Make sure that all of the control knobs on 7. Turn on the fan switch. If the downdraft vent the cooktop’s control panel are turned to system is operating properly, the blower OFF. - Page 20 — NOTES — 1-16...
-
Page 21: Theory Of Operation
Cooking Products Service Manual 4321972 Original April, 1996 © 1996 Whirlpool Corporation Page 2-1 THEORY OF OPERATION THE COIL ELEMENTS The coil module consists of one 6 ", and one 8 " 120-volts to the surface unit indicator light. A resis- element. -
Page 22: The Radiant Elements
THE RADIANT ELEMENTS The ceramic glass module consists of one 6 " and A resistor inside the switch also energizes and one 8 " element. The elements are controlled by an creates a heat load, which opens cycling contacts infinite switch. When a switch is turned to the Low, L2 to H2. -
Page 23: The Grill Elements
Cooking Products Service Manual 4321972 Original April, 1996 © 1996 Whirlpool Corporation Page 2-3 THE GRILL ELEMENTS When a switch is turned to the Low, Medium or A 2800-watt grill module is available for use in this High position, contacts L1 to H1, and L2 to H2 cooktop. -
Page 24: The Fan Motor
THE FAN MOTOR MANUAL OPERATION AUTOMATIC OPERATION The fan motor is operated by a fan switch that is Whenever the grill module is turned on, contact L1 located on the control panel of the cooktop. When in the infinite switch provides 120-volts to the fan the switch is turned “ON,”... -
Page 25: Component Access
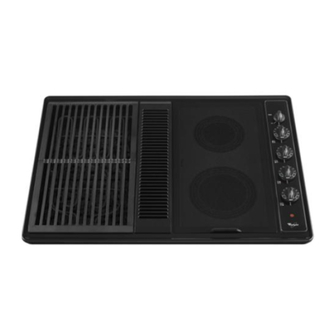
Cooking Products Service Manual 4321972 Original April, 1996 © 1996 Whirlpool Corporation Page 3-1 COMPONENT ACCESS THE COOKTOP COMPONENTS Component Locations OPTIONAL GRILL COVER OPTIONAL CERAMIC SURFACE UNIT AIR GRILLE OPTIONAL GRIDDLE OPTIONAL COIL SURFACE UNIT (MODEL RC8720 USES NON-REMOVABLE SURFACE... -
Page 26: Removing The Control Panel & The Surface Unit Indicator Light
Removing The Control Panel & The Surface Unit Indicator Light Remove the control panel from the WARNING cooktop. If you are replacing the panel, remove the rubber grommet from the fan shaft hole and install it in the new panel. Electrical Shock Hazard Disconnect from electrical supply before ser- RUBBER... -
Page 27: Removing The Control Switch
Cooking Products Service Manual 4321972 Original April, 1996 © 1996 Whirlpool Corporation Page 3-3 Removing A Control Switch Remove the control cover (use the proce- WARNING dure shown on page 3-2). Disconnect the wires from the old control Electrical Shock Hazard switch and reconnect them to the new one. -
Page 28: Removing The Cooktop
Removing The Cooktop Turn off the electrical power to the WARNING cooktop. Remove the modules, accessories, and Electrical Shock Hazard air grille from the cooktop and set them aside. Disconnect from electrical supply before ser- vicing unit. NOTE: If the fan motor is supported by some- thing other than the cooktop, remove the six Failure to do so could result in electrical screws from the top of the vent housing (see... - Page 29 Cooking Products Service Manual 4321972 Original April, 1996 © 1996 Whirlpool Corporation Page 3-5 Remove the five control knobs from the Remove the four hex-head screws from control shafts. the control cover. Remove the indicated torx screw and the HEX SCREWS (4) metal insert from each of the the controls and remove the control panel.
-
Page 30: Removing A Terminal Block
Removing A Terminal Block Refer to page 3-4 and remove the cooktop WARNING from the countertop. To remove the rear terminal block, re- Electrical Shock Hazard move the seven indicated hex-head screws. Disconnect from electrical supply before ser- vicing unit. To remove the front terminal block, remove the two indicated torx screws and Failure to do so could result in electrical... -
Page 31: Removing The Fan Motor
Cooking Products Service Manual 4321972 Original April, 1996 © 1996 Whirlpool Corporation Page 3-7 Removing The Fan Motor Turn off the electrical power to the WARNING cooktop. Remove the four hex-head nuts from the Electrical Shock Hazard fan motor. Disconnect from electrical supply before ser- Unplug the quick-disconnects from the vicing unit. -
Page 32: Module Components
MODULE COMPONENTS The Ceramic Surface Unit RCM30DB/Q Removing The Glass, Element, Or Limiter Remove the seven hex-head screws from WARNING around the ceran glass frame and lift it off the base. Electrical Shock Hazard If you are replacing the ceran glass, re- move the eight clips and push the old Disconnect from electrical supply before ser- glass out of the frame, then install the... - Page 33 Cooking Products Service Manual 4321972 Original April, 1996 © 1996 Whirlpool Corporation Page 3-9 NOTE: If you are replacing an element, per- One at a time, disconnect the wires from form steps 5 and 6. If you are replacing just a the terminals of the old element, and re- limiter, proceed to step 7.
-
Page 34: The Coil Surface Unit Rcm10Db/Q Removing A Coil Element & Connector
The Coil Surface Unit RCM10DB/Q Removing A Coil Element & Connector To replace the coil element connector, WARNING remove the coil module from the cooktop. Electrical Shock Hazard Disconnect from electrical supply before ser- COIL MODULE vicing unit. Failure to do so could result in electrical shock or other personal injury. - Page 35 Cooking Products Service Manual 4321972 Original April, 1996 © 1996 Whirlpool Corporation Page 3-11 OPENING COIL ELEMENT CONNECTOR SCREW COIL MODULE INSULATOR PRONG WIRE SCREW PRONG MOUNTING BRACKET TERMINAL BLOCK BASE BASE SCREW (7) COIL ELEMENT CONNECTOR MOUNTING BRACKET SCREW...
-
Page 36: The Grill Rcm20Db Removing The Grill Element
The Grill RCM20DB Removing The Grill Element Turn off the electrical power to the WARNING cooktop. Make sure that the grill element is cool. Electrical Shock Hazard To remove the grill element, remove the Disconnect from electrical supply before ser- grill grates from the cooktop. -
Page 37: Removing A Terminal Plug Connector
Cooking Products Service Manual 4321972 Original April, 1996 © 1996 Whirlpool Corporation Page 3-13 Removing A Terminal Plug Connector Turn off the electrical power to the WARNING cooktop. Make sure that the module you are servic- Electrical Shock Hazard ing is cool and remove it from the cooktop. - Page 38 — NOTES — 3-14...
-
Page 39: Component Testing
Cooking Products Service Manual 4321972 Original April, 1996 © 1996 Whirlpool Corporation Page 4-1 COMPONENT TESTING TROUBLESHOOTING WARNING Electrical Shock Hazard Certain procedures in this section require caution at all times. If test points are not electrical tests or measurements while power easily accessible, disconnect power, attach is applied to the cooktop. -
Page 40: Radiant Elements
LIMITER RADIANT ELEMENTS COOKTOP SENSING ROD HEATING COIL SENSOR TUBE LIMITER INSULATION SENSOR SENSOR TERMINALS ELEMENT TERMINALS WARNING WARNING Electrical Shock Hazard Electrical Shock Hazard Disconnect from electrical supply before ser- Disconnect from electrical supply before ser- vicing unit. vicing unit. Failure to do so could result in electrical Failure to do so could result in electrical shock or other personal injury. -
Page 41: Coil Elements
Cooking Products Service Manual 4321972 Original April, 1996 © 1996 Whirlpool Corporation Page 4-3 COIL ELEMENTS GRILL ELEMENTS BACK ELEMENT FRONT ELEMENT WARNING WARNING Electrical Shock Hazard Electrical Shock Hazard Disconnect from electrical supply before ser- Disconnect from electrical supply before ser- vicing unit. -
Page 42: Troubleshooting Chart
Troubleshooting Chart PROBLEM POSSIBLE CAUSE SOLUTION No line voltage. Repair or replace wiring (see Element does not heat. wiring diagrams). Loose or bad wiring. Test and/or replace element. Defective element. Element barely heats. Line voltage should be minimum Low line voltage. 240-volts. -
Page 43: Tech Tips
Cooking Products Service Manual 4321972 Original April, 1996 © 1996 Whirlpool Corporation Page 5-1 TECH TIPS SCHEMATIC DIAGRAM Model RC8700ED GROUND BLACK MOTOR WHITE GREEN SWITCH GRILL ELEMENT SHUNT INFINITE INFINITE SWITCH SWITCH ELEMENT INDICATOR INFINITE LIGHT SWITCH INFINITE SWITCH... -
Page 44: Wiring Diagram Model Rc8700Ed
WIRING DIAGRAM Model RC8700ED BLACK WHITE GREEN LR INF. LF INF. RR INF. RF INF. SWITCH SWITCH SWITCH SWITCH INDICATOR LIGHT MOTOR SWITCH LEFT RIGHT GRILL GRILL RECEPTACLE RECEPTACLE GRILL GRILL ELEMENT ELEMENT ELEMENT ELEMENT SHUNT SHUNT ELEMENT ELEMENT... -
Page 45: Schematic Diagram Model Rc8720Ed
Cooking Products Service Manual 4321972 Original April, 1996 © 1996 Whirlpool Corporation Page 5-3 SCHEMATIC DIAGRAM Model RC8720ED GROUND BLACK WHITE MOTOR GREEN SWITCH GRILL ELEMENT SHUNT INFINITE INFINITE SWITCH SWITCH ELEMENT INDICATOR INFINITE LIGHT SWITCH INFINITE SWITCH ELEMENT INFINITE... -
Page 46: Wiring Diagram Model Rc8720Ed
WIRING DIAGRAM Model RC8720ED BLACK WHITE GREEN LR INF. LF INF. RR INF. RF INF. SWITCH SWITCH SWITCH SWITCH INDICATOR LIGHT MOTOR SWITCH LEFT GRILL RECEPTACLE GRILL ELEMENT ELEMENT SHUNT ELEMENT ELEMENT ELEMENT... -
Page 47: Strip Circuits
Cooking Products Service Manual 4321972 Original April, 1996 © 1996 Whirlpool Corporation Page 5-5 STRIP CIRCUITS RADIANT ELEMENT INFINITE INFINITE SWITCH SWITCH RADIANT SENSOR ELEMENT “ON” INDICATOR COIL ELEMENT INFINITE INFINITE SWITCH SWITCH COIL ELEMENT “ON” INDICATOR GRILL ELEMENT INFINITE... -
Page 48: Specifications
SPECIFICATIONS Model RC8700EDB/W MODEL NUMBER RC8700EDB RC8700EDW Cooktop Colors: Perimeter Finish Procelain Black Porcelain White Control Panel Black White Control Panel Graphics White Ascot Grey Control Panel Accents Persimmon Red Persimmon Red Dimensions (Inches): Overall Width 29-7/8 29-7/8 Overall Depth 21-1/2 21-1/2 Cutout Width... - Page 49 Cooking Products Service Manual 4321972 Original April, 1996 © 1996 Whirlpool Corporation Page 5-7 MODEL NUMBER RC8700EDB RC8700EDW Approved Modules: 2-Elements Fixed Coil Module RCM10DB RCM10DQ 2-Elements Radiant Ceran RCM30DB RCM10DQ Grill (Left Bay Only) RCM20DB RCM20DB Approved Modules— RCM10DB...
- Page 50 Model RC8720EDB/W MODEL NUMBER RC8720EDB RC8720EDW Cooktop Colors: Perimeter Finish Procelain Black Porcelain White Control Panel Black White Control Panel Graphics White Ascot Grey Control Panel Accents Persimmon Red Persimmon Red Air Grille Black White Dimensions (Inches): Overall Width 29-7/8 29-7/8 Overall Depth 21-1/2...
- Page 51 Cooking Products Service Manual 4321972 Original April, 1996 © 1996 Whirlpool Corporation Page 5-9 MODEL NUMBER RC8720EDB RC8720EDW Approved Modules: 2-Elements Fixed Coil Module RCM10DB RCM10DQ 2-Elements Radiant Ceran RCM30DB RCM30DQ Grill (Left Bay Only) RCM20DB RCM20DB Approved Modules— RCM10DB...
-
Page 52: Model Number Designation
MODEL NUMBER DESIGNATION MODEL NUMBER INTERNATIONAL SALES IND. OR MARKETING CHANNEL, IF PRESENT PRODUCT GROUP R = ELECTRIC S = GAS PRODUCT IDENTIFICATION A = ACCESSORY H = HOODS C = COOKTOP K = KITS E = EYE-LEVEL S = SET-INS F = FREESTANDING MODEL SIZE 0 = 20"... -
Page 53: Electric Modular Downdraft Cooktop Warranty
This warranty gives you specific legal rights, and you may also have other rights which vary from state-to-state. Outside the United States, a different warranty may apply. For details, please contact your authorized Whirlpool dealer. If you need service, first see the “Assistance or Service” section of the Use and Care Guide. After checking “Assistance or Service,’’ additional help can be found by calling our Consumer Assistance Center telephone number, 1-800-253-1301, from anywhere in the U.S.A. - Page 54 — NOTES — 5-12...