Miele PT 8257 Operating And Installation Instructions
Hide thumbs
Also See for PT 8257:
- Operating instructions manual (82 pages) ,
- Operating and installation instructions (84 pages) ,
- Installation instructions manual (24 pages)

Related Manuals for Miele PT 8257


Summary of Contents for Miele PT 8257
- Page 1 Operating and Installation Instructions Mode d'emploi Sèche-linge PT 8257 PT 8337 PT 8407 PT 8507 To prevent accidents and machine damage en, fr - US, CA read these instructions before M.-Nr. 07 713 522 installing or use.
-
Page 3: Table Of Contents
Contents IMPORTANT SAFETY INSTRUCTIONS ............4 Description of the appliance . -
Page 4: Important Safety Instructions
Installation, repair and maintenance work should be Empty all pockets so that no flammable items such as performed by a Miele authorized service technician. lighters, matches, candles and cosmetics end up in the Work by unqualified persons could be dangerous dryer. - Page 5 – small animals from climbing into the dryer. Repairs to electrical and gas appliances should only be carried out by a Miele Service Technician in accordance Do not operate the appliance if the control panel, wires with local and national safety regulations. Unauthorized or cables are damaged.
-
Page 6: Description Of The Appliance
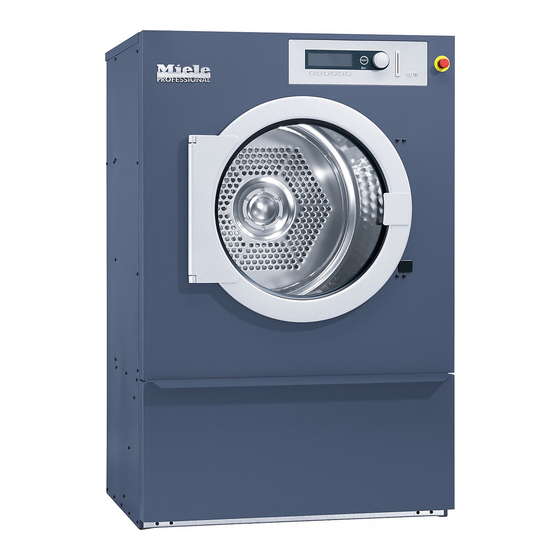
Description of the appliance a Emergency Stop button f Electrical connection Use only in case of an emergency. After elimination of the problem, unlock the switch by g Air intake opening turning the dial to the right. Do not use the Emergency Stop button to turn off h Exhaust air collar the dryer during normal operation! b Control panel... -
Page 7: Operating Panel
Description of the appliance Operating panel d Optical PC interface a Display* For data transfer between the machine’s controls and White Cottons a PC. Cottons e Jog shuttle Cottons Hot Wash Turn the jog shuttle for display selections and input fields. - Page 8 Description of the appliance Control keys Operator card f Stop / End No programs are saved on this card. To transfer the Press to stop a selected program or end an already data from the control to the card and vice versa see stopped program.
-
Page 9: Drying
Drying Before first use Important drying information: ^ Wipe the interior of the drum with a soft dry cloth – Articles made from pure wool and wool mixtures may become matted. Dry these with the Woolens program only. – Pure linen may become rough with tumble drying. Preparing the laundry Consult the manufacturer’s instructions before drying. -
Page 10: Turn On The Dryer
Drying 1. Turn on the dryer Maximum laundry weight ^ Open the gas or steam valve (on site). PT 8257 PT 8337 PT 8407 PT 8507 ^ Turn on the power main (on site). Drum volume ^ Press the l "On" button to turn the dryer on. -
Page 11: Select A Program
Drying 4. Select [ "Blockplus" (if desired) 3. Select a program The dryer uses an electronic sensor system which (Not available for standard programs) monitors the residual moisture in the laundry and a ^ Confirm the selected program by pressing the jog timer for extra safety. -
Page 12: Adjust The Program (If Desired)
Drying 5. Adjust the program (if desired) Residual moisture To change program settings before starting the In 1 % steps from -4 to 40 %. program: ^ Turn the jog shuttle to "Residual moisture" (0 %) ^ Confirm the selected program by pressing the jog and press to confirm the selection. -
Page 13: Select Delay Start (If Desired)
Drying 6. Select Delay Start (if desired) The program will start at the selected time. Use the m "Delay start" button to start a program at a Cottons 22.0 lb later time. Drying 2:07pm -2.13.2006 Start: 2:10pm-2.13.2006 Setting the delay start ^ Select a program. -
Page 14: Start A Program
Drying 7. Start a program 8. End of program ^ Press the "Start" button to begin the program.. Cottons Program end Anti-crease Finish at 12:35 The program end is shown in the display and the buzzer sounds. ^ Open the drum door. ^ Remove the laundry. -
Page 15: Extra Features
Extra features Add or remove laundry during a program Skip or repeat program sequences The drum door can be opened during a program to Sequences of a program in progress can be skipped add or remove laundry. or repeated. ^ Open the door. ^ Press the f "End"... -
Page 16: Program Stop
Extra features K Information Program stop ^ Press the f "End" button to stop the program. ^ Press the K "Information" button during the program to see program information. Cottons Examples: Program stop Press Start. Cottons ü Delay start: 10.7.2003 Start time: 9:47 ^ Press the "Start"... - Page 17 Extra features Language The display language can be temporarily changed with the flag symbol. White Cottons Cottons Colors ^ Press the FC function button. Settings Back <- Main menu Language Programming level ^ Press the jog shuttle to select "Language". Settings svenska Language...
-
Page 18: Estates
Extra features Estates Program Fabric Type max. load White items made of cottons, linens PT 8257 22-29 lb White Cottons (10-13 kg) 165 °F PT 8337 29-35 lb Cottons White or colored items made of cottons, linens or mixed fabrics... - Page 19 Extra features Program Fabric Type max. load Linen Tablecloths Tablecloths, napkins made of cottons, linens PT 8257 22-29 lb (10-13 kg) 165 °F PT 8337 29-35 lb (13-16 kg) PT 8407 35-44 lb (16-20 kg) PT 8507 44-55 lb (20-25 kg)
- Page 20 Extra features Program Fabric Type max. load Smoothing Cotton and linen fabrics PT 8257 11 lb 165 °F, Reduces wrinkles after the being washed. Remove items immediately after (5.0 kg) program end and allow to air dry. PT 8337 14.5 lb...
-
Page 21: Program Guide
Program guide The following programs are available upon request. Please contact Miele for more information. Basic programs Program Fabric Type max. load 1 Hot Wash / Cottons extra dry 0% Multilayered or very thick fabrics made of cotton and linen which do not completely (Normal+) 165 °F... - Page 22 Fabric Type max. load 11 Timed drying - cool air 15 min. To air fluff items PT 8257 22-29 lb (10-13 kg) PT 8337 29-35 lb 12 Timed drying - warm air 20 min. Drying small loads or finish drying single items (13-16 kg) 165 °F...
-
Page 23: Comforters
Comforters Program Fabric Type max. load Feather or down comforters and pillows PT 8257 1 cover or 2 pillows Down Comforters 22 lb (10 kg) 165 °F, Drying to 0% residual moisture, Additional drying, Cooling PT 8337 3 pillows or... -
Page 24: Fire Department
PT 8507 ® Protective clothing Fire department uniforms e.g. Nomex PT 8257 approx. 1 - 2 Uniforms jackets, pants (1 Jacket + 2 Pants or 2 Jackets) PT 8337 approx. 2 Uniforms 165 °F, Drying to 0% residual moisture, Additional drying, Cooling (or 3 Jackets) For optimum drying results turn the garments inside out. - Page 25 Fabric Type max. load Horse blankets Horse blankets, saddle cloths, tendon boots, bandages, cloth PT 8257 22 lb (10 kg) halter PT 8337 29 lb (13 kg) PT 8407 35.5 lb (16 kg) 140 °F, Drying to 0% residual moisture, Additional drying, Cooling...
-
Page 26: Chip Card Use / Coin Mechanism
Chip card use / Coin mechanism If the machine is programmed for card operation, If the card was inserted the wrong way only the drying programs on the card can be used. Card fault § Cards containing a program are programmed for a Reinsert card correctly in card reader. -
Page 27: Cleaning And Care
– The vent duct and air outlet to the outside ^ Clean any lint away with a vacuum. The machine needs timely and professional maintenance to prevent operation power loss, malfunctions and danger of fire. Contact Miele’s Technical Service Department for maintenance work. -
Page 28: Frequently Asked Questions
Repairs to electrical, gas or steam appliances If the following error messages cannot be fixed with should only be carried out by a Miele authorized five restarts, a general message will show: technician in accordance with local and national safety regulations. - Page 29 Frequently asked questions Power failure Card fault § Program stop. Reinsert card correctly in card Press Start. reader. ^ Press "START" to continue the program. ^ Insert the card properly into the card reader. Heating system fault § Program stop. Press Start. Program runs with cold water.
-
Page 30: After Sales Service
^ When contacting Technical Service report the fault in the display. Only use original Miele spare parts when performing maintenance or repairs on this machine. When ordering please quote the model, serial number (SN) - Page 31 Installation instructions...
-
Page 32: Important Safety Instructions
CAUTION: An unvented dryer produces combustible lint. Exhaust outdoors! Any installation, service or repair work is to be done by a Miele Service Technician. Any work done by an No filters or louvers should be built into the exhaust unauthorized person could be dangerous. - Page 33 IMPORTANT SAFETY INSTRUCTIONS To allow easy access for maintenance and servicing, The dryer must be installed and tested by Miele's the minimum dimensions and distance to the wall Technical Service Department or an authorized must be observed. dealer. This appliance must be installed in accordance with the applicable regulations and may only be used in a room with adequate ventilation.
-
Page 34: Leveling The Dryer
IMPORTANT SAFETY INSTRUCTIONS Leveling the dryer Installation on an elevated base The dryer does not need to be installed on a base. The dryer can be installed on an elevated concrete However, adjustments must be made to compensate base. for any unevenness in the floor. If installing the dryer on an existing concrete base, it must be secured with retaining clips. -
Page 35: Coin Mechanism
The dryer is fitted with an exhaust fan which causes a certain amount of noise. To minimize the noise level, a muffler (available from Miele) can be installed at the exhaust connection (see installation instructions). Coin mechanism The dryer can be equipped with a coin mechanism*. -
Page 36: Electrical Connection
The steam valve and the condensate trap are disconnected from the power supply. available from Miele. When the dryer has been connected, check the rotation direction of the fan. It must turn clockwise. If it turns counter clockwise, two phases must be exchanged at the terminal box. -
Page 37: Technical Data
Technical Data PT 825x PT833x PT 840X PT 850X Height 55 1/8" (1400 mm) 55 1/8" (1400 mm) 55 1/8" (1400 mm) 64 9/16" (1640 mm) Width 35 11/16" (906 mm) 35 11/16" (906 mm) 35 11/16" (906 mm) 47 ½" (1206 mm) Depth 33"... -
Page 38: Guide To The Data Plate Symbols
Guide to the data plate symbols 1 Model 2 Serial number 3 Item number 4 Material number 5 Voltage / Frequency 6 Control breaker 7 Motor 8 Drum data 9 Drum diameter / Drum depth 10 Spin speed 11 Drum volume / Dry laundry weight 12 Kinetic energy 13 Acceleration time 14 Deceleration time... -
Page 39: Help To Protect The Environment
Help to protect the environment Disposal of the packing materials Disposal of an old appliance The cardboard box and packing materials protect the Old appliances may contain materials that can be appliance during shipping. They are environmentally recycled. Please contact your local recycling friendly for disposal and can be recycled. -
Page 41: Quick Guide
Quick Guide 1. Sort the laundry Not all fabrics are suitable for drying in a tumble dryer. Pay attention to the manufacturer’s instructions on the wash care label. q = Dry at normal temperature r = Dry at low temperature s = Do not tumble dry Sort the laundry by fabric and color 2. - Page 44 M.-Nr. 07 713 522 / 01 Alteration rights reserved / 2014...
-
Page 45: Operating Instructions
Operating instructions Dryers PT 8257 PT 8337 PT 8407 PT 8507 PT 8807 en - CA To avoid the risk of accidents or damage to the machine it is essential to read these instructions before installing, M.-Nr. 07 713 522... - Page 47 Abbreviated operating instructions PT 8257 / 8337 / 8407 / 8507 / 8807......
-
Page 48: Warning And Safety Instructions
Faulty components must only be replaced by ge- – fabrics which contain a large proportion of rubber, nuine Miele original spare parts. Only when these foam rubber or rubber-like materials. parts are fitted can the safety standards of the machi- –... - Page 49 Accessory parts may only be fitted when expres- mes. It is not a toy! To avoid the risk of injury do not sly approved by Miele. Using spare parts or accesso- allow them to play on or near it or to play with the ries from other manufacturers will invalidate the gua- controls.
-
Page 50: Caring For The Environment
Caring for the environment Disposal of the packing material Tips on saving energy The transport and protective packing has been selec- Make sure that your laundry is thoroughly spun befo- ted from materials which are environmentally friendly re drying. This saves time and energy. for disposal. -
Page 51: Guide To The Machine
Guide to the machine a Emergency stop switch f Electrical connection Only for use in an emergency. Once the danger is no longer present, turn the groo- g Air intake ved disc clockwise to disengage the switch. Do not use the Emergency stop switch to turn off h Exhaust connection the dryer in normal use. -
Page 52: Control Elements
Guide to the machine Control elements d PC / Optical interface a Display This interface is used for transferring data to the con- trol unit from a PC and vice versa. Cottons extra dry e Rotary selector Cottons dry Cottons damp Turning the selector brings up options and menus in the display. -
Page 53: Function Buttons
Guide to the machine Function buttons Chip card operation f Stop/End The chip card is supplied without any programs. The function button on the right-hand side is used to See the programming instruction booklet for informati- stop a program after it has started. Pressing it again on on transferring data from the control unit to the finishes the program. -
Page 54: Drying
Drying Sort the laundry The following textiles should not be machine dried: Not all textiles are suitable for machine drying. Ple- Woollens and wool blends as these tend to matt and ase read the instructions given on the garment shrink. Pre-finish drying these using in the "Woollens" program. -
Page 55: Before Using For The First Time
Max. load (dry weight of laundry) The machine must be commissioned by a Miele technician before it is used for the first time. PT 8257 PT 8337 PT 8407 PT 8507 PT 8807 Before using for the first time Drum volume in litres Before loading the dryer with laundry you should wipe the internal drum surface with a soft, dry cloth. -
Page 56: Select A Program
Drying Select the additional option [ "Blockplus" if re- Select a program quired This machine is equipped with an electronic sensor system that continually monitors the moisture level of (this is not available on standard programs) the laundry. ^ Confirm the selection of the program by pressing As soon as the required dryness is reached the laun- the rotary selector. - Page 57 Drying Load weight The program end display has a self-learning function You can enter the weight of the load manually before and will not show an accurate reading until the pro- the start of the program. gram has been run several times. Cottons dry 10,0 13.0 kg...
- Page 58 Drying If no more laundry is to be processed: ^ Close the drum door ^ Press the 0 "Off" button to switch the machine off. ^ Switch off the on-site mains switch. ^ Close all faucets for steam as applicable. Adding or removing items The drum door can be opened during a drying pro- gram to remove or add items if necessary.
-
Page 59: Card Operation / Coin Mechanism
Card operation / coin mechanism Cards on which a program has been saved can only If the card is inserted the wrong way round the follo- be used on the machine type for which they have wing message will appear in the display: been written. -
Page 60: Additional Options
Additional options Language selection The following (example) will appear in the display: The language shown in the display can be changed Cottons dry 13.0 kg briefly before starting a program if you wish. To do so Start time: : 10 Start date: 2.4.2003 use the button underneath the flag symbol. -
Page 61: Program Stop
Additional options ^ Press the S "Save" button and then press "Start" to Program stop reorganise the program order or press the A To halt the program press the f button. "Back" button to go back to programme stop and The program remains stationary. -
Page 62: Program Overview
Cottons dry program. (Normal+) 74°C 2 Cottons dry 0 % Single and multi-layered cotton and linen texti- les. (Normal) 74°C PT 8257 10-13 (22-29 lb) 3 Cottons damp 20 % PT 8337 13-16 (29-35 lb) (Machine iron) 74°C PT 8407... - Page 63 (poplin) or ta- (Normal) 60°C blecloths which are suitable for drying in a tumble dryer and have been treated to pro- PT 8257 5 - 6.6 (11-14.5 lb) vide a water and dirt resistant finish. PT 8337 6.6 - 9 (14.5-20 lb) This program includes a proofing fixing phase.
-
Page 64: Duvets
Programme Fabric type max. load capacity (kg, dry weight) Feather and down filled duvets and pillows. PT 8257 1 single duvet or 2 pillows Down duvets (10/22 lb) 74°C, Dries to 0 % residual moisture, Tumble phase, Cooling down PT 8337 3 pillows or... -
Page 65: Fire Service
PT 8807 Protective clothing Protective clothing (e.g. as used by the fire bri- PT 8257 approx. 1 - 2 suits gade), overalls, jackets, trousers (1 jacket + 2 trousers or 2 jackets) PT 8337 approx. 2 suits (or 3 jackets) 74°C, Dries to 0% residual moisture, Tumble phase, Cooling down pha-... - Page 66 (kg, dry weight) Horse blankets, saddle-cloths, gaiters, boots, bandages, tex- Horse blankets tile halters PT 8257 10 (22 lb) PT 8337 13 (29 lb) 60°C, Dries to 0 % residual moisture, Tumble phase, Cooling down phase PT 8407...
-
Page 67: Optional Modules
Optional modules Operating data After selecting Total data, the following (example) will appear in the display: By pressing the \ "Operating data" button, the mo- dule can be used to read or delete operating data eit- Operating data module ~ Total data her before the start of a program, or after it has finis- Total time power on: 200,987 h hed. -
Page 68: Peak Load Cut-Out
Optional modules Other options: The module menu option can be used to delete the total data and program data from the operating data Town: Abingdon memory. Serial number: 12345678 The total data option can only be used to delete the Machine type: PT 8337 total data from the operating data. -
Page 69: Problem Solving Guide
Problem solving guide Error messages A message will flash in the display if there is a pro- blem either before starting a program or once it has Repairs to electrical or steam operated machi- started: nes may only be carried out by a suitably qualified If any of the following messages still appear after five person in accordance with national and local safe- re-starts of the machine the following general fault... -
Page 70: After Sales Service
^ To continue the program without heating press the Should you require spare parts ensure that you only h "Start" button. use genuine original Miele Spare Parts (and re- Call the Service Department. member to let the Spare Parts Department know the model, serial number and ma- terial number of your machine). -
Page 71: Cleaning And Care
If taken into the dryer, they can cause faults with the machine. The following should be checked and cleaned once a year by a Miele service technician: – The heaters and heater shaft on electric-heated dryers. – The entire interior of the dryer –... -
Page 72: Installation And Connection
Installation and connection To ensure suitable access for future maintenance and Read the instructions supplied before installing service work, please ensure that the minimum distan- and using it for the first time. ces between the dryer and the wall specified on the installation diagram are strictly observed. -
Page 73: Levelling The Machine
The dryer can be fitted with a coin mechanism.* A suitable adapter* is required for this. The machine has to be reprogrammed by a Miele service technici- Empty the coin box every day. This prevents too many coins or tokens collecting in the coin box, which could lead to the machine breaking down. -
Page 74: Electrical Connection
See the installation instructions supplied. A steam valve and condensate trap are available to order from the Miele Spare Parts Department. After setting up and connecting the dryer, en- sure that all outer casing parts are correctly fitted... -
Page 75: Technical Data
Technical data PT 825X EL PT 833X EL/D PT 840X EL/D PT 850X EL/D PT 880X EL/D Height in mm 1400 1400 1400 1640 1640 Width in mm 1206 1206 Depth in mm 1035 1164 1018 1384 Depth with door open in 1456 1639 1768... -
Page 76: Explanation Of Symbols On The Data Plate
Explanation of symbols on the data plate 1 Machine type 2 Serial number 3 Article number 4 Material number 5 Voltage/Frequency 6 Control fuse 7 Drive motor 8 Drum data 9 Drum diameter/Drum depth 10 Spin speed 11 Drum volume/Laundry dry weight 12 Kinetic energy 13 Run-up time 14 Braking time... -
Page 77: Abbreviated Operating Instructions Pt 8257 / 8337 / 8407 / 8507 / 8807
Abbreviated operating instructions PT 8257 / 8337 / 8407 / 8507 / 8807 1. Sort the laundry Not all textiles are suitable for machine drying. Please read the instructions given on the gar- ment care label. q = Dry at normal temperature... - Page 80 M.-Nr. 07 713 522 / 01 Alteration rights reserved/2014...
- Page 81 Instructions d'utilisation et d'installation Sécheuse PT 8257 PT 8337 PT 8407 PT 8507 PT 8807 Afin de prévenir les accidents fr - CA et d'éviter d'endommager l'appareil, veuillez lire attentivement les instructions M.-Nr. 07 713 522 avant de l'installer et de l'utiliser.
- Page 83 Table des matières INSTRUCTIONS IMPORTANTES SUR LA SÉCURITÉ ..........4 Aidez-nous à...
-
Page 84: Instructions Importantes Sur La Sécurité
être effectués par un technicien médiatement les articles de la sécheuse. Gardez un autorisé de Miele. Il peut être dangereux de extincteur à proximité de la sécheuse. confier ces travaux à des personnes non quali- Les articles ne doivent pas être retirés de la sé-... - Page 85 INSTRUCTIONS IMPORTANTES SUR LA SÉCURITÉ Sécurité N'utilisez et n'entreposez jamais d'essence, de substances à base de pétrole, ou d'autres substan- L'appareil est conçu uniquement pour sécher ces facilement inflammables à proximité de l'appareil. les tissus qui ont été lavés avec de l'eau. Risques d'incendie et d'explosion! Une accumulation de charpie pourrait obstruer le N'utilisez la sécheuse que si celle-ci est raccordée...
- Page 86 électrique. Les réparations d'appareils électriques et au gaz doivent être effectuées uniquement par un technicien autorisé Miele, conformément au normes de sécurité nationales et locales. Les réparations effectuées par des personnes non qualifiées pourraient causer des blessures ou endommager l’appareil.
-
Page 87: Aidez-Nous À Protéger L'environnement
Aidez-nous à protéger l'environnement Élimination des produits d'emballage Mise au rebut d'un ancien appareil La boîte de carton et les produits d'emballage protè- Les anciens appareils peuvent contenir des maté- gent l'appareil durant le transport. Ces matériaux ont riaux recyclables. Veuillez communiquer avec le été... -
Page 88: Description De L'appareil
Description de l'appareil a Touche d'arrêt d'urgence f Branchement électrique N'utilisez cette touche qu'en cas d'urgence. Une fois le problème résolu, débloquez l'interrupteur g Entrée d'air en tournant le bouton vers la droite. N'utilisez jamais la touche d'arrêt d'urgence pour h Collier d'évacuation de l'air éteindre la sécheuse lorsque celle-ci fonctionne normalement. -
Page 89: Panneau De Commande
Description de l'appareil Panneau de commande d Interface optique PC a Affichage* Permet de transférer des données entre les comman- des de l'appareil et un ordinateur personnel. Blanc/Couleurs intensif e Bouton rotatif Blanc/Couleurs normal + Blanc/Couleurs normal 20 % Tournez le bouton rotatif pour sélectionner les élé- ments d'affichage et les zones de saisie. - Page 90 Description de l'appareil Touches de commande Carte d'utilisateur f Arrêt/Fin Aucun programme n'est enregistré sur cette carte. Appuyez sur cette touche pour arrêter un programme Pour transférer des données des commandes de sélectionné ou mettre fin à un programme déjà arrêté. l'appareil à...
-
Page 91: Séchage
Séchage Avant la première utilisation Renseignements importants concernant le sé- chage : ^ Essuyez l'intérieur du tambour à l'aide d'un chiffon doux et sec. – Les articles en pure laine ou en laine mélangée peuvent feutrer. Pour le séchage de ces articles, utilisez uniquement le programme Laine –... -
Page 92: Mettre La Sécheuse Sous Tension
Séchage 1. Mettre la sécheuse sous tension Poids maximal des articles ^ Ouvrez la valve à gaz ou à vapeur (sur place). PT 8257 PT 8337 PT 8407 PT 8507 ^ Activez l'alimentation principale (sur place). Volume du tambour ^ Appuyez sur la touche l "Marche" pour mettre la sé-... -
Page 93: Sélectionner Un Programme
Séchage 3. Sélectionner un programme 5. Régler le programme (facultatif) La sécheuse est équipée d'un système de capteur Pour modifier les réglages d'un programme avant de électronique qui permet de contrôler l'humidité rési- le lancer : duelle des articles, ainsi que d'une minuterie, pour ^ Appuyez sur le bouton rotatif pour valider le pro- plus de sécurité. -
Page 94: Utiliser L'option Début Différé (Facultatif)
Séchage 6. Utiliser l'option Début différé (facultatif) Humidité résiduelle Utilisez m la touche "Début différé" pour retarder le Vous pouvez régler le taux d'humidité résiduelle par paliers de 1 %, de –4 % à 10 %. lancement d'un programme. ^ Sélectionnez "Humidité résiduelle" (0 %) à l'aide du Réglage de l'heure du début différé... -
Page 95: Lancer Un Programme
Séchage 7. Lancer un programme ^ Appuyez sur la touche "Marche" pour lancer le pro- gramme. 8. Fin d'un programme Blanc/Couleurs normal + Fin du programme Infroissable Fin à 12:15 Lorsque le programme est terminé, un message s'af- fiche à l'écran et la sonnerie retentit. ^ Ouvrez la porte de l'appareil. -
Page 96: Fonctionnement Avec Carte À Puce/Jetons
Fonctionnement avec carte à puce/jetons Si l'appareil est programmé pour fonctionner avec Si la carte n'a pas été correctement insérée dans une carte, seuls les programmes de séchage enre- le lecteur gistrés sur la carte pourront être utilisés. Défaut carte §... -
Page 97: Options Supplémentaires
Options supplémentaires Ajouter ou retirer des articles pendant un Sauter ou exécuter de nouveau certaines programme étapes du programme Il est possible d'ouvrir la porte du tambour en cours Il est possible de sauter les étapes d'un programme de programme pour ajouter ou retirer des articles. ou de les exécuter de nouveau. -
Page 98: Arrêt D'un Programme
Options supplémentaires Arrêt d'un programme Langue ^ Appuyez sur la touche f "Fin" pour arrêter le pro- La langue d'affichage peut être modifiée temporaire- gramme. ment à l'aide du drapeau. Blanc/Couleurs normal + Blanc/Couleurs intensif Arrêt programme Blanc/Couleurs normal + Presser touche Marche. -
Page 99: Guide Des Programmes
2 Blanc/Couleurs normal + 0% Articles fait d'une seule couche et articles multicouches, en coton et en lin. (Normal) 74°C PT 8257 22-29 lb (10-13 kg) 3 Blanc/Couleurs normal 20 % PT 8337 29-35 lb (13-16 kg) (Repassage machine) 74°C... - Page 100 Type de tissu charge max. 11 Minuterie froid 15 min. Pour le duvetage des articles. PT 8257 22-29 lb (10-13 kg) PT 8337 29-35 lb 12 Minuterie chaud 20 min. Pour le séchage d'articles de petite taille, ou le sé- (13-16 kg) chage complémentaire d'un article.
-
Page 101: Couettes
Programme Type de tissu charge max. Couettes et oreillers en plumes ou en duvet PT 8257 1 couette ou 2 oreillers Couettes plumes 22 lb (10 kg) 74°C, 0 % d'humidité résiduelle après séchage, séchage supplémen- PT 8337 3 oreillers ou... -
Page 102: Pompiers
à l'aide de plaques de montage spéciales PT 8507 (accessoires offerts en option). Tenue de protection Uniformes des pompiers, p. ex. vêtements en PT 8257 de 1 à 2 uniformes (1 blou- ® Nomex son + 2 pantalons ou 2 blousons) blousons, pantalons... - Page 103 Type de tissu charge max. Couvertures cheval Couvertures de chevaux, tapis de selle, guêtres de tendon, PT 8257 22 lb (10 kg) bandages, licous PT 8337 29 lb (13 kg) PT 8407 35,5 lb (16 kg) 60°C, 0 % d'humidité résiduelle après séchage, séchage supplémentaire, refroidisse-...
-
Page 104: Questions Fréquemment Posées
Si les erreurs n'ont toujours pas été résolues après la gaz ou à vapeur doivent être effectuées unique- cinqième réinitialisation du programme, un message ment par un technicien autorisé Miele, conformé- général s'affiche : ment au normes de sécurité nationales et locales. -
Page 105: Service Après-Vente
à l'écran. N'utilisez que des pièces de rechange d'origine de Miele pour l'entretien et la réparation de cet appareil. Défaut capteur pression § Lorsque vous passez commande de ces pièces, indi- quez le numéro de série et la référence de votre ap-... -
Page 106: Nettoyage Et Entretien
électrique en coupant l'ali- cendie. mentation générale ou en basculant le disjoncteur. Communiquez avec le Service technique de Miele pour la réalisation des travaux d'entretien. Dans le cas des sécheuses fonctionnant avec un sys- tème de chauffage au gaz, le robinet manuel d'arrêt du gaz et le dispositif d'arrêt du compteur de gaz... -
Page 107: Instructions Importantes Sur La Sécurité
Tous les travaux d'installation, d'entretien et de ré- cheuse à l'extérieur! paration doivent être effectués par un technicien au- torisé Miele. Il peut être dangereux de confier ces tra- N'installez pas de filtres ou de grilles d'aération vaux à des personnes non qualifiées. - Page 108 Pour faciliter l'accès à l'appareil lors de la réalisation La sécheuse doit être installée et testée par un de travaux de maintenance et d'entretien, veuillez technicien Miele ou par un détaillant autorisé. respecter les dimensions minimales et la distance re- quise par rapport au mur.
-
Page 109: Mise À Niveau De La Sécheuse
Afin de réduire le niveau de bruit, il est possible d'in- tionner correctement. staller un atténuateur accoustique (que vous pouvez vous procurez auprès de Miele) au niveau du raccord d'évacuation (consultez les instructions d'installation). Appareil payant La sécheuse peut être équipée d'un dispositif à je- tons*. -
Page 110: Branchement Électrique
Vous pouvez vous procurer la valve de production de doivent être homologuées CSA ou UL. vapeur ainsi que le purgeur de condensat auprès de Miele. La fiche de connexion ou le séparateur doivent être accessibles en tout temps. Vous devez être en mesure de verrouiller le dispositif séparateur ou de le contrôler dans les cas où... -
Page 111: Données Techniques
Données techniques PT 825x PT833x PT 840X PT 850X Hauteur 55 1/8 po 55 1/8 po 55 1/8 po 64 9/16 po (1 400 mm) (1 400 mm) (1 400 mm) (1 640 mm) Largeur 35 11/16 po 35 11/16 po 35 11/16 po 47 ½... -
Page 112: Guide Des Symboles De La Plaque Signalétique
Guide des symboles de la plaque signalétique 1 Modèle 2 Numéro de série 3 Numéro d'article 4 Numéro de produit 5 Tension/Fréquence 6 Disjoncteur de commande 7 Moteur 8 Données sur le tambour 9 Diamètre du tambour/Profondeur du tambour 10 Vitesse d'essorage 11 Volume du tambour/Poids des articles secs 12 Énergie cinétique 13 Temps d'accélération... -
Page 113: Guide De Consultation Rapide
Guide de consultation rapide 1. Triez les articles Certains tissus ne peuvent pas être séchés dans une sécheuse à culbutage. Suivez les ins- tructions du fabricant figurant sur les étiquettes d'entretien des articles. q = Séchage à température normale r = Séchage à basse température s = Ne pas sécher à... - Page 116 M.-Nr. 07 713 522 / 01 Sous réserve de modifications/1014...