Table of Contents
Advertisement
Available languages
Available languages
TABLE OF CONTENTS
Service Information . . . . . . . . . . . . . . . . . . . . . . . . . . . . . .1
Rules for Safe Operation . . . . . . . . . . . . . . . . . . . . . . . . . .2
Oil and Fuel Information . . . . . . . . . . . . . . . . . . . . . . . . . . .3
Assembly Instructions . . . . . . . . . . . . . . . . . . . . . . . . . . . .4
Know Your Unit . . . . . . . . . . . . . . . . . . . . . . . . . . . . . . . . .4
Starting/Stopping Instructions . . . . . . . . . . . . . . . . . . . . . .5
Operating Instructions . . . . . . . . . . . . . . . . . . . . . . . . . . . .6
Maintenance and Repair Instructions . . . . . . . . . . . . . . . .7
Cleaning and Storage . . . . . . . . . . . . . . . . . . . . . . . . . . .13
Troubleshooting Chart . . . . . . . . . . . . . . . . . . . . . . . . . . .14
Specifications . . . . . . . . . . . . . . . . . . . . . . . . . . . . . . . . .15
Warranty Information . . . . . . . . . . . . . . . . . . . . . . . . .17-18
Parts List . . . . . . . . . . . . . . . . . . . . . . . . . . . . . . . . . . . .E17
WARNING:
When using the unit, you must follow
the safety rules. Please read these instructions
before operating the unit in order to ensure the
safety of the operator and any bystanders. Please
keep these instructions for later use.
P/N 769-01951A
Operator's Manual
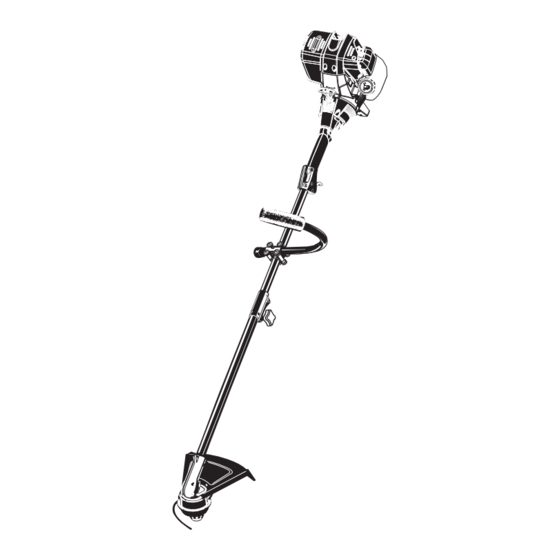
4-Cycle Gasoline Trimmer
Y26SS
SAVE THESE INSTRUCTIONS
For service call 1-800-800-7310 in the United States, or
1-800-668-1238 in Canada to obtain a list of authorized service
dealers near you. For more details about your unit, visit our
website at www.yardmachines.com.
DO NOT RETURN THE UNIT TO THE RETAILER. PROOF OF
PURCHASE WILL BE REQUIRED FOR WARRANTY
SERVICE.
THIS PRODUCT IS COVERED BY ONE OR MORE U.S.
PATENTS. OTHER PATENTS PENDING.
Service on this unit both within and after the warranty period
should be performed only by an authorized and approved
service dealer.
SPARK ARRESTOR NOTE
NOTE: For users on U.S. Forest Land and in the states of
California, Maine, Oregon and Washington. All U.S. Forest
Land and the state of California (Public Resources Codes 4442
and 4443), Oregon and Washington require, by law that certain
internal combustion engines operated on forest brush and/or
grass-covered areas be equipped with a spark arrestor,
maintained in effective working order, or the engine be
constructed, equipped and maintained for the prevention of
fire. Check with your state or local authorities for regulations
pertaining to these requirements. Failure to follow these
requirements could subject you to liability or a fine. This unit is
factory equipped with a spark arrestor. If it requires
replacement, ask your LOCAL SERVICE DEALER to install the
Accessory Part #791-180890 Spark Arrestor Kit.
CALIFORNIA PROPOSITION 65 WARNING
WARNING
THE ENGINE EXHAUST FROM THIS PRODUCT CONTAINS
CHEMICALS KNOWN TO THE STATE OF CALIFORNIA TO
CAUSE CANCER, BIRTH DEFECTS OR OTHER
REPRODUCTIVE HARM.
All information, illustrations, and specifications in this manual
are based on the latest product information available at the
time of printing. We reserve the right to make changes at any
time without notice.
Copyright© 2006 MTD SOUTHWEST INC, All Rights Reserved.
(12/06)
Advertisement
Chapters
Table of Contents

Related Manuals for Yard Machines Y26SS


Summary of Contents for Yard Machines Y26SS
- Page 1 Operator’s Manual 4-Cycle Gasoline Trimmer Y26SS SAVE THESE INSTRUCTIONS For service call 1-800-800-7310 in the United States, or 1-800-668-1238 in Canada to obtain a list of authorized service dealers near you. For more details about your unit, visit our website at www.yardmachines.com.
- Page 2 RULES FOR SAFE OPERATION • IMPORTANT SAFETY INSTRUCTIONS • READ ALL INSTRUCTIONS shirt. Do not wear loose clothing, jewelry, short pants, BEFORE OPERATING sandals or go barefoot. Secure hair above shoulder level. • Read the instructions carefully. Be familiar with the controls •...
- Page 3 RULES FOR SAFE OPERATION SAFETY AND INTERNATIONAL SYMBOLS This operator's manual describes safety and international symbols and pictographs that may appear on this product. Read the operator's manual for complete safety, assembly, operating and maintenance and repair information. SYMBOL MEANING SYMBOL MEANING •...
- Page 4 ASSEMBLY INSTRUCTIONS Spark Arrestor Spark Plug INSTALL AND ADJUST THE J-HANDLE Muffler The Y26SS is equipped with a J-handle. 1. Place the J-handle between the top and middle clamp Muffler Guard pieces (Fig. 5). Screws (4) Starter Rope Grip 2. While holding...
- Page 5 STARTING/STOPPING INSTRUCTIONS WARNING: Operate this unit only in a well- ventilated outdoor area. Carbon monoxide exhaust fumes can be lethal in a confined area. WARNING: Avoid accidental starting. Make sure you are in the starting position when pulling the starter rope (Fig. 8). To avoid serious injury, the operator and unit must be in a stable position while starting.
- Page 6 OPERATING INSTRUCTIONS OPERATING THE EZ-LINK ™ SYSTEM NOTE: Aligning the release button with the guide recess will help installation (Fig. 11). The EZ-Link™ system enables the use of these optional Add- 3. Turn the knob clockwise to tighten (Fig. 13). Ons: Trimmer/Blower .
- Page 7 OPERATING INSTRUCTIONS ADJUSTING TRIMMING LINE LENGTH TIPS FOR BEST TRIMMING RESULTS • For best trimming results, operate unit at full throttle. WARNING: Do not remove or alter the line cutting • Keep the cutting attachment parallel to the ground. blade assembly. Excessive line length will make the clutch overheat.
- Page 8 MAINTENANCE AND REPAIR INSTRUCTIONS SPEEDSPOOL ® loading hole in the inner reel WARNING : Never use metal-reinforced line, wire, (Fig. 18). Do not chain or rope. These can break off and become bend the line dangerous projectiles. when inserting it into the eyelet.
- Page 9 MAINTENANCE AND REPAIR INSTRUCTIONS INSTALLING A PRE-WOUND REEL press down on the plunger (Fig. 27). Remove Shaft 1. Turn the bump knob any dirt or debris from the counterclockwise and Bump Knob Plunger shaft. remove the bump knob, Foam Seal spring and foam seal NOTE: The inner reel must (Fig.
- Page 10 MAINTENANCE AND REPAIR INSTRUCTIONS CHANGING THE OIL Air Filter For a new engine, change the oil after the first 10 hours of Air Filter Cover operation. Change the oil while the engine is still warm. The oil will flow freely and carry away more impurities. 1.
- Page 11 MAINTENANCE AND REPAIR INSTRUCTIONS Checking the fuel, cleaning the air filter, and adjusting the idle Air Filter speed should solve most engine problems. If not and all of the Air Filter following are true: Cover • the engine will not idle •...
- Page 12 MAINTENANCE AND REPAIR INSTRUCTIONS 3. Remove the screw behind Screw Adjusting Nut the engine cover (Fig. 41). 4. Disconnect the spark plug Rocker Arm wire. 5. Clean dirt from around the spark plug. Remove the spark plug from the cylinder head by turning a 5/8 in.
- Page 13 MAINTENANCE AND REPAIR INSTRUCTIONS SPARK ARRESTOR MAINTENANCE STORAGE Remove the muffler cover. See Rocker Arm Clearance. • Never store the unit with fuel in the tank where fumes may reach an open flame or spark. 2. With a flat blade screwdriver or Torx T-20 bit, remove the screw attaching the spark arrestor cover to the muffler •...
- Page 14 TROUBLESHOOTING ENGINE WILL NOT START C A U S E A C T I O N On/Off control in the STOP position Turn On/Off control to ON Empty fuel tank Fill fuel tank with new fuel Primer bulb wasn't pressed enough Press primer bulb fully and slowly 10 times Old fuel Drain gas tank and add fresh fuel...
- Page 15 SPECIFICATIONS ENGINE* Engine Type.................................. Air-Cooled, 4-Cycle Displacement ................................. 1.6 cu. in. (26.2 cc) Operating RPM ................................... 7,200+ rpm Idle Speed RPM ................................2,800 - 3,600 rpm Ignition Type....................................Electronic Ignition Switch ................................Positive On/Off Switch Valve clearance............................0.003–0.006 in. (0.076–0.152 mm) Spark Plug Gap ................................
- Page 16 NOTES...
- Page 17 California / EPA Emission Control Warranty Statement Your Warranty Rights and Obligations The California Air Resources Board, the Environmental Protection Agency and MTD LLC (MTD) are pleased to explain the emission control system warranty on your 2005 and later small off-road engine. New small off-road engines must be designed, built and equipped to meet stringent anti-smog standards.
- Page 18 MANUFACTURER’S LIMITED WARRANTY FOR: The limited warranty set forth below is given by MTD LLC No implied warranty, including any implied warranty of (“MTD”) with respect with new merchandise purchased and merchantability or fitness for a particular purpose, applies used in the United States, its possessions and territories. after the applicable period of express written warranty above as to the parts as identified.
-
Page 19: Table Of Contents
Manuel de L’utilisateur Désherbeuse à gaz à 4-temps Y26SS SAVE THESE INSTRUCTIONS Obtenez la liste des concessionnaires agréés appelez le 1-800- 800-7310 aux États-Unis ou le 1-800-668-1238 au Canada. Pour de plus amples informations à propos de votre appareil, visitez www.yardmachines.com. -
Page 20: Consignes De Sécurité
CONSIGNES DE SÉCURITÉ • IMPORTANTES CONSIGNES DE SÉCURITÉ • LIRE TOUTES LES INSTRUCTIONS chemise à manches longues. Ne marchez pas pieds nus et évitez AVANT UTILISATION les vêtements lâches, bijoux, pantalons courts et sandales. Relevez • Veuillez lire les instructions avec soin. Familiarisez-vous avec les les cheveux au-dessus des épaules. -
Page 21: Informations Sur L'huile Et Le Carburant
CONSIGNES DE SÉCURITÉ SYMBOLES DE SÉCURITÉ ET INTERNATIONAUX Ce manuel de l'utilisateur décrit les symboles et pictogrammes de sécurité et internationaux pouvant apparaître sur ce produit. Consultez le manuel de l'utilisateur pour les informations concernant la sécurité, le montage, le fonctionnement, l'entretien et les réparations. SYMBOLE SIGNIFICATION SYMBOLE... -
Page 22: Instructions De Montage
INFORMATIONS SUR L’HUILE ET LE CARBURANT TYPE DE CARBURANT RECOMMANDÉ règlements fédéral, provincial et municipal en vigueur. En général, si l'appareil ne fonctionne pas correctement, c'est que le carburant est vieux ou mal mélangé. Prenez soin INSTRUCTIONS DE MONTAGE d'utiliser du carburant sans plomb frais et propre. REMARQUE : ceci est un moteur à... -
Page 23: Instructions De Démarrage Et D'arrêt
INSTRUCTIONS DE DÉMARRAGE ET ARRÊT AVERTISSEMENT: n’utiliser l’outil qu’à l’extérieur, dans un endroit bien aéré. Les émanations d’oxyde de carbone dans un endroit confiné peuvent être mortelles. AVERTISSEMENT: évitez tout démarrage accidentel. Tenez-vous en position de démarrage lorsque vous tirez sur la corde de démarrage (Fig. 22). L'opérateur et l'appareil doivent tous deux être en position stable pour éviter des blessures graves. -
Page 24: Mode D'emploi
MODE D’EMPLOI FONCTIONNEMENT DU EZ-Link MISE EN GARDE: verrouillez le bouton de Le système EZ-Link permet d'utiliser ces accessoires déclenchement dans le trou principal (Fig. 12) et optionnels : vissez bien le bouton avant de faire marcher l'appareil. Désherbeuse/Souffleuse ......BT720r Cultivateur . -
Page 25: Entretien Et Réparations
MODE D’EMPLOI RÉGLAGE DE LA LONGUEUR DU FIL CONSEILS POUR BIEN DÉSHERBER • Pour meilleurs les résultats qui taillent, opérer l'unité à plein AVERTISSEMENT: n'enlevez pas ni n'altérez étrangle. l'ensemble de la lame coupante. Un excès de fil surchauffera l'embrayage. Ceci pourrait causer •... - Page 26 INSTRUCTIONS D’ENTRETIEN ET RÉPARATIONS INSTALACION DE LA LINEA PARA EL SPEEDSPOOL ® del orificio de carga del AVERTISSEMENT : n'utilisez jamais de fil, de carrete interior chaîne ou de cordon à renfort métallique car ils (Fig. 18). No peuvent se briser et se transformer en projectile doble la línea al dangereux.
- Page 27 INSTRUCTIONS D’ENTRETIEN ET RÉPARATIONS Instalación de un carrete interior prebobinado 5. Limpie el eje y la superficie interior de la bobina exterior. 1. Saque la perilla percuisva, Para limpiar el eje debajo del émbolo, empuje el émbolo Perilla el resorte y el sello de hacia abajo (Fig.
- Page 28 INSTRUCTIONS D’ENTRETIEN ET RÉPARATIONS CHANGEMENT D'HUILE Ouvrez le couvercle du filtre à air Enfoncez la languette à droite du couvercle, tirez celui-ci vers vous puis vers la Si le moteur est neuf, changez l'huile après les 10 premières gauche (Fig. 32). heures d’utilisation.
- Page 29 INSTRUCTIONS D’ENTRETIEN ET RÉPARATIONS AVERTISSEMENT: il se peut que l'accessoire Filtre à air de coupe tourne pendant le réglage de la vitesse Couvercle du de ralenti. Portez des vêtements protecteurs et filtre à air respectez toutes les consignes de sécurité pour éviter des blessures graves.
- Page 30 INSTRUCTIONS D’ENTRETIEN ET RÉPARATIONS Moteur vu de haut Retirez les vis Écrou de réglage Couvercle du moteur Culbuteur 0,076-0,0152 mm (0,003-0,006 po) Jauge d'épaisseur Silencieux Fig. 40 • Les deux culbuteurs se Tige de soupape déplacent librement et les deux soupapes sont fermées Fig.
- Page 31 INSTRUCTIONS D’ENTRETIEN ET RÉPARATIONS ENTRETIEN DU PARE-ÉTINCELLES ENTREPOSAGE Retirez le couvercle du silencieux. Voir Jeu entre soupape • Ne rangez jamais l'appareil plein de carburant dans un lieu où les et culbuteur. vapeurs peuvent atteindre une flamme vive ou des étincelles. Retirez la vis retenant le couvercle du pare-étincelles au •...
- Page 32 GUIDE DE DÉPANNAGE LE MOTEUR REFUSE DE DÉMARRER C A U S E S O L U T I O N La commande Marche/Arrêt Stop est en position ARRÊT Mettez-la en position MARCHE Réservoir de carburant vide Remplissez-le de carburant frais La poire d'amorçage n'a pas été...
-
Page 33: Caractéristiques
CARACTÉRISTIQUES MOTEUR* Type de moteur ..............................Refroidi par air, 4-temps Cylindrée ..................................26,2 cc (1,6 po3) Régime de fonctionnement..............................7.200+ tr/min Régime ralenti................................2.800 - 3.600 tr/min Type d'allumage ..................................Électronique Contact d'allumage ..............................Interrupteur berceau Jeu de soupape............................ 0,076-0,152 mm (0,003-0,006 po) Écartement de la bougie ............................ - Page 34 REMARQUES...
-
Page 35: Garantie
Garantie portant sur les normes antipollution de l'EPA et la California Vos droits et obligations en vertu de cette garantie Le California Air Resource Board, la Environmental Protection Agency et MTD LLC (MTD) ont le plaisir de présenter la garantie du dispositif antipollution des petits moteurs à... - Page 36 GARANTIE LIMITÉE DU FABRICANT POUR: Aucune garantie implicite, y compris toute garantie de valeur La garantie limitée énoncée ci-après est accordée par MTD marchande ou d’adaptation à une fin particulière, ne LLC (« MTD ») et concerne les marchandises neuves achetées et s’applique après la période applicable de garantie expresse utilisées aux États-Unis, ainsi que dans leurs possessions et écrite ci-dessus concernant les pièces qui sont identifiées.
- Page 37 Manual del Dueño Recortador de 4 Ciclos a Gasolina Y26SS CONSERVE ESTAS INSTRUCCIONES Llame 1-800-800-7310 en EE.UU. o al 1-800-668-1238 en Canada para obtener una lista de distribuidores de servicio localizados cerca de usted. Para obtener más detalles sobre su unidad, visite nuestro sitio en www.yardmachines.com.
-
Page 38: Normas Para Una Operación Segura
NORMAS PARA UNA OPERACIÓN SEGURA • IMPORTANTE INFORMACION DE SEGURIDAD • LEA TODAS LAS INSTRUCCIONES sandalias ni esté descalzo. Sostenga el cabello sobre el nivel de los ANTES DE LA OPERACION hombros. • Lea todas las instrucciones con cuidado. Conozca bien los •... -
Page 39: Información Del Aceite Y Del Combustible
NORMAS PARA UNA OPERACIÓN SEGURA SIMBOLOS DE SEGURIDAD E INTERNACIONALES Este manual del operador describe los símbolos y figuras de seguridad e internacionales que pueden aparecer en este producto. Lea el manual del operador para obtener información completa acerca de la seguridad, ensamble, operación y mantenimiento y reparación. SIMBOLO SIGNIFICADO SIMBOLO... -
Page 40: Instrucciones De Ensamble
INFORMACION DEL ACEITE Y DEL COMBUSTIBLE TIPO DE COMBUSTIBLE RECOMENDADO INSTRUCCIONS DE ENSAMBLE El combustible viejo es la causa principal del mal funcionamiento de la unidad. Asegúrese de usar combustible nuevo, limpio y sin plomo. INSTALACIÓN Y AJUSTE DE LA MANIJA EN J NOTA: Este es un motor de cuatro ciclos. -
Page 41: Instrucciones De Arranque Y Apagado
INSTRUCCIONES DE ARRANQUE Y APAGADO ADVERTENCIA: Use esta unidad sólo en un área exterior bien ventilada. Los gases de escape de monóxido de carbono pueden ser letales en un área cerrada. ADVERTENCIA: Evite los arranques accidentales. Colóquese en posición de inicio cuando tire de la cuerda de arranque (Fig. -
Page 42: Instrucciones De Operación
INSTRUCCIONES DE OPERACIÓN OPERACION DEL SISTEMA EZ-Link™ NOTA: La alineación del botón de desconexión con el hueco El sistema EZ-Link™ le permite el uso de estos accesorios de guía facilitará la instalación (Fig. 11). optativos. Gire la perilla en sentido horario para ajustarla (Fig. 13). Recortador/Soplador . -
Page 43: Instrucciones De Mantenimiento Y Reparación
INSTRUCCIONES DE OPERACIÓN AJUSTE DE LA LONGITUD DE LA LINEA DE CORTE CONSEJOS PARA OBTENER MEJORES RESULTADOS AL El accesorio de corte Bump Head™ le permite soltar línea de corte RECORTAR sin apagar el motor. Para soltar más línea, golpee suavemente el •... - Page 44 INSTRUCCIONES DE MANTENIMIENTO Y REPARACIÓN ® INSTALACION DE LA LINEA PARA EL SPEEDSPOOL carga del carrete interior (Fig. 18). ADVERTENCIA: No use nunca línea reforzada No doble la línea con metal, alambre, cadena ni soga, etc. Estos al insertarla en el elementos pueden desprenderse y convertirse en un proyectil peligroso.
- Page 45 INSTRUCCIONES DE MANTENIMIENTO Y REPARACIÓN INSTALACÍON DE UN CARRETE INTERIOR PREBOBINADO jabonosa tibia (Fig. 26). 1. Saque la perilla percuisva, 5. Limpie el eje y la superficie Perilla el resorte y el sello de interior de la bobina percusiva Embolo espuma girando la perilla exterior.
- Page 46 INSTRUCCIONES DE MANTENIMIENTO Y REPARACIÓN Repita hasta que el nivel de aceite llegue hasta la parte MANTENIMIENTO DEL FILTRO DE AIRE superior de la varilla de medición. ADVERTENCIA: Para evitar graves lesiones NOTA: No llene demasiado la unidad. personales, apague siempre su recortador y espere que se enfríe antes de limpiarlo o realizar todo tipo NOTA: Verifique que el anillo en O esté...
- Page 47 INSTRUCCIONES DE MANTENIMIENTO Y REPARACIÓN Mueva la cubierta el motor aún no funciona en mínima, ajuste el tornillo de velocidad Ranura de la placa Placa posterior hacia la derecha mínima según se indica a continuación. posterior hasta que la Arranque el motor y déjelo funcionar a una mínima alta orejeta del filtro durante un minuto para que se caliente.
- Page 48 INSTRUCCIONES DE MANTENIMIENTO Y REPARACIÓN Tuercas de Brazos ENTRADA ajuste oscilantes ESCAPE Cubierta del Motor Muesca y Orejeta Galga Orejeta Fig. 43 Orejeta El huelgo recomendado para las válvulas de entrada y de escape es 0,076 – 0,152 mm (0,003 – 0,006 pulgadas). Use un calibrador regular de automóvil de 0,127 mm (0,005 pulgadas).
- Page 49 INSTRUCCIONES DE MANTENIMIENTO Y REPARACIÓN CAMBIO DE LA BUJIA DE ENCENDIDO LIMPIEZA Use una bujía de encendido 791-180852B. La separación ADVERTENCIA: Para evitar graves lesiones correcta es de 0,635 mm (0,025 pulgadas). Retire la bujía luego personales, apague siempre su recortador y de cada 25 horas de operación e inspeccione su estado.
- Page 50 RESOLUCIÓN DE PROBLEMAS EL MOTOR NO ARRANCA C A U S A A C C I Ó N El control de apagado On/Off está en posición de OFF Gire el control de apagado On/Off a ON El tanque de combustible está vacío Llene el tanque con combustible bien mezclado La bombilla de cebado no fue oprimida lo suficiente Oprima la bombilla de cebado total y lentamente de 10 veces...
-
Page 51: Especificaciones
ESPECIFICACIONES MOTOR* Tipo de motor ..............................Enfriado por aire, 4 ciclos Desplazamiento............................26,2 cc (1,.6 pulgadas cúbicas) R.P.M. de operación ................................7.200+ r.p.m. R.P.M. de velocidad mínima............................2.800 - 3.600 r.p.m. Tipo de encendido ................................... Electrónico Interruptor de encendido ............................Interruptor oscilante Huelgo de la válvula ......................... - Page 52 Declaración de Garantía de Control de Emisiones de la EPA / California Sus Derechos y Obligaciones de la Garantía La Junta de Recursos del Aire de California, la Agencia de Protección Ambiental y MTD LLC (MTD) se complacen en explicar la garantía del sistema de control de emisiones para su pequeño motor para uso fuera de la carretera del 2005 y posterior.
- Page 53 PARTS LIST ENGINE PARTS - Y26SS 4-CYCLE GAS TRIMMER 17 18 19 20...
- Page 54 PARTS LIST ENGINE PARTS - Y26SS 4-CYCLE GAS TRIMMER Item Part No. Description Item Part No. Description 753-04083 Engine Cover 753-04288 Pulley Retainer 753-04994 Engine Cover Screws 753-1199 Recoil Pulley 791-181025 Valve Cover Screw 753-04286 Recoil Spring 791-182098 Valve Cover...
- Page 55 PARTS LIST BOOM AND TRIMMER PARTS - Y26SS 4-CYCLE GAS TRIMMER Item Part No. Description 753-04114 Throttle HousingAssembly (includes 2 & 3) 791-610314 Throttle Trigger Spring 753-04115 Throttle Trigger 753-04503 Upper Drive Shaft Housing Assembly 791-180687 J-Handle Assembly 791-683295 Handle Bracket Assembly (includes 7-12)
-
Page 56: Garantía
GARANTÍA LIMITADA DEL FABRICANTE PARA: La garantía limitada establecida a continuación es dada por MTD Ninguna garantía implícita es aplicable, incluyendo cualquier garantía implícita de comerciabilidad o idoneidad LLC (“MTD”) con respecto a mercancía nueva que sea comprada para un propósito particular, después del período de la y usada en los Estados Unidos, sus posesiones y territorios.