Table of Contents
Advertisement
Product Registration Card ..........................................................................3
Stand Mixer Safety .....................................................................................4
Important Safeguards ................................................................................4
Electrical Requirements ..............................................................................5
Stand Mixer Warranty .............................................................6
®
50 United States And District Of Columbia ................................................7
Hassle-Free Replacement Warranty - Canada .............................................7
How to Arrange for Warranty Service in Puerto Rico ..................................8
How to Arrange for Service Outside these Locations ..................................8
How to Order Accessories and Replacement Parts ......................................9
Troubleshooting Problems ..........................................................................9
Tilt-Head Stand Mixer Features .................................................................10
Assembling Your Tilt-Head Stand Mixer ....................................................11
Using Your Pouring Shield ........................................................................12
Mixing Time .............................................................................................13
Tilt-Head Stand Mixer Use ........................................................................14
Care and Cleaning ...................................................................................14
Beater to Bowl Clearance .........................................................................14
Speed Control Guide ................................................................................15
Mixing Tips ..............................................................................................16
Egg Whites .......................................................................................17
Whipped Cream ...............................................................................17
Attachments and Accessories ...................................................................18
General Instructions .................................................................................19
TABLE OF CONTENTS
Accessories .........................................................13
®
Advertisement
Table of Contents

Related Manuals for KitchenAid TILT-HEAD STAND MIXER


Summary of Contents for KitchenAid TILT-HEAD STAND MIXER
-
Page 1: Table Of Contents
How to Arrange for Service Outside these Locations ........8 How to Order Accessories and Replacement Parts ........9 Troubleshooting Problems ................9 Tilt-Head Stand Mixer Features ..............10 Assembling Your Tilt-Head Stand Mixer ............11 Using Your Pouring Shield ................12 Using Your KitchenAid Accessories ............13 ®... -
Page 2: Product Registration Card
PROOF OF PURCHASE & PRODUCT REGISTRATION Always keep a copy of the sales receipt showing the date of purchase of your Stand Mixer. Proof of purchase will assure you of in-warranty service. Before you use your Stand Mixer, please fill out and mail your product registration card packed with the unit. -
Page 3: Stand Mixer Safety
Return appliance to the nearest Authorized Service Center for examination, repair or electrical or mechanical adjustment. Call the KitchenAid Customer Satisfaction Center at 1-800-541-6390 for more information. The use of attachments not recommended or sold by KitchenAid may cause fire, electrical shock or injury. -
Page 4: Electrical Requirements
Do not use the Stand Mixer outdoors. Do not let the cord hang over edge of table or counter. Remove flat beater, wire whip or dough hook from Stand Mixer before washing. This product is designed for household use only. SAVE THESE INSTRUCTIONS ELECTRICAL REQUIREMENTS Volts: 120 A.C. -
Page 5: Kitchenaid ® Stand Mixer Warranty
IF THIS PRODUCT FAILS TO WORK AS WARRANTED, CUSTOMER’S SOLE AND EXCLUSIVE REMEDY SHALL BE REPAIR OR REPLACEMENT ACCORDING TO THE TERMS OF THIS LIMITED WARRANTY. KITCHENAID AND KITCHENAID CANADA DO NOT ASSUME ANY RESPONSIBILITY FOR INCIDENTAL OR CONSEQUENTIAL DAMAGES. This warranty gives you specific legal rights and you may also have other rights which vary from state to state or province to province. -
Page 6: Hassle-Free Replacement Warranty - Canada
Stand Mixer should fail Customer Satisfaction Center at within the first year of ownership, 1-800-541-6390 Monday through KitchenAid will arrange to deliver Friday, 8 a.m. to 8 p.m. (Eastern an identical or comparable Time), or Saturday, 10 a.m. to replacement to your door free of 5 p.m. -
Page 7: How To Arrange For Warranty Service In Puerto Rico
Authorized KitchenAid Service purchase. KitchenAid will pay for Center. Your repaired Stand Mixer replacement parts and labor costs will be returned prepaid and to correct defects in materials insured. -
Page 8: How To Order Accessories And Replacement Parts
Proof of purchase will assure you of 01-800-902-31-00 in-warranty service. (Industrias Birtman) If your Stand Mixer should See the KitchenAid Warranty and malfunction or fail to operate, Service section on page 6 for please check the following: additional details. Do not return the Blender to the retailer –... -
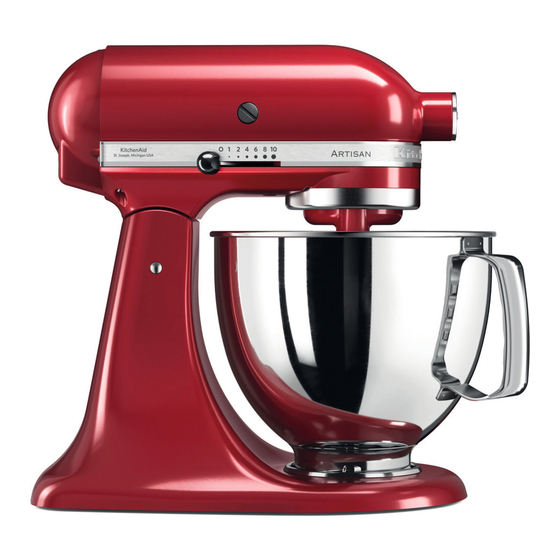
Page 9: Tilt-Head Stand Mixer Features
TILT-HEAD STAND MIXER FEATURES Motor Head Attachment Hub Speed Control Knob Attachment Knob Motor Head Locking Lever (not shown) Beater Shaft Flat Beater Beater Height Adjustment Screw ⁄ or 5 Quart (4.26 or 4.73 L) Stainless Steel Bowl Wire Whip... -
Page 10: Assembling Your Tilt-Head Stand Mixer
ASSEMBLING YOUR TILT-HEAD STAND MIXER WARNING Electrical Shock Hazard To Attach Bowl Turn speed control to OFF. Plug into a grounded 3 prong Unplug stand mixer or outlet. disconnect power. Do not remove ground prong. Tilt motor head back. Place bowl on bowl Do not use an adapter. -
Page 11: Using Your Pouring Shield
ASSEMBLING YOUR TILT-HEAD STAND MIXER Speed Control To Operate Speed Control Speed control lever should always be set on lowest speed for starting, then gradually moved to desired higher speed to avoid splashing ingredients out of bowl. See page 15 for Speed Control Guide. -
Page 12: Using Your Kitchenaid Accessories
USING YOUR KITCHENAID ACCESSORIES ® Flat Beater for normal to heavy mixtures: cakes biscuits creamed frostings quick breads candies meat loaf cookies mashed potatoes pie pastry Wire Whip for mixtures that need air incorporated: eggs sponge cakes egg whites angel food cakes... -
Page 13: Tilt-Head Stand Mixer Use
TILT-HEAD STAND MIXER USE NOTE: Do not scrape the bowl WARNING while the Stand Mixer is operating. The bowl and beater are designed Injury Hazard to provide thorough mixing without frequent scraping. Unplug mixer before touching Scraping the bowl once or twice beaters. -
Page 14: Speed Control Guide
SPEED CONTROL GUIDE Number of Speed Stir Speed STIR For slow stirring, combining, mashing, starting all mixing procedures. Use to add flour and dry ingredients to batter, add liquids to dry ingredients, and combine heavy mixtures. Use with Ice Cream Maker attachment. -
Page 15: Mixing Tips
Stand Mixer works more quickly should be dusted with flour for than other mixers. In general, better distribution in the batter. mixing a cake with the KitchenAid ® Stand Mixer will take about half the Liquid Mixtures time called for in most traditional Mixtures containing large amounts and non-packaged cake recipes. -
Page 16: Egg Whites
Whipping Stages Stiff Watch the cream closely during Cream stands in stiff, sharp peaks whipping. Because your KitchenAid ® when wire whip is removed. Use mixer whips so quickly, there are just for topping on cakes or desserts, a few seconds between whipping or filling for cream puffs. -
Page 17: Attachments And Accessories
The hub and shaft housing are tapered to assure a snug fit, even after prolonged use and wear. KitchenAid attachments require no extra power ®... -
Page 18: General Instructions
GENERAL INSTRUCTIONS To Attach Turn the speed control to OFF. Unplug mixer or disconnect power. Loosen the attachment knob by turning it counterclockwise, and remove the attachment hub cover or flip up hinged hub cover. Insert the attachment shaft housing into the attachment hub, making certain the attachment power shaft fits into the square attachment hub socket. - Page 19 STAND MIXER ATTACHMENTS SOLD SEPARATELY FOR MORE INFORMATION CALL 800-541-6390 • WWW.KITCHENAID.COM ICE CREAM MAKER PASTA ROLLER AND CUTTER SET Model: KICA Model: KPRA The Ice Cream Maker attachment produces Making fresh, a variety of frozen restaurant-quality desserts as well...
- Page 20 International, Ltd. Recipes and text on the inside front cover and pages 1-68, 82, 88-95, 105, 114-121, 129, and 140-142 © 2006 by KitchenAid, U.S.A. All rights reserved. This publication may not be reproduced or quoted in whole or in part by any means whatsoever without written permission from Louis Weber, CEO, Publications International, Ltd., 7373 North Cicero...
- Page 21 ® FOR THE WAY IT’S MADE. ® Registered trademark/ Trademark/ the shape of the mixer is a trademark of KitchenAid, U.S.A. 9709785 rev. B © 2007. All rights reserved. Printed in China. (PIL030107)