Table of Contents
Advertisement
Advertisement
Table of Contents

Related Manuals for John Lewis U29492 JLBIIH603


Summary of Contents for John Lewis U29492 JLBIIH603
- Page 1 JLBIIH603 Ceramic glass induction hob Instruction manual...
-
Page 2: Important Safety Information
You MUST read them carefully before use or installation by a qualified person. If you are unsure of the meanings of these warnings contact the John Lewis branch from which you purchased the appliance. -
Page 3: Table Of Contents
Contents For the User Important Safety Information Description of the Appliance The control panel · Touch Control sensor fields · Displays · Residual heat indicator · Switching the appliance on and off · Selecting the heat setting · Locking/unlocking the control panel ·... -
Page 4: Description Of The Appliance
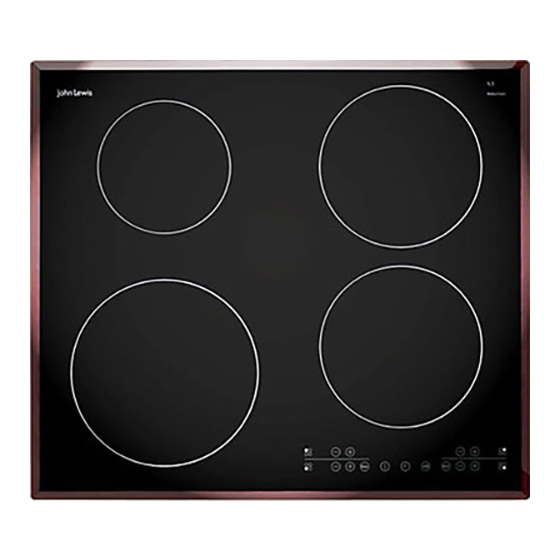
Description of the Appliance Cooking surface layout Induction cooking zone 1800 W Induction cooking zone 1400 W Induction cooking zone 2200 W Control panel Induction cooking zone 1800 W with power function 2800 W with power function 2800 W... -
Page 5: Installation
Installation It is dangerous to alter the specifications or attempt to modify this product in any way. Care must be taken to ensure that the appliance does not stand on the electrical supply cable. Any electrical work required to install this appliance should be carried out by a qualified electrician or competent person. -
Page 6: Electrical Connection
Electrical Connection This hob must be earthed. Electrical Requirements Any permanent electrical installation must comply with the latest I.E.E. Regulations and local Electricity Board regula- tions. For your own safety this should be undertaken by a qualified electrician, e.g. your local Electricity Board, or a contractor who is on the roll of the National Inspection Council for Electrical Installation Contracting (NICEIC). -
Page 7: Building In
Building In... -
Page 11: The Control Panel
The control panel 1: Display 2: Heat setting selection 3: Cooking zone indicators Timer function 4: Timer display 5: Power function 6: Lock 7: Timer 8: On/Off with power indicator Touch Control sensor fields The appliance is operated using Touch Control sensor fields. -
Page 12: Residual Heat Indicator
Residual heat indicator Warning! Risk of burns from residual heat. After being switched off, the cooking zones need some time to cool down. Look at the residual heat indica- Residual heat can be used for melting and keeping food warm. The induction cooking zones create the heat required for cooking directly in the base of the cookware. -
Page 13: Using The Child Safety Device
Using the child safety device The child safety device prevents unintentional use of the ap- pliance. Setting the child safety device Step Switch on the appliance (Do not set a heat setting) Touch until the signal sounds Touch Appliance switches off. The child safety device is set. Overriding the child safety device The child safety device can be released in this way for a sin- gle cooking session;... -
Page 14: Switching The Power Function On And Off
Switching the power function on and off The power function makes additional power available to the front induction cooking zones, e.g. to bring a large vol- ume of water to the boil. The power function is activated for 8 minutes for the front left cooking zone and for 5 minutes for the front right cook- ing zone. -
Page 15: Using The Timer
Using the timer All cooking zones can use each use one of the two timer functions at the same time. Function Automatic cut-out Countdown timer If a cooking zone is switched off, the timer function set is also switched off. If a heat setting is set on this cooking zone in addi- tion to a countdown timer, the cooking zone is switched off after the time set has elapsed. - Page 16 Setting time Step Control panel Selecting cooking zone Touch cooking zone Touch cooking zone for more than 4 seconds After a few seconds the power indicator flashes more slowly. The time is set. The time counts down. Switching off the Timer function Step Control panel Select a cooking zone...
-
Page 17: Safety Cut-Out
Safety cut-out Cooking surface • If after switching on the cooking surface, a heat setting is not set for a cooking zone within approx. 10 seconds, the cooking surface automatically switches itself off. • If all cooking zones are switched off, the cooking surface automatically switches itself off after approx. -
Page 18: When The Hob Is First Installed
When the hob is first installed Remove all packaging, both inside and outside the hob including the advertising labels and any protec- tive film, before using the hob. When a cooking zone is switched on, it may hum briefly. This is a characteristic of all ceramic glass cooking zones and does not impair either the func- tion or the life of the appliance. -
Page 19: Hints And Tips On Cooking And Frying
Hints and Tips on Cooking and Frying Information about acrylamides According to the latest scientific research, intensive browning of food, especially in products containing starch, may present a health risk due to acrylamide. Therefore we recommend cooking at low tempera- tures and not browning foods too much. -
Page 20: Cooking Chart
Cooking chart This chart is intended as a guide only. It may be nec- essary to increase or decrease the temperature to suit your individual requirements. Only experience will enable you to determine the correct setting for your personal requirements. Heat set- Cooking ting... -
Page 21: Maintenance And Cleaning
*Scrapers and cleaners for glass ceramic and stainless steel can be pur- chased from your local John Lewis branch. Remove stubborn residues with a cleaner for glass ceramic or stainless steel. Scratches or dark stains on the glass ceramic that cannot be removed do not affect the functioning of the appliance. -
Page 22: Something Not Working
Something Not Working If the hob is not working correctly, please carry out the following checks, before contacting your local Service Force repair agent. In the event of any other fault codes that arise, disconnect the appliance from the electrical supply for a few seconds (take out the fuse from the housing wiring system). -
Page 23: Repairs - After Sales Service
0870 0107887 who will give you details for your Service Force repair agent. Always insist on genuine spare parts. Rating Plate JLBIIH603 55GADD5AU 230 V 50 Hz John Lewis 949 592 582 Induction 7,2 kW 7,2 kW... - Page 24 John Lewis Partnership 171 Victoria Street London SW1E 5NN www. johnlewis.com 822 930 410 A-05 05/06...