Table of Contents
Advertisement
Quick Links
Advertisement
Table of Contents

Related Manuals for John Lewis JLBIGGH605


Summary of Contents for John Lewis JLBIGGH605
- Page 1 JLBIGGH605 Gas hob Instruction manual...
- Page 2 These warnings have been provided in the interest of safety. You MUST read them carefully before use or installation by a qualified person. If you are unsure of the meanings of these warnings contact the John Lewis branch from which you purchased the appliance. Installation...
- Page 3 Unstable or misshapen pans should not Environmental Environmental Environmental Environmental Environmental be used on the hob as unstable pans can Information Information Information Information Information cause an accident by tipping or spillage. Never leave the hob unattended when After installation, please dispose of the cooking with oil and fats.
-
Page 4: Table Of Contents
2 0 0 6 / 9 5 2 0 0 6 / 9 5 (Low VoltageDirective); * * * * * 2004/108 2004/108 2004/108 John Lewis Partnership John Lewis Partnership 2004/108 2004/108 (Electromagnetical John Lewis Partnership John Lewis Partnership John Lewis Partnership Compatibility Directive);... -
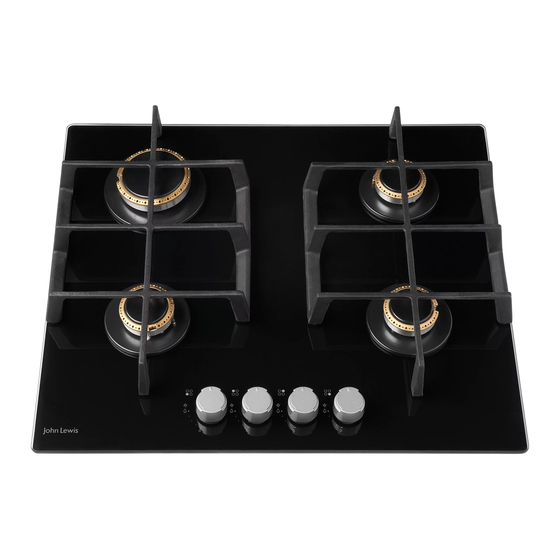
Page 5: Description Of The Hob
Description of the Hob Description of the Hob Description of the Hob Description of the Hob Description of the Hob 1 . 1 . 1 . 1 . 1 . Hob Top 2 . 2 . 2 . 2 . 2 . Semi-rapid Burner 3 . -
Page 6: Instructions For The Installer
Instructions for the Installer Instructions for the Installer Instructions for the Installer Instructions for the Installer Instructions for the Installer Installation Installation Installation Installation Installation IMPORTANT: IMPORTANT: IMPORTANT: IMPORTANT: IMPORTANT: This hob must be installed according to the instruction supplied, and by qualified and qualified and qualified and qualified and... -
Page 7: Engineer Technical Data
Engineer technical data Engineer technical data Engineer technical data Engineer technical data Engineer technical data HEATING ELEMENTS RA TING ELEMENTS RA TING ELEMENTS RA TING ELEMENTS RATING TING TING TING TING ELEMENTS RA TING O O O O O VERALL DIMENSIONS VERALL DIMENSIONS VERALL DIMENSIONS VERALL DIMENSIONS... -
Page 8: Electrical Connections
Electrical Connections Electrical Connections Electrical Connections Electrical Connections Electrical Connections Green and Yellow - Earth THIS HOB MUST BE EAR THIS HOB MUST BE EAR THED THED THED..THIS HOB MUST BE EAR THIS HOB MUST BE EAR THIS HOB MUST BE EARTHED THED Blue... -
Page 9: Wiring Diagram
Supply cable replacement Supply cable replacement Supply cable replacement Supply cable replacement Supply cable replacement The cable used to connect the hob to the electrical supply must comply to the specifications given below. Min. size Cable/flex Min. size Cable/flex Min. size Cable/flex Min. -
Page 10: Fault Finding
Fault Finding Fault Finding Fault Finding Fault Finding Fault Finding Pr Pr Pr Pr Pr eliminar eliminar eliminar eliminar y Electrical y Electrical y Electrical y Electrical eliminar y Electrical Blue Brown Green Systems Check Systems Check Systems Check Systems Check Systems Check START START... - Page 11 Ignition System / Gas Ignition System / Gas Ignition System / Gas Ignition System / Gas Ignition System / Gas Ignition Ignition Ignition Ignition Ignition Y E S Y E S Y E S Y E S Y E S Check gas supply at Ignitor does not spark burner...
-
Page 12: Commissioning
Commissioning Commissioning Commissioning Commissioning Commissioning When the hob has been fully installed it will be necessary to check the minimum flame setting. To do this, follow the procedure below. Turn the gas tap to the MAX position and ignite. Set the gas tap to the MIN flame position then turn the control knob from MIN to MAX several times. -
Page 13: Conversion From Natural Gas To Lpg
Conversion from Natural Conversion from Natural Conversion from Natural Conversion from Natural Conversion from Natural Gas to LPG Gas to LPG Gas to LPG Gas to LPG Gas to LPG IMPORTANT: IMPORTANT: IMPORTANT: IMPORTANT: IMPORTANT: The replacement/ The replacement/ The replacement/ The replacement/ The replacement/ conversion from natural gas to... -
Page 14: Building In
Building in Building in Building in Building in Building in IMPORTANT: IMPORTANT: IMPORTANT: IMPORTANT: IMPORTANT: This hob must be installed according to the instruction ON/OFF SWITCH supplied, and by qualified and qualified and qualified and qualified and qualified and competent personnel competent personnel competent personnel to the relevant competent personnel... -
Page 15: Fitting The Hob Into The Worktop
Building over a kitchen Building over a kitchen Building over a kitchen Building over a kitchen Building over a kitchen unit with door unit with door unit with door unit with door unit with door Dimensions are given in mm. Proper arrangements must be taken in designing the furniture unit, in order to avoid any contact with the bottom of the hob which... -
Page 16: Important Safety Requirements
Impor Impor tant saf tant saf ety r ety r equir equir ements ements Impor tant saf tant saf ety r ety r equir equir ements ements Impor Impor tant saf ety r equir ements This hob must be installed in accordance with the Gas Safety (Installation and Use) Regulations (Current Edition) and the IEE Wiring Regulations (Current Edition). - Page 17 Location Location Location Location Location The hob may be located in a kitchen, a kitchen/diner or bed sitting room, but not in a bathroom or shower room. Ensure that there is a minimum distance of 55 mm between the rear cut out edge and the wall.
-
Page 18: Instructions For The User
Instructions for the User Instructions for the User Instructions for the User Instructions for the User Instructions for the User Operation Operation Operation Operation Operation For easier lighting, For easier lighting, proceed proceed For easier lighting, For easier lighting, For easier lighting, proceed proceed proceed... - Page 19 As soon as a liquid starts boiling, turn down the flame so that it will barely keep the liquid simmering. If the control knobs become difficult to turn, please contact your local Service Force Centre. When switching on the mains, after installation or a power cut, it is quite normal for the spark generator to be activated automatically.
-
Page 20: Cleaning The Hob
Cleaning the hob Cleaning the hob Cleaning the hob Cleaning the hob Cleaning the hob Before Before Before maintenance maintenance maintenance Before Before maintenance maintenance cleaning can be carried out, you cleaning can be carried out, you cleaning can be carried out, you cleaning can be carried out, you cleaning can be carried out, you must DISCONNECT the hob... -
Page 21: The Ignition Electrode
occasionally leaves rough edges. If necessary, remove stubborn stains using a paste cleaner. After cleaning, make sure that the pan supports are correctly positioned. To keep the pan supports in the correct position, they are mounted on metal pins located in the lateral sides of the hob. To ensure a better cleaning, pan supports can be removed from the hob. -
Page 22: Something Not Working
Something Not Something Not W W orking? orking? orking? Something Not W orking? Something Not Something Not orking? If the hob is not working correctly, please carry out the following checks before contacting your local Service Force Centre. SYMPT SYMPTOM SYMPT SYMPT SYMPT... -
Page 23: Repairs - After Sales Service
Repairs - Repairs - After Sales Ser After Sales Ser vice vice Repairs - After Sales Ser After Sales Ser vice vice Repairs - Repairs - After Sales Ser vice If your hob is not performing satisfactorily; consult the fault finding guide within this instruction book (Something not working on the previous page). - Page 24 John Lewis Partnership John Lewis Partnership John Lewis Partnership John Lewis Partnership John Lewis Partnership 171 Victoria Street London SW1E 5NN www.johnlewis.com ANC 39712-0102 04/09 R.A.