Table of Contents
Advertisement
Advertisement
Table of Contents

Related Manuals for Tascam 488 Portastudio


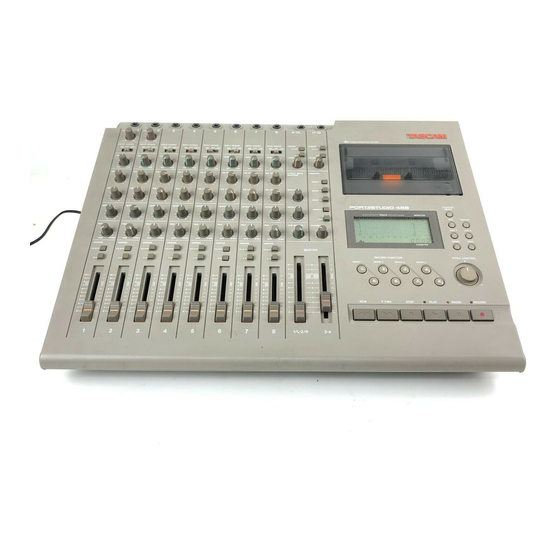
Summary of Contents for Tascam 488 Portastudio
- Page 1 TASCAM TEAC Professional Division 5700123804...
-
Page 2: Table Of Contents
Table Of Contents Using Effects with the PORTASTUDIO 488 33-34 Safety Instructions Setting effect send levels Introduction Setting the output level of effect devices The Recording System Setting the mix/balance control The three steps to multitrack on effect devices Understanding the Mixer How to connect your effects devices Signal flow in the 488 mixer Recording with TAPE SYNC... -
Page 3: Safety Instructions
Safety Instructions CAUTION: 13. Cleaning — The appliance should be cleaned only as recom¬ mended by the manufacturer. • Read all of these instructions. • Save these instructions for later use. 14. Power Lines — An outdoor antenna should be located away •... -
Page 4: Introduction
(like PAN). Transport allowed TASCAM to earn its reputation in m odes and som e features are described w ith an professional audio production fields, and its upper c ase first letter (like Rec ord mode). -
Page 5: The Recording System
The Recording System The PORTASTUDIO 488 is a complete audio additionally need these: Input devices (microphones, instruments). Output devices production facility in a single box. It is divided (headphones), 2-track recorder, Effects into tw o major sections: a full-function mixer and proc essors, etc . -
Page 6: The Three Steps To Multitrack
The Three Steps to Multitrack The diagram below depicts how signals from equipment connected to the 488 c an be routed. In TRACK ING and Overdubbing, the mixer inputs are usually microphones or instruments, going IC. different tracks of the recorder. In OVERDUBBING, the MONITOR section and TAPE CUE of the mixer must be used to listen to previous tracks w hile you record new ones, so... -
Page 7: Understanding The Mixer
Understanding the Mixer Signal Flow in the 488 mixer The illustration below show s how the input OUT jacks and the multitrack recorder (not signal passes through the 488 Mixer section. show n). This is the most important signal route After the MASTER faders they go to the GROUP in the mixer and is called "Main Mix". -
Page 8: Cue Monitor System
Cue Monitor System The five MONITOR Source sw itches choose The CUE mix and MONITOR sw itches are also w hich mix(es) you c an hear in the PH ON ES - the crucial for successful multitrack recording, CU E mix, and any of the four GROU PS. You press because they control what you hear in the the applicable GROU P sw itch to hear w hat you headphones. -
Page 9: Multitrack Cassette Recorder
• The tape speed can be increased or dec reased band between music and sync tone tracks with the PITCH CONTROL dial in both because of the low crosstalk of the TASCAM playback and record, to match pitch or for heads. - Page 10 Tape Length Tapes recorded on stereo c asset t e recorders will Use the shortest possible tape for a given w ork. not playbac k properly on the 488 bec ause of the It is not unusual to play a tape 100 times before differences in the track format and tape speed.
-
Page 11: Block Diagram
Sliders and Controls... -
Page 12: Brief Guide
Brief Guide Input selection and adjustment MIC/LINE IN (Ch. 1-2) or LINE IN (Ch. 3-8): These are the input jac k s for the mixer channels. Connec t line-level signals to any channel; connect low er-level signals (from microphones and som e guitar pickups) to the MIC/LINE INs (c hannel 1 or 2). - Page 13 ST EREO INPUTS (Channel 9-12) ST EREO INPUTS: Connec t any line-level signal (suc h as an effect return, or electronic instrument) here. They c an operate in three different w ays. • Four Sourc es: By using a special 3-c onduc t or Tip- Ring-Sleeve (T RS) cable, eac h jack c an ac c ept two signals at onc e (Tip to the left.
- Page 14 Rec order controls -METERS: These show the recorded level of the respective tape tracks. The average level should be in the center (0), but peak s up to +6 are acceptable. • The MONITOR L /R meters show the level of mixes selected by the MONITOR sw itches.
- Page 15 OUTPUT JACKS: Rear panel EFFECT SENDS 1 and 2: Connect these to the inputs of effect devices. -GROUP OUTs 1-4: Connect 1 /L and 2/R t o the inputs of your mixdow n deck. The GROUP OUT jacks can also be connected to the inputs of external mixers, etc.
-
Page 16: Step-By-Step Operations Guide
Step-By-Step Operations Guide Let's try the 488 mixer To learn how the mixer w orks, first you need to plug a signal sourc e into one of the ten 1/4" jac k s located at upper top of the 488, in your easy reach. - Page 17 7. Press the c hannel 1 ASSIGN "1/L-2/R" sw itch. Assigning to groups Channel level 8. Raise the c hannel fader to "7" on the scale. Group level 9. Raise the MASTER " 1/L-2/R" fader t o "7". Monitor selection 10.
-
Page 18: How To Record On Track 1
How to record on track 1 As a trial, let's record your voic e on tape. 1. Have in hand a new c asset t e tape (Type II, C-9 0 length or shorter). 2. Press on the c asset t e door's low er right hand corner, and it will Loading a cassette spring open. - Page 19 Stopping to record 9. Press STOP to stop the tape and terminate recording. Putting track into "Safe" 10. The REC "1" indicator in the meter should now be blinking as before. Press the RECORD FUNCTION "1" sw itch to turn that indicator off.
-
Page 20: How To Make An Overdub On Track 2
How to make an overdub on track 2 Overdubbing is recording one or more additional track s on the sam e tape, w hile listening to previously recorded tracks using CUE. Leave the microphone connected to the channel 1 input. There is no need to repat c h it to channel 2 to record on track 2. - Page 21 10. Hold RECORD and press PL A Y t o initiate recording. The REC "2" Begin to record indicator that w as blinking will turn on solid, indicating track 2 is now being recorded. Monitoring input/tape 11. You will hear trac k 1 play, together w ith the new signal going to trac k 2, in the headphones.
-
Page 22: How To Record Many Sources Onto A Single Track
How to record multiple tracks simultaneously How to record many sourc es onto a single track If you w ant to record more than one track at a In the first example w e rec orded one microphone time, you simply dec ide w hich instruments you onto one track at a time. -
Page 23: How To Mix Down
How to mix down When the 8 tracks are all recorded, the final step is mixing them into a standard stereo format. This procedure is known as Remixing or Mixing down. During this procedure the tracks are blended together and balanced to create the desired sound. Connections 1. - Page 24 Playback level 7. Press PLAY and, while listening to the tape play, use the channel faders to set each track's relative level for the desired balance. The channel 1 fader is being fed with track 1, the channel 2 fader with track 2, the channel 3 fader with track 3, and so on.
-
Page 25: Using Memory Location Points
Using Memory Location Points Loading MEMO points 2 autolocation points c an be established in the 488's m em ory system. At the desired moment, hold the MEMO k ey and press the L OC 1 k ey. MEM0 1 The MEMO 1 indicator will turn on, show ing that the current tape location is loaded into that register. -
Page 26: Locating The Tape
Locating the tape To 0000 Press the RT Z k ey to fast w ind the tape to the counter zero point. To MEMO 1 Press the L OC 1 k ey to fast w ind the tape to the MEMO 1 point. To MEMO 2 Press the L OC 2 k ey to fast w ind the tape to the MEMO 2 point. -
Page 27: Repeat Play
Repeat Play The REPEA T function provides a "Playbac k Loop" or "Bloc k Repeat " bet w een the tw o programmed MEMO points. The 488 understands the low er MEMO point as the start point of the loop, and the higher point as the end. -
Page 28: Punch-In Or Insert Recording
PUNCH-IN or INSERT Recording "Punc hing in" or "insert recording" is w hen you record over a small section of a previously recorded track in order to fix a mistak e or improve a performance, w hile k eeping the rest of the trac k as before. The mixer settings should be exactly the sam e as they w ere during the original recording. -
Page 29: Punch-In/Out With Record
Repeat Play 6. Press the RECORD FUNCTION "2" sw itch. The RE C 2 indicator will start blinking in the meter w indow , and meter 2 will show the level from your instrument. Adjust the channel fader and the MASTER 1/L-2/R fader for the proper recording level. -
Page 30: Using Record Function Switch
Using RECORD FUNCTION switch 1. Check to see that all the REC indicators are off, especially the indicator for the punch-in track, in our example, track 2. Locate the tape to a point a little behind the error, then hold RECORD and press PLAY. -
Page 31: Bouncing Tracks (Ping-Pong)
Bouncing Tracks (Ping-Pong) The recording capability of the PORTASTUDI O 488 is not limited to eight tracks. You c an "bounce" or combine track s you have rec orded to an empty track, and then replac e the original tracks with new material. -
Page 32: Ping-Pong In Stereo Procedure
8. Press PL A Y . The tape will start playing. 9. Use channel faders 1 through 4 to m ak e any necessary level adjustments. You m ay w ant to repeat this step several times to get the balanc e correct 10. -
Page 33: Using Effects With The Portastudio 488
Using Effects with the PORTASTUDIO 488 Effec t s and signal processing is one of the areas Setting Effec t Send Levels where you can really start to have fun customizing your, sound, and develop your ow n The goal is not to distort the device, w hile unique recording style- Bec ause there are so staying above the noise that effect units many possibilities, it also c an be confusing. -
Page 34: How To Connect Your Effects Devices
How to connect your effects devices This is the most common method. EFF 1 feeds a There is no absolute "right" or "wrong" way to do reverb unit, which has a synthesized stereo this-there are several ways, each with its own output patched into STEREO INPUTS 9-10. -
Page 35: Recording With Tape Sync
Recording with TAPE SYNC The 488 has a SYNC feature that allows you to have your electronic instruments play in sync with the tape. MIDI clocks are themselves a computer type digital language and cannot be recorded on analog tape ; it is necessary to convert them to recordable FSK (Frequency Shift Keying) signals using an appropriate converter, such as the MTS- The MTS-30 is not a mere MIDI-FSK converter but translates MIDI clocks into a FSK sync signal containing score "bar"... -
Page 36: Features And Controls
488 MIXER Input Section The input sec t ion of the 488 is m ade up of input jacks, input level controls (on channels 1 and 2 only) and sw itches that determine w here the input signal is sent . Channels 1-2 differ from channels 3-8 in construction. -
Page 37: Tape Monitor Section
6. EQ HIGH: This controls the tonality of the CUE (c hannels 5-8): high or "treble" frequencies. Turn it to the for sending signals directly to the CU E right to boost the high frequency content of MASTER control, for monitoring in the signal and emphasize its brilliance or headphones w ithout recording. -
Page 38: Effect Send Section
"insert" or "stereo splitter" cable, suc h as 11. EFFECT control: This is a combination the TASCAM PW-2Y or PW-4Y), each "w here to" and "how much" control. It get s ST EREO INPUT jack c an return tw o signals its signal from a point just after the c hannel (left and right) from a stereo unit. - Page 39 into the 11/12 input of the 488 (also labeled adjusting the two LEVEL controls separately, •R"). In this case, the 9/10 LEVEL controls the you can send signal in varying degrees to the left, right, or center of the mix similar to volume of the left (1-3) side, and the 11/12 using a pan pot.
-
Page 40: Group Master Section
15. ASSIGN switch: This routes signals coming The CUE MASTER mix is sent to the MONITOR "CUE" switch, then to the from the LEVEL control (#16) to the PH ON ES jack . corresponding MASTER faders, for recording onto multitrack . 20. -
Page 41: 488 Recorder
28. PLAY key: 488 RECORDER a) Pressing this key alone starts playback. b) If pressed together with RECORD, starts Cassette Loading and dbx System recording ("punch in"). c) Pressing the key during recording stops 23. Cassette compartment door: To insert or the recording ("punch out") without stopping remove a cassette, push on the door's lower the tape motion. -
Page 42: Track Controls
31. PITCH CONTROL dial: Provides a plus or 35. TRACK level meters: They register Input to minus 12% variation to the tape speed in the tracks (= "group mix") or Output from both record and play modes. Turn the dial to them (= "tape signal"). -
Page 43: Autolocators
MIDI sync signals from devic es 2) If pressed alone, it c auses the tape to fast suc h as the TASCAM MTS-30. This jac k is w ind in either direction to the MEMO 1 point ac t ive only w hen the SYNC sw itch is in its (if this has been memorized). -
Page 44: Care And Maintenance
Care and Maintenance Even-though the heads used in your 488 have Using a good head cleaning fluid and a high wear resistance and are rigidly constructed, cotton swab, clean the heads and tape performance degradation or electro-mechanical guides until the sw ab comes off clean. Wipe failure can be prevented if maintenance is off any excess cleaning fluid with a dry sw ab. -
Page 45: Degaussing (Demagnetizing)
How the dbx Works The DB X is a w ide-band compression-expansion DEGAUSSING (DEMAGNETIZING) system w hich provides a net noise reduction (broadband, not just hiss) of a little more than 30 A little stray magnetism c an bec om e quite a big dB. -
Page 46: Troubleshooting
Troubleshooting Problem Possible Cause Playback sound poor in brightness Dirty heads Playback level won't rise Dirty heads TAPE controls set to OFF No playback sound Transport keys not effective Pow er turned off, or tape not loaded No tape motion PAUSE pressed No recording Cassette tab broken, or RHSL engaged... - Page 47 Electrical Characteristics Mixer Section MIC/LINE input (1/4" phone jack x 2) 50k ohms Input Impedance: Nominal Input Level: -50 dBV (3mV) at Trim Max. ~ -10 dBV (0.3 V) at Trim Min. Maximum Input Level: +8 dBV (2.5 V) at Trim Min. LINE input (1/4"...
-
Page 48: Specifications
Typical Performance Mixer Section Frequency Response: 20 Hz to 22k Hz, +1/-2 dB Signal-to-Noise Ratio (at Nominal Input Level): UNWTD(20 Hz to 20 k Hz)/IHF A WTD 1 LINE - GROUP OUT 79 dB/82 dB 8 LINE ~ GROUP OUT 71 dB/76 dB 1 MIC/LINE* ~ GROUP OUT 69 dB/73 dB... -
Page 49: Level Diagrams
Level Diagrams MIXER SECTION... - Page 50 RECORDER SECTION...
-
Page 51: Optional Accessories
Optional Accessories RC-30P Remote Footswitch MTS-30 MIDI-Tape Synchronizer Head Demagnetizer PW-2Y/PW-4Y Insertion Cable TZ-261 Cleaning Kit (Except U.S.) HC-1 Head Cleaner & RC-1 Rubber Cleaner (U.S.only) - Page 52 TRKTRKTRKTRKTRKTRKTRKTRK MONITOR « ITRK I | ITRK8 I I T R K 3 | I TRK « I...
- Page 53 Block Diagram S TRACK SOUNNEL REC/REPSO AMPLIFIER 0«X MR (ENCODER)
- Page 54 TASCAM TEAC Professional Division...