Jensen VM9312HD Installation And Operation Manual
Mobile multimedia receiver
Hide thumbs
Also See for VM9312HD:
- Quick start manual (2 pages) ,
- Installating and operation manual (38 pages)

Related Manuals for Jensen VM9312HD


Summary of Contents for Jensen VM9312HD
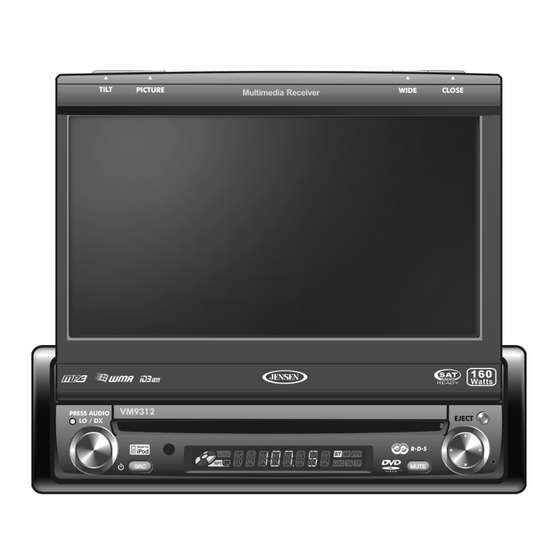
- Page 1 VM9312HD Multimedia Receiver Installation and Operation Manual READY VM9312HD PRESS AUDIO Watts Peak 40W x 4...
-
Page 3: Table Of Contents
VM9312HD CONTENTS Thank you for choosing a Jensen product. We hope you will find the instructions in this owner’s manual clear and easy to follow. If you take a few minutes to look through it, you’ll learn how to use all the features of your new Jensen VM9312HD Mobile Multimedia Receiver for maximum enjoyment. - Page 4 VM9312HD...
-
Page 5: Preparation
PREPARATION Congratulations on your purchase of the Jensen VM9312HD Mobile Multimedia Receiver. It’s a good idea to read all of the instructions before beginning the installation. We recommend having your Jensen VM9312HD installed by a reputable installation shop. Features •... -
Page 6: Installation
To prevent a short circuit, be sure to turn off the ignition and remove the negative (-) battery cable prior to installation. NOTE: If the VM9312HD is to be installed in a car equipped with an on-board drive or navigation computer, do not disconnect the battery cable. -
Page 7: Final Installation
MU TE Remove trim ring. Mount factory brackets on new radio using existing screws from old radio. Slide radio chassis into dash opening and secure. Reinstall dash panel. FINAL ISO-DIN INSTALLATION BAND AS/PS PRESS AUDIO LO/DX DISP OPEN EJECT VM9312HD... -
Page 8: Wiring Diagram
VM9312HD WIRING DIAGRAM See the Module Connections diagram for more information about connecting a satellite receiver and an iPod (through the MediaLink). External Power Amplifier HD RADIO Connect to HD Module (See Module Connections Diagram) Auto antenna control (connect to antenna control lead &... - Page 9 Compatible SAT Tuners: 1. XMD1000 (requires XMC or XMDJEN100 Cable Kit) 2. CNP2000UC 3. SC-C1 and SIRJEN2 Requires Gen 5.5 or earlier photo or video iPod. iPod Touch, iPod Classic and iPod Nano with video will only play music files. VM9312HD...
-
Page 10: Controls And Indicators
With the monitor closed, press the DISP button to cycle through information available on the LCD screen. When the NAV101 is connected to the VM9312HD, press and hold to display the navigation user interface. The TFT screen must be open for this function to operate. -
Page 11: Wide
MENU Mode: Press once to move the cursor up. 16. ( Press once for disc insertion/ejection. Press and hold to reset core mechanism position. 17. TFT Display BAND TILT PICTURE VM9312HD PRESS AUDIO VM9312HD DISP OPEN WIDE CLOSE Watts READY... -
Page 12: Remote Control
VM9312HD REMOTE CONTROL MUSIC PHOTOS VIDEO iPod DISP WIDE TILT PRESET MENU SLOW SETUP CLEAR NOTE: Your remote control may differ slightly from the one pictured here. The above diagram is for illustrative purposes only. - Page 13 Searches an available radio Selects the next track for play- station by increasing tuning back frequency Selects FM/AM band Stops playback VM9312HD SATELLITE iPod Displays diagnostics screen Selects Photo mode Selects Music mode Toggles on/off audio output Toggles on/off audio output...
- Page 14 VM9312HD Button Name Ref# OPEN/ Opens/closes the TFT moni- Opens/closes the TFT moni- CLOSE Decreases monitor tilt angle Decreases monitor tilt angle Increases monitor tilt angle Increases monitor tilt angle DISP Selects display mode: FULL Selects display mode: FULL or NORMAL...
-
Page 15: Using The Tft Monitor
Exit Picture Quality Setting Mode: Press the PIC button (24) on the remote control or the PICTURE/AS button (3) on the monitor VM9312HD Parking Brake Inhibit When the pink "Parking" wire is connected to the vehicle Parking Brake circuit, the front TFT monitor will display video when the Parking Brake is engaged. -
Page 16: Operating Instructions
“0” to “40”. The LCD or TFT screen displays the volume level for 3 seconds. Steering Wheel Control (SWC) The VM9312HD is compatible with the PAC (Pacific Accessory Corporation) steering wheel control adapter SWI- PS. A 3.5mm female connector (labeled “SWC Interface”) on the back of the head unit allows connectivity to the PAC adapter. -
Page 17: Setup Menu
If a DVD supports more than 1 Subtitle or Audio language, all the languages are available for selection during playback. If the selected language is not supported by the DVD, then the default language is used. VM9312HD Setting Options Function... -
Page 18: Exiting The System Setup Menu
VM9312HD Rating Sub-menu Features The DVD system has a built-in parental lock feature to prevent unauthorized persons from viewing restricted disc content. By default, the rating system is unlocked. Once setup, the parental lock is released only by entering the correct password. -
Page 19: Tuner Operation
With multicasting, you can receive up to eight additional multicast channels: HD1~HD8. With your VM9312HD radio, you will receive HD Radio digital broadcasts automatically when tuned to a station that offers HD Radio technology. -
Page 20: Preset
VM9312HD Direct Tuning To enter a radio station directly, touch the button or press the GOTO button (21) on the remote control to display the direct entry menu. FM: _ _ _ . _ MHz Exit Clear Enter the desired radio station using the on-screen number pad. -
Page 21: Satellite Radio Operation
All six stored stations (P1-P6) for the current band appear on the TFT screen. Storing a Station Select a band (if needed), then select a station. VM9312HD Touch the on-screen MEM button (18) to open the preset screen. CH###... - Page 22 VM9312HD Channel Guide is the default search mode. To access Category Guide, press the TITLE button (2) on the remote control or touch CAT on the touch screen. To return to Channel Guide, touch CH on the screen or press the SUBTITLE button (9) on the remote control.
-
Page 23: Dvd/Vcd Video Operation
> button on the remote control (18) to suspend or resume disc play. VM9312HD Slow Motion Playback Press the << button (22) on the remote control, the V button (11) on the joystick, or the << button on the screen to play the current title in slow motion. -
Page 24: Accessing The Dvd Menu
VM9312HD NOTE: When a VCD is playing with PBC turned “On”, activating random playback automatically turns PBC off. Accessing the DVD Menu Press the MENU button (1) on the remote control to recall the main DVD menu. Use the directional (arrow) buttons (<, >, /\ &... -
Page 25: Playback Information
Region 4: Australia, New Zealand, Middle and South America, South Pacific Ocean Islands/ Oceania • Region 5: Russia, Mongolia, India, Middle Asia, Eastern Europe, North Korea, North Africa, North-West Asia • Region 6: Mainland China • ALL: All regions VM9312HD... -
Page 26: Dvd/Cd Audio Operation
Instructions for TFT control and Insert/Eject are the same for DVD and CD operation. Please see the DVD/Disc Video Operation section for information about these topics. The VM9312HD will play music or other audio files from the following disc media: •... -
Page 27: Mp3/Wma Operation
Folder Search, File Search or Folder Select, as shown below. The VM9312HD player will only recognize three folder levels and does not display folders containing only other folders. In the example above, the unit will display folders 3, 4, 6, and 8, but not 2 and 7 since they do not contain any tracks directly. -
Page 28: Controlling Playback
VM9312HD Controlling Playback Playing MP3/WMA Files After inserting a MP3/WMA disc, files will play in the sequence of the “Root’ directory. NOTE: When burning MP3 / WMA files onto a DVD disc, use the 2X or 4X burning option, if available. This slower burning speed will help eliminate buffer errors and increase disc reading reliability. -
Page 29: Ipod Operation
MENU button (1) on the remote control to access the iPod PHOTO mode. The VM9312HD will release control back to the iPod so you can select video media to be displayed on the TFT monitor. To exit PHOTO mode, touch the screen. -
Page 30: Troubleshooting
VM9312HD TROUBLESHOOTING Problem GENERAL Unit will not power on Radio Fuse blown Car battery fuse blown Illegal operation Remote control does not function Battery depleted Battery installed incorrectly No/low audio output Improper audio output connection Volume set too low Improper “MUTE” connection... -
Page 31: Error Messages
Cause Clean disc with soft cloth Insert disc with label side up Insert disc Clean disc with soft cloth Insert disc with label side up Press EJECT key for 5 seconds to reset loading mechanism VM9312HD Corrective Action Corrective Action... -
Page 32: Care And Maintenance
VM9312HD Care and Maintenance Use only a clean silicone cloth and neutral detergent to clean the front panel or monitor. A rough cloth and non- neutral detergent (such as alcohol) may result in scratching or discoloration. Do not get water or cleaning fluids on the unit. -
Page 33: Specifications
Power Output: 13 Watts RMS x 4 channels into 4-Ohms @ < 1% THD+N Signal to Noise Ratio: 70dBA below reference (Reference: 1 Watt, 4-Ohms) Frequency Response: 20 Hz - 20 kHz, -3dB. (Aux Input used as reference input) Reference Supply Voltage: 14.4VDC *Specifications subject to change without notice. VM9312HD... - Page 34 VM9312HD...
-
Page 35: Limited Warranty
Limited Warranty CD or Multimedia Radios/Headunits Audiovox Electronics Corporation (“the Company”) is committed to quality and customer service, and are pleased to offer you this Warranty. Please read it thoroughly and contact the Company at 1-800- 323-4815 with any questions. Who is covered? The Company extends this warranty to the original retail purchaser of products purchased through an authorized Audiovox retailer in the U.S.A., Puerto Rico or... - Page 36 Audiovox Electronics Corporation Hauppauge, NY 11788 Technical Assistance: 1-800-323-4815 www.jensen.com © 2008 Audiovox Ver. 041808 Printed in China...
- Page 38 Terms of Use. eMusic is a registered trademark of eMusic.com Inc. in the U.S.A. and other countries. iPod is a registered trademark of Apple, Inc. Apple is not a partner, sponsor, or owner of eMusic. Offer also available at www.jensen.com and click on the music download icon. • Burn unlimited CDs •...