
Related Manuals for Jensen VM9324


Summary of Contents for Jensen VM9324
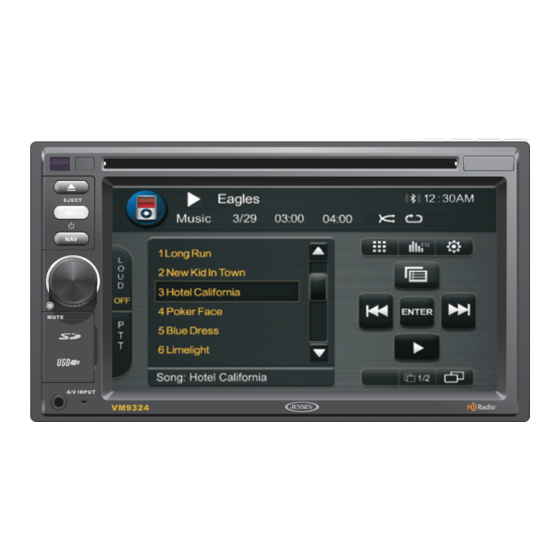
- Page 1 VM9324 Operating Instructions EJECT MUTE A/V INPUT VM9324 ® watts peak 40W x 4...
- Page 2 VM9324...
-
Page 3: Table Of Contents
VM9324 CONTENTS Thank you for choosing a Jensen product. We hope you will find the instructions in this owner’s manual clear and easy to follow. If you take a few minutes to look through it, you’ll learn how to use all the features of your new Jensen VM9324 Mobile Multimedia Receiver for maximum enjoyment. - Page 4 VM9324...
-
Page 5: Features
VM9324 FEATURES Congratulations on your purchase of the Jensen VM9324 Mobile Multimedia Receiver. It’s a good idea to read all of the instructions before beginning the installation. We recommend having your Jensen VM9324 installed by a reputable installation shop. •... - Page 6 VM9324 Chassis • 2.0 DIN • 6.2” Hi-Res TFT Active Matrix • 1,152,000 Sub Pixels (480 x 2400) • Heat Management System - Forced Air-Cooling to Keep the Chip-Sets Operating at Nominal Temperatures General • iPod Voice Control • Navigation Ready (NAV102) •...
-
Page 7: Optional Equipment
See “Bluetooth Operation” on page 58. • Rear Camera The VM9324 is "camera ready." Before accessing any camera features, you must purchase and install a rear video camera. Once the rear camera is connected and operating properly, the CAMERA source mode will become active. -
Page 8: Warnings
VM9324 WARNINGS WARNING! Never install this unit where operation and viewing could interfere with safe driving conditions. WARNING! To reduce the risk of a traffic accident (except when using for rear view video camera) never use the video display function while driving the vehicle. -
Page 9: Anti-Theft Feature
VM9324 ANTI-THEFT FEATURE The VM9324 is equipped with an anti-theft feature requiring the user to enter a password upon initial power on. Entering the Default Password The default user password is 012345 (6 digits). Enter the password using the on-screen keypad and then press the arrow (enter) button. You can also use the remote control keypad to enter the password. -
Page 10: Changing The Password
VM9324 Changing the Password To change the SECURITY password using the touch screen, perform the following steps: 1. Touch the button to view the “SETUP” menu. 2. Touch SECURITY to view the “SECURITY” sub-menu. TIME SCREEN THEME SECURITY VERSION SECURITY P.VOL... -
Page 11: Controls And Indicators
VM9324 CONTROLS AND INDICATORS 1. Rotary Encoder Rotate to adjust the volume. While in the audio menu, press and release to enter and/or confirm audio settings. Press to activate the MUTE function and silence the receiver. Press again to resume sound. - Page 12 VM9324 EJECT MUTE OPEN VM9324...
-
Page 13: Remote Control
VM9324 REMOTE CONTROL See remote control tables in various sections for button functions. iPod MUSIC PHOTO VIDEO... -
Page 14: Using The Tft Monitor
VM9324 USING THE TFT MONITOR Aspect Ratio Press the DISP button (10) on the remote control to adjust the aspect ratio as follows: FULL The entire screen is extended horizontally to the aspect ratio of 16 to 9. The extension ratio is the same at any point. -
Page 15: Operating Instructions
VM9324 OPERATING INSTRUCTIONS Power On / Off Press the /SRC button (2) on the unit (or the button (4) on the remote control) to turn the unit on. The buttons on the front of the unit light up and the current mode status appears in the LCD (11). - Page 16 VM9324 Mute/Line Mute Press the rotary encoder button (1) on the front panel or the MUTE button (3) on the remote to mute the volume from the unit. Press the rotary encoder button again to restore the volume. “MUTE” is displayed on the LCD. Adjusting the volume or using any of the audio setup features cancels the mute function.
-
Page 17: Volume Adjustment
VM9324 NOTE: You can press and hold to drag the “Source Menu” icons and rearrange them based on your preference External Devices External peripheral devices, including a game console, camcorder, navigation unit, iPod, Zune, etc. can be connected to this unit via RCA output using the A/V Media Adapter Cable (included). -
Page 18: Audio Control Menu
VM9324 Programmable Turn-On Volume This feature allows the user to select a turn-on volume setting regardless of the volume setting prior to turning the unit off. To use this feature, the TFT monitor must be displayed. To program a specific turn-on volume level, turn the rotary encoder (1) to adjust the volume to the desired turn-on volume. -
Page 19: System Reset
VM9324 • Use the touch screen to adjust the settings for an audio feature. Table 2: Audio Adjustments Audio Function Adjustable Range Dance Hip hop Rave (NOTE: The “User” setting is automati- User cally selected when Acoustic individual BASS, MID and TREB set- Rock tings are modified.) -
Page 20: Ipod Voice Control
The VM9324 is provided with a high quality active microphone for voice control. This microphone should be mounted as close to the driver as possible, preferably on the visor directly above the driver, for best voice recognition. - Page 21 Steering Wheel Control The VM9324 offers the option to re-program one of your steering wheel controls to operate as the "PTT" (Push To Talk) control on the VM9324, allowing for a truly hands-free music management experience. See “SWC (Steering Wheel Control) Sub-menu Features” on page 20.
-
Page 22: Setup Menu
VM9324 SETUP MENU To access system settings, touch the button on the screen to enter the setup menu. The “TIME” sub-menu appears highlighted in yellow. TIME SCREEN THEME SECURITY VERSION TIME P.VOL AUDIO 2009 VIDEO 7:46 PM Clock Mode 12-hour... - Page 23 VM9324 TIME Sub-menu Features Setting Options Function Clock Mode 12-hour Clock displays 12 hour time using AM and PM. 24-hour Clock displays 24 hour time up to 23:59. Month Jan-Dec Touch to view the direct entry keypad. Enter numeric equivalent of current month (1-12) and touch the enter key.
- Page 24 (function 7 or 8) is held down and function 5 is pressed momentarily, Preset Down will be selected. NOTE: The VM9324 offers the option to reprogram one of your steering wheel controls to operate as the "PTT" (Push To Talk) control on the VM9324 to activate voice control for a truly hands-free music management experience.
- Page 25 VM9324 SECURITY Sub-menu Features. Setting Options Function Password ****** Enter the current password (default is 012345) and touch the arrow (enter) key to access SECURITY features. To change the password, touch the “Password” field to open the on-screen keypad. Enter a new 6-digit password and press the arrow (enter) button.
- Page 26 VM9324 AUDIO Sub-menu Features Setting Options Function Loudness Turn bass boost on/off Employ the Dynamic Range Control for better playback for low volumes. Sub- Turn the subwoofer on/off. woofer Sub- 80Hz Selecting a crossover frequency sets a cut-off frequency of woofer the subwoofer's LPF (low-pass filter).
- Page 27 VM9324 BT (Bluetooth) Sub-menu Features Setting Options Function Bluetooth Enable Bluetooth function. Disable Bluetooth function. Auto The unit automatically answers all incoming calls. Answer Manually answer calls by touching the button. Auto Con- Automatically connect when your paired phone is in range.
- Page 28 VM9324 NOTE: Record the password and keep it in a safe place for future reference. The rating for each disc is marked on the disc, disc packing, or documentation. If the rating is not available on the disc, the parental lock feature is unavailable.
-
Page 29: Tuner Operation
VM9324 TUNER OPERATION To access the radio (HD) screen, press the SRC button (2) on the front panel or remote control (8) or touch the top left corner of the screen to access the Source menu, and then touch the “RADIO” icon. With the screen closed, press the SRC button (8) on the remote control until “RADIO”... -
Page 30: Remote Control Functions
VM9324 17. (a) Current source (b) Touch to view the SOURCE MENU and select a new source 18. AS: Scan and automatically store strongest received stations : View the SETUP menu 20. TAG: Tag the current song for possible iTunes download. If an iPod is connected, the tag goes directly to the iPod/iPhone. -
Page 31: Direct Tuning
VM9324 Direct Tuning To enter a radio station directly, touch the button or press the GOTO button (21) on the remote control to display the direct entry menu. Exit Enter the desired radio station using the on-screen number pad. Press the arrow (enter) button to tune to the selected station. - Page 32 VM9324 Recalling a Station 1. Select a band (if needed). 2. Touch an on-screen preset button (6) to select the corresponding stored station. P1 FM 87.5 MHz P2 FM 90.1 MHz P3 FM 98.1 MHz P4 FM 106.1MHz P5 FM 107.9MHz P6 FM 102.9MHz...
-
Page 33: Dvd/Vcd Video Operation
VM9324 DVD/VCD VIDEO OPERATION NOTE: When properly installed, DVD video cannot be displayed on the main TFT screen unless the parking brake is applied. If you attempt to play a DVD while the vehicle is moving, the TFT screen displays “WARNING!!! It is illegal to view video while driving or operating a motor... - Page 34 VM9324 Accessing DVD Mode To switch to DVD mode when a disc is already inserted, press the SRC button (2) on the front panel or remote control (8) to access the SOURCE MENU. Touch the “DISC” icon. Table 4: DVD/VCD Remote Control Functions...
-
Page 35: Controlling Playback
VM9324 Controlling Playback To access the on-screen controls, touch the bottom 1/3 of the screen while a DVD is playing. Touch the 1/2 button to view a second page of controls AUDIO TITLE TITLE DISP Stopping Playback Touch the stop button ( ) on the screen or press the || /BAND button (20) on the remote control to stop DVD play. - Page 36 VM9324 • DVD: Repeat Chapter, Repeat TItle, Repeat Off • VCD (PBC Off): Repeat Single, Repeat Off NOTE: For VCD play, the repeat function is not available if PBC is on. Sectional Repeat Function (A-B) Use the A-B function to define a specific area of a disc to repeat.
- Page 37 VM9324 • For DVD mode, you can choose Time or Title/Chapter search. DVD Search Search Title – Go to specific Title title Chapter Chapter – Go to Time 00 : 00 : 00 specific chapter Time – Go to specific time in current title •...
- Page 38 VM9324 Touch Screen Direct Entry To select a chapter/track directly, touch the button on screen control to display the direct entry menu. Chapter: _ Exit Enter Clear Enter the desired chapter/track using the on-screen number pad. Press the Enter button to tune to the selected station. To exit the screen without changing the station, touch Exit.
-
Page 39: Playback Information
VM9324 NOTE: During VCD playback, press the AUDIO button (5) on the remote control to choose between Left Channel, Right Channel, and Stereo. PBC - Play Back Control (VCD Only) For VCDs with play back functionality, play back control (PBC) provides additional controls for VCD playback. - Page 40 VM9324 General Disc Information Table 5: Disc Properties Symbol 12cm Disc Properties Max Play Time Single side single layer (DVD-5) (MPEG 2 Method) Single side double layer (DVD-9) 133 minutes Double side single layer (DVD-10) 242 minutes Double side double layer (DVD-18)
-
Page 41: Dvd/Cd Audio Operation
Instructions for TFT control and Insert/Eject are the same for DVD and CD operation. Please see the DVD/Disc Video Operation section for information about these topics. The VM9324 will play music or other audio files from the following disc media: • CD-DA •... - Page 42 VM9324 2. Elapsed playing time 3. Current time 4. Track titles 5. Disc title /||: Play/pause : Stop disc playback. Press /|| to resume normal playback. 8. | : Previous track |: Next track : Fast reverse x2, x4, x8, x20. Press /|| to resume normal playback.
- Page 43 VM9324 Remote Control Functions Table 7: CD/DVD Audio Remote Control Functions Eject disc || / BAND Select AM/FM band Previous track Next track Fast reverse x2, x4, x8, x20 Fast forward x2, x4, x8, x20 Play/pause Stop playback 1-9, 0...
- Page 44 VM9324 Direct Track Entry To select a track directly, touch the button on screen control to display the direct entry menu. Track:__/8 Exit Clear Enter the desired track using the on-screen number pad. Press the enter button (arrow) to play the selected track. To exit the screen without selecting a...
-
Page 45: Mp3 Operation
VM9324 MP3 OPERATION Instructions for TFT control and Insert/Eject are the same for DVD and MP3 operation. Please see the DVD/Disc Video Operation section for information about these topics. Media and File Requirements This player allows you to play back MP3 and WMA files recorded onto CD-R/ RWs, DVD+R/RWs, and DVD-R/RWs. - Page 46 For example, a medium with the following folder/file hierarchy is subject to Folder Search, File Search or Folder Select, as shown below. The VM9324 player will only recognize three folder levels and does not display folders containing only other folders. In the example above, the unit will display folders 3, 4, 6, and 8, but not 2 and 7 since they do not contain any tracks directly.
- Page 47 VM9324 Accessing an SD Card 1. Locate the SD connector (9) on the front of the radio. 2. Insert the SD card into the SD connector. 3. Press the SRC button (2) on the front panel or remote control (8) or touch the top left corner of the screen to access the Source menu, and then touch the “SD”...
- Page 48 VM9324 On-Screen Controls and Indicators The on-screen indicators and touch key areas for MP3 playback are outlined below. 01:02 PM Folder: 1/141 00:01:51 World in My Eyes Sweetest Perfection Personal Jesus Halo Waiting for the Night Enjoy the Silence 1. Current track and total number of tracks on disc 2.
- Page 49 VM9324 21. Repeat and Random playback indicators 22. LOUD: Turn loudness features ON/OFF 23. DIR -: View the previous folder 24. DIR +: View the next folder : List audio files : List photo files (see “Viewing JPEG Photos” on page 46)
-
Page 50: Viewing Jpeg Photos
VM9324 VIEWING JPEG PHOTOS JPEG images stored as individual images or stored in folders can be accessed using the DISC/SD/USB interface. When a disc/card is loaded and read by the unit, the root menu will display the music contents of the disc when music files are present. -
Page 51: Mpeg Movie Playback
VM9324 MPEG MOVIE PLAYBACK Version 1 and 2 MPEG movies can be accessed using the DISC/SD/USB interface. When a disc/card is loaded and read by the unit, the root menu will display the music contents of the disc when music files are present. To view... - Page 52 VM9324 17. DISP: Display file information (file name and track number) Returning to the Music Interface To return to the music interface, touch the icon to list audio files. Touch to select an audio file and begin playback. Touch the button to view MP3 playback controls.
-
Page 53: Xm ® Radio Operation
VM9324 RADIO OPERATION ® Listeners can subscribe to XM Radio on the Web by visiting ® www.xmradio.com, or by calling (800) 967-2346. Customers should have their Radio ID ready (see “Displaying the Identification (ID) Code”). Customers can receive a limited number of free-to-air channels without activation. -
Page 54: Selecting A Station
VM9324 16. BAND: Change between XM1, XM2 and XM3 bands : View the SETUP menu 18. Touch this area to view the SOURCE MENU and select a new playback source 19. MEM: View screen used to enter current channel into preset memory 20. - Page 55 VM9324 Storing a Station 1. Select a band (if needed), then select a station. 2. Touch the on-screen MEM button to open the preset screen. MEM : E x i t 3. Touch the preset number in which you would like to store the current station (or press Exit to cancel and close the menu).
- Page 56 VM9324 Channel/Category Guide Mode There are two search modes to help navigate through channels and or categories. To access the Channel/Category Guide mode, touch the CG button. Channel Guide is the default search mode. To access Category Guide, press the SUBTITLE button (9) on the remote control or touch CAT on the touch screen.
- Page 57 VM9324 Category Guide Mode When Category Mode is selected, folder icons appear on the screen next to category choices. • While in Search Mode, to switch between Channel and Category search modes, touch the CH or CAT buttons on the screen.
-
Page 58: Ipod Operation
VM9324 iPod OPERATION NOTE: Be sure your iPod has the latest Apple firmware installed to avoid connectivity issues. Accessing iPod Mode This unit is Made for iPod and works with iPhone. You can control your iPod via touch screen to access Playlist, Artist, Album, Songs, etc. Supported models include, but are not limited to, the following: •... - Page 59 VM9324 2. File number and total number of files on the iPod 3. Current time 4. File titles 5. ID3 information (Artist/Album) 6. ENTER: Touch to “Enter” : Activate/deactivate Random mode |: Next track 9. | : Previous track : iPod Menu 11.
- Page 60 VM9324 Controlling your iPod Touch the button or press the following remote control buttons to access the main iPod menu. Menu Remote Control Music AUDIO Photos SUBTITLE Videos ANGLE Use the touchscreen or the directional keys on the remote control to navigate the iPod menus.
- Page 61 Clear over, touch Clear. NOTE: To transmit the video from your iPod to the VM9324 screen, you must set the following options through the iPod video settings menu: TV Out = On, TV Signal = NTSC, and Widescreen = On.
-
Page 62: Bluetooth Operation
Before attempting to use the Bluetooth functions on the VM9324, you must purchase and install the BTM15. When connected properly, the blue light appears illuminated. Bluetooth features are only available when the BTM15 is installed. - Page 63 Try to perform pairing within a few minutes of the phone being turned on. • Once the unit has been paired with the phone, the unit’s model number, “VM9324”, will be displayed on the mobile phone. • To achieve the best performance, always keep the mobile phone within 3 meters of the head unit.
- Page 64 VM9324 Bluetooth User Interface The on-screen indicators and touch key areas for Bluetooth operation are outlined below. 01:02 PM 1 Blackberry 8300 2 iPhone History Paired List PHONE INTERFACE (Not Connected) MUSIC INTERFACE 1. Name of connected device 2. Current time 3.
- Page 65 VM9324 : Access the direct entry screen 18. Touch the scroll bar and arrows to view the previous/ next page of choices (only visible when needed) 19. | : Previous file 20. ||: Play/pause |: Next file : Stop A2DP playback...
-
Page 66: Pairing Bluetooth System With Mobile Phone And Head Unit
VM9324 is “1234”. See “BT (Bluetooth) Sub-menu Features” on page 23 for instructions on entering the pairing code. 3. Select “VM9324” from the pairing list on the mobile phone. • If pairing is successful, the TFT will display the paired mobile phone model number or name (as specified in your phone’s Bluetooth Setup... - Page 67 VM9324 Reconnecting Once the Bluetooth device has been paired, you can touch the connect button (9) to reconnect. NOTE: You can only connect to a phone using the buttons on the on- screen Phone interface. Each time the button is pressed, the head unit will automatically reconnect with the mobile phone once (only if the mobile phone was previously paired with the head unit).
-
Page 68: Menu List
VM9324 1. Touch the button to open the direct dial screen. 5551237845 Exit 2. Use the 0-9, *, and # buttons to input the phone number. Touch the C button to clear the last digit. 3. After entering the phone number, press the button to dial the call. - Page 69 3. Touch to highlight the number you want to dial (the selected number appears at the top of the screen) and then touch the button. NOTE: Some mobile phones do not support Phone Book upload through Bluetooth. This is a limitation of the phone, not the VM9324.
- Page 70 3. Touch the area to the right of “Auto Connect” to select “On”. Advanced Audio Distribution Profile (A2DP) The VM9324 allows you to play back audio files from your phone, PDA or personal music player using a Bluetooth connection. Before using an audio player, it may be necessary to enter a PIN code into the unit.
-
Page 71: Rear Camera Function
VM9324 REAR CAMERA FUNCTION This unit is “camera ready.” Before accessing any camera features, you must install a rear video camera. When the camera is not installed and the function is accessed by gear selector being placed in reverse or by the unit’s menu, the message “NO VIDEO SIGNAL”... -
Page 72: Troubleshooting
VM9324 TROUBLESHOOTING Table 12: Troubleshooting Problem Cause Corrective Action GENERAL Unit will not Radio Fuse blown Install new fuse with correct rating power on Car battery fuse blown Install new fuse with correct rating Illegal operation Press the RESET button located in the... - Page 73 VM9324 Table 12: Troubleshooting Problem Cause Corrective Action Prolonged Improper aspect ratio Use correct aspect ratio setting image or setup improper height/width ratio display Monitor stops Moving path is blocked Press OPEN key to restart monitor at incorrect movement position...
-
Page 74: Error Messages
VM9324 Table 12: Troubleshooting Problem Cause Corrective Action Incorrect play- Message is longer than back message LCD can display displayed Error Messages Table 13: Error Messages Message Cause Corrective Action Displayed Loading Disc is being read No Disc Disc is dirty... -
Page 75: Care And Maintenance
VM9324 Care and Maintenance 1. Use only a clean silicone cloth and neutral detergent to clean the front panel or monitor. A rough cloth and non-neutral detergent (such as alco- hol) may result in scratching or discoloration. 2. Do not get water or cleaning fluids on the unit. -
Page 76: Specifications
VM9324 SPECIFICATIONS DVD/CD Player Compatible Disc Media: DVD + R / RW (Single and Dual Layer) and CD-R / Compatible Media Formats: CD-DA, MP3, WMA, VCD, SVCD, Xvid, AVI, MPEG1 / 2 Signal to Noise Ratio: >95dBA Dynamic Range: >95dB Frequency Response: 20Hz to 20 kHz, -3dB Channel Separation: >... - Page 77 VM9324 Monitor Screen Size: 6.2” Hi-Res TFT Active Matrix Resolution: 1,152,000 Sub Pixels (480 x 2400) General Auxiliary Input impedance: 10k Power Supply: 11 to 16VDC, negative ground Power Antenna (Blue): 500mA max, current limited protection Amplifier Remote (Blue/White): 500mA max, current limited protection...
- Page 78 VM9324...
- Page 79 Audiovox Electronics Corporation Hauppauge, NY 11788 Technical Assistance: 1-800-323-4815 www.jensen.com © 2010 Audiovox Ver. 051210 Printed in China...