Sony Mavica MVC-FD85 Training Manual
Mavica cameras
Hide thumbs
Also See for Mavica MVC-FD85:
- Operating instructions manual (68 pages) ,
- Service manual (30 pages) ,
- Service manual (112 pages)

Related Manuals for Sony Mavica MVC-FD85


Summary of Contents for Sony Mavica MVC-FD85
-
Page 1: Digital Camera
Training Manual ® Digital Camera Sony Mavica Cameras Models: MVC-FD85 MVC-FD90 MVC-FD95 MVC-FD85 Troubleshooting & Circuit Descriptions Course: DSC-01... -
Page 2: Table Of Contents
Table of Contents Introduction Floppy Disc Drive Common Failures Checking for Floppy Disc Drive Voltage Purpose of this book Checking the Floppy Drive Signals Electronic Contents of Mavica Floppy Drive Alignment Check Circuit Boards Location LCD Block New Mavica Features Timing Signals MVC-FD80/90 Disassembly LCD Drive Signals... -
Page 3: Common Failures
How to use the (RM-95 and Radar W) memory access jigs • The first Sony Mavica consumer still camera was produced in 1996. That Circuit Operation early camera was compact and had a flash but did not have zoom. The •... -
Page 4: Circuit Boards Location
CD-248 (MVC-FD85) FU-140 (MVC-FD90) CD-236 (MVC-FD90) PK-50 (MVC-FD90) FU-146 (MVC-FD85) PK-52 (MVC-FD85) FLASH UNIT FC-72 MAIN BOARD CIRCUIT BOARDS LOCATION 1DSC1 3/7/01... -
Page 5: New Mavica Features
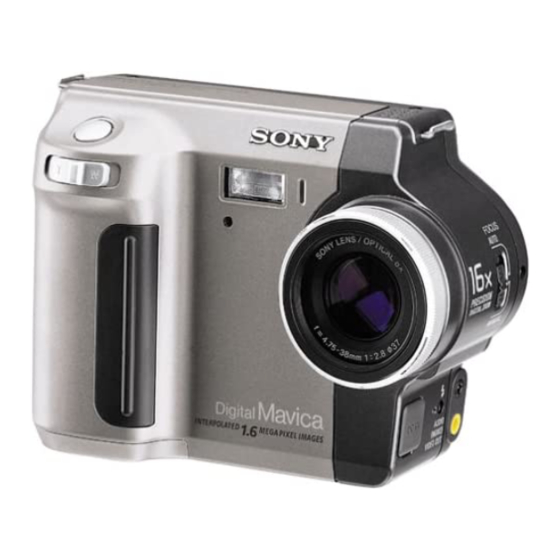
You can choose the flash intensity from the menu. A low intensity just illuminates the subject, leaving the background dark. A higher intensity Since the introduction of the Sony digital still camera in 1996, many fea- lights a larger, more distant background. - Page 6 Imager size Max Pic Model MSRP Focus Zoom / Resolution Size Media 1 Media 2 Media 3 Display MVC-FD85 $800 Auto 3X Optical 0.37" diagonal / 1280 x Floppy Memory 2.5" LCD 6X Digital 1.3M pixels drive Stick ** 123k pixels...
- Page 7 Moving images in the Movie Mode or deleting the picture by pressing this button to make the selection. Unlike previous Mavica cameras, the MVC-FD85, 90 and 95 can play Cropping / Trimming back moving pictures and sound. The minimum recording time is set...
- Page 8 PWR = GRN Add Audio to Still Pictures PLAY MOVIE CHARGE = AMBER Instant Still Picture Check STILL Cropping / Trimming PROG MVC-FD85 ReSizing the Picture FOCUS DISPLAY BACK PANEL Text Picture Mode FLASH MENU E Mail Picture Mode MENUS...
- Page 9 Slide Show in the Play Mode This feature displays all the still pictures taken one by one. You can se- lect the time the picture remains visible before the next picture is selected. The intervals are 3, 5, 10, 30 or 60 seconds. Repeat can also be se- lected.
-
Page 10: Mvc-Fd80/90 Disassembly
Cabinet (front) Two screws (M2x4), Two screws (M2x4) Cabinet (rear) Screw (M2x4), Screw (M2x4), Two screws (M2x4), MVC-FD80/90/95 DISASSEMBLY 1 4DSC1 3/7/01... - Page 11 AC POWER ADAPTOR AC IN FU-140 board (MVC-FD90) FU-146 board (MVC-FD85) FC-82 board CD-246 PK-52 board (MVC-FD85) board PK-50 board (MVC-FD90) Liquid crystal module indicator (24p) Lens block assembly (MVC-FD90) Cold cathode CD-248 board fluroescent tube (20p) Lens block assembly...
-
Page 12: Floppy Drive Connections
FU-52 harness (9p) Microphone unit (2p) Flash unit (10p) Cabinet (front) Blind sheet block assembly Floppy disk drive (4 x) Flexible board (18P) (MVC-FD85 FP-231) Claw (MVC-FD90 FP-167) FC Bracket Three screws Lens block assembly (M2 x 2.5) (MVC-FD85 (26P) -
Page 13: Flash Unit Access
Two tapping screws (M2 x 5) ST insulating sheet FU-140 board (MVC-FD90 FU-146 board (MVC-FD85) Two tapping screws (M2 x 5) Control switch block (6p) Flash unit Short jig resistor 1k, 1W (Part No. 1-215-869-11) When handling the flash unit, be sure to discharge the charging capacitor before handling it. - Page 14 NOTES...
-
Page 15: Overall Block
AC Adapter Power Overall Block The AC adapter (not shown) produces about 8.4Vdc (1.5A capacity) to the DC In terminals of the FU board. This DC input is fused before enter- The circuit makeup of the Mavica Still Picture Camera consists of the ing the power supply on the main FC-72 board to power IC404 and the power supply and several sections necessary to display a picture on the camera’s DC-DC Converter. - Page 16 IC901, IC904 IC404 STB Y,R-Y,B-Y,H,V PANEL LCD DRIVER CHARGE TIMING GEN. STB FULL FLASH IC102 IC901 UNIT IC301 VIDEO VIDEO OUTPUT ASSEMBLY CAMERA PROCESS TO OUTPUT JACK STRB ON IC252, IC253 PROCESS J781 AUDIO CCD OUT LENS PROCESS SPEAKER/ MIC ASSY.
- Page 17 Back Up Battery Power In addition to the STRB ON line, the flash assembly capacitor needs to be charged to produce the flash of light for picture taking. IC404 controls the The back up battery located on the rear panel PK board powers the timer charge function and indication using two controls lines.
- Page 18 IC901, IC904 IC404 STB Y,R-Y,B-Y,H,V PANEL LCD DRIVER CHARGE TIMING GEN. STB FULL FLASH IC102 IC901 UNIT IC301 VIDEO VIDEO OUTPUT ASSEMBLY CAMERA PROCESS TO OUTPUT JACK IC252, IC253 STRB ON PROCESS J781 AUDIO CCD OUT LENS PROCESS SPEAKER/ MIC ASSY.
- Page 19 LCD Backlight Stage The backlight is necessary for the LCD unit’s visibility or it will appear almost black. The backlight circuit is powered by the BL Unreg line from F003, but is switched by the LCD Backlight ON/OFF switch at the rear panel to conserve battery power.
- Page 20 IC901, IC904 IC404 STB Y,R-Y,B-Y,H,V PANEL LCD DRIVER CHARGE TIMING GEN. STB FULL FLASH IC102 IC901 UNIT IC301 VIDEO VIDEO OUTPUT ASSEMBLY CAMERA PROCESS TO OUTPUT JACK IC252, IC253 STRB ON PROCESS J781 AUDIO CCD OUT LENS PROCESS SPEAKER/ MIC ASSY.
-
Page 21: Power Block
Battery Charge Determination signal is output Power Block Once IC404 knows there is an AC power source, IC404 begins outputting battery charge determining pulses at pin 27 even though there is no bat- The power block consists of three sections with inter-functional opera- tery connected. - Page 22 FU BD. FC-72 BD. J902 FROM BATTERY DC IN Q001, Q004 CN001/ BL UNREG. CN004 F003 TO BACK LIGHT DRIVE (PK BD.) CAMERA VOLTAGES F002 4.9V CAM A 4.9V POWER FDD 4.9V SUPPLY F001 FDD P 5V FDD SPIN LCD PANEL VOLTAGES D401 BATT.
-
Page 23: Battery Power
IC404 Detects the Battery Only Battery Power Now that the Active Ever 3.2V line powers HI Control IC404, it detects battery voltage at pin 71 from F004 with the camera still off. IC404’s next The battery power circuit is used to power the camera when the camera is step is dependent upon whether the AC power is detected at pin 72. - Page 24 CN004/ BATT.EXT. IC404/20 CN001 OUTPUT (FC-72 BD.) POWER VOLTAGES F001 SUPPLY 7.2V DD ON (SWITCH) DC IN Q001 BATT./ J902 D402 F005 EVER EXT. IC401 D001 3.2V J902/3 R001 3.2V SOURCE BATTERY INFO. REG. 7.2V LITHIUM R002 NP-F 330/ Q001 D401 NP-F 550 IC404...
- Page 25 Battery Compartment Switch Test Charging the Fully Charged Battery The switch in the battery compartment, J901, remains grounded with or After the battery is charged, the rear panel amber charge light goes out. without a battery inserted. This switch only opens when the car battery This circuit changes to test charge the battery while the camera is still cord or battery down adjustment test cord is inserted.
- Page 26 CN004/ BATT.EXT. IC404/20 CN001 OUTPUT (FC-72 BD.) POWER VOLTAGES F001 SUPPLY 7.2V DD ON (SWITCH) DC IN Q001 BATT./ J902 D402 F005 EVER EXT. IC401 D001 3.2V J902/3 R001 3.2V SOURCE BATTERY INFO. REG. 7.2V LITHIUM R002 NP-F 330/ Q001 D401 NP-F 550 IC404...
-
Page 27: Battery Charge Determination
The Camera is OFF Battery Charge Determination Battery charging only works when both power sources are connected and IC404 has determined that the camera is off. This circuit test charges the battery to determine if charging is needed. Test charge pulses are produced when the AC adapter is plugged in and This Battery Charge Determination circuit test charges the bat- the camera is off. - Page 28 FC-72 BD. FU BD. CN004/ BATT.EXT. IC404/20 CN001 OUTPUT DC IN (FC-72 BD.) POWER VOLTAGES J902 F001 SUPPLY DD ON (SWITCH) R020 F005 AC-L10 R004 BATT./ ADAPTER D402 EVER EXT. = AC ONLY IC401 3.2V R001 1k J902/3 3.2V 8.4V = AC+BATT. SOURCE BATTERY INFO.
- Page 29 The Amber Battery Charge Light Turns ON Battery Charging comes from Q001 (not shown) (not shown) If charging is called for, the one-second pulses from IC404/pin 27 stop If battery charging is called for, IC404/pin 100 goes high to charge the and the amber charge light is lit.
- Page 30 FC-72 BD. FU BD. CN004/ BATT.EXT. IC404/20 CN001 OUTPUT DC IN (FC-72 BD.) POWER VOLTAGES J902 F001 SUPPLY DD ON (SWITCH) R020 F005 AC-L10 R004 BATT./ ADAPTER D402 EVER EXT. = AC ONLY IC401 3.2V R001 1k J902/3 3.2V 8.4V = AC+BATT. SOURCE BATTERY INFO.
-
Page 31: Power Block Troubleshooting
Perform the battery down adjustment as outlined in both this training Power Block Troubleshooting manual and the service manual. The camera does not have to be taken apart, but a power supply, DVM, the RM-95 adjustment tool, No Power ON and a special power cord are needed. - Page 32 CN004/CN001 F003 CN001 DC IN BL UNREG. TO BACKLIGHT DRIVE (PK52/5O BD.) A4.9V F002 DC IN R020 CAMERA VOLTAGES J902 POWER FDD 4.9V 4.9 CAM SUPPLY F001 FDD P5V R001 R004 Q002 LCD PANELVOLTAGES FDD SPIN BATT/ BATTERY Q001/ F005 LCD ON TERM.
-
Page 33: Flash Operation
How does the shutter button trigger the flash? Flash Operation After the shutter button is pressed, the flash command is sent as data through IC501 to IC301. Along with the flash command is a user decision Before touching the Flash unit, you must discharge the large 300- to force a flash or strobe the flash. - Page 34 FC-72 BD. LOW PULSE = PK52/PK50 BD. ST UNREG. CN301 CAP CHARGED 4.9V A4.9V XSTB FULL CHARGE STB CHARGE OSC. H = CHARGE FLASH FLASH FLASH STRB IC404 CYCLE CAPACITOR D701 PHOTO Hi CONTROL S705 STRB ON IC301/ FLASH CN701/ LOCK IC501 FLASH...
-
Page 35: Discharging The 300V Flash Capacitor
Discharging the 300V Flash Capacitor The flash unit contains the flash tube, flash capacitor and phototransistor For your own safety, you must dis- for flash monitoring. charge the flash capacitor before working near the Flash Unit flash unit board. Discharge Procedure: 1k ohm 1. - Page 36 NOTES...
-
Page 37: Camera Signal Processing
Camera Signal Processing -7.5V xxxxxxxxxxxxxxxxxxxxxxxxxxxxxx Camera Modes of Operation: CCD Imager xxxxxxxxxxxxxxxxxxxxxxxxxxxxxx V1-V4 All three operating modes use the LCD and Floppy Drive but not the cam- xxxxxxxxxxxxxxxxxxxxxxxxxxxxxx xxxxxxxxxxxxxxxxxxxxxxxxxxxxxx era and audio sections. xxxxxxxxxxxxxxxxxxxxxxxxxxxxxx CCD Output Operating Sections Mode Camera Speaker H1, H2, PG Play... - Page 38 V OUT CN201/ CN101 -7.5V -7.5V VDD 15V +15V IC301CAMERA IC102 SAMPLE/HOLD Q202 CCD OUTPUT AGC, A/D CONV. BUFF. LIGHT IC101/IC102 IMAGER IC101 TIMING GENERATOR FU-72 BD. CD BD. X101 X102 24.5MHz 24.3MHz NTSC CAMERA PROCESS 15DSC1 1312 3/20/01...
- Page 39 When the lens is covered so the picture is dark, no voltage from the Horizontal Timing Signals phototransistors is output. The signal carrier pulses (RG) equivalent to a Name Location Voltage clock signal is the only information on the CCD Output line. Imager IC201/pin 15 3Vp-p Imager IC201/pin 16...
- Page 40 C H 1 !1 0 .0 V = C H 2 !5 .0 0 V = C H 3 !5 .0 0 V ~ C H P M T B 2 0 .0 u s- 1 .86 d v c h 1 + Vertical Timing Signals - 2 Name Location...
-
Page 41: Missing Camera Timing Signals
Missing Camera Timing Signals Normal picture of a B and W star chart used in Missing V2 Timing signal to imager/pin 4 camcorder focus adjustments. The Color bars Description: Total loss of vertical signal transfer. are at the top background. Only the last line is output because the horizontal timing pulses are present. - Page 42 Missing V3B Timing signal to imager/pin 3 Missing H2 Timing signal to imager/pin 16 Description: Total loss of vertical signal transfer. Only Description: One of the two horizontal signals the last line is output because the horizontal timing used to carry the CCD voltages (charges) out of pulses are present.
-
Page 43: Floppy Disc Drive
Knowing how the floppy drive normally behaves and checking for motor Floppy Disc Drive drive signals to the floppy drive is almost as good as substituting the floppy drive unit itself. The input/output head signal is too low to be seen The camera’s main FC-72 board contains the signal processing and mo- on a scope so they cannot be used for testing. - Page 44 Y,R-Y,B-Y CN201 (FD85) CN101 (FD90) 12 BIT DRIVE PARALLEL CD BD. (PK BD.) IC901 LINES IC301 CN101 IC102 VIDEO AMP CN801/ CAMERA/DSP/ VIDEO S/H, AGC CN701 OUTPUT A/D CONV. IC252 LENS IC101/ AUDIO ASSY. IC201 HI-2 PROCESS IMAGER IC101 16 BIT AUDIO IC501 TIMING...
- Page 45 Stepper Motor Drive Spindle Motor Drive Signals The stepper motor is connected to the read/write heads and can move Signal Name Location Voltage - Disc Comments the heads from the outside track 00 to the inside data area of the floppy not spinning disc.
- Page 46 Y,R-Y,B-Y CN201 (FD85) CN101 (FD90) 12 BIT DRIVE PARALLEL CD BD. (PK BD.) IC901 LINES IC301 CN101 IC102 VIDEO AMP CN801/ CAMERA/DSP/ VIDEO S/H, AGC CN701 OUTPUT A/D CONV. IC252 LENS IC101/ AUDIO ASSY. IC201 HI-2 PROCESS IMAGER IC101 16 BIT AUDIO IC501 TIMING...
- Page 47 Stepper Motor Drive signals Name Location Voltage CN701/pin 1 4.3Vp-p CN701/pin 4 8Vp-p (voltage spikes) Time Base = 20msec/div. At track 00 a photodetector beam is crossed, marking this track. The stepper motor stops and disc’s table of contents are read and loaded into memory on the main board.
- Page 48 Y,R-Y,B-Y CN201 (FD85) CN101 (FD90) 12 BIT DRIVE PARALLEL (PK BD.) CD BD. IC901 LINES IC301 CN101 IC102 VIDEO AMP CN801/ CAMERA/DSP/ VIDEO S/H, AGC CN701 OUTPUT A/D CONV. IC252 LENS IC101/ AUDIO ASSY. IC201 HI-2 PROCESS IMAGER IC101 16 BIT AUDIO IC501 TIMING...
-
Page 49: Floppy Drive Alignment Check
Floppy Drive Alignment Check The floppy drive in the camera must be tested because it is subject to more stress than those found in a stationary computer. When a drive is jarred out of alignment, the unit will play and record its own discs but the Test Disc Contents disc will not playback in a computer. - Page 50 NOTES...
-
Page 51: Lcd Block
by setting the DC voltage from EVR IC902/pin 8. This procedure using LCD Block the service Remote Controller RM-95 is in the service manual. An off frequency VCO produces a LCD picture consisting of just lines. The Liquid Crystal Display requires timing signals and the LCD drive. LCD Drive Signals Timing Signals The signal from the camera or the floppy disc is processed by the main... - Page 52 Vcc2 Vcc1 DISPLAY 4.6Vp-p 10.3 26,28 FROM 13.2V PANEL Q901, IC001 13.2V Q902 POWER 3.2V IC904 PANEL 3.2V CONV. TIMING 3.2V GEN. PANEL V FROM P-XVD IC301 P-XHD FC-72 BD. PK 52 BD. MVC-FD85 - LCD BLOCK 17DSC1 1314 3/8/01...
- Page 53 IC901 - Changes the color, contrast and brightness during the conversion Chip During the video to RGB conversion within IC901, the DC levels and am- Not for Select plitudes of the signals can be altered to change the color, contrast and IC902 brightness of the output signal.
- Page 54 Vcc2 Vcc1 DISPLAY 4.6Vp-p 10.3 26,28 FROM 13.2V PANEL Q901, IC001 13.2V Q902 POWER 3.2V IC904 PANEL 3.2V CONV. TIMING 3.2V GEN. PANEL V FROM P-XVD IC301 P-XHD FC-72 BD. PK 52 BD. MVC-FD85 - LCD BLOCK 17DSC1 1314 3/8/01...
- Page 55 Therefore to keep the display picture from degrading, IC901/pin 29 re- Normal ceives an invert signal (FRP) from the timing generator IC904/pin 9. This Normal Inverted signal is used by IC901 to invert every other horizontal line. By inverting Inverted the lines, the voltage applied to the picture elements is reversed, prevent- ing the display picture from degrading.
- Page 56 Vcc2 Vcc1 DISPLAY 4.6Vp-p 10.3 26,28 FROM 13.2V PANEL Q901, IC001 13.2V Q902 POWER 3.2V IC904 PANEL 3.2V CONV. TIMING 3.2V GEN. PANEL V FROM P-XVD IC301 P-XHD FC-72 BD. PK 52 BD. MVC-FD85 - LCD BLOCK 17DSC1 1314 3/8/01...
-
Page 57: Backlight Block
Backlight Block Backlight Regulator Name Input / Output Purpose Q856 BL Unreg Voltage / Regulated Switching regulator The LCD panel needs a backlight to view a picture on the rear panel. A 5.2Vdc backlight On/Off switch on the rear panel permits the user to shut off the backlight, saving battery power when the display is not used. - Page 58 PK 52 BD. CN801/CN701 Q856 UNREG L852 5.2V 8.4V FROM C866 R866 C861 F003 750Vp-p Q854 1.8k CN851 T851 92kHz FC-72 BD. Q860 OSC. R858 Q851 R867 R860 17Vp-p PANEL 1.8k Q852 START Q861 4.9V D901 IC851 DC CONV. DC-DC R861 IC001 R873...
-
Page 59: Oscillator
Oscillator Circuit When the backlight is powered ON, 4.9V is applied via Q861 to R873 to The main backlight oscillator parts are bipolar transistor Q860 and trans- turn on the infrared start LED D901. When the tube lights up, current is former T851. - Page 60 PK 52 BD. CN801/CN701 Q856 UNREG L852 5.2V 8.4V FROM C866 R866 C861 F003 750Vp-p Q854 1.8k CN851 T851 92kHz FC-72 BD. Q860 OSC. R858 Q851 R867 R860 17Vp-p PANEL 1.8k Q852 START Q861 4.9V D901 IC851 DC CONV. DC-DC R861 IC001 R873...
-
Page 61: Appendix
APPENDIX... -
Page 62: Using The Rm-95 For Adjustments
Procedure Using the RM-95 for Adjustments 1. Connect the RM-95 to the Mavica camera. Some models have a jack for the RM-95 while others require the CPC-12 interface jig as shown. Generally when the lens or imager is replaced, the camera adjustments 2. - Page 63 [Adjusting connector] Most of the measuring points for adjusting the LCD system are concentrated in CN803 of FC-72 board. Connect the Measuring Instruments via the CPC-12 jig (J-6082-436-A). The following table shows the Pin No. and signal name of CPC lid CN803 of FC-72 board Pin No.
- Page 64 3. Go to the LED check page 2, address 06 and change its data to 02. VALUE SONY All the LEDs on the camera will light except the disc access LED next SONY P/N J-6082-053-B DECREASE DATA to the power switch. IC4 P/N 8-759-148-35 VALUE 4.
- Page 65 Adjustment remote commander FDD UNIT RM - 95 (J-6082-053-B) CPC-12 jig (J-6082-436-A) CN803 Foil Side LANC Foil jack Side RM-95 CONNECTION 3DSC1 3/16/01...
- Page 66 RM-95 - Test Switches Failure Codes Activating the push buttons or switches and you will see the data change There are error codes held in the self-diagnostics section and appear on at one of four address locations. This is how you know the switch itself the LCD screen.
-
Page 67: Battery Down Adjustment
4. Set the RM-95 to Page 2, Address 52. Battery Down Adjustment 5. Reduce the power supply voltage to 5.5Vdc and write down the RM- 95 data number. If the camera shuts down just as you reach 5.5Vdc These adjustments set both the camera’s shut off voltage and the LCD +01V, the adjustment is correct. - Page 68 Regulated power supply Digital voltmeter CN002 Expansion figure Lens block Cover the lens with a black cap Power cord (J-6082-223-A) FDD unit CN002 Rear Panel FU-146 board : MVC-FD85 model FU-140 board : MVC-FD90 model BATTERY DOWN ADJUSTMENT 8DSC1 3/14/01...
- Page 69 Use the RM-95 to monitor the input voltage Battery Symbol Page d, Address Locations Location Purpose Name Page d, Purpose Address Page 2, Read data that corresponds to the input voltage. Address 52. This reference voltage will be used next. D ref Camera shutdown point D ref + decimal 5...
- Page 70 Re-Enable the Shutdown Circuit The following two settings will reset automatically when the camera is powered ON again so it is not necessary to restore these settings. If you wish you could manually enable the Shutdown circuit to conclude the ad- justments.
-
Page 71: Fc-72 Board Eeprom Location
CN402 (MVC95 ONLY) CN001 CN002 CN001 CN701 FC-72 BD. FC-72 BD. BACK FRONT FLOPPY CN702 DRIVE EEPROM IC406 CN703 IC404 CONTROL CN101 X401 POWER 1-767-980-21 INPUT FROM FU BOARD CN803 EEPROM CN183 TO CPC-12 IC508 FRONT BACK FC-72 BOARD EEPROM LOCATION 11DSC 1309 3/14/01... -
Page 72: Fu Board Replacement
CONNECT FROM RADAR W’S IS THERE POWER FROM RADAR W’S RADAR W INITIAL SCREEN, TROUBLE ON RADAR W AND SCREEN, SELECT (+CPC-12 SELECT "DATA THE FC-72 BD.? THE CAMERA THE MODEL ADAPTER) HANDLING" PERFORM FROM DATA STANDARD REPAIR HANDLING SCREEN, FROM THE DATA SELECT "SAVE OF DATA". -
Page 73: Downloading Radar W Software
A. Download the three Radar programs: A. The Radar W hardware is an interface between your computer that 1. Go to the Sony website and find the links to download the Main Radar will have the software installed and the camcorder or Mavica Camera W Program, the Models data and Instructions. - Page 74 xiii B. Click on the two executable files to create temp files The two executable (.exe) files will unzip when you click on them, produc- ing the temporary files 1. Click each of the two self-extracting (.exe) files (one at a time). Downloaded Folder name Expanded file Name •...
- Page 75 Hardware Connection (Interface Unit) The Radar hardware Jig (P/N = J 6082 429 A) consists of an interface plug and a 3’ LANC cord with a 2.5mm plug at each end. 1. Connect the 25 pin male connector of the interface to your PC parallel port.
-
Page 76: Using Radar W - Version 2.1
Model selection Using Radar W - Version 2.1 Clicking on Model selection brings us to the Model selection screen. When Radar W is launched from the Start menu, an initial screen similar to this one will be displayed. This screen identifies the Radar W version (2.1) and the previous camera model selected. - Page 77 This screen is used to do all uploading and downloading of data. We will give an example now of the Upload/Download process. Upload Example To upload the data from the camcorder, press the purple Read button. The following sample screen containing data will be displayed. Above the Purple Buttons Above the three purple buttons is a drop down menu.
- Page 78 xvii Downloading Example After replacing the main camera board, you need to write that data back into the camera on the new board. 1. Begin by clicking on “Load of Data” above the table. This completes the Upload/Download process. 2. From the Data Load screen, select the file (named by serial number) that you want to load into the camera.
- Page 79 Adjustment The following Execution End screen will appear. Click OK. This ends the adjustment and returns you to the Adjustment menu. This section allows us to perform some camcorder adjustments. Select Adjustments from the Main Menu to begin. The following window ap- pears: Test Menu The Test section of the Radar W Main Menu is for camcorders.
- Page 80 Auto-Test - Intended for scripting sequences. A script would contain an operation that the camcorder would complete such as Play 10 seconds, Rewind 5 seconds and Stop. The camcorder can then be set to repeat this sequence an infinite number of times. This feature is currently not operational in the Radar W version 2.1.
- Page 81 Sony Service Company A Division of Sony Electronics Inc ©2000 All Rights Reserved Printed in U.S.A. S is a trademark of Sony Electronics SEL Service Company A Division of Sony Electronics Inc. 1 Sony Drive Park Ridge, New Jersey 07656...