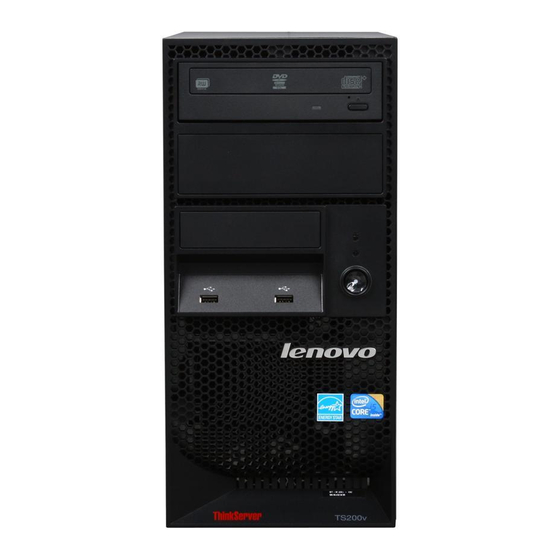
Lenovo ThinkServer TS200v Hardware Maintenance Manual
Lenovo thinkserver ts200v hardware maintenance manual
Hide thumbs
Also See for ThinkServer TS200v:
- Garantie et support (36 pages) ,
- Warranty and support information (33 pages) ,
- Reference manual (33 pages)
Table of Contents
Advertisement
Quick Links
Advertisement
Table of Contents

Related Manuals for Lenovo ThinkServer TS200v

Summary of Contents for Lenovo ThinkServer TS200v
- Page 3 ThinkServer TS200v Types 0981, 0992, 1008, and 1010 Hardware Maintenance Manual...
- Page 4 First Edition (January 2010) © Copyright Lenovo 2010. LENOVO products, data, computer software, and services have been developed exclusively at private expense and are sold to governmental entities as commercial items as defined by 48 C.F.R. 2.101 with limited and restricted rights to use, reproduction and disclosure.
-
Page 5: Table Of Contents
Installing or replacing the optical drive . . 41 statement . . 92 Replacing the secondary hard disk drive . 43 EU-EMC Directive (2004/108/EC) EN 55022 class Replacing the power supply assembly . 46 B Statement of Compliance . . 92 © Copyright Lenovo 2010... - Page 6 Index ....99 Turkish statement of compliance . . 96 Waste electrical and electronic equipment (WEEE) notices . . 96 ThinkServer TS200v Types 0981, 0992, 1008, and 1010: Hardware Maintenance Manual...
-
Page 7: Chapter 1. About This Manual
Optional-service customer replaceable unit: You may install an optional-service CRU yourself or request Lenovo to install it, at no additional charge, under the type of warranty service that is designated for the server. -
Page 8: Safety Statements
Read any additional safety information that comes with the server or optional device before you install the device. Attention: Use No. 26 AWG or larger UL-listed or CSA certified telecommunication line cord. ThinkServer TS200v Types 0981, 0992, 1008, and 1010: Hardware Maintenance Manual... - Page 9 Statement 1: DANGER Electrical current from power, telephone, and communication cables is hazardous. To avoid a shock hazard: v Do not connect or disconnect any cables or perform installation, maintenance, or reconfiguration of this product during an electrical storm. v Connect all power cords to a properly wired and grounded electrical outlet. v Connect to properly wired outlets any equipment that will be attached to this product.
- Page 10 Do not: v Throw or immerse into water v Heat to more than 100°C (212°F) v Repair or disassemble Dispose of the battery as required by local ordinances or regulations. ThinkServer TS200v Types 0981, 0992, 1008, and 1010: Hardware Maintenance Manual...
- Page 11 Statement 3: CAUTION: When laser products (such as CD-ROMs, DVD drives, fiber optic devices, or transmitters) are installed, note the following: v Do not remove the covers. Removing the covers of the laser product could result in exposure to hazardous laser radiation. There are no serviceable parts inside the device.
- Page 12 The device also might have more than one power cord. To remove all electrical current from the device, ensure that all power cords are disconnected from the power source. ThinkServer TS200v Types 0981, 0992, 1008, and 1010: Hardware Maintenance Manual...
-
Page 13: Important Information About Replacing Rohs Compliant Frus
Equipment Directive (2002/95/EC) is a European Union legal requirement affecting the global electronics industry. RoHS requirements must be implemented on Lenovo products placed on the market and sold in the European Union after June 2006. Products on the market before June 2006 are not required to have RoHS compliant parts. - Page 14 Lenovo plans to transition to RoHS compliance well before the implementation date and expects its suppliers to be ready to support Lenovo’s requirements and schedule in the EU. Products sold in 2005 will contain some RoHS compliant FRUs. The following statement pertains to these products and any product Lenovo produces containing RoHS compliant parts.
-
Page 15: Chapter 2. General Information
One Ethernet connector controller v One DisplayPort connector Power supply v One VGA monitor connector v 280-watt auto-sensing power supply v Three audio connectors on the rear panel (audio line-in connector, audio line-out connector, and microphone connector) © Copyright Lenovo 2010... -
Page 16: Software
The ThinkServer EasyManage Agent enables other clients on the network to be managed by the centralized console. The ThinkServer EasyManage Agent is supported on 32-bit and 64-bit Windows, Red Hat, and SUSE operating systems. ThinkServer TS200v Types 0981, 0992, 1008, and 1010: Hardware Maintenance Manual... -
Page 17: Chapter 3. General Checkout
Support and Engineering functions. v Machine type and model v Processor or hard disk drive upgrades v Failure symptom – Do diagnostics indicate a failure? – What, when, where, single, or multiple systems? – Is the failure repeatable? © Copyright Lenovo 2010... - Page 18 7. Have the same configuration options set in the system 8. Have the same setup for operating-system-controlled files Comparing the configuration and software set-up between “working and non-working” systems will often lead to problem resolution. ThinkServer TS200v Types 0981, 0992, 1008, and 1010: Hardware Maintenance Manual...
-
Page 19: Chapter 4. Diagnostics
2. If you are unable to isolate and repair the problem yourself after running the diagnostic programs, save and print the log files created by the diagnostic programs. You will need the log files when you speak to a Lenovo technical support representative. -
Page 20: Navigating Through The Diagnostics Programs
DeviceID: Contains the component’s unit-ID that corresponds to a fixed disk drive, removable media drive, serial or parallel port, processor, specific RIMM, or a device on the PCI bus. ThinkServer TS200v Types 0981, 0992, 1008, and 1010: Hardware Maintenance Manual... -
Page 21: Viewing The Test Log
v Date: Contains the date when the diagnostic test was run. The date is retrieved from CMOS and displayed using the YYYYMMDD format. v ChkDigits: Contains a 2-digit check-digit value to ensure the following: – Diagnostics were run on the specified date. –... -
Page 22: Troubleshooting Tables
On/Off switch power supply connector v System board power supply connectors v Microprocessor(s) connection Check the power cord for continuity. Power cord Check the power-on switch for continuity. Power-on switch ThinkServer TS200v Types 0981, 0992, 1008, and 1010: Hardware Maintenance Manual... -
Page 23: Beep Symptoms
Beep symptoms Beep symptoms are tones or a series of tones separated by pauses (intervals without sound) during POST. The following tables describes beep symptoms. Beep Symptom FRU/Action 2 short beeps Perform the following actions in order. CMOS setting error 1. -
Page 24: Post Error Codes
Memory test fail If POST detects an error during memory testing, additional information appears. This information gives specifics about the type and location of the memory error. ThinkServer TS200v Types 0981, 0992, 1008, and 1010: Hardware Maintenance Manual... -
Page 25: Easystartup Problems
POST Error Message Description/Action Press TAB to show POST screen Pressing the TAB key permits the user to toggle between the default POST display screen and a custom POST display screen. Error: Non-System disk or disk error The BIOS was unable to find a suitable boot Replace and press any key when ready device. - Page 26 2. System Board Power-on indicator or hard disk drive in-use 1. Power switch/LED assembly light not on, but computer works correctly 2. System Board Printer problems 1. Printer 2. System Board ThinkServer TS200v Types 0981, 0992, 1008, and 1010: Hardware Maintenance Manual...
-
Page 27: Undetermined Problems
Message/Symptom FRU/Action Program loads from the hard disk with a 1. Run the Setup Utility program and check known-good diagnostics diskette in the first Startup sequence. 3.5-inch diskette drive 2. Diskette Drive 3. Diskette Drive Cable 4. System Board 5. Power Supply RPL computer cannot access programs from 1. - Page 28 ThinkServer TS200v Types 0981, 0992, 1008, and 1010: Hardware Maintenance Manual...
-
Page 29: Chapter 5. Locating Server Controls And Connectors
Figure 2 on page 24 shows the locations of the connectors on the rear of your server. Some connectors on the rear of your server are color-coded to help you determine where to connect the cables in your server. © Copyright Lenovo 2010... - Page 30 9 Audio line-in connector 4 DisplayPort connector 10 PCI Express x16 card slot 5 USB connectors (6) 11 PCI Express x1 card slot 6 Ethernet connector 12 PCI card slots (2) ThinkServer TS200v Types 0981, 0992, 1008, and 1010: Hardware Maintenance Manual...
- Page 31 Connector Description Audio line-in connector Used to receive audio signals from an external audio device, such as a stereo system. When you attach an external audio device, a cable connects the audio line-out connector of the device to the audio line-in connector of the server. Audio line-out connector Used to send audio signals from the server to external devices, such as powered stereo speakers (speakers with built-in...
-
Page 32: System-Board Internal Connectors
Figure 4 on page 27 shows the locations of the various components in your server. To remove the server cover and access to the inside of the server, see “Removing the server cover” on page 33. ThinkServer TS200v Types 0981, 0992, 1008, and 1010: Hardware Maintenance Manual... - Page 33 Figure 4. Component locations Heat sink Secondary hard disk drive (installed in some models) Microprocessor8 Primary hard disk drive Memory modules System board Optical drive Rear fan assembly Front bezel Power supply Front fan assembly Chapter 5. Locating Server Controls and connectors...
- Page 34 ThinkServer TS200v Types 0981, 0992, 1008, and 1010: Hardware Maintenance Manual...
-
Page 35: Chapter 6. Replacing Frus
Use the information in this section to help you identify potential unsafe conditions in a Lenovo product that you are working on. Each Lenovo product, as it was designed and manufactured, has required safety items to protect users and service technicians from injury. -
Page 36: Guidelines For Servicing Electrical Equipment
5. Check for any obvious non-Lenovo alterations. Use good judgment as to the safety of any non-Lenovo alterations. 6. Check inside the server for any obvious unsafe conditions, such as metal filings, contamination, water or other liquid, or signs of fire or smoke damage. -
Page 37: Handling Static-Sensitive Devices
v If an electrical accident occurs, use caution, turn off the power, and send another person to get medical aid. Handling static-sensitive devices Attention: Static electricity can damage the server and other electronic devices. To avoid damage, keep static-sensitive devices in their static-protective packages until you are ready to install them. -
Page 38: Server Components
1. Use only server parts provided by Lenovo. 2. When installing or replacing a FRU, use the appropriate instructions in this section along with the instructions that come with the FRU. ThinkServer TS200v Types 0981, 0992, 1008, and 1010: Hardware Maintenance Manual... -
Page 39: Removing The Server Cover
Do not open your server or attempt any repair before reading and understanding the Chapter 1, “About this manual,” on page 1 and the Safety Information book. To obtain a copy of the Safety Information book, go to: http://www.lenovo.com/support This section provides instructions on how to remove the server cover. CAUTION: Turn off the server and wait three to five minutes to let the server cool before removing the server cover. -
Page 40: Removing And Reinstalling The Front Bezel
2. Remove the server cover. See “Removing the server cover” on page 33. 3. Remove the front bezel by releasing the three plastic tabs on the left side and pivoting the front bezel outward. ThinkServer TS200v Types 0981, 0992, 1008, and 1010: Hardware Maintenance Manual... -
Page 41: Installing Or Replacing A Pci Card
Chapter 1, “About this manual,” on page 1 and the Safety Information book. To obtain a copy of the Safety Information book, go to: http://www.lenovo.com/support This section provides instructions on how to install or replace a PCI card. - Page 42 3. At the rear of the server, press the release button 1 to open the PCI card latch Figure 7. Opening the PCI card latch ThinkServer TS200v Types 0981, 0992, 1008, and 1010: Hardware Maintenance Manual...
- Page 43 4. If you are installing a PCI card, remove the appropriate metal slot cover. If you are replacing an old PCI card, grasp the old card that is currently installed and gently pull it out of the slot. Figure 8. Removing a PCI card Note: The PCI card fits tightly into the card slot.
-
Page 44: Replacing The Battery
1. Remove all media from the drives and turn off all attached devices and the server. Then, disconnect all power cords from electrical outlets and disconnect all cables that are connected to the server. ThinkServer TS200v Types 0981, 0992, 1008, and 1010: Hardware Maintenance Manual... -
Page 45: Installing Or Replacing A Memory Module
Chapter 1, “About this manual,” on page 1 and the Safety Information book. To obtain a copy of the Safety Information book, go to: http://www.lenovo.com/support This section provides instructions on how to install or replace a memory module. - Page 46 If you are replacing an old memory module, open the retaining clips and gently pull the memory module out of the memory slot. Figure 13. Removing a memory module ThinkServer TS200v Types 0981, 0992, 1008, and 1010: Hardware Maintenance Manual...
-
Page 47: Installing Or Replacing The Optical Drive
Chapter 1, “About this manual,” on page 1 and the Safety Information book. To obtain a copy of the Safety Information book, go to: http://www.lenovo.com/support This section provides instructions on how to install or replace the optical drive. - Page 48 Figure 16. Installing the optical drive retainer 6. Slide the new optical drive into the optical drive bay from the front of the server until the optical drive snaps into position. ThinkServer TS200v Types 0981, 0992, 1008, and 1010: Hardware Maintenance Manual...
-
Page 49: Replacing The Secondary Hard Disk Drive
Chapter 1, “About this manual,” on page 1 and the Safety Information book. To obtain a copy of the Safety Information book, go to: http://www.lenovo.com/support This section provides instructions on how to replace the secondary hard disk drive. - Page 50 Figure 19. Installing the hard disk drive into the bracket 8. Slide the new hard disk drive with the blue bracket into the secondary hard disk drive cage until it snaps into position. ThinkServer TS200v Types 0981, 0992, 1008, and 1010: Hardware Maintenance Manual...
- Page 51 9. Slide the hard disk drive cage with the new hard disk drive into the chassis until it is directly underneath the metal tab 1 . Figure 20. Installing the secondary hard disk drive 10. Press the hard disk drive cage downward until it snaps into position. Make sure that the hard disk drive cage is secured in the chassis.
-
Page 52: Replacing The Power Supply Assembly
8. Install and tighten the four screws to secure the new power supply assembly. Note: Use only screws provided by Lenovo. ThinkServer TS200v Types 0981, 0992, 1008, and 1010: Hardware Maintenance Manual... -
Page 53: Replacing The Heat Sink And Fan Assembly
Chapter 1, “About this manual,” on page 1 and the Safety Information book. To obtain a copy of the Safety Information book, go to: http://www.lenovo.com/support This section provides instructions on how to replace the heat sink and fan assembly. -
Page 54: Replacing The Microprocessor
Do not open your server or attempt any repair before reading and understanding the Chapter 1, “About this manual,” on page 1 and the Safety Information book. To obtain a copy of the Safety Information book, go to: http://www.lenovo.com/support ThinkServer TS200v Types 0981, 0992, 1008, and 1010: Hardware Maintenance Manual... - Page 55 This section provides instructions on how to replace the microprocessor. CAUTION: The heat sink and microprocessor might be very hot. Turn off the server and wait three to five minutes to let the server cool before removing the server cover. To replace the microprocessor, do the following: 1.
- Page 56 11. Reinstall the heat sink and fan assembly. See “Replacing the heat sink and fan assembly” on page 47. 12. Reinstall any other parts or reconnect any other cables you removed. 13. Go to “Completing the parts replacement” on page 61. ThinkServer TS200v Types 0981, 0992, 1008, and 1010: Hardware Maintenance Manual...
-
Page 57: Replacing The System Board
Do not open your server or attempt any repair before reading and understanding the Chapter 1, “About this manual,” on page 1 and the Safety Information book. To obtain a copy of the Safety Information book, go to: http://www.lenovo.com/support This section provides instructions on how to replace the system board. CAUTION: The heat sink and microprocessor might be very hot. - Page 58 2. Align the notches 1 on the microprocessor socket cover with the alignment keys 2 in the microprocessor socket. 3. Install one side of the socket cover into the microprocessor socket as shown. ThinkServer TS200v Types 0981, 0992, 1008, and 1010: Hardware Maintenance Manual...
-
Page 59: Replacing The Primary Hard Disk Drive
Chapter 1, “About this manual,” on page 1 and the Safety Information book. To obtain a copy of the Safety Information book, go to: http://www.lenovo.com/support This section provides instructions on how to replace the primary hard disk drive. - Page 60 Figure 28. Removing the primary hard disk drive 6. Flex the sides of the blue bracket to remove the hard disk drive from the bracket. ThinkServer TS200v Types 0981, 0992, 1008, and 1010: Hardware Maintenance Manual...
- Page 61 7. To install a new hard disk drive into the blue bracket, flex the sides of the bracket and align pin 1 , pin 2 , pin 3 , and pin 4 on the bracket with the corresponding holes in the hard disk drive. Do not touch the circuit board 5 on the bottom of the hard disk drive.
- Page 62 Note: There are two arrows, one on the upper drive cage and one on the hard disk drive cage. The arrows are aligned when the hard disk drive is in the proper position. Figure 30. Installing the primary hard disk drive ThinkServer TS200v Types 0981, 0992, 1008, and 1010: Hardware Maintenance Manual...
-
Page 63: Replacing The Front Fan Assembly
Chapter 1, “About this manual,” on page 1 and the Safety Information book. To obtain a copy of the Safety Information book, go to: http://www.lenovo.com/support Depending on the model type, your server might have a front fan assembly installed. - Page 64 5. Release the two tabs 1 that attach the front fan assembly to the chassis as shown and then completely remove the front fan assembly from the chassis. Figure 31. Removing the front fan assembly ThinkServer TS200v Types 0981, 0992, 1008, and 1010: Hardware Maintenance Manual...
- Page 65 6. Insert the two tabs 2 of the new front fan assembly into the corresponding holes in the chassis, and press the other two tabs 1 through the holes until the front fan assembly is secured in place. Figure 32. Installing the front fan assembly 7.
-
Page 66: Replacing The Rear Fan Assembly
6. Install the new rear fan assembly by aligning the new rubber mounts with the corresponding holes in the chassis and push the rubber mounts through the holes. Note: The new rear fan assembly will have four new rubber mounts attached. ThinkServer TS200v Types 0981, 0992, 1008, and 1010: Hardware Maintenance Manual... -
Page 67: Completing The Parts Replacement
7. Carefully pull on the tips of the rubber mounts until the new rear fan assembly is secured in place. Figure 34. Installing the rear fan assembly 8. Connect the new rear fan assembly cable to the system fan connector on the system board. -
Page 68: Updating The Server Configuration
Setup Utility program. Refer to Chapter 8, “Configuring the server,” on page 79. Note: In most areas of the world, Lenovo requires the return of the defective FRU. Information about this will come with the FRU or will come a few days after the FRU arrives. -
Page 69: Chapter 7. Parts Listing, Ts200V Machine Types 0981, 0992, 1008, And 1010
Optional-service customer replaceable unit: You may install an optional-service CRU yourself or request Lenovo to install it, at no additional charge, under the type of warranty service that is designated for your server. - Page 70 Speaker cable, 400mm (models CTO All Models) 43N9091 EMC Shield (models CTO All Models) 41N8080 Cable, SATA 457mm (RoHS) (models CTO All Models) 43N9013 FDD EMI shield (models CTO All Models) 41N8078 ThinkServer TS200v Types 0981, 0992, 1008, and 1010: Hardware Maintenance Manual...
- Page 71 90Y0075 Chassis assembly, mechanical kit (models CTO All Models) 90Y1296 Intel Pro/1000 PT dual port Ethernet card (models CTO) 67Y1430 Lenovo RDX drive bay (models CTO) 67Y1421 Lenovo RDX cables (models CTO) 67Y1422 Lenovo RDX 160GB cartridge (models CTO) 67Y1423...
- Page 72 Dutch (models CTO) 90Y1190 0981 Windows Small Business Server 2008 Standard w/ SP2 FRU# English (models CTO) 90Y1174 French (models CTO) 90Y1176 German (models CTO) 90Y1177 Japanese (models CTO) 90Y1179 ThinkServer TS200v Types 0981, 0992, 1008, and 1010: Hardware Maintenance Manual...
-
Page 73: Machine Type 0992
0981 Windows Small Business Server 2008 Standard w/ SP2 FRU# Spanish (models CTO) 90Y1180 Italian (models CTO) 90Y1178 Turkish (models CTO) 90Y1181 Dutch (models CTO) 90Y1175 Machine Type 0992 Item # 0992 FRUs FRU# Heat sink, 73/95 Watt (models CTO All Models) 43N9700 Microprocessor, Intel Celeron, 2.26G/2M-L2 (models CTO) 46U3127... - Page 74 Lenovo RDX cables (models CTO All Models) 67Y1422 Lenovo RDX 160GB cartridge (models CTO All Models) 67Y1423 Lenovo RDX 320GB cartridge (models CTO All Models) 67Y1424 Lenovo RDX 500GB cartridge (models CTO All Models) 67Y1425 ThinkServer TS200v Types 0981, 0992, 1008, and 1010: Hardware Maintenance Manual...
- Page 75 0992 Line Cords FRU# Line Cord - US (models CTO) 41R3184 Line Cord - US (models CTO) 41R3185 Line Cord - China (models CTO) 41R3256 Line Cord - China (models CTO) 41R3257 Line Cord - Japan (models CTO) 41R3248 Line Cord - Japan (models CTO) 41R3249 Line Cord - Brazil (models CTO) 41R3270...
- Page 76 90Y1174 French (models CTO) 90Y1176 German (models CTO) 90Y1177 Japanese (models CTO) 90Y1179 Spanish (models CTO) 90Y1180 Italian (models CTO) 90Y1178 Turkish (models CTO) 90Y1181 Dutch (models CTO) 90Y1175 ThinkServer TS200v Types 0981, 0992, 1008, and 1010: Hardware Maintenance Manual...
-
Page 77: Machine Type 1008
Machine Type 1008 Item # 1008 FRUs FRU# Heat sink, 73/95 Watt (models CTO All Models) 43N9700 Microprocessor, Intel Celeron, 2.26G/2M-L2 (models CTO) 46U3127 Microprocessor, Pentium G6950 1066/2800MHz 3MB Cache 73W 2-Thread Dual 71Y5303 Core (iGfx 533MHz) (models CTO) Microprocessor, Core i3 530 1333/2930MHz 4MB Cache 73W 4-Thread Dual Core 71Y6960 (iGfx Speed 733MHz) (models CTO) Microprocessor, Core i3-540 / 2.93GHz (models CTO) - Page 78 41R3184 Line Cord - US (models CTO) 41R3185 Line Cord - China (models CTO) 41R3256 Line Cord - China (models CTO) 41R3257 Line Cord - Japan (models CTO) 41R3248 ThinkServer TS200v Types 0981, 0992, 1008, and 1010: Hardware Maintenance Manual...
- Page 79 1008 Line Cords FRU# Line Cord - Japan (models CTO) 41R3249 Line Cord - Brazil (models CTO) 41R3270 Line Cord - Brazil (models CTO) 41R3271 Line Cord - LA High Volt (APU) (models CTO) 41R3176 Line Cord - LA High Volt (APU) (models CTO) 41R3177 Line Cord-Australia / New Zealand (models CTO) 41R3196...
-
Page 80: Machine Type 1010
Italian (models CTO) 90Y1178 Turkish (models CTO) 90Y1181 Dutch (models CTO) 90Y1175 Machine Type 1010 Item # 1010 FRUs FRU# Heat sink, 73/95 Watt (models CTO All Models) 43N9700 ThinkServer TS200v Types 0981, 0992, 1008, and 1010: Hardware Maintenance Manual... - Page 81 Item # 1010 FRUs FRU# Microprocessor, Intel Celeron, 2.26G/2M-L2 (models CTO) 46U3127 Microprocessor, Pentium G6950 1066/2800MHz 3MB Cache 73W 2-Thread Dual 71Y5303 Core (iGfx 533MHz) (models CTO) Microprocessor, Core i3 530 1333/2930MHz 4MB Cache 73W 4-Thread Dual Core 71Y6960 (iGfx Speed 733MHz) (models CTO) Microprocessor, Core i3-540 / 2.93GHz (models CTO) 71Y5304 Microprocessor, Core i5-650 / 3.20GHz (models CTO)
- Page 82 Line Cord - A models (models CTO) 41R3208 Line Cord - A models (models CTO) 41R3209 Line Cord - Denmark (models CTO) 41R3212 Line Cord - Denmark (models CTO) 41R3213 ThinkServer TS200v Types 0981, 0992, 1008, and 1010: Hardware Maintenance Manual...
- Page 83 1010 Line Cords FRU# Line Cord - Switzerland (models CTO) 41R3228 Line Cord - Switzerland (models CTO) 41R3229 Line Cord - Israel (models CTO) 41R3236 Line Cord - Israel (models CTO) 41R3237 Line Cord - South Africa (models CTO) 41R3220 Line Cord - South Africa (models CTO) 41R3221 Line Cord - India (models CTO)
- Page 84 ThinkServer TS200v Types 0981, 0992, 1008, and 1010: Hardware Maintenance Manual...
-
Page 85: Chapter 8. Configuring The Server
“Starting the Setup Utility program.” Then, follow the instructions on the screen. When working with the Setup Utility program menu, you must use the keyboard. The keys used to perform various tasks are displayed at the bottom of each screen. © Copyright Lenovo 2010... -
Page 86: Using Passwords
2. From the Setup Utility program main menu, select Security. 3. Depending on the password type, select Set Power-On Password, Set Administrator Password, or Hard Disk Security → Hard Disk Password. ThinkServer TS200v Types 0981, 0992, 1008, and 1010: Hardware Maintenance Manual... -
Page 87: Enabling Or Disabling A Device
4. Follow the instructions on the right side of the screen to set, change, or delete a password. Note: A password can be any combination of up to 64 alphabetic and numeric characters. For more information, see “Password considerations” on page 80. Enabling or disabling a device This section provides information on how to enable or disable user access to the following devices:... -
Page 88: Advanced Settings
Note: The information about configuring RAID in this section is applicable only for a Windows environment. For information about configuring RAID in a Linux environment, contact your Linux software provider. ThinkServer TS200v Types 0981, 0992, 1008, and 1010: Hardware Maintenance Manual... -
Page 89: Raid Level
RAID Level Your server must have the minimum number of SATA hard disk drives installed for the supported level of RAID below: v RAID Level 0 – Striped disk array – Two hard disk drives minimum – Better performance without fault tolerance v RAID Level 1 –... -
Page 90: Deleting Raid Volumes
Setup Utility program to view and change the configuration and setup of your server. Your server system board has a module called electrically erasable programmable read-only memory (EEPROM, also referred to as flash memory). You can easily ThinkServer TS200v Types 0981, 0992, 1008, and 1010: Hardware Maintenance Manual... -
Page 91: Updating (Flashing) The Uefi From A Disc
Lenovo might make changes and enhancements to the POST and UEFI. When updates are released, they are available as downloadable files on the Lenovo Web site at http://www.lenovo.com. Instructions for using the POST/UEFI updates are available in a TXT file that is included with the update files. For most models, you can download either an update program to create a system-program-update (flash) disc or an update program that can be run from the operating system. -
Page 92: Recovering From A Post/Uefi Update Failure
Detects installed hardware devices v Guides you through the process of creating a response file v Prepares the hard disk drive for installation v Prompts you to insert the operating-system installation disc ThinkServer TS200v Types 0981, 0992, 1008, and 1010: Hardware Maintenance Manual... - Page 93 The program is contained on the ThinkServer EasyStartup DVD provided with your server. If you did not receive the DVD with your server, you can download an ISO image of the DVD from http://www.lenovo.com/support. The program has a built-in help system and User Guide to answer questions you might have. The...
-
Page 94: Installing Thinkserver Easymanage Agent
ThinkServer EasyManage Agent to your new server. Also, the ThinkServer EasyStartup program provides an option to install the ThinkServer EasyManage Agent as part of the operating system installation process. ThinkServer TS200v Types 0981, 0992, 1008, and 1010: Hardware Maintenance Manual... -
Page 95: Appendix. Notices
Web sites. The materials at those Web sites are not part of the materials for this Lenovo product, and use of those Web sites is at your own risk. -
Page 96: Export Classification Notice
Macrovision Corporation. Reverse engineering or disassembly is prohibited. European conformance CE mark Trademarks The following terms are trademarks of Lenovo in the United States, other countries, or both: Lenovo The Lenovo logo ThinkServer Microsoft, Windows, and Windows Server are trademarks of the Microsoft group of companies. -
Page 97: Electronic Emissions Notices
Consult an authorized dealer or service representative for help. Lenovo is not responsible for any radio or television interference caused by using other than specified or recommended cables or connectors or by unauthorized changes or modifications to this equipment. Unauthorized changes or modifications could void the user’s authority to operate the equipment. -
Page 98: European Union Emc Directive Conformance Statement
Grenzwerte der EN 55022 Klasse B ein. Um dieses sicherzustellen, sind die Geräte wie in den Handbüchern beschrieben zu installieren und zu betreiben. Des Weiteren dürfen auch nur von der Lenovo empfohlene Kabel angeschlossen werden. Lenovo übernimmt keine Verantwortung für die Einhaltung der Schutzanforderungen, wenn das Produkt ohne Zustimmung der Lenovo verändert bzw. -
Page 99: Japanese Vcci Class B Statement
You may attach the label to the exterior of the computer in which you install the Lenovo modem, or you may attach the label to the external DAA, if you have one. Place the label in a location that is easily accessible, should you need to provide the label information to the telephone company. -
Page 100: Canadian Department Of Communications Certification Label
To avoid electrical shock, always use the power cord and plug with a properly grounded outlet. Power cords provided by Lenovo in the United States and Canada are listed by Underwriters Laboratories (UL) and certified by the Canadian Standards Association (CSA). - Page 101 The cord set should have the appropriate safety approvals for the country in which the equipment will be installed. Power cords provided by Lenovo for a specific country or region are usually available only in that country or region.
-
Page 102: Polyvinyl Chloride (Pvc) Cable And Cord Notice
State of California to cause cancer, and birth defects or other reproductive harm. Wash hands after handling. Turkish statement of compliance The Lenovo product meets the requirements of the Republic of Turkey Directive on the Restriction of the Use of Certain Hazardous Substances in Electrical and Electronic Equipment (EEE). -
Page 103: European Union (Eu) Weee Statement
Collecting and recycling a disused Lenovo computer or monitor If you are a company employee and need to dispose of a Lenovo computer or monitor that is the property of the company, you must do so in accordance with the Law for Promotion of Effective Utilization of Resources. Computers and monitors are categorized as industrial waste and should be properly disposed of by an industrial waste disposal contractor certified by a local government. -
Page 104: Disposing Of Disused Lithium Batteries From Lenovo Computers
If you want to replace it with a new one, contact your place of purchase or ask for a repair service provided by Lenovo. If you have replaced it by yourself and want to dispose of the disused lithium battery, insulate it with vinyl tape, contact your place of purchase, and follow their instructions. -
Page 105: Index
80 from a POST/UEFI update failure 86 Setup Utility 79 hard disk drive, replacing 53 recovery heat sink and fan assembly, replacing 47 boot-block 86 removing server cover 33 replacing battery 38 hard disk drive 53 © Copyright Lenovo 2010... - Page 106 VGA monitor connector 25 video subsystem 9 viewing and changing settings 79 ThinkServer TS200v Types 0981, 0992, 1008, and 1010: Hardware Maintenance Manual...
- Page 108 Part Number: XXXXXX Printed in USA (1P) P/N: XXXXXX...