Table of Contents
Advertisement
Page 3: 2-channel models
CTs 600
CTs 1200
CTs 2000
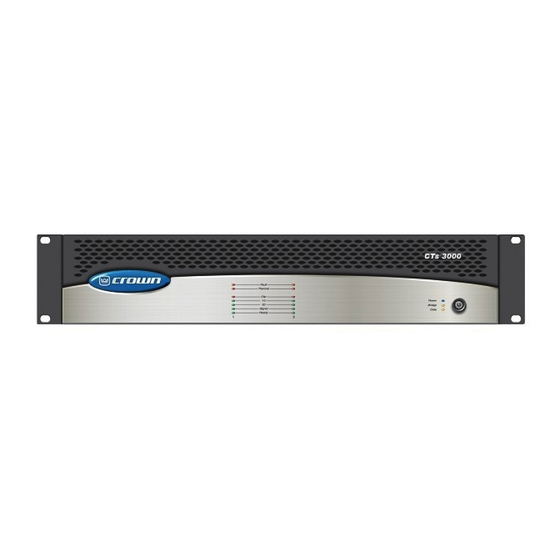
CTs 3000
CTs Series Operation Manual
Obtaining Other Language Versions: To obtain information in another language about the use of this product, please contact your
local Crown Distributor. If you need assistance locating your local distributor, please contact Crown at 574-294-8000.
This manual does not include all of the details of design, production, or variations of the equipment. Nor does it cover every possible situa-
tion which may arise during installation, operation or maintenance.
The information provided in this manual was deemed accurate as of the publication date. However, updates to this information may have
occurred. To obtain the latest version of this manual, please visit the Crown website at www.crownaudio.com.
Trademark Notice: Com-Tech, BCA, Crown, Crown Audio, Amcron and Multi-Mode are registered trademarks of Crown International.
IQwic, PIP and PIP2 are trademarks of Crown International. Other trademarks are the property of their respective owners.
®
© 2007 by Crown Audio
, Inc. 1718 W. Mishawaka Rd., Elkhart, Indiana 46517-9439 U.S.A. Telephone: 574-294-8000
Page 31: Multi-channel models
CTs 4200
CTs 8200
137000-4A
9/07
Advertisement
Table of Contents
Troubleshooting

Related Manuals for Crown CTs Series


Summary of Contents for Crown CTs Series
- Page 1 To obtain the latest version of this manual, please visit the Crown website at www.crownaudio.com. Trademark Notice: Com-Tech, BCA, Crown, Crown Audio, Amcron and Multi-Mode are registered trademarks of Crown International. IQwic, PIP and PIP2 are trademarks of Crown International. Other trademarks are the property of their respective owners.
-
Page 2: Important Safety Instructions
Importantes Instructions de Sécurité Instrucciones de Seguridad Importantes IMPORTANT CTs Series amplifiers require Class 2 output wiring. Read these instructions. TO PREVENT ELECTRIC SHOCK DO NOT REMOVE TOP OR Les amplificateurs de série de CTs exigent des câbles de sortie de Keep these instructions. - Page 3 CTs Power Amplifiers CTs 2-Channel Series CTs 600 CTs 1200 CTs 2000 CTs 3000 Operation Manual page 3...
- Page 4 CTs Power Amplifiers THIS PAGE INTENTIONALLY LEFT BLANK page 4 Operation Manual...
-
Page 5: Declaration Of Conformity
CTs Power Amplifiers DECLARATION of CONFORMITY Crown Audio, Inc. FOR COMPLIANCE QUESTIONS ONLY: Sue Whitfield ISSUED BY: Crown Audio, Inc. 574-294-8289 1718 W. Mishawaka Road swhitfield@crownintl.com Elkhart, Indiana 46517 U.S.A. European Representative's Name and Address: David Budge 10 Harvest Close... -
Page 6: Table Of Contents
CTs Power Amplifiers Table of Contents Important Safety Instructions ............2 5 Advanced Features and Options ......18 CTs 2-Channel Models ......3 5.1 Protection Systems ............18 5.1.1 Thermal Level Control (TLC) ........18 Declaration of Conformity .............. 5 5.1.2 Junction Temperature Simulation (JTS) .....18 1 Welcome ............ - Page 7 CTs Power Amplifiers Table of Contents CTs Multi-Channel Models......31 5.1.6 Power Fuse ............42 5.1.7 Inrush Limiting ............42 Declaration of Conformity ............32 5.1.8 Variable-speed Fans ..........42 1 Welcome ............ 33 5.2 Advanced Features ............42 1.1 Features ................33 5.2.1Switching Power Supply .........
-
Page 8: Welcome
Input sensitivity is independently select- selection of high- and low-impedance opera- able for each channel. Choose low-imped- tion for a specific channel, and CTs Series ance (4/8 ohm), constant-voltage (70V/ amplifiers continue that tradition, with power 100V/140V/200V), or 26 dB. -
Page 9: How To Use This Manual
CTs Power Amplifiers 1 Welcome ® 2 How to Use This Features (continued from page 8) • Legendary Crown class I (BCA ) and ® class AB+B (Multi-Mode ) output topol- Manual ogies offer the best in amplifier reliability. • Switchable high-pass filter for each chan- CTs 600/1200 use Class AB+B;... -
Page 10: Setup
CTs Power Amplifiers 3 Setup 3.1 Unpack Your Amplifier 3.2 Install Your Amplifier 3.3 Ensure Proper Cooling Please unpack and inspect your amplifier for CAUTION: Before you begin, make sure When using an equipment rack, mount units any damage that may have occurred during your amplifier is disconnected from the directly on top of each other. -
Page 11: Choose Input Wire And Connectors
CTs Power Amplifiers 3 Setup 3.4 Choose Input Wire and Connectors Figure 3.3 shows connector pin assignments for balanced wiring, and Figure 3.4 shows connec- Figure 3.3 tor pin assignments for unbalanced wiring. Balanced Input Connector Wiring NOTE: Custom wiring should only be per- formed by qualified personnel. -
Page 12: Wire Your System
CTs Power Amplifiers 3 Setup 3.6 Wire Your System 3.6.1 Dual 8/4/2 Mode Typical input and output wiring, along with Attenuator and Mode Switch settings are shown in Figures 3.6 and 3.7. Make sure the Mode switch is set to the “Dual” posi- tion when operating in Dual mode. -
Page 13: Dual 70V/100V Mode
CTs Power Amplifiers 3 Setup 3.6.3 Dual 70V/100V Mode Typical input and output wiring, along with Atten- uator and Mode Switch settings are shown in Fig- ures 3.10 and 3.11. Make sure the Mode switch is set to the “Dual” position when operating in Dual mode. -
Page 14: Dual Mode With "Y" Input
CTs Power Amplifiers 3 Setup 3.6.5 Dual Mode with “Y” Input See Figure 3.14. This configuration feeds a mono signal to both Channel 1 and Channel 2. In the example in Figure 3.14, Channel 1 is driving a low- impedance loudspeaker and Channel 2 is driving a loudspeaker with a 70V transformer. -
Page 15: Connect To Ac Mains
CTs Power Amplifiers 3 Setup 4 Operation 3.7 Connect to AC Mains On the back panel, check whether your amplifier is labeled for 120V or 220-240V AC mains. Connect your amplifier 4.1 Precautions to the corresponding AC mains power source (power out- Your amplifier is protected from internal and external let) with the supplied AC power cordset. -
Page 16: Front Panel Controls And Indicators
CTs Power Amplifiers 4 Operation Power Indicator 4.2 Front Panel Controls Signal Indicators Blue LED indicates AC power has been and Indicators Three green LEDS per channel indicate the applied and is within the safe operating amplifier’s input and output signal levels. range of the power supply. -
Page 17: Back Panel Controls And Connectors
CTs Power Amplifiers 4 Operation The “Y” Input Switch also can be used to 4.3 Back Panel Controls Sensitivity Switches Behind the input panel are the Input Sensi- daisy-chain the signal to another amplifier. and Connectors. tivity Switches. One 3-position switch per See Section 3.6.5 for details. -
Page 18: Advanced Features And Options
CTs Power Amplifiers 5 Advanced Features and Options NOTE: For detailed information about 5.1.3 Fault 5.1.9 Inrush Limiting these Crown amplifier features, please The amplifier will light the Fault LED if the A soft-start circuit in the power supply mini- consult the Crown Amplifier Application mizes the amplifier’s current draw during amplifier output stage stops operating. -
Page 19: Input Sensitivity Switches
CTs Power Amplifiers 5 Advanced Features and Options 5.2.4 Input Sensitivity Switches 5.3 Options T-170V: See Figure 5.3. This is an autoformer that See Figures 5.1 and 5.2. To access the Input Sensitivity Switches, turn off the allows 100V output from the CTs 600/1200, and amplifier and remove the PIP2-BBY Input Panel. -
Page 20: Nominal Attenuation Settings
CTs Power Amplifiers 5 Advanced Features and Options 5.3.1 Nominal Attenuation Settings The signal level for each input can be attenuated repeatably by Attenuation in dB adjusting the 21-step Level Control (see Section 4.3). Figure 5.5 shows the attenuation in dB for each detent. The setting of the input-sensitivity switch varies the actual attenation as shown. -
Page 21: Troubleshooting
CTs Power Amplifiers 6 Troubleshooting CONDITION: Power indicator is CONDITION: Fault indicator is off. flashing. POSSIBLE REASON POSSIBLE REASON: • The amplifier has lost AC power. • The amplifier channel has stopped operat- • The amplifier’s Power switch is off. ing. - Page 22 CTs Power Amplifiers 6 Troubleshooting CONDITION: Data indicator not flash- ing, even though PIP module is CONDITION: No sound, even though installed and host computer control the amp has power. Power LED is on with- software is active. out flashing and the amp is receiving an input sig- nal.
-
Page 23: Specifications
CTs Power Amplifiers 7 Specifications Minimum Guaranteed Power CTs 600 CTs 1200 CTs 2000 CTs 3000 (20 Hz - 20 kHz) Power at 0.1% THD Power at 0.1% THD Power at 0.35% THD Power at 0.35% THD 2-ohm Dual (per ch.) 150W 250W 1000W... - Page 24 CTs Power Amplifiers 7 Specifications Performance CTs 600 CTs 1200 CTs 2000 CTs 3000 Maximum Input Level Before input compression +20 dBu +20 dBu +20 dBu +20 dBu Absolute maximum + 32 dBu + 32 dBu + 32 dBu + 32 dBu Load Impedance (Note: Safe with all types of loads) Stereo 2, 4, 8, 16 ohms, 70V, and 100V*...
- Page 25 CTs Power Amplifiers 7 Specifications Figure 7.2 CTs 600/1200 Typical Crosstalk vs. Frequency Figure 7.1 CTs 600/1200 Typical Frequency Response (1 W, 8 ohms) Figure 7.3 CTs 600/1200 Typical Damping Factor vs. Frequency Operation Manual page 25...
- Page 26 CTs Power Amplifiers 7 Specifications Figure 7.4 CTs 2000/3000 Typical Frequency Response (1W) Figure 7.5 CTs 2000/3000 Typical Crosstalk vs. Frequency Figure 7.6 CTs 2000/3000 Typical Damping Factor vs. Frequency page 26 Operation Manual...
-
Page 27: Ac Power Draw And Thermal Dissipation
CTs Power Amplifiers 8 AC Power Draw and Thermal Dissipation AC Power Draw and Thermal Dissipation: Pink noise 12dB crest factor, bandwidth limited 22Hz to 22kHz. Typical line impedance used. Measurements made with 120VAC mains. Line current figures for 230VAC units derived by multiplying 120VAC figures by 0.5. Data based on all channels driven. - Page 28 CTs Power Amplifiers 8 AC Power Draw and Thermal Dissipation AC Power Draw and Thermal Dissipation: Pink noise 12dB crest factor, bandwidth limited 22Hz to 22kHz. Typical line impedance used. Measurements made with 120VAC mains. Line current figures for 230VAC units derived by multiplying 120VAC figures by 0.5. Data based on all channels driven.
- Page 29 CTs Power Amplifiers 8 AC Power Draw and Thermal Dissipation AC Power Draw and Thermal Dissipation: Pink noise 12dB crest factor, bandwidth limited 22Hz to 22kHz. Typical line impedance used. Measurements made with 120VAC mains. Data based on all channels driven. Line current figures for 230VAC units derived by multiplying 120VAC figures by 0.5.
- Page 30 CTs Power Amplifiers 8 AC Power Draw and Thermal Dissipation AC Power Draw and Thermal Dissipation: Pink noise 12dB crest factor, bandwidth limited 22Hz to 22kHz. Typical line impedance used. Measurements made with 120VAC mains. Data based on all channels driven. Line current figures for 230VAC units derived by multiplying 120VAC figures by 0.5.
-
Page 31: Cts Multi-Channel Models
CTs Power Amplifiers CTs Multi-Channel Series CTs 4200 CTs 8200 Operation Manual page 31... -
Page 32: Declaration Of Conformity
CTs Power Amplifiers DECLARATION of CONFORMITY Crown Audio, Inc. FOR COMPLIANCE QUESTIONS ONLY: Sue Whitfield ISSUED BY: Crown Audio, Inc. 574-294-8289 1718 W. Mishawaka Road swhitfield@crownintl.com Elkhart, Indiana 46517 U.S.A. European Representative's Name and Address: David Budge 10 Harvest Close... -
Page 33: Welcome
• FIT (Fault Isolation Topology) circuitry operation for a specific channel, and CTs Series isolates faults within affected channels. amplifiers continue that tradition, with power • 35 Hz High-Pass Filter (70 Hz in CTs... -
Page 34: Setup
CTs Power Amplifiers 3 Setup 3.1 Unpack Your Amplifier 3.2 Install Your Amplifier 3.3 Ensure Proper Cooling CAUTION: Before you begin, make sure When using an equipment rack, mount units Please unpack and inspect your amplifier for directly on top of each other. Close any open any damage that may have occurred during your amplifier is disconnected from the transit. -
Page 35: Choose Input Wire And Connectors
CTs Power Amplifiers 3 Setup Figure 3.3 Balanced Input 3.4 Choose Input Wire Connector Wiring and Connectors Figure 3.3 shows connector pin assignments for balanced wiring, and Figure 3.4 shows connector pin assignments for unbalanced wiring. See the Crown Amplifier Appli- When possible, use balanced wiring for signal input, which provides better cation Guide, available online at rejection of unwanted noise and hum. -
Page 36: Wire Your System
CTs Power Amplifiers 3 Setup See the Crown Amplifier Appli- cation Guide, available online at www.crownaudio.com, for pin 3.6 Wire Your System assignments for commonly used connector types. CAUTION: Never change the position of BRIDGE the Mode Switch while the amplifier DUAL DUAL power is on. -
Page 37: Bridge-Mono 16/8 Mode
CTs Power Amplifiers 3 Setup See the Crown Amplifier Appli- cation Guide, available online at 3.6.3 Bridge-Mono 16/8 Mode www.crownaudio.com, for pin CAUTION: Never change the position of assignments for commonly the Mode Switch while the amplifier used connector types. BRIDGE DUAL DUAL... -
Page 38: Connect To Ac Mains
CTs Power Amplifiers 3 Setup 3.7 Connect to AC Mains 3.8 Startup Procedure Use the following procedure when first turning on Connect your amplifier to the AC mains power source (power outlet) with the supplied AC power your amplifier: cordset. First, connect the IEC end of the cordset to 1. -
Page 39: Operation
CTs Power Amplifiers 4 Operation 4. WARNING: Never connect the output 4.1 Precautions to a power supply, battery or power Your amplifier is protected from internal and main. Electrical shock may result. external faults, but you should still take the fol- lowing precautions for optimum performance and 5. -
Page 40: Front Panel Controls And Indicators
CTs Power Amplifiers 4 Operation F. Fault Indicator 4.2 Front Panel Controls C. Signal Indicator and Indicators Green LED, one per channel, illuminates to Red LED, one per channel, illuminates indicate the presence of input signals when the amplifier output channel has Note: CTs 8200 is shown. -
Page 41: Back Panel Controls And Connectors
CTs Power Amplifiers 4 Operation 4.3 Back Panel Controls P. Mode Switch M. Accessory Panel and Connectors Used on each consecutive pair of channels, this CTs 4200: Accepts an optional IQ-MC4A or four-position switch is used to select the ampli- VCA-MC4A module. -
Page 42: Advanced Features And Options
CTs Power Amplifiers 5 Advanced Features and Options NOTE: For more information about these Crown 5.1.4 35-Hz High-Pass Filter 5.2 Advanced Features amplifier features, please visit the Crown web- A fixed 35-Hz (70-Hz in CTs 4200) high-pass filter per 5.2.1 Switching Power Supply site at www.crownaudio.com. -
Page 43: Channel Level Control
CTs Power Amplifiers 5 Advanced Features and Options 5.2.4 Channel Level Control ATTENUATION in dB The signal level for each input can be attenu- ated accurately by adjusting the 21-step Level Detent 4/8 Ohm 100V Control (see Section 4.2). Figure 5.2 shows the 0 (full CCW) 68.31 72.90... -
Page 44: Options
CTs Power Amplifiers 5 Advanced Features and Options Choosing the Right Module 5.3 Options Wall-Mount level control panels for use with To order accessory modules for your amplifier, VCA module: Below are some available options. For current please refer to the model tag (located on the back options, visit the Crown website at www.crownau- 1-VCAP: See Figure 5.4. -
Page 45: Troubleshooting
CTs Power Amplifiers 6 Troubleshooting CONDITION: Power indicator is off. CONDITION: Fault indicator is on. POSSIBLE REASON POSSIBLE REASON: • The amplifier has lost AC power. • The amplifier channel has stopped oper- ating. Return the unit to an authorized •... - Page 46 CTs Power Amplifiers 6 Troubleshooting CONDITION: No sound, even though CONDITION: Thermal indicator is the amp has power. Power LED is on flashing. without flashing and the amp is receiving an POSSIBLE REASON: input signal. Signal indicator is flashing. • The amplifier has become too hot for safe operation.
-
Page 47: Specifications
CTs Power Amplifiers 7 Specifications CTs 4200: MINIMUM GUARANTEED POWER (in watts, 0.1% THD) 120VAC, 60 Hz units Dual Mode Channels Driven 1 kHz 20 Hz - 20 kHz 1 kHz 1 kHz 20 Hz - 20 kHz 4 Ohm 8 Ohm Figure 7.1 CTs 4200 70V (25 Ohm) at 0.1% THD... - Page 48 CTs Power Amplifiers 7 Specifications The following specifications apply to all models in Dual 8/4 ohm mode with 8-ohm loads unless otherwise specified. Performance CTs 4200 CTs 8200 Frequency Response (at 1 watt, 20 Hz - 20 kHz) ± 0.5 dB ±...
- Page 49 CTs Power Amplifiers 7 Specifications Figure 7.4 CTs 8200 Typical Phase Response (1 W) Figure 7.3 CTs 8200 Typical Frequency Response (1 W) Figure 7.5 CTs 8200 Typical Damping Factor vs. Frequency Operation Manual page 49...
- Page 50 CTs Power Amplifiers 7 Specifications Figure 7.6 CTs 8200 Typical Output Impedance vs. Frequency Figure 7.7 CTs 8200 Typical Crosstalk vs. Frequency page 50 Operation Manual...
-
Page 51: Ac Power Draw And Thermal Dissipation
CTs Power Amplifiers 8 AC Power Draw and Thermal Dissipation AC Power Draw and Thermal Dissipation: Pink noise 12dB crest factor, bandwidth limited 22Hz to 22kHz. Typical line impedance used. Measurements made with 120VAC mains. Line current figures for 230VAC units derived by multiplying 120VAC figures by 0.5. Data based on all channels driven. - Page 52 CTs Power Amplifiers 8 AC Power Draw and Thermal Dissipation AC Power Draw and Thermal Dissipation: Pink noise 12dB crest factor, bandwidth limited 22Hz to 22kHz. Typical line impedance used. Measurements made with 120VAC mains. Line current figures for 230VAC units derived by multiplying 120VAC figures by 0.5. Data based on all channels driven.
-
Page 53: Service
3. When shipping your Crown product, it is important outside of the shipping carton. Do not send this form call Crown’s Customer Service at 574.294.8200 or being notified by Crown Audio Inc. Units still in the pos- that it has adequate protection. We recommend you separately. -
Page 54: Warranty
CTs Power Amplifiers 10 Warranty UNITED STATES & CANADA to the actual purchase price, not including inter- PRODUCT. THIS INCLUDES ANY DAMAGE TO SUMMARY OF WARRANTY est, insurance, closing costs, and other finance ANOTHER PRODUCT OR PRODUCTS RESULT- Crown International, 1718 West Mishawaka Road, charges less a reasonable depreciation on the ING FROM SUCH A DEFECT. - Page 55 CTs Power Amplifiers 10 Warranty WORLDWIDE EXCEPT USA & CANADA SUMMARY OF WARRANTY WHAT THE WARRANTOR WILL DO DISCLAIMER OF CONSEQUENTIAL AND INCIDENTAL DAMAGES Crown International, 1718 West Mishawaka Road, We will remedy any defect, regardless of the rea- Elkhart, Indiana 46517-4095 U.S.A. warrants to son for failure (except as excluded), by repair, YOU ARE NOT ENTITLED TO RECOVER FROM US you, the ORIGINAL PURCHASER and ANY SUB-...
- Page 56 CTs Power Amplifiers NOTES page 56 Operation Manual...
-
Page 57: Factory Service Information Form
CTs Power Amplifiers PRODUCT REGISTRATION Crown Audio, Inc. 1718 W. Mishawaka Rd. Elkhart, IN 46517-9439 Phone: 574-294-8000 Fax: 574-294-8329 www.crownaudio.com Online registration is also available at http://crownweb.crownintl.com/webregistration When this form is used to register your product, it may be mailed or faxed. - Page 58 CTs Power Amplifiers THIS PAGE INTENTIONALLY LEFT BLANK page 58 Operation Manual...
-
Page 59: Product Registration Form
CTs Power Amplifiers Crown Factory Service Information Shipping Address: Crown Factory Service, 1718 W. Mishawaka Rd., Elkhart, IN 46517 PLEASE PRINT CLEARLY SRA #: __________________(If sending product to Crown factory service.) Model: _________________________________ Serial Number: _____________________ Purchase Date: ________________ PRODUCT RETURN INFORMATION Individual or Business Name: ___________________________________________________________________________________________________________________________________________________________________________ Phone #: __________________________________________________...