
Related Manuals for August DA900C


Summary of Contents for August DA900C
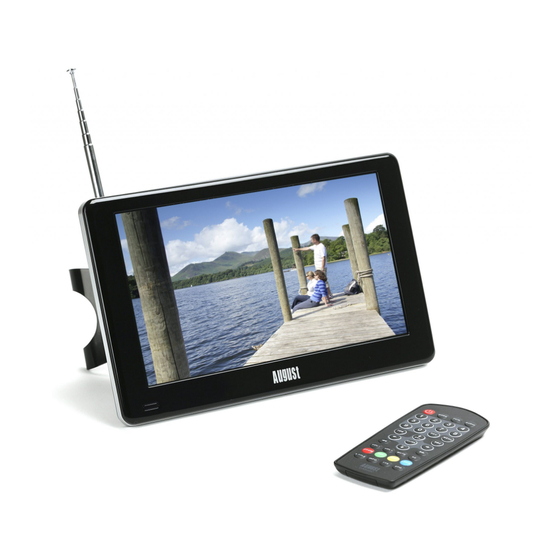
- Page 1 DA900C August International Ltd United Kingdom 9 Inch Digital & Analogue LCD TV Telephone:+44 (0) 845 250 0586 www.augustint.com...
- Page 2 Connect the device to the mains power, press POWER on the remote to Thank you for buying our August TV. You may already be familiar with using turn on the device, or press and hold POWER on the device for 1.5 seconds a similar product but please take time to read these instructions carefully.
-
Page 3: Table Of Contents
Switchover Program. Reception may also be affected by various factors 12. Troubleshooting such as how close you are to transmitters, tall buildings, thick walls, 13. Warranty ceilings and weather etc. For any further queries, please telephone August International Ltd helpline +44 (0) 845 250 0586 or email service@augustint.com... -
Page 4: Safety Instructions
1. Safety Instructions 1.Use only the supplied power adaptor with this device. Failure to do so can Storage and Use cause damage to the device and risk personal injury. 2.For the sake of safety, when you do not intend to use the display, please Keep this machine Keep the TV switch off the AC adaptor or car adaptor. -
Page 5: Accessories
3. Part Names and Functions 2 Accessories 3.1 Front 1. IR receiver window 2. LCD display AC/DC adaptor Remote control 3.2 Back Digital TV antenna Stand 1. Speakers 2. Stand Telescopic antenna AV cable 3.3 Left Earphones User manual 1. Antenna input jack 2. - Page 6 Channel Down/ Down/ Previous Track or Chapter Channel Up/ Up / Next Track or Chapter Volume Up / Volume Down / MODE Press and hold to power on/off the device. Press repeatedly for mode switch. More details can be found on page 12. MOVE DA900C...
- Page 7 Power on/off the device 3.5.2 Use of the Remote Control Mode switch Please remove the PVC packaging before using the remote control for the first time. Freeview TV and Radio switch 1.Do not expose the remote control to direct sunlight or very strong/bright light. Select audio channel or audio language Numbers 2.Do not drop or step on the remote control or subject it to shocks.
-
Page 8: Connection
*Note: 4.3 Connecting to a TV set via AV Output 1.Please ensure proper disposal of used batteries. Turn off all devices before connecting or disconnecting any cables. 2.To prevent leakage of fluid from the lithium battery, remove the battery when not using the remote control for a long period of time. -
Page 9: Basic Operation
4.4 Connecting to an Audio/Video device via AV Input 5. Basic Operation Turn off all devices before connecting or disconnecting any cables. 5.1 Turning on/off the device 5.1.1 Turn power on Audio/Video output Connect the device to the mains power, press POWER on the remote to turn on Left side the device, or press and hold POWER on the device for 1.5 seconds to turn it on. -
Page 10: Digital Freeview Tv (Dvb-T)
2. If there is no channel saved on the TV, 3. Use UP/DOWN to select the channel, 6. Digital Freeview TV (DVB-T) Channel Sorting can not be accessed, and then select the category by pressing 2. If there is no channel saved on the TV, If the device is not in the Digital Freeview and it will show “Channel not available”. - Page 11 ⑤ 1. Use UP/DOWN to select TV channels, 6.2.2 Manual Search Left of the menu lists all the options under Video PID: can be changed by pressing it will ask “ Delete all TV channels?”, If you know a channel's broadcasting OSD.
- Page 12 2. Aspect Ratio: press LEFT/RIGHT to select In Manual timer mode, press UP/DOWN between 16:9, 4:3 Pan Scan, 4:3 Letter to select an option, use RIGHT/LEFT or Box, press ENTER to confirm and exit the numbers to change the Date, Time, GMT setting.
-
Page 13: Digital Tv Recording
Enter the old password, if it is correct, the 7. Digital TV Recording 7.2 Scheduled TV Recording cursor will move to Enter New Password To set up a recording schedule, please make When the recording starts, it will show The device supports recording Freeview TV option, enter and confirm the new password. -
Page 14: Games
8.2 Music 8.3 Photo 9. Games Use UP/DOWN to select a subtrack. Press MENU, select Photo, press ENTER, Press MENU, select Music, press ENTER, Games can be accessed by selecting Menu the Photo menu will show: the Music menu will show: ->Game->... -
Page 15: Analogue Tv (Atv)
10. Analogue TV (ATV) 10.3 SKIP SWITCH The SKIP SWITCH allows you to hide any channels, and they will be skipped To search for Analogue TV, press MODE repeatedly until it shows ATV, press when selecting channels using CH+ or CH-. LEFT or RIGHT to switch to the Analogue TV mode. -
Page 16: Specifications
11. Specifications Media Formats File Type AVI,MPG,ASF,VOB Screen size: 9 Inch Video Type MPEG1, MPEG2, MPEG4 Resolution: 640X234 pixels Audio Type MPEG1/2, Layer 1/2/3, PCM, LPCM LCD Display Aspect Ratio: 16:9 Brightness: 250 cd/m Video player 32Kbps ~ 320Kbps Audio bit Ratio Contrast: 150:1 Resolution Max. -
Page 17: Troubleshooting
This is due to the fact that Freeview is yet to operate in full power in the UK. August TVs should not be deemed as faulty if it can receive Freeview by connecting to a proper digital rooftop aerial.