Skoda Amundsen Operating Instructions Manual
Hide thumbs
Also See for Amundsen:
- Owner's manual (84 pages) ,
- Operating instructions manual (76 pages) ,
- Manual (40 pages)
Table of Contents
Advertisement
Advertisement
Table of Contents

Related Manuals for Skoda Amundsen


Summary of Contents for Skoda Amundsen
- Page 1 SIMPLY CLEVER Navigation system Amundsen+ Operating instructions...
- Page 2 CAUTION Structure of this Owner's Manual (explanations) A Caution note draws your attention to the possibility of damage to your vehicle (e.g. damage to gearbox), or points out general risks of an accident. This Owner's Manual has been systematically designed to make it easy for you to Note search for and obtain the information you require.
-
Page 3: Table Of Contents
PHONE mode Table of Contents ® Pairing mobile phone or Bluetooth device with device General information Main menu TELEPHONE Operating instructions Telephone calls and functions during a call Important information Settings in PHONE mode Basic settings NAV mode (Navigation) System and sound settings Introductory information RADIO mode Navigation data and the SD memory card... -
Page 4: General Information
Only use the device so that you are in full control of your vehicle in every ■ traffic situation – there is the risk of accidents! Please read this Amundsen+ navigation system (from here on referred to only Adjust the volume to ensure that acoustic signals from outside the vehicle, ■... - Page 5 system can be used again. The code number can only be retrieved “online” via the Personalisation ŠKODA system, as this guarantees even more effective anti-theft protection. Visit Your vehicle can be equipped with up to four keys. Individual settings of the de- a specialist garage if necessary.
-
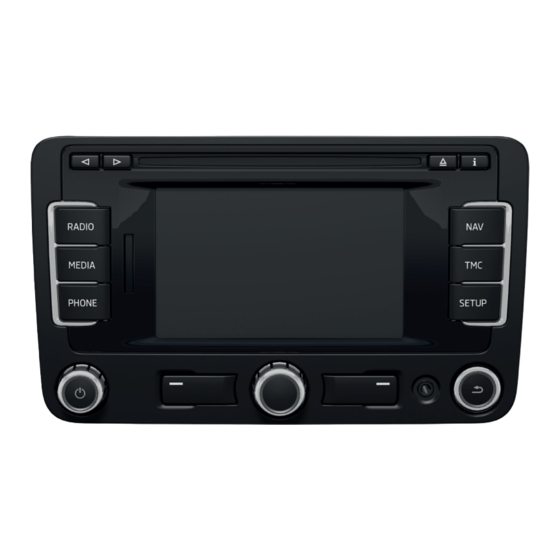
Page 6: Equipment Overview
- Return to previous menu item Equipment overview AUX input - Connect an external audio source Menu button › Select a function or a sub-menu, confirm a value (press) › Move between functions or sub-menus, set a value (turn) SD memory card slot Function keys - Function is context-dependent ... - Page 7 “Checkbox” Screen operation Some functions can only be switched on or off. There is a so-called “Check box” in front of a function which can only be switched on or off: Fig. 2 - Function is switched on. Overview of the operating ele- ...
- Page 8 - switches to the input screen for numbers and special characters - switches to the input screen for letters A..Z - Enter a space - moves the cursor in the entry line - to the left or right. ...
-
Page 9: Basic Settings
Basic settings System and sound settings System settings Press the button → SETUP System - Menu language for the displays and the language messages ■ Language ■ Adaptive - auto-detection of menu language, depending on the setting in the information display or direct selection of the required language from the list ■... -
Page 10: Radio Mode
Settings in RADIO mode RADIO mode Press the button → RADIO SETUP Main menu RADIO - switches traffic program on/off ■ Traffic program (TP) - Sets the station selection function in RADIO mode using the arrow ■ Arrow keys Press the button RADIO keys - Switches all stations currently in range for the selected frequency... -
Page 11: Digital Radio Reception Dab
Digital radio reception DAB Traffic Program TP DAB (Digital Audio Broadcasting) is the digital transmission of radio programmes The display “TP” in combination with a station name (e.g. in the station or preset based on the DAB, DAB+ or DMB standards. It allows multiple stations to be list), indicates a traffic programme station. -
Page 12: Media Mode
- Input volume for an external audio source at the multimedia sock- ■ AUX volume MEDIA mode et AUX - Input volume for iPod™ or iPhone™ units at the multimedia socket ■ MDI volume MDI or an external audio source AUX at the multimedia socket MDI Main menu MEDIA ®... -
Page 13: Introductory Information About The Cd Mode
Never use liquids such as petrol, paint thinner or record cleaner to clean the sur- ■ Introductory information about the CD mode face of the CD - this may cause damage. Never expose the CD to direct sun light! ■ Insert CD Only write on the CD with appropriate writing tools. -
Page 14: External Sources
® SD memory card empty or data not readable Connecting an external audio source via Bluetooth If an SD memory card is inserted and no data or no legible data has been stored In Bluetooth audio mode, audio files can be played from an external audio source ®... -
Page 15: Requirements For Media Sources And Audio Files
WARNING (Continued) Note Never hold external sources in your hand or on your knees while driving. ■ See the owner's manual of the specific manufacturer for instructions on operat- ■ These could be thrown into the passenger compartment during sudden driv- ing the external source. -
Page 16: Phone Mode
® - Settings for the Bluetooth - function ■ Bluetooth settings PHONE mode - Activates visibility of the device on other devices with ■ Set Bluetooth visibility ® the Bluetooth function ® ® Launch the search for Bluetooth audio accessories on the mobile phone. The Pairing mobile phone or Bluetooth device with search can take around 15 to 20 seconds. -
Page 17: Telephone Calls And Functions During A Call
Function keys in the main menu TELEPHONE Outgoing call Press the button You can use the device to start a phone conversation directly by entering a tele- ■ TELEPHONE - Switches on voice operation, only with GSM II telephone preinstallation. phone number or by selecting a number from the phonebook, the list of selected ■... -
Page 18: Settings In Phone Mode
If a DTMF key tone has to be entered during a conversation, open the keypad field by pressing the function key → and follow the instruc- Extras Enter numbers tions (for example: “For a private conversation with one of our co-workers, please press ”). -
Page 19: Nav Mode (Navigation)
WARNING (Continued) NAV mode (Navigation) Traffic signs and traffic regulations always have priority over the driving rec- ■ ommendations provided by the navigation system. Introductory information Route guidance is subject to constant changes, particularly to information ■ relating to one-way streets, pedestrian zones etc. stored in the navigation da- ta. -
Page 20: Main Menu Navigation
- Using the navigation data directly from the SD memory card. If you ■ Use SD Main menu Navigation want to use navigation data from other regions that differs from the data stor- ed in the memory of the device, you can also use data directly from the SD memory card for guidance. -
Page 21: Settings In The (Nav) Navigation Mode
- Starting a route guidance to a stored Home address. During route - switches between the following information during route guidance Home add. ■ Time display guidance, the function key appears here. - displays the expected time to destination Stop ■... - Page 22 - opens screen for entering the name of the destination During route guidance, press the button - switches to the main menu of ■ Store - Change name of destination Navigation. ■ Delete - saves the name of the destination ■...
-
Page 23: Route Guidance
› Position; - distance to destination (in the bottom left-hand corner of the screen) › latitude and longitude; - distance to stopover (in the bottom left-hand corner of the screen) - only dis- › height above seal level (if at least 4 satellites are available); played when the route guidance and display of the expected arrival time at the ›... - Page 24 - turn the menu button to select the length of the stretch to When the function Dynamic Route » page 19, Settings in the (NAV) Navigation ■ Congestion ahead be blocked from the current position. The length of the currently blocked mode is activated and the radio navigation system calculates a time advantage stretch of the journey is shown in the lower line of the screen.
-
Page 25: Tmc Mode
- switches traffic programme on/off ■ Traffic program (TP) TMC mode - activates/deactivates the usage of TMC traffic reports for route ■ Dynamic route guidance » page 22, Dynamic route guidance with TMC use. Displaying TMC traffic reports TMC traffic reports are used to optimise the route during route guidance when there are traffic disruptions »... -
Page 26: Display Of Optical Park Assist
Rearview camera display Display of optical park assist Display of visual parking system (OPS) Fig. 6 Display example of the device screen Fig. 7 Display example of the device screen The reversing camera monitors the area behind the vehicle. When parking and manoeuvring, obstacles in the vicinity of the vehicle are dis- The monitored area is shown on the device screen. -
Page 27: Index
Index General information Navigation Displaying stretches of the journey Enter and save destinations Main menu Anti-theft protection Input screen with keypad Manually blocking a stretch of the route Navigation of the SD memory card iPod Orientation in the map Settings Starting route guidance Car park Stopping route guidance... - Page 28 SD card SD memory card Navigation of the SD memory card Update the navigation data Settings Basic system settings Media Mobile phone Navigation Radio Sound System TMC traffic reports TP traffic information Volume Switching the device off Switching the device on Telephone Main menu Pairing telephone using Bluetooth...
- Page 29 ŠKODA AUTO a.s. pursues a policy of constant product and model development. Reprinting, reproduction, translation or any other use, either in whole or in part, is We trust that you will understand that changes to models in terms of shape, not permitted without the written consent of ŠKODA AUTO a.s..
- Page 30 Amundsen+ Navigacní systém anglicky 11.2013 S00.5615.06.20 3T0 012 720 CE...