Advertisement
Quick Links
Download this manual
See also:
Owner's Manual
www.shercousa.com
Sherco Motorcycle
Assembly Instructions
This manual is intended to be used as an
assembly guide for the Sherco 1.25 – 2.9 Trials
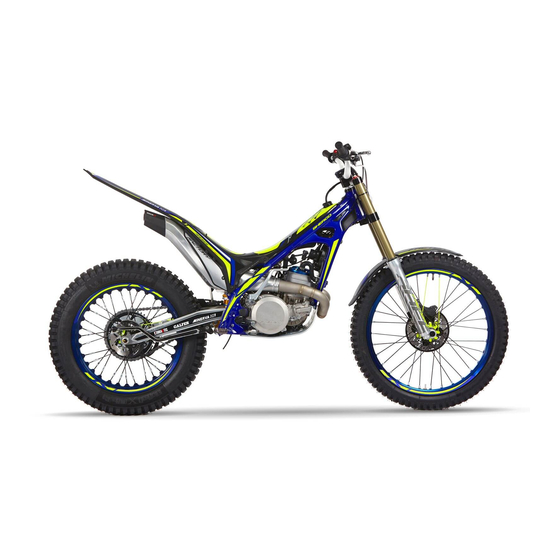
Motorcycles. The motorcycle shown in the
pictures is a new 2002, 2.9, the one that you are
assembling may be slightly different but the
principles shown will apply to all of the models
indicated.
The technician shown in the photographs is
David Chaves who received his training at the
Sherco factory in Spain. David is also a member
of Team Sherco and is competing in the NATC
national series as a Champ rider.
The pictures start out showing the bike in the
crate and progress through the complete
assembly process.
If you have any question or are not certain
about any procedure call Ryan Young Products
on 1-800-607-8742.
7/22/2002
Sherco Assembly
1
Instructions
Advertisement

Related Manuals for SHERCO 1.25


Summary of Contents for SHERCO 1.25
- Page 1 Sherco Motorcycle Assembly Instructions This manual is intended to be used as an assembly guide for the Sherco 1.25 – 2.9 Trials Motorcycles. The motorcycle shown in the pictures is a new 2002, 2.9, the one that you are assembling may be slightly different but the principles shown will apply to all of the models indicated.
- Page 2 These pictures show how the bike is packaged and shipped from the factory. Set the crate upright as shown. 7/22/2002 Sherco Assembly Instructions...
- Page 3 Preparation for assembly. Remove both of the straps. 7/22/2002 Sherco Assembly Instructions...
- Page 4 Lift the box off of the bike and set aside. 7/22/2002 Sherco Assembly Instructions...
- Page 5 These pictures show the bike in it’s shipping configuration. 7/22/2002 Sherco Assembly Instructions...
- Page 6 This picture shows how the axle bolt is used to retain the bike to the crate. 7/22/2002 Sherco Assembly Instructions...
- Page 7 Set the front wheel and the package containing the plastic parts aside. 7/22/2002 Sherco Assembly Instructions...
- Page 8 Carefully remove all of the protective plastic wrap. 7/22/2002 Sherco Assembly Instructions...
- Page 9 The bike is now ready to be assembled. 7/22/2002 Sherco Assembly Instructions...
- Page 10 Handlebar Installation David removes the 2 rear bolts and loosens the front 2, This allows him to install the handlebars without having to completely remove the clamps. 7/22/2002 Sherco Assembly Instructions...
- Page 11 The handlebar adjustment is unique to each rider, David usually rolls them forward. These 4 bolts should be tightened to 15 ft lbs. 7/22/2002 Sherco Assembly Instructions...
- Page 12 In order to remove the bike from the wooden crate you must remove the front axle. The first step is to loosen the 2 bolts on the front of the fork leg. 7/22/2002 Sherco Assembly Instructions...
- Page 13 Carefully remove the front axle, If it is in a bind you may have to loosen the fork brace bolts. 7/22/2002 Sherco Assembly Instructions...
-
Page 14: Front Wheel Installation
Front Wheel Installation David now sets the bike on a stand so that he can install the front wheel. 7/22/2002 Sherco Assembly Instructions... - Page 15 Make sure that the threads in the fork are clean, David uses an air gun and blows out any foreign material that may be present. 7/22/2002 Sherco Assembly Instructions...
- Page 16 David makes sure that the axle fits perfectly before he installs the wheel. If the fork legs are not aligned properly the threads on the axle can be ruined. You may have to loosen the fork brace bolts in order to properly install the axle. 7/22/2002 Sherco Assembly Instructions...
- Page 17 Make sure that there is enough clearance between the brake pads to install the brake disc. In this case the pads were touching. 7/22/2002 Sherco Assembly Instructions...
- Page 18 Loosen the brake adjusting screw enough so that the brake lever has free play. This will allow the brake pads to be pushed apart so that the brake disc will fit. 7/22/2002 Sherco Assembly Instructions...
- Page 19 David used a small screw driver and gently opened up the brake pads so he can install the front wheel assembly. DO NOT FORCE THE PADS APART AS YOU COULD DAMAGE THEM. 7/22/2002 Sherco Assembly Instructions...
- Page 20 Carefully slide the disc between the brake pads Install the axle. 7/22/2002 Sherco Assembly Instructions...
- Page 21 Install the spacer. Tighten the axle to 44 ft lbs Tighten the pinch bolts to 8 ft lbs 7/22/2002 Sherco Assembly Instructions...
- Page 22 The Bike Is Now Ready To Have The Headlight and Fenders Installed. Take the bike off of the wooden shipping frame and set it back on the stand in preparation for the final assembly. 7/22/2002 Sherco Assembly Instructions...
- Page 23 Open the package that contains the plastic parts and lay them out in preparation for installation. 7/22/2002 Sherco Assembly Instructions...
- Page 24 Front Brake Caliper Guard Installation Remove the lower brake Remove the small bolt from the bottom of the caliper fixing bolt. fork leg. 7/22/2002 Sherco Assembly Instructions...
- Page 25 Install the plastic caliper guard using the 2 bolts that were removed in the previous step. Tighten the brake caliper bolt to 15 ft lbs and tighten the small lower bolt snugly, do not strip it out. 7/22/2002 Sherco Assembly Instructions...
- Page 26 Front Fender Installation The next step is to install the front fender. Remove the 2 fender mounting bolts from the fender mounting bracket. 7/22/2002 Sherco Assembly Instructions...
- Page 27 Set the fender in place on the bracket. Install the fender bolts. 7/22/2002 Sherco Assembly Instructions...
-
Page 28: Wiring Harness
Headlight Installation Attach the headlight wire to the chassis wiring harness. Fasten the headlight to the fork tubes using the 2 zip ties. 7/22/2002 Sherco Assembly Instructions... - Page 29 Tighten and then cut the loose ends off of the zip ties. Push the cut ends in towards the back of the headlight. 7/22/2002 Sherco Assembly Instructions...
- Page 30 David will take the time to go through the steps to check the coolant level before he finishes putting the bike together. The first step is to remove the rear fuel tank mounting bolt. 7/22/2002 Sherco Assembly Instructions...
- Page 31 Remove the front mounting bolt and disconnect the fuel tank overflow line. Disconnect the fuel line from the fuel valve. 7/22/2002 Sherco Assembly Instructions...
- Page 32 Remove the fuel tank. 7/22/2002 Sherco Assembly Instructions...
- Page 33 Carefully remove the radiator cap, you can remove it without removing the ignition coil. Check the coolant level. It should cover the fins and not be up in the filler neck of the radiator. 7/22/2002 Sherco Assembly Instructions...
- Page 34 If you need to add coolant we recommend Maxima premixed coolant 50/50 mixture. Also shown are the Maxima gear oil and 2 stroke oil we recommend. These items are available from Ryan Young Products. 7/22/2002 Sherco Assembly Instructions...
- Page 35 Carefully reinstall the radiator cap. David uses a screw driver as a lever to tighten the radiator cap. 7/22/2002 Sherco Assembly Instructions...
- Page 36 Fuel Tank Installation Reinstall the fuel tank. Install and tighten the front mounting bolt. Reattach the fuel tank overflow hose. 7/22/2002 Sherco Assembly Instructions...
- Page 37 Reconnect the fuel line. 7/22/2002 Sherco Assembly Instructions...
- Page 38 Rear Fender Installation Remove the 2 fender mounting screws. Route the tail light harness as shown. 7/22/2002 Sherco Assembly Instructions...
- Page 39 Connect the tail light harness to the chassis harness. Install the fender, note that the lip on the fender overlaps the lip on the air box. 7/22/2002 Sherco Assembly Instructions...
- Page 40 This picture shows the installed fender, note how the lip on the fender fits over the lip on the air box. 7/22/2002 Sherco Assembly Instructions...
- Page 41 Rear Fender Installation Continued. Install and tighten the front fender (rear fuel tank) bolt. Install and tighten the 2 rear fender mounting bolts 7/22/2002 Sherco Assembly Instructions...
- Page 42 The foot peg mounting bolts are tightened at the factory so that they are in an upright fixed position for shipping. Loosen the bolts just enough to allow the foot pegs to move freely. 7/22/2002 Sherco Assembly Instructions...
- Page 43 The Finished Product! The bike should look like this except it should have the headlight installed, we removed the headlight while taking pictures for another project. As pictured the bike is ready for competition. 7/22/2002 Sherco Assembly Instructions...
- Page 44 Finishing Touches David Goes Around The Bike and Tightens all of These Bolts David is shown tightening the rear sprocket bolts. In this picture he is tightening the rear brake caliper bolts. 7/22/2002 Sherco Assembly Instructions...
- Page 45 Here he is tightening the front brake caliper bolts. Tighten the fork brace bolts. 7/22/2002 Sherco Assembly Instructions...
- Page 46 Here we see David tightening the triple clamp bolts. 7/22/2002 Sherco Assembly Instructions...
- Page 47 David also tightens the exhaust flange bolts. 7/22/2002 Sherco Assembly Instructions...
- Page 48 We also suggest that you use a good brand of anti seize on all bolts that are threaded into aluminum. If you have any questions please call Ryan Young Products on 1-800-607-8742. 7/22/2002 Sherco Assembly Instructions...