
Related Manuals for Intel P4000M


Summary of Contents for Intel P4000M
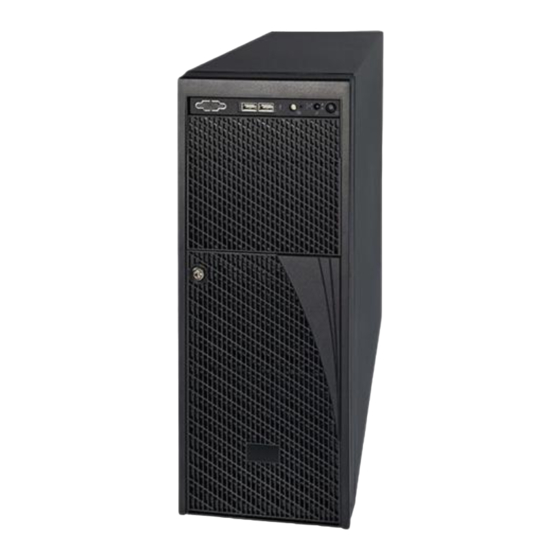
- Page 1 ® Intel Server Chassis P4000M Family Service Guide ® A Guide for Technically Qualified Assemblers of Intel identified Subassemblies/Products Order Number: G30559-005...
- Page 2 ® Copies of documents which have an order number and are referenced in this document, or other Intel literature, may be obtained by calling 1-800-548-4725, or go to: http://www.intel.com/design/literature.
-
Page 3: Safety Information
Wichtige Sicherheitshinweise Lesen Sie zunächst sämtliche Warnund Sicherheitshinweise in diesem Dokument, bevor Sie eine ® der Anweisungen ausführen. Beachten Sie hierzu auch die Sicherheitshinweise zu Intel ® Serverplatinen und Servergehäusen auf der Intel Server Deployment Toolkit 3.0 CD oder unter http://www.intel.com/support/motherboards/server/sb/cs-010770.htm. - Page 4 Take care to grip with, but not squeeze, the pliers or other tool you use to remove a jumper, or you may bend or break the pins on the board. ® Intel Server Chassis P4000M Service Guide...
-
Page 5: Preface
® and instructions on how to add and replace components on the Intel Server Chassis P4000M family. For the latest version of this manual, refer to http://www.intel.com/p/en_US/support. -
Page 6: Table Of Contents
Installing 4x3.5'' Hotswap Hard Drive Cage with Backplane ......... 30 Removing and Installing 4x3.5'' Hotswap Backplane ............. 32 Removing 4x3.5'' Hotswap Backplane ..............32 Installing 4x3.5” Hotswap Backplane ..............33 Removing and Installing 8x3.5'' Hotswap Hard Drive Cage Assembly ......34 ® Intel Server Chassis P4000M Service Guide... - Page 7 Installing and/or Removing a Server/Workstation Board ..........79 Connecting and Disconnecting Cables to or from Server Workstation Board ..... 80 Connecting Cables to Server/Workstation Board ..........80 Removing Cables from Server/Workstation Board ..........80 ® Intel Server Chassis P4000M Service Guide...
- Page 8 Extent of Limited Warranty ....................96 Warranty Limitations and Exclusions ................96 Limitations of Liability ....................97 How to Obtain Warranty Service ..................97 Telephone Support ....................97 Returning a Defective Product ................97 ® viii Intel Server Chassis P4000M Service Guide...
- Page 9 Figure 1. Chassis Front View for Fixed Hard Drive ..............1 Figure 2. Chassis Front View for Hotswap Hard Drive ............1 ® Figure 3. Internal Chassis View of Intel Server Chassis P4000M with Fixed Power Supply, Fixed Hard Drives, Fixed System Fans ............... 3 ®...
- Page 10 Figure 99. Removing Power Supply Filler Panel ..............61 Figure 100. Installing Additional Hotswap Power Supply Module ........61 Figure 101. Removing Hotswap Power Supply Module from Chassis ........ 62 Figure 102. Installing Hotswap Power Supply Module into Chassis ........62 ® Intel Server Chassis P4000M Service Guide...
- Page 11 Figure 127. Removing the Alternate Serial Port Knockout ..........77 Figure 128. Installing the Alternate Serial Port Knockout ............ 77 Figure 130. Removing the Expander card ................79 Figure 131. RMM4 knockout ....................81 Figure 132. Mechanical Locks ....................82 ® Intel Server Chassis P4000M Service Guide...
- Page 12 List of Tables ® Table 1. Intel Server Chassis P4000M family Base Features ..........2 Table 2. Front Panel LED Functionality ................... 7 Table 3. 460-W Power Supply Output Voltages ..............83 Table 4. 550-W Power Supply Output Voltages ..............84 Table 5.
- Page 13 List of Tables <This page is intentionally left blank.> ® Intel Server Chassis P4000M Service Guide xiii...
-
Page 15: Server Chassis Features
Server Chassis Features Server Chassis Features ® This chapter briefly describes the main features of the Intel Server Chassis P4000M family. This chapter provides a list of the server chassis features, and diagrams showing the location of important components and connections on the server chassis. -
Page 16: Chassis Features
Server Chassis Features Chassis Features ® Table 1. Intel Server Chassis P4000M family Base Features Feature Description 17.2'' high Dimensions 6.8'' wide 25'' deep (without bezel: 24.5'') Up to eight fixed HDDs Hard Drives Options 4x 3.5'' SATA/SAS Hot Swap Hard Drive Bays ... -
Page 17: Component Identification
M. Fixed Hard Drive Carrier Tray N. PCI Zone System Fan (Fan 1) O. PCI card retainer ® Figure 3. Internal Chassis View of Intel Server Chassis P4000M with Fixed Power Supply, Fixed Hard Drives, Fixed System Fans ® Intel Server Chassis P4000M Service Guide... -
Page 18: Figure 4. Internal Chassis View Of Intel Server Chassis P000M With Hotswap Power Supply, Hotswap Hard Drives And Hotswap System Fans
O. Hotswap System Fan 2 8x3.5'' Hotswap HDD Cage Q. Hotswap System Fan 1 R. PCI card retainer ® Figure 4. Internal Chassis View of Intel Server Chassis P000M with Hotswap Power Supply, Hotswap Hard Drives and Hotswap System Fans ® Intel... -
Page 19: Hot Swap Hard Drive Bay Options And Hdd Numbering
Server Chassis Features Hot Swap Hard Drive Bay Options and HDD Numbering Figure 5. 4x3.5'' Hotswap Drive Cage Figure 6. 8x3.5'' Hotswap Drive Cage ® Intel Server Chassis P4000M Service Guide... -
Page 20: Front Panel
Figure 8. Two 8x2.5'' Hotswap Drive Cages Front Panel ® The Intel Server Chassis P4000M family uses a common front control panel. The layout of the front control panel is as shown in below figure. ® Intel Server Chassis P4000M Service Guide... -
Page 21: Figure 9. Front Panel Controls And Indicators
Activity/Link Green Blink LAN access. ® (LAN 1-2 for Intel Server Board Idle S1200BT) Blue Front panel chassis ID button pressed. Blue Blink Unit selected for identification via software. Chassis Identification No identification. ® Intel Server Chassis P4000M Service Guide... -
Page 22: Back Panel
Serial-B Port (Optional) Power Connector Kensington* Cable Lock Mounting Hole Hotswap Power Supply Padlock Loop IO Connectors RMM4 NIC Port (Optional) RMM4 NIC/1394B Port/(Optional) Figure 11. Back Panel Layout (with Hotswap Power Supply) ® Intel Server Chassis P4000M Service Guide... -
Page 23: Hotswap Sas/Sata Backplane
Hard Drive Backplane A. I C_In Connectors B. SATA/SAS Cable Connectors C. Power Connectors D. SATA 6X Mode Connector E. I C_Out Connector F. SGPIO Connector Figure 12. 4x3.5'' HSBP Board (Rear View) ® Intel Server Chassis P4000M Service Guide... -
Page 24: 8X3.5'' Hard Drive Backplane
Figure 13. 4x3.5'' HSBP Board Layout (Front View) 8x3.5'' Hard Drive Backplane A. SATA 6X Mode B. Power Connectors C. MINI_SAS Connectors D. I C Connector Figure 14. 8x3.5'' HSBP Board (Rear View) ® Intel Server Chassis P4000M Service Guide... -
Page 25: 8X2.5'' Hard Drive Backplane
E. SATA/SAS Hotswap Drive Connectors Figure 15. 8x3.5'' HSBP Board (Front View) 8x2.5'' Hard Drive Backplane A. I C_OUT Connector B. MINI_SAS Connectors C_IN Connector D. Power Connectors Figure 16. 8x2.5'' HSBP Board (Front View) ® Intel Server Chassis P4000M Service Guide... -
Page 26: Figure 17. 8X3.5'' Hsbp Board (Front View)
Server Chassis Features E. SATA/SAS Hotswap Drive Connectors Figure 17. 8x3.5'' HSBP Board (Front View) ® Intel Server Chassis P4000M Service Guide... -
Page 27: Hardware Installations And Upgrades
® The Intel Server Chassis P4000M family must be operated with the top cover in place to ensure proper cooling. You will need to remove the top cover to add or replace components inside of the platform. Before removing the top cover, power down the server and unplug all peripheral devices and the AC power cable. -
Page 28: Installing The Chassis Cover
Slide the chassis cover on the chassis (see letter A) Latch the cover securely to the chassis. Secure the chassis cover with the screws (see letter B). Figure 19. Installing the Chassis Cover ® Intel Server Chassis P4000M Service Guide... -
Page 29: Removing And Installing The Front Bezel (Pedestal Only)
If the bezel assembly does not immediately disconnect from the chassis, tap the left-hand side of the bezel assembly to disengage the bezel hooks on the right-hand side of the chassis. Figure 20. Removing the Front Bezel ® Intel Server Chassis P4000M Service Guide... -
Page 30: Installing The Front Bezel (Pedestal Only)
Latch the two plastic tabs (see letter B) on the left side of the bezel assembly to the chassis. Figure 21. Installing the Front Bezel Converting the Pedestal Chassis to Rack Mount Chassis Remove the front panel module. Figure 22. Removing the Front Panel ® Intel Server Chassis P4000M Service Guide... -
Page 31: Figure 23. Removing The Fillers
Remove the fillers for 5.25” drive slots if need. Figure 23. Removing the Fillers Remove the cosmetic top board. Figure 24. Removing the Top Board Install the front panel module. Figure 25. Installing the Front Panel ® Intel Server Chassis P4000M Service Guide... -
Page 32: Figure 26. Installing The Drive (Optional)
Install the 5.25” drive if need. Figure 26. Installing the Drive (optional) Install the rack bezel frame NOTE The rack bezel frame is different from the pedestal bezel frame). Figure 27. Installing the Rack Bezel frame ® Intel Server Chassis P4000M Service Guide... -
Page 33: Figure 28. Installing The Rack Mount Handles
Install the rack mount handles. Figure 28. Installing the Rack Mount handles Install the rack bezel (optional). Figure 29. Installing the Rack Bezel Lock the front bezel key. Figure 30. Locking the Front Bezel key ® Intel Server Chassis P4000M Service Guide... -
Page 34: Installing And/Or Removing Airduct
Remove the chassis cover. For instructions, see “Removing the Chassis Cover”. Install the airduct by matching the alignment tabs on airduct and the alignment holes on chassis bracket. Figure 31. Installing the Airduct ® Intel Server Chassis P4000M Service Guide... -
Page 35: Removing The Airduct
® This procedure applies only to the Intel Server Chassis P4000M family with fixed fan configuration. Removing the Fixed Fan Observe the safety and ESD precautions at the beginning of this book. Power down the server and unplug all peripheral devices and the AC power cable. -
Page 36: Installing The Fixed Fan
The fan with blue fan cable connector should be installed in fan2 bracket; the fan with white fan connector should be installed in fan 1 bracket. Figure 34. Inserting the fan cable in the corresponding fan bracket ® Intel Server Chassis P4000M Service Guide... -
Page 37: Removing And Installing The Hotswap Fan
NOTE ® This procedure applies only to the Intel Server Chassis P4000M family with hotswap fan configuration. Removing the Hotswap Fan Observe the safety and ESD precautions at the beginning of this book. Remove the chassis cover. For instructions, see “Removing the Chassis Cover”. -
Page 38: Installing The Hotswap Fan
® This procedure applies only to the Intel Server chassis P4000M family with fixed HDD configuration. Removing the Fixed HDD EMI Shield Observe the safety and ESD precautions at the beginning of this book. Power down the server and unplug all peripheral devices and the AC power cable. -
Page 39: Installing The Fixed Hdd Emi Shield
While pressing the clip (see letter B), slide the EMI Shield downwards until the latches on the EMI Shield are engaged with the chassis (see letter C). Figure 39. Installing the Fixed HDD EMI Shield ® Intel Server Chassis P4000M Service Guide... -
Page 40: Removing And Installing Fixed Hard Drive(S)
NOTE ® This procedure applies only to the Intel Server Chassis P4000M family with fixed HDD configuration. Removing Fixed Hard Drive(s) Observe the safety and ESD precautions at the beginning of this book. Power down the server and unplug all peripheral devices and the AC power cable. -
Page 41: Installing Fixed Hard Drive(S)
Remove the chassis cover. For instructions, see “Removing the Chassis Cover”. Remove the front bezel if it is installed. For instructions, see “Removing the Front Bezel”. Remove the Fixed HDD EMI shield. For instructions, see “Removing the Fixed HDD EMI Shield”. ® Intel Server Chassis P4000M Service Guide... -
Page 42: Figure 44. Removing Fixed Hard Drive
Pull out the HDD carrier tray. Figure 44. Removing Fixed Hard Drive Secure the 3.5” or 2.5” HDD on the HDD carrier tray with screws. Figure 45. Securing the 3.5” HDD on Fixed HDD Carrier Tray ® Intel Server Chassis P4000M Service Guide... -
Page 43: Removing And Installing 4X3.5" Hotswap Hard Drive Cage Assembly
NOTE ® This procedure applies only to the Intel Server Chassis P4000M family with 4x3.5'' hotswap hard disk drive cage configuration. Removing 4x3.5” Hotswap Hard Drive Cage with Backplane Observe the safety and ESD precautions at the beginning of this book. -
Page 44: Installing 4X3.5'' Hotswap Hard Drive Cage With Backplane
Remove the chassis cover. For instructions, see “Removing the Chassis Cover”. Remove the front bezel if it is installed. For instructions, see “Removing the Front Bezel”. Install the hotswap EMI HDD shield under the hotswap cage. ® Intel Server Chassis P4000M Service Guide... -
Page 45: Figure 50. Installing The Emi Shield
RAID controller card for instructions on connecting backplane cables to your server board or RAID controller card. Connect data cables (letter A). Connect an I2C_IN cable (letter B). Connect an SGPIO cable (letter C). ® Intel Server Chassis P4000M Service Guide... -
Page 46: Removing And Installing 4X3.5'' Hotswap Backplane
Remove the 4x3.5'' Hotswap Hard drives cage. For instructions, see “Removing 4x3.5'' Hotswap Hard Drive Cage”. Remove the screw on the backplane (see letter A). Push the backplane (see letter B) and remove the backplane from the chassis (see letter C). ® Intel Server Chassis P4000M Service Guide... -
Page 47: Installing 4X3.5" Hotswap Backplane
Figure 54. Installing 4x3.5” Hotswap Backplane Install the 4x3.5'' Hotswap Hard drives cage. For instructions, see “installing 4x3.5'' Hotswap Hard Drive Cage”. Install the front bezel. For instructions, see “Installing the Front Bezel”. ® Intel Server Chassis P4000M Service Guide... -
Page 48: Removing And Installing 8X3.5'' Hotswap Hard Drive Cage Assembly
NOTE ® This procedure applies only to the Intel Server Chassis P4000M family with 8x3.5'' hotswap hard disk drive cage configuration. Removing 8x3.5'' Hotswap Hard Drive Cage Assembly Observe the safety and ESD precautions at the beginning of this book. -
Page 49: Installing 8X3.5'' Hotswap Hard Drive Cage Assembly
RAID controller card for instructions on connecting backplane cables to your server board or RAID controller card. Connect an I C cable (letter A). Connect Mini SAS data cables (letter B). Connect power cable (letter C). ® Intel Server Chassis P4000M Service Guide... -
Page 50: Removing And Installing 8X3.5'' Hotswap Backplane
Removing and Installing 8x3.5'' Hotswap Backplane NOTE ® This procedure applies only to the Intel Server Chassis P4000M family with 8x3.5'' hotswap hard disk drive cage configuration. Removing 8x3.5'' Hotswap Backplane Observe the safety and ESD precautions at the beginning of this book. -
Page 51: Installing 8X3.5'' Hotswap Backplane
Attach the backplane to the back side of the hotswap drive cage, and make sure the hooks on the cage are inserted in the backplane holes (see letter A). Push the backplane (see letter B) and secure the backplane with the screw (see letter C). Figure 59. Installing 8x3.5 Hotswap Backplane ® Intel Server Chassis P4000M Service Guide... -
Page 52: Removing And Installing 8X2.5'' Hotswap Hard Drive Cage Assembly
NOTE ® This procedure applies only to the Intel Server Chassis P4000M family with 8x2.5'' hotswap hard disk drive cage configuration. Removing 8x2.5'' Hotswap Hard Drive Cage Assembly Observe the safety and ESD precautions at the beginning of this book. -
Page 53: Installing 8X2.5'' Hotswap Hard Drive Cage Assembly
Connect an I2C_IN cable (letter A). Connect MiniSAS data cables (letter B). There are multiple MiniSAS connectors on the backplane. The figure show connecting to one of them. Connect them as needed. Connect power cable (letter C). ® Intel Server Chassis P4000M Service Guide... -
Page 54: Removing And Installing The Hotswap Hdd Emi Shield
Removing and Installing the Hotswap HDD EMI Shield NOTE ® This procedure applies only to the Intel Server Chassis P4000M family with 8x2.5'' hotswap hard disk drive cage configuration. Removing the Hotswap HDD EMI Shield Observe the safety and ESD precautions at the beginning of this book. -
Page 55: Installing The Hotswap Hdd Emi Shield
While pressing the EMI Shield, slide the EMI Shield downwards until the latches on the EMI Shield are engaged with the chassis (see letter B). Figure 64. Installing the Hotswap HDD EMI Shield ® Intel Server Chassis P4000M Service Guide... -
Page 56: Removing And Installing Second 8X2.5'' Hotswap Hard Disk Drive Cage Assembly
Disk Drive Cage Assembly NOTE ® This procedure applies only to the Intel Server Chassis P4000M family with two 8x2.5'' hotswap hard disk drive cage configuration. Removing Second 8x2.5'' Hotswap Hard Disk Drive Cage Assembly Observe the safety and ESD precautions at the beginning of this book. -
Page 57: Installing Second 8X2.5'' Hotswap Hard Disk Drive Cage Assembly
C cable to the I2C_OUT connector of the bottom backplane and the I2C_IN connector of the top backplane (see letter D). Install the front bezel. For instructions, see “Installing the Front Bezel (Pedestal Only)”. ® Intel Server Chassis P4000M Service Guide... -
Page 58: Removing And Installing 8X2.5'' Hotswap Backplane
Remove the 8x2.5'' Hotswap Hard drives cage. For instructions, see “Removing 8x2.5'' Hotswap Hard Drive Cage Assembly”. Remove the screw on the backplane (see letter A). Push the backplane (see letter B) and remove the backplane from the cage (see letter C). ® Intel Server Chassis P4000M Service Guide... -
Page 59: Installing 8X2.5'' Hotswap Backplane
Attach the backplane to the back side of the hotswap drive cage, and make sure the hooks on the cage are inserted in the backplane holes (see letter A). Push the backplane (see letter B) and secure the backplane with the screw (see letter C). Figure 69. Installing 8x2.5 Hotswap Backplane ® Intel Server Chassis P4000M Service Guide... -
Page 60: Installing Hotswap Hard Drive
NOTE ® This procedure applies only to the Intel Server Chassis P4000M family with 3.5'' hotswap hard disk drive cage configuration. Open the Hotswap HDD door Remove the drive carrier by pressing the green button and opening the lever (see letter A). Then slide the carrier out (see letter B). -
Page 61: Figure 71. Removing The 3.5" Hdd Interface Bracket From Carrier
Install the 3.5" hard disk drive using the same four screws as shown. Make sure the connector end of the drive matches the backplane connector. Figure 72. Installing the 3.5" HDD into the Carrier ® Intel Server Chassis P4000M Service Guide... -
Page 62: Installing 2.5" Hotswap Hard Disk Drive In 3.5'' Hdd Carrier
Installing 2.5" Hotswap Hard Disk Drive in 3.5'' HDD Carrier Remove the four screws securing the 3.5" HDD interface bracket and remove the 3.5" HDD interface bracket. Figure 74. Removing the 3.5" HDD interface bracket from Carrier ® Intel Server Chassis P4000M Service Guide... -
Page 63: Figure 75. Breaking Off The Tab On The Bracket
Figure 75. Breaking off the tab on the bracket Install the 2.5" Hard Drive Interface Bracket from top. Secure the bracket using the same screws as shown. Figure 76. Installing 2.5" HDD interface bracket into Carrier ® Intel Server Chassis P4000M Service Guide... -
Page 64: Figure 77. Installing The 2.5" Hdd Into Carrier
Slide the 2.5" HDD into the bracket to align the screw holes with the right and left rail (See figure D). Secure the hard disk drive using the screws for the 2.5'' HDD (See figure E). Figure 77. Installing the 2.5" HDD into carrier ® Intel Server Chassis P4000M Service Guide... -
Page 65: Installing 2.5" Hotswap Hard Disk Drive In 2.5'' Hdd Carrier
Disengage the plastic retention device from the HDD carrier (see letter D). Remove the plastic retention device from the 2.5'' HDD carrier (see letter E). Figure 79. Removing the plastic retention device from Carrier ® Intel Server Chassis P4000M Service Guide... -
Page 66: Figure 80. Installing The 2.5'' Hdd In Carrier
With the lever open, insert the hard disk drive assembly into the cage opening and push until the locking lever engaged (see letter G). Push in the lever to lock it into place (see letter H). Figure 81. Installing the 2.5" HDD into the Chassis 10. Close the hotswap HDD door. ® Intel Server Chassis P4000M Service Guide... -
Page 67: Installing And Removing A Dvd Or Cd-Rom Drive
(see letter D). Figure 83. Installing DVD or CD-ROM Drive Connect the DVD or CD-ROM power cable. See your server board documents for data cable connection. ® Intel Server Chassis P4000M Service Guide... -
Page 68: Removing A Dvd Or Cd-Rom Drive
DVD or CD-ROM drive (see letter C). Figure 84. Removing DVD or CD-ROM Drive If not replacing with another drive, reinsert an EMI shield into chassis (see below illustration). Figure 85. Re-inserting Empty EMI Shield ® Intel Server Chassis P4000M Service Guide... -
Page 69: Installing Pci Add-In Board(S)
Rotate the PCI card retainer all the way up (see letter C). Figure 87. Rotate the PCI card retainer From within the chassis, press open the back panel PCI add-in board retention device (see letter D). ® Intel Server Chassis P4000M Service Guide... -
Page 70: Figure 88. Open The Back Panel Pci Add-In Board Retention Device
Installing a Double Width Card Extension guiding slot on the double width card fixture.See ““ Bracket” ” for additional information on using double width cards. It is on page 60. Figure 89. Installing PCI Add-in Board ® Intel Server Chassis P4000M Service Guide... -
Page 71: Figure 90. Closing The Pci Card Retention Device
14. Install the air duct if it is removed. For instructions, see “Installing the Airduct”. 15. Install the chassis cover. For instructions, see “Installing the Chassis Cover”. 16. Plug all peripheral devices and the AC power cable into the server. 17. Power up the server. ® Intel Server Chassis P4000M Service Guide... -
Page 72: Installing A Double Width Card Extension Bracket
Users need to install the double width card extension bracket to make a non-full length double width card to be full length, in order to take advantage of the double width card bracket. Figure 93. Installing the double width card extension bracket ® Intel Server Chassis P4000M Service Guide... -
Page 73: Removing And Installing The Fixed Power Supply
Remove the air duct if it is installed. For instructions, see “Installing the Airduct”. Disconnect all internal power cables from chassis components and server board. Rotate the power supply locking device counter-clockwise (see letter A) and remove the fixed power supply (see letter B). ® Intel Server Chassis P4000M Service Guide... -
Page 74: Installing The Fixed Power Supply
Install the air duct. For instructions, see “Installing the Airduct”. Install the chassis cover. For instructions, see “Installing the Chassis Cover”. Plug all peripheral devices and the AC power cable into the server. Power up the server. ® Intel Server Chassis P4000M Service Guide... -
Page 75: Installing An Additional Hotswap Power Supply Module
Figure 99. Removing Power Supply Filler Panel Insert the power supply module into the power supply cage and push all the way until it clicks into place. Figure 100. Installing Additional Hotswap Power Supply Module ® Intel Server Chassis P4000M Service Guide... -
Page 76: Replacing A Hot Swap Power Supply Module
Figure 101. Removing Hotswap Power Supply Module from Chassis Insert new power supply module into the power supply cage and push all the way until it clicks into place. Figure 102. Installing Hotswap Power Supply Module into Chassis ® Intel Server Chassis P4000M Service Guide... -
Page 77: Replacing The Power Distribution Board For 460W/750W Psus
Figure 103. Removing Hotswap Power Supply Module from Chassis Loosen screws securing the bracket with power distribution board to the chassis (see letter A and B). Figure 104. Loosening the Bracket with Power Distribution Board from Chassis ® Intel Server Chassis P4000M Service Guide... -
Page 78: Figure 105. Removing The Bracket With Power Distribution Board From Chassis
Figure 105. Removing the Bracket with Power Distribution Board from Chassis Loosen screws securing the power distribution board to the bracket, and then remove it from the bracket (see letter D). Figure 106. Removing the Power Distribution Board from Bracket ® Intel Server Chassis P4000M Service Guide... -
Page 79: Figure 107. Sliding The New Power Distribution Board In Bracket
10. Slide the new power distribution board to the bracket (see letter E) and secure the new power distribution board to the bracket using the same screws (see letter F). Figure 107. Sliding the New Power Distribution Board in Bracket Figure 108. Securing the New Power Distribution Board in Bracket ® Intel Server Chassis P4000M Service Guide... -
Page 80: Figure 109. Sliding The Bracket Into Power Supply Cage
(see letter “H”). And then secure the bracket with the screws (see letter “I” and “J”). Figure 110. Securing the Bracket into Power Supply Cage ® Intel Server Chassis P4000M Service Guide... -
Page 81: Figure 111. Installing Hotswap Power Supply Module Into Chassis
15. Reinstall the air duct. For instructions, see “Installing the Airduct”. 16. Re-install the chassis cover. For instructions, see “Installing the Chassis Cover’. 17. Plug all peripheral devices and the AC power cable into the server. 18. Power up the server. ® Intel Server Chassis P4000M Service Guide... -
Page 82: Replacing The Power Distribution Board For 1200-Wpsus
See letter A. Push the bracket forward to release the latch which secure the bracket then pull out the bracket from the chassis. See letter B. The figure shows the different PDB locations for 460-W/750-W PSU and 1200-W PSU. Figure 112. Removing the PDB for 1200-W PSU ® Intel Server Chassis P4000M Service Guide... -
Page 83: Figure 113. Installing The Pdb For 1200-W Psu
See letter A. Then secure the bracket with the screws. See letter B. The figure shows the different PDB locations for 460-W/750-W PSU and 1200-W PSU. Figure 113. Installing the PDB for 1200-W PSU ® Intel Server Chassis P4000M Service Guide... -
Page 84: Removing And Installing The Top Cosmetic Cover
Then slide the top cosmetic cover forward until the latches on the top cosmetic cover are engaged with the chassis. Figure 115. Installing the Top Cosmetic Cover ® Intel Server Chassis P4000M Service Guide... -
Page 85: Removing And Installing The Chassis Feet
® Do not install feet on your Intel Server Chassis P4000M family if it is to be installed in a rack. Only install feet on a pedestal-configured chassis. Observe the safety and ESD precautions at the beginning of this book. -
Page 86: Removing And Installing The Front Panel Tray
Remove the front bezel if it is installed. For instructions, see “Removing the Front Bezel”. Remove the air duct if it is installed. Disconnect the front panel cable, USB cable from the server board. ® Intel Server Chassis P4000M Service Guide... -
Page 87: Figure 118. Disconnecting The Cables From The Server Board
Do not slide the front panel out far from the front of the chassis before you disconnect the instruction cable from the front panel board. Figure 119. Sliding the Front Panel Tray out from the Chassis ® Intel Server Chassis P4000M Service Guide... -
Page 88: Installing The Front Panel Tray
Remove the air duct if it is installed. Attach the front panel cable and the chassis intrusion cable (see Letter A) to the front panel board. Figure 121. Connecting the Cables to the Front Panel Board ® Intel Server Chassis P4000M Service Guide... -
Page 89: Figure 122. Installing The Front Panel Tray In Chassis
10. Install the air duct based on board requirement. 11. Install the chassis cover. For instructions, see “Installing the Chassis Cover”. 12. Plug all peripheral devices and the AC power cable into the server. 13. Power up the server. ® Intel Server Chassis P4000M Service Guide... -
Page 90: Replacing The Front Panel Board
Attach the new front panel board in the front panel tray (see letter A) and secure the new front panel board with the screw (see letter B). Figure 126. Installing the New Front Panel Board ® Intel Server Chassis P4000M Service Guide... -
Page 91: Installing Alternate Serial Port
Figure 127. Removing the Alternate Serial Port Knockout Install the serial port on the rear panel of the chassis. Connect the cable to the Serial B Connector on your motherboard. Figure 128. Installing the Alternate Serial Port Knockout ® Intel Server Chassis P4000M Service Guide... -
Page 92: Installing And/Or Removing A Expander Card
Remove the fans. For instructions, see “Removing the Fixed Fan” or “Removing the Hotswap Fans”. Remove the Fixed HDDs or Hotswap drive cages. For instructions, see “Remove Fixed Hard Drives”, or “Remove 8x3.5 Hotswap Drive Cage Assemble”, or “Remove 8x2.5 Hotswap Drive Cage Assemble”. ® Intel Server Chassis P4000M Service Guide... -
Page 93: Installing And/Or Removing A Server/Workstation Board
Use the mounting screws, bumpers and standoffs (if necessary) that came with your chassis to secure the server/workstation board to the chassis. Make sure the server/workstation board is properly seated and then tighten the ® Intel Server Chassis P4000M Service Guide... -
Page 94: Connecting And Disconnecting Cables To Or From Server Workstation Board
Rack-mounted Systems ® ® Your Intel Server Chassis P4000M family can be mounted into a rack. Intel provides a tool-less rail kit and a cable management arm to mount this server chassis into a rack. When installing the ® chassis into a rack, Intel recommends you install systems from the bottom of the rack to the top. -
Page 95: Intel ® Remote Management Module 4
It also provides Remote KVM Redirection and USB Media Redirection allowing USB devices attached to the remote system to be used on the managed server. ® ® Intel Server Chassis P4000M family provide two Intel Remote Management Module 4 ® ® knockout. For instructions on installing the Intel Remote Management Module 4, see Intel Remote Management Module 4 User Guide. -
Page 96: Mechanical Locks
Mechanical Locks All configurations of the server chassis can support the installation of a padlock loop (see letter A in the following figure) at the rear of the chassis. Figure 132. Mechanical Locks ® Intel Server Chassis P4000M Service Guide... -
Page 97: Technical Reference
Technical Reference Technical Reference Power Supply Specification ® The power supply specifications for your Intel Server Chassis P4000M family depend upon the configuration of chassis you purchased. Below power supply configurations are available: 460-W hotswap power supply 550-W fixed power supply ... -
Page 98: 750-W Hotswap Power Supply Input Voltage
200-240V at 50/60 Hz; 10A max. 1200-W Hotswap Power Supply Output Voltages Table 6. 1200-W Power Supply Output Voltages Parameter Tolerance UNITS +12V - 5%/+5% +11.40 +12.00 +12.60 +12V stby - 5%/+5% +11.40 +12.00 +12.60 ® Intel Server Chassis P4000M Service Guide... -
Page 99: System Environmental Requirements
Current (maximum) at voltage level +3.3V + 5V -5 V +12 V -12 V 5V Standby Device Baseboard, Front Panel Board and Fans Processor(s) Memory 3.5-inch Diskette Drive CD-ROM Drive Second 5.25-inch Device ® Intel Server Chassis P4000M Service Guide... -
Page 100: Table 9. Power Usage Worksheet 2
________ W (+5 V) X (______ A) ________W (+12 V) X (______ A) ________ W (–12 V) X (______ A) ________ W (5 V standby) X (______ A) ________ W Total Combined Wattage ® Intel Server Chassis P4000M Service Guide... -
Page 101: Appendix A: Regulatory And Compliance Information
Appendix A: Regulatory and Compliance Information Appendix A: Regulatory and Compliance Information Please refer to the Server Products Regulatory and Safety document for the product regulatory compliance reference. The document can be downloaded from http://www.intel.com/support/motherboards/server/. ® Intel Server Chassis P4000M Service Guide... -
Page 102: Appendix B: Safety Information
Appendix B: Safety Information Appendix B: Safety Information Please refer to the Server Products Regulatory and Safety document for the Safety Information. The document can be downloaded from http://www.intel.com/support/motherboards/server/. ® Intel Server Chassis P4000M Service Guide... -
Page 103: Appendix C: Installation/Assembly Safety Instructions
Appendix C: Installation/Assembly Safety Instructions Appendix C: Installation/Assembly Safety Instructions Please refer to the Server Products Regulatory and Safety document for the Installation/Assembly Safety Instructions. The document can be downloaded from http://www.intel.com/support/motherboards/server/. ® Intel Server Chassis P4000M Service Guide... -
Page 104: Appendix D: Getting Help
24x7 support when you need it to get the ® latest and most complete technical support information on all Intel Enterprise Server and Storage Platforms. Information available at the support site includes: Latest BIOS, firmware, drivers and utilities. -
Page 105: Appendix E: Intel Server Issue Report Form
Has the latest BMC/mBMC been tried? (Yes/No): Has the latest IMM BMC been tried? (Yes/No): Has the latest RMM Firmware been tried? (Yes/No): Has the latest FRU/SDR been tried? (Yes/No): Has the latest HSC been tried? (Yes/No): ® Intel Server Chassis P4000M Service Guide... - Page 106 Add-in adapters (Example: NICs, Management Adapters, Serial Expansion Cards, PCI- Express* Adapters, RAID Controllers, SCSI Controllers, and so on): Type Slot Manufacturer Model Firmware Other third part hardware (Example: Example: KVM, Chassis, and so on): Description/Use Manufacturer Model Firmware ® Intel Server Chassis P4000M Service Guide...
- Page 107 RAID driver version: Has the latest RAID driver been tried? (Yes/No): RAID volumes configuration (disks and RAID level): RAID volume use (Boot device/Data Volume): Is BBU (Battery Backup Unit) installed? (Yes/No): BBU part number ® Intel Server Chassis P4000M Service Guide...
- Page 108 ® Appendix E: Intel Server Issue Report Form Detailed description of issue: Troubleshooting tried: Steps to replicate the issue: ® Intel Server Chassis P4000M Service Guide...
- Page 109 Server Issue Report Form Issue impact statements: ® Do you have any potential Intel system, or component purchases that this issue is holding up? If yes, please provide a brief description below. Do you have systems already purchased that are not being delivered to your customers because of this issue? If yes, please provide a brief description below.
-
Page 110: Appendix F: Warranty
Warranty Limitations and Exclusions These warranties replace all other warranties, expressed or implied including, but not limited to, the ® implied warranties of merchantability and fitness for a particular purpose. Intel makes no expressed ® warranties beyond those stated here. Intel disclaims all other warranties, expressed or implied including, without limitation, implied warranties of merchantability and fitness for a particular purpose. -
Page 111: Limitations Of Liability
How to Obtain Warranty Service ® To obtain warranty service for this Product, you may contact Intel or your authorized distributor. North America and Latin America: To obtain warranty repair for the product, please go to the following Web site to obtain instructions: http://www.intel.com/support/motherboards/warrantysupport.htm.