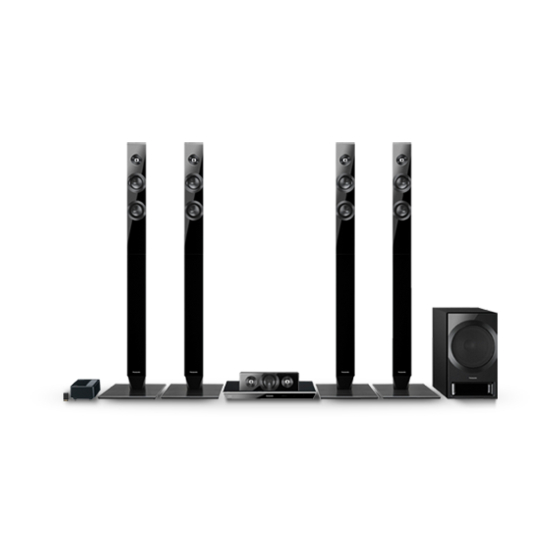
Panasonic SC-BTT880 Operating Instructions Manual
Blu-ray disc home theater sound system
Hide thumbs
Also See for SC-BTT880:
- Quick start manual (2 pages) ,
- Basic operating instructions manual (85 pages) ,
- Operating instructions manual (52 pages)
Table of Contents
Advertisement
Blu-ray Disc
Thank you for purchasing this product.
Please read these instructions carefully before using this product, and save this manual for future use.
GN
GS
GA
Home Theater Sound System
TM
Unless otherwise indicated, illustrations in these operating instructions are of SC-BTT880.
Firmware updates
Panasonic is constantly improving the unit's firmware to ensure that our
customers are enjoying the latest technology.
Panasonic recommends updating your firmware as soon as you are
notified.
For details, refer to "Firmware updates" (
http://panasonic.jp/support/global/cs/ (This site is in English only.)
Operating Instructions
Model No. SC-BTT880
21) or
SC-BTT480
SC-BTT460
SC-BTT400
SC-BTT300
VQT4Q15-1
Advertisement
Table of Contents

Related Manuals for Panasonic SC-BTT880


Summary of Contents for Panasonic SC-BTT880
-
Page 1: Operating Instructions
SC-BTT480 SC-BTT460 SC-BTT400 SC-BTT300 Unless otherwise indicated, illustrations in these operating instructions are of SC-BTT880. Firmware updates Panasonic is constantly improving the unit’s firmware to ensure that our customers are enjoying the latest technology. Panasonic recommends updating your firmware as soon as you are notified. -
Page 2: Precautions
Panasonic will in no way be responsible for any incidental damage ≥ This unit may receive radio interference caused by mobile which may arise due to a failure to obey these limits, or to any telephones during use. -
Page 3: Ac Mains Lead
To dispose or transfer this unit Restriction on use of unauthorized copied content The unit may keep the user settings information in the unit. If you discard this unit either by disposal or transfer, then follow the This unit adopts the following technology for copyright protection. procedure to return all the settings to the factory presets to delete the user settings. -
Page 4: Table Of Contents
Table of contents Precautions ......2 Getting started Package contents and accessories ..5 Unit and media care . -
Page 5: Package Contents And Accessories
Getting started Package contents and accessories Check the package contents and supplied accessories before using this unit. Package contents Main unit Main unit Main unit (SA-BTT880) (SA-BTT480) (SA-BTT460) FRONT SURROUND FRONT SURROUND FRONT SURROUND (SB-HF4800) (SB-HS8800) (SB-HF4800) (SB-HS4800) (SB-HF4800) (SB-HS4000) (Speakers) (Speakers) (Speakers) -
Page 6: Unit And Media Care
Unit and media care Accessories ∫ Clean this unit with a soft, dry cloth ∏ 1 Remote control ≥ Never use alcohol, paint thinner or benzine to [BTT880] [BTT480] [BTT460] [BTT400] clean this unit. (N2QAYB000729) ≥ Before using chemically treated cloth, carefully [BTT300] (N2QAYB000851) read the instructions that came with the cloth. -
Page 7: Playable Media
Playable media Device Disc markings Device types Contents format BD-Video Video BD-RE Video, JPEG, MPO BD-R Video, MKV DVD-Video Video DVD-R Video, AVCHD, MKV, JPEG, MPO, FLAC, MP3, WAV DVD-R DL DVD-RW Video, AVCHD — +R/+RW/+R DL Music CD Music [CD-DA] MKV, JPEG, MPO, CD-R —... -
Page 8: Usb Device
“4” or “ALL”. supply unit. Example: ∫ BD-RE, BD-R Discs recorded in DR mode using Panasonic Blu-ray Disc recorders may not play back the audio etc., correctly. ∫ Finalize DVD-R/RW/R DL, +R/+RW/+R DL and CD-R/RW ≥ It may not be possible to play the above media in some cases recorded by a recorder, etc. -
Page 9: Control Reference Guide
Control reference guide Turn the unit on and off Remote control Select title numbers, etc./ [BTT880] [BTT480] [BTT460] [BTT400] e.g., [BTT880] [BTT480] [BTT460] [BTT400] Enter numbers or characters [BTT300] Enter numbers [CANCEL]: Cancel Select the source Basic playback control buttons ( Select preset radio stations ( Show status messages ( [BTT880] [BTT480] [BTT460] [BTT400] Show the... - Page 10 Main unit (Front) [BTT880] SD CARD e.g., [BTT480] [BTT460] [BTT400] Standby/on switch (Í/I) ( SD card slot ( Press to switch the unit from on to standby USB port mode or vice versa. In standby mode, the unit [BTT880] [BTT480] [BTT460] [BTT400] ( 22, 28) is still consuming a small amount of power.
- Page 11 Main unit (Rear) [BTT880] 9 10 e.g., [BTT480] [BTT460] [BTT400] AC IN terminal ( [BTT880] Speaker terminals ( HDMI1 IN (CABLE/SAT) terminal ( Cooling fan [BTT880] LAN port ( HDMI2 IN terminal ( DIGITAL AUDIO IN terminal ( 16, 17) [BTT880] [BTT480] [BTT460] [BTT400] USB port ( 18, 32)
-
Page 12: Step 1: Positioning
STEP 1: Positioning For optimum position Place the front, centre and surround speakers at approximately the same distance from the seating position. ≥ Adjust the volume using the Delay time function if the distance between each speaker and the seating position is not equal. ( A Centre speaker e.g., [BTT880] ≥... -
Page 13: Step 2: Preparing The Speakers
STEP 2: Preparing the speakers Assembling the speakers [BTT880] [BTT480] Front speakers, Surround speakers [BTT460] Front speakers Attach the stand to the base. Attach the speaker. Thread the speaker cable through the base. Tighten the 3 screws (supplied) securely. Tighten the screw (supplied) securely. ... -
Page 14: Connecting The Speaker Cables
Connecting the speaker cables Attach the speaker cable sticker (supplied) and connect the speaker cables to the speakers. [BTT880] [BTT480] [BTT460] [BTT400] e.g., [BTT460] [BTT400] Surround speaker r: White s: Blue line SURROUND Connector Speaker cable sticker (supplied) Push Speaker indication Speaker cable sticker Connector... -
Page 15: Step 3: Connections
STEP 3: Connections Turn off all equipment before connection and read the appropriate operating instructions. Do not connect the AC mains lead until all other connections are complete. Speaker connection [BTT880] Connect the speaker cables to the terminals of the same colour. SPEAKERS ENCEINTES LS / RB LB / RS... -
Page 16: Connecting To A Tv
≥ Use the ARC compatible High Speed HDMI cables. Non-HDMI-compliant cables cannot be utilized. The HDMI-compliant cable is supplied with this unit. It is recommended that you use Panasonic’s HDMI cable. When outputting 1080p signal, please use HDMI cables 5.0 meters or less. - Page 17 Other device connection ∫ [BTT880] When the connecting devices have an HDMI terminal e.g., AV OUT AV OUT AV IN Set Top Box, etc. (ARC) Video game, etc. HDMI cable* HDMI cable* * Extra HDMI cables in addition to the supplied one are required.
-
Page 18: Connecting To The Network
Use of a wireless LAN connection is prohibited in the regions where DY-WL5 is not sold. ≥ For up-to-date compatibility information on your wireless router, refer to http://panasonic.jp/support/global/cs/ (This site is in English only.) ≥ The unit is not compatible with public wireless LAN services provided in airports, stations, cafes, etc. -
Page 19: Step 4: Connecting The Ac Mains Lead
STEP 4: Connecting the AC mains lead Connect only after all other connections are complete. [For]the]Middle]East]and]South]East]Asia] 2 AC mains leads are supplied. Use the AC mains lead that matches the socket for the area you live in. ≥ In Saudi Arabia, always use the 3-pin AC mains lead. ≥... -
Page 20: Step 6: Settings
LAN devices. Setting” in the Setup menu. ( ≥ If this unit is connected to a Panasonic TV (VIERA) supporting 1 Press WPS button or corresponding button of HDAVI Control 2 or later via an HDMI cable, then the setting the wireless router until the lamp starts information on the TV is acquired by this unit. - Page 21 ≥ You can perform this setup anytime by selecting “Easy Network Setting” in the Setup menu. ( If you have more than one Panasonic products ≥ You can redo these settings individually using “Network Settings”. ( and the remote control operates both products at once, you will need to change the remote control ≥...
-
Page 22: Inserting Or Removing Media
≥ When removing the SD card, press the centre of the card and pull it straight out. ≥ If you connect a Panasonic product with a USB ≥ You cannot change the audio type when the TV is connection cable, the setup screen may be connected to this unit via the AUX terminal. -
Page 23: Home Menu
HOME menu Major functions of this unit can be operated from FM Radio the HOME menu. Preparation Turn on the television and select the appropriate Videos/Photos/Music video input on the television. Play back the contents. Disc Press [Í] to turn on the unit. SD Card ≥... -
Page 24: Multi User Mode
≥ To use smartphones as a remote control, installation of dedicated software is required. For more details, refer to Personalize a background of the the following website. HOME menu. http://panasonic.jp/support/global/cs/ (This site is in English only.) Select ≥ Other than prepared Wallpaper... -
Page 25: Playback
Playback Playback Search/Slow motion Search While playing, press [SEARCH6] or Insert the media. [SEARCH5]. Playback starts depending on the media. ≥ Music and MP3: The speed is fixed to a single Select the item to play and press [OK]. step. Repeat this procedure if necessary. -
Page 26: [Btt880] [Btt480] [Btt460] [Btt400]
Displaying menus and playback Enjoying 3D video and photos information Preparation Connect 3D compatible TV to an HDMI AV OUT Show top menu/pop-up menu terminal of this unit using a High Speed HDMI [BTT880] [BTT480] [BTT460] [BTT400] Cable. ( 16, 17) Press [POP-UP MENU/TOP MENU]. -
Page 27: Using The Ipod/Iphone
[BTT880] [BTT480] [BTT460] [BTT400] Slideshow Using the iPod/iPhone Play a slideshow of photos and make various Compatible iPod/iPhone (as of December 2012) settings during the playback. ≥ Update your iPod/iPhone with the latest software before using this unit. Insert the media. ≥... - Page 28 Connect the iPod/iPhone firmly. iPod/iPhone Connection ≥ Check that the connector (B) has no dust or foreign materials before connecting. Connect the iPod/iPhone to either of the USB port ≥ To connect the iPod/iPhone firmly, remove it or the Dock ([BTT880] only). from the case, etc.
-
Page 29: Viera Link "Hdavi Control
Panasonic When the unit is connected to a Panasonic TV TV (VIERA) under “HDAVI Control”. (VIERA) that supports HDAVI Control 2 or later. You can use this function by connecting Select “Video”... -
Page 30: Enjoying Tv And Stb With Unit's Speakers
Select the STB audio Enjoying TV and STB with unit’s speakers When the STB power is turned on, this unit and the TV will automatically turn on. The video is You can select whether audio is output from the output from the TV, and the audio is output from unit’s speakers or the TV speakers by using the the speakers of this unit. -
Page 31: Listening To The Radio
Listening to the Radio ∫ Manual tuning and presetting Select a radio broadcast. You can preset up to 30 channels. 1 Press [RADIO] to select “FM”. Preparation 2 Press [SEARCH6] or [SEARCH5] to Make sure that the FM antenna is connected. ( select the frequency. -
Page 32: [Btt880] [Btt480] [Btt460] [Btt400] Viera Connect (Enjoying Internet Service)
MORE BACK discontinued either temporarily or permanently without notice. Therefore, Panasonic will make no warranty for the XXXXXXXXXXXXXXXX Internet content or the continuity of the services. ≥ All features of websites or content of the service may not be available. -
Page 33: Home Network Feature
You can also enjoy viewing the video and photos recorded in Panasonic DLNA compatible recorders (DIGA). Server Refer to our website about the sales area, etc. (... -
Page 34: Option Menu
Option menu ∫ Repeat Play (Only when the elapsed time is being displayed A variety of playback operations and settings can on the unit’s display.) be performed from this menu. Select the item that you want to repeat. Available options differ depending on the playing ≥... - Page 35 ∫ Playback Information Window Picture Settings Displays the following. ∫ Picture Mode Audio/video attribute information of disc. Select the picture quality mode during play. Settings status of “Digital Audio Output” ≥ If you select “User”, you can change settings in 38).
-
Page 36: Sound Settings
Re-master 1 Pop and rock Sound Settings Re-master 2 Jazz “Surround Effects” and “Sound Effects” can also Re-master 3 Classical be set by using the [SURROUND] and [SOUND] Digital Tube Sound: on the remote control. ( This feature gives you warm sound, like that ∫... -
Page 37: Setup Menu
Setup menu 3D Settings Change the unit’s settings if necessary. The ∫ Signal Format settings remain intact even if you switch the unit to standby. Original Keep original picture format. Some items in the Setup menu are common to 3D picture format comprising of the Option menu. - Page 38 ∫ HDMI Output ∫ Still Mode Press [OK] to show the following settings: Select the type of picture shown when you pause playback. HDMI Video Format Automatically selects the type The items supported by the connected devices are Automatic of picture shown. indicated on the screen as “¢”.
- Page 39 BD-Video Secondary Audio Select whether or not to mix the primary and secondary audio (including the button click ∫ 3D BD-Video Playback sound). Select the playback method of 3D compatible If “Off” is selected, the unit outputs the primary video software. audio only.
- Page 40 Wireless Settings Language This allows the wireless router and connection settings to be set. Current connection settings ∫ Soundtrack Preference and connection state can be checked. Choose the language for audio. Connection Setting ≥ If “Original” is selected, the original language of The wireless router connection wizard will be each disc will be selected.
- Page 41 For the setting and operation method of connected equipment, refer to the following ∫ BD-Video Ratings website. Set an age limit of BD-Video play. http://panasonic.jp/support/global/cs/ (This site is in English only.) ∫ [BTT880] [BTT480] [BTT460] [BTT400] Network Service Lock Network Service Lock Remote Device Settings ( You can restrict the usage of VIERA Connect.
- Page 42 ∫ Remote Control automatically. Change the remote control code if other ≥ While playing and pausing, etc., this function Panasonic products react to this remote control. is not available. ∫ Firmware Update ( On-Screen Messages Press [OK] to show the following settings: Choose whether to show status messages automatically.
-
Page 43: Speaker Settings
∫ Delay time Speaker settings For optimum listening with 5.1-channel sound, all the speakers, except for the subwoofer, should be the same distance from the seating position. If either distance 1 or 2 is less than 3, measure the distance and adjust the time to make up for the difference (see the table below). -
Page 44: Changing The Sound Settings
Changing the sound Speaker installation settings option For more details on each setting, refer to “Sound Consult a qualified building contractor when Settings” on the Option menu. ( attaching the speakers to a wall. Improper attachment may result in damage to the wall and Surround Effects speakers and personal injury. - Page 45 [BTT300] Centre speaker [BTT300] Front speaker, Surround speaker M 40 mm N 24 mm D 18 mm E 24 mm F 95.5 mm G 27 mm To prevent tipping/falling of the speakers [BTT880] [BTT480] Front speaker, Surround speaker Preventing tipping [BTT460] Front speaker...
-
Page 46: Troubleshooting Guide
This unit is turned off when the input for the Troubleshooting guide Reference TV is switched. Before requesting service, please perform the This is a normal phenomenon when using following checks. VIERA Link (HDAVI Control 4 or later). For If the problem remains unresolved, consult details please read the operating instructions your dealer for instructions. - Page 47 The system used on the disc doesn’t match The unit switches to standby mode. your television. This unit will automatically turn to standby jPAL discs cannot be correctly viewed on an mode after 30 minutes if it is inactive. ( NTSC television.
- Page 48 No sound from the TV. Sound Press [EXT-IN] to select the corresponding source. ( No sound. When connecting the unit to a TV using an Low volume. HDMI cable, check whether the HDMI Distorted sound. terminal on the TV is labelled “HDMI (ARC)”. Cannot hear the desired audio type.
- Page 49 iPod/iPhone operation [BTT880] Wireless system (SH-FX71) Cannot charge or operate. Check that the iPod/iPhone is connected The wireless link indicator is flashing. firmly. ( There is no link between the main unit and the [BTT880] When iPod/iPhone devices are wireless system. Turn the wireless system off connected to both the USB port and the Dock, and then back on.
-
Page 50: Messages
Messages On the unit’s display The following messages or service numbers may appear on the TV or unit’s display. The unit fails to operate properly. Press [Í/I] On the television on the main unit for 3 seconds to switch the unit to standby, then switch back on. -
Page 51: Specifications
Specifications or F (“ ” stands for a number.) Check and correct the speaker cable GENERAL connections. There is something unusual. Power consumption [BTT880] Check the unit using the troubleshooting Approx. 89 W guide. If the service number remains [BTT480] [BTT460] [BTT400] displayed, do the following. -
Page 52: Speaker Section
SPEAKER SECTION AMPLIFIER SECTION Super Woofer Full range RMS TTL POWER [BTT880] [BTT480] [BTT460] [BTT400] tweeter 1000 W CONE TYPE CONE TYPE OUTPUT (cm) (cm) Piezo type [BTT300] 435 W [BTT880] [BTT480] Front 1 kHz, 10 % total harmonic distortion ≤... -
Page 53: Video Section
VIDEO SECTION File format Signal system PAL/NTSC File format Extension Reference HDMI AV output* Output connector: This unit supports ID3 Type A (19 pin) 1 system tags, but only titles, [BTT880] HDMI AV Input* Input connector: “.MP3”, “.mp3” artist names and album names can be Type A (19 pin) 2 system displayed. -
Page 54: Language Code List
“AVCHD”, “AVCHD 3D”, “AVCHD Progressive” and “AVCHD 3D/ Display languages list Progressive” are trademarks of Panasonic Corporation and Sony Corporation. Java is a registered trademark of Oracle and/or its affiliates. Display Language Display Language Display Language Manufactured under license from Dolby Laboratories. - Page 55 (1) the software developed independently by or for Panasonic Corporation, RQLXS 0092 (2) the software owned by third party and licensed to Panasonic Corporation, (3) the software licensed under the GNU General Public License, Version 2 (GPL v2), (4) the software licensed under the GNU LESSER General Public License, Version 2.1 (LGPL v2.1) and/or,...
-
Page 56: Limited Warranty (Only For Australia)
Panasonic Customer Care Centre. If the failure in the product is not a major failure then Panasonic may choose to repair or replace the product and will do so in a reasonable period of time from receiving notice from you.