Table of Contents
Advertisement
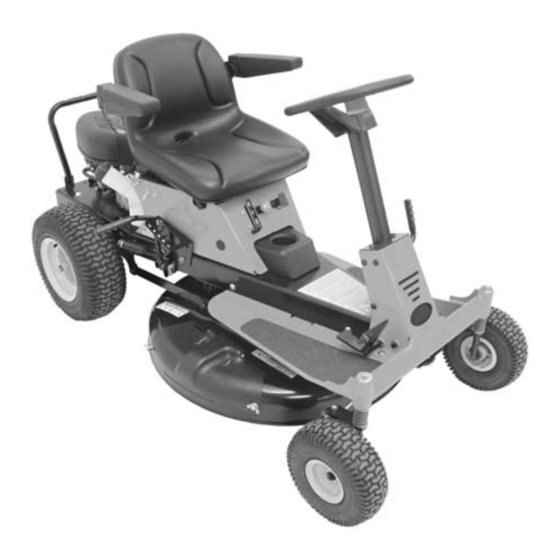
Rear-Engine Rider
Owner/Operator Manual
Models
927067 - 10528
927069 - 14532
Transfer
model &
serial number
label from
product reg-
istration here.
Coller l'autocollant du
modèle et du numéro de
série dans cet encadré.
Transferir aquí la etiqueta del
modelo y número de serie
del registro del producto.
ENGLISH
FRANÇAIS
ESPAÑOL
02792300 10/04
Printed in USA
Advertisement
Table of Contents

Related Manuals for Ariens 927067-10528


Summary of Contents for Ariens 927067-10528
- Page 1 Rear-Engine Rider Owner/Operator Manual Models 927067 - 10528 927069 - 14532 ENGLISH FRANÇAIS ESPAÑOL Transfer Coller l’autocollant du model & modèle et du numéro de serial number série dans cet encadré. label from Transferir aquí la etiqueta del product reg- modelo y número de serie 02792300 10/04 istration here.
-
Page 2: Table Of Contents
INTRODUCTION THE MANUAL PRODUCT REGISTRATION Before operation of unit, carefully and The Ariens dealer must register the product completely read your manuals. The contents at the time of purchase. Registering the will provide you with an understanding of product will help the company process... -
Page 3: Safety
Before Attempting To Operate Your 6. Fill out a Product Registration Card and return the card to the Ariens Company or Unit go to www.ariens.com. 1. Make sure all assembly has been properly completed. DISCLAIMER 2. Understand all Safety Precautions Ariens reserves the right to discontinue, provided in the manuals. - Page 4 OA0016 Figure 2 1. Danger! • If machine stops going uphill, stop blade and back down slowly. • Avoid sudden turns. Read the operator’s manual. OL1801 • Keep safety devices (guards, shields, switches, etc.) in place and working. Keep children and others away •...
-
Page 5: Safety Rules
3. Danger! Do not tip unit on end. Always keep feet and hands away from rotating parts. OAa100 OL1809 SAFETY RULES Always stand clear of If unit is to be used by someone other than discharge area. Do not direct original purchaser;... - Page 6 NEVER allow anyone to operate this unit ALWAYS keep protective structures, guards when their alertness or coordination is and panels in good repair, in place and impaired. securely fastened. Wear adequate safety gear, sturdy shoes, Do not operate without either entire grass and protective gloves.
- Page 7 This product is equipped with an internal ALWAYS disconnect negative (-) cable FIRST combustion type engine. DO NOT use unit on and positive (+) cable SECOND. ALWAYS or near any unimproved, forest-covered or connect positive (+) cable FIRST, and brush covered land unless exhaust system is negative (-) cable SECOND.
-
Page 8: Assembly
ASSEMBLY 3. Check engine oil. Refer to Engine Manual. WARNING: AVOID INJURY. Read and understand the entire Safety 4. Check tire pressure (see section before proceeding. SPECIFICATIONS on page 24). 5. Fill fuel tank (see FILLING FUEL TANK TOOLS REQUIRED on page 11). -
Page 9: Controls And Features
CONTROLS AND FEATURES Figure 3 OA0130 1. Seat 7. Ignition Switch 2. Steering Wheel 8. PTO Switch 3. Parking Brake 9. Throttle Lever 4. Forward and Reverse Pedal 10. Mower Lift Lever 5. Mower Deck 11. Fuel Tank 6. Mulch Cover / Discharge Chute (Unit shown with mulch cover installed.) GB - 9... -
Page 10: Operation
Perform the following tests to ensure the safety interlock system is working properly. If the unit does not perform as stated, contact your Ariens dealer for repairs. Test Forward and Parking Brake Engine... -
Page 11: Filling Fuel Tank
Forward and Reverse Pedal 3. Fill fuel tank to 1/2 in. (1.3 cm) below bottom of filler neck. See Press front of pedal SPECIFICATIONS on page 24 for fuel down to move unit tank capacity. forward. Press rear of pedal 4. -
Page 12: Operating Mower
3. Turn ignition key to start position and MOVING THE UNIT MANUALY release once engine has started. 4. After engine starts, set throttle lever to WARNING: DO NOT disengage or bypass transmission and coast fast position. downhill. IMPORTANT: Let engine warm up several seconds to several minutes depending on Disengage transmission bypass lever (1) to outside temperature. -
Page 13: Seat Adjustment
SEAT ADJUSTMENT FOR BEST PERFORMANCE 1. Tip seat forward (see TIPPING THE Cut grass when it is dry. SEAT FORWARD on page 15). Keep mower blade sharp. 2. Loosen mounting hardware and slide Keep mower deck properly leveled. seat forward or backward to desired Do not set height of cut too low. -
Page 14: Maintenance Schedule
Engage parking brake and engage transmission bypass Brake lever (see MOVING THE UNIT MANUALY on page 12). Push unit. If unit rolls, contact your Ariens Dealer. Clean Unit Clean engine, battery, seat, mower deck, etc. of all dirt and debris. Do not use solvents, hard cleaners, or abrasives. -
Page 15: Service And Adjustments
SERVICE AND ADJUSTMENTS REMOVE AND INSTALL MOWER WARNING: AVOID INJURY. Read DECK and understand the entire Safety section before proceeding. Remove ((Figure 9)) 1. Remove PTO belt (see PTO BELT TIPPING THE SEAT FORWARD REPLACEMENT on page 21). Pull out detent pin, pull seat back, and then 2. - Page 16 1. Guide Arm 3. Lift Link 2. PTO Belt 4. Mower Deck 5. Electric Clutch Connector Figure 9 OA0190 LEVELING MOWER DECK AND Mower Deck Shown From The Front ADJUSTING MOWER DECK PITCH Adjust on a level surface, with tires inflated to correct air pressure (see SPECIFICATIONS on page 24), and mower lift lever in the middle position.
- Page 17 Adjusting Mower Deck Pitch 4. Remove front trunnion and front lift link from unit (figure 13). NOTE: The front blade cutting height should be 1/16 – 3/8 in. (1.59 – 9.53 mm) lower than • TO RAISE front of mower deck, turn the rear blade cutting height (figure 12).
-
Page 18: Mower Blade Replacement
MOWER BLADE REPLACEMENT on known to the State of California to page 18). cause cancer and reproductive harm. NOTE: Ariens recommends having the Wash hands after handling. mower blade sharpened by a professional. Contact your Ariens dealer. Battery Removal and Installation... -
Page 19: Front Wheel Alignment
Terminal Figure 17 OA0200 Jump-Starting Cleaning Battery and Battery Cables Ariens does not recommend jump-starting your unit. Jump-starting can damage engine (Figure 17) and electrical system components. See your engine manual for more detailed information. 1. Remove battery from unit (see Battery Removal and Installation on page 18). - Page 20 • The minimum engagement of thread for HYDROSTATIC BELT both tie-rods is 1/4 in. (0.635 cm). REPLACEMENT Adjust (Figure 18) Remove (Figure 19) 1. Remove tie-rod(s) from spindle(s). 1. Remove PTO belt (see PTO BELT 2. Loosen jam nut(s) and turn tie-rod(s) REPLACEMENT on page 21).
-
Page 21: Storage
PTO BELT REPLACEMENT 2. Pull idler towards the outside of the unit and remove PTO belt from idler. Remove (Figure 20) 3. Remove PTO belt from mower deck Mower Deck Shown Removed For Clarity pulley and engine sheave. Install (Figure 20) 1. -
Page 22: Troubleshooting
5. Connect spark plug wire or plug faulty. replace spark plug. Refer to Engine Manual for detailed instructions. 6. Faulty electrical system. 6. Contact your Ariens Dealer. 7. Faulty engine. 7. Contact your Ariens Dealer. 1. Choke engaged. 1. Disengage choke. Engine 2. -
Page 23: Service Parts
SHARPENING MOWER BLADE on page 18) or replace mower blades (see MOWER BLADE REPLACEMENT on page 18). SERVICE PARTS Be sure to always use genuine Ariens parts to keep your unit running like new. Part no. Description 01600600 28-inch mower blade... -
Page 24: Specifications
SPECIFICATIONS Model Number 927067 927069 Description 10528 14532 Engine Type Single Cylinder Briggs & Stratton Engine Power – hp (kW) @ Max RPM 10.5 14.5 Max RPM 3600 Transmission Hydrostatic Speed Forward Max. – mph (km/h) 5.5 (8.85) Reverse Max. – mph (km/h) 2.5 (4.02) Turning Radius –... -
Page 25: Warranty
Ariens Company, then any such implied warranty is limited to the duration of this warranty. Some states do not allow limitations on how long an implied warranty lasts, so the above limitation may not apply to you. - Page 26 Ariens Company 655 West Ryan Street P.O. Box 157 Brillion, WI 54110-0157 Phone: 920-756-2141 Fax: 920-756-2407 www.ariens.com...