
Related Manuals for Sanyo CE52SR3


Summary of Contents for Sanyo CE52SR3
-
Page 1: Instruction Manual
INSTRUCTION MANUAL CE52LH2WP CE52SR3 LCD Monitor Please read this Instruction book before using your LCD monitor. We wish you many hours of pleasure from your new LCD monitor. -
Page 2: Table Of Contents
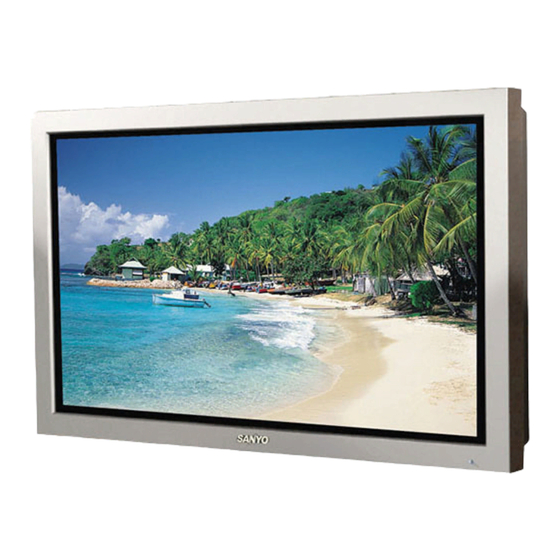
IP66 weather-resistant approval . Daylight readable monitor (CE52SR3) In addition to Weather proof monitor, it has adaptive brightness in accordance with prevailing light conditions . -
Page 3: Safety Precautions
SAFETY PRECAUTIONS CAUTION: Please read and retain for your safety. This unit has been designed and manufactured to assure your personal safety, but improper use can result in potential electric shock or fire hazards. In order not to defeat the safeguards incorporated in this monitor observe the following basic rules for its installation, use and servicing . -
Page 4: Servicing
This will often require extensive work by a qualified technician to restore the monitor to normal operation. Important recycling information. Your SANYO product is designed and manufactured with high quality materials and components which can be recycled and reused . -
Page 5: Ac Power Cord Requirement
. 2. This End-User License is governed by the laws of the State of California . The End-User and Sanyo agree that any action to enforce or inter- pret the terms of this End-User License shall be brought only in the appropriate state or federal court located in Los Angeles County, Califor- nia . -
Page 6: Installation
INSTALLATION Step: 1 Mains Connection n Connect the display unit to VGA, BNC and Scart con- nector as required. LD-Net 4. AV3 1. Connect the in-line power connector to the Mains Inlet as shown Composite (CVBS) signal input . above . AV3-OUT can be used to output the incoming AV3 signal to the other monitor . -
Page 7: Remote Control
The symbol mark and recycling systems described below apply to EU countries and do not apply to countries in other areas of the world . Your SANYO product is designed and manufactured with high quality materials and components which can be recycled and/or reused . -
Page 8: Controls And Menus
INSTALLATION Controls and Menus Menu Operation Many of your monitors functions are controlled through the menu function, using the remote control . MENU Picture Brightness Contrast Color Tint (only if NTSC equipment is detected) Sharpness White Tone White Tone / R / G / B Advanced Setting DCDi / ACC/ACM / CCS / DNR / MPEG NR / Film Mode Sound... -
Page 9: Menu Operation
MENU OPERATION n Current Weekday Picture menu Use to set current weekday using the 1 or 2 button . n Advanced settings n Current Time Use the 5 or 6 button to select Advanced settings and press Use to set the current time using the Numeric buttons . the 1 or 2 button to enter the sub menu as follows . -
Page 10: Pc Adj. Menu
MENU OPERATION part, but the most is 5 parts (5 monitors) . V_Sets is used to divide the vertical picture into more than one part, and the most is also 5 parts (5 monitors) . Using the 1 or 2 but- ton to set . -
Page 11: Installation Mode
INSTALLATION MODE n Address Installation Mode Set the address for the LCD monitor (0 ~ 999) . Setting the monitor address in RS232 mode ● Installation Mode G2.02 0000 Each monitor can have a specific Address, which helps command On program that monitor individually and will not effect to other monitors con- Tuner Menu Max Volume... -
Page 12: Operation
OPERATION Selection of picture size Select screen size from FULL, FULL ALL, ZOOM 16:9, TITLE IN 16:9, ZOOM 14:9, TITLE IN 14:9, NORMAL or NATURAL WIDE by pressing the WIDE button repeatedly on the Remote Control . ✐ When in AV2 (RGBHV) or PC mode FULL or NORMAL can be selected . -
Page 13: Pip/Pop Operation
OPERATION PIP/POP Operation Using this function, you can enjoy a DVI or Network program and an image (AV1, AV2, AV3 or PC input) at the same time . Press the ON/OFF button on the Remote Control repeatly to select PIP1, PIP2, POP or OFF mode . During the PIP/POP mode, press the Main/Sub Picture Swap but- ton will switch the location for main and sub picture . -
Page 14: Operation (In Text Mode)
OPERATION (IN TEXT MODE) Teletext Operation Text Cancel Teletext is only available via external sources . Press the TEXT CANCEL button in TEXT or MIX mode, the TV pic- Teletext mode can be operated by the following buttons on the Re- ture appears on the screen . -
Page 15: Specifications/Helpful Hints
1920 x 1080 H: 176°, V: 176° 1304 x 800 x 227 .5 mm CE52SR3 The specifications are subject to change without notice. ● LCD panels are manufactured to the highest possible standards . Even though 99 .99% of the pixels are effective, a tiny fraction ●... - Page 16 DIMENSIONS Unit: mm n CE52SR3 1304 1216 193.8 1152 176.7 227.5 Standby / Power LED Control buttons RC RECEIVER 1304 1120.6 376.5 358.4 117.6 Handles x 4 229.6 M6 WALL BRACKET FIXING 233.9 Control buttons Cables exit terminal cover 310.9 286.8...
-
Page 17: List
PC/DVI-D/COMPONENT SIGNAL SUPPORT TIMING LIST n PC signal support timing n DVI-D signal support timing Horizontal Vertical Horizontal Vertical Resolution Frequency Frequency Remark Resolution Frequency Frequency Remark (kHz) (Hz) (kHz) (Hz) 720 x 400 31 .47 70 .09 DOS (VGA) 640 x 480 31 .43 59 .88... -
Page 18: Rs232C Command Tables
RS232C COMMAND TABLES n Functional Execution Command Table n Image control Read Command Table Command Item Status read command Item POWER ON CR BRIGHT Status of Brightness . POWER OFF CR CONT Status of Contrast . POWER ON/ OFF (toggle) CR COLOR Status of Color . -
Page 19: Rs232C Command Tables
RS232C COMMAND TABLES n Time Read Command Table n UK5 Read Command Table (Basic Command) Status read command Item Command Item Note Status of accumulated lifetime of panel . Power On, Standby, power error, CR PANELH (The same as CR_LAMPH Command) Input Mode AV1, AV2, . - Page 20 SANYO Electric Co., Ltd. N7WKS/N7WLS...