Table of Contents
Advertisement
Available languages
Available languages
Advertisement
Chapters
Table of Contents

Related Manuals for Kenmore 796.8128 Series


Summary of Contents for Kenmore 796.8128 Series
- Page 1 Use & Care Guide Manual de Uso y Cuidado English / Español Model/Modelo: 796.8128#, 796.9128#, 796.8118#, 796.9118# Kenmore ® Dryer # = color number, numero de color P/N MFL62512877 Sears Brand Management Corporation Hoff man Estates, IL 60179 U.S.A. www.kenmore.com www.sears.com...
-
Page 2: Table Of Contents
• Rental reimbursement if repair of your covered Maintaining the Exhaust System ......27 product takes longer than promised. KENMORE CONNECT ..........28 • 25% discount off the regular price of any non-covered TROUBLESHOOTING GUIDE repair service and related installed parts. -
Page 3: Important Safety Instructions
IMPORTANT SAFETY INSTRUCTIONS READ ALL INSTRUCTIONS BEFORE USE Your safety and the safety of others is very important. We have provided many important safety messages in this manual and on your appliance. Always read and obey all safety messages. This is the safety alert symbol. This symbol alerts you to potential hazards that can kill or hurt you and others. -
Page 4: Grounding Requirements
IMPORTANT SAFETY INSTRUCTIONS BASIC SAFETY PRECAUTIONS WARNING: To reduce the risk of fi re, electric shock, or injury to persons when using this appliance, follow basic precautions, including the following: • Do not allow children to play on or in the dryer. Close •... -
Page 5: Safety Instructions For Installation
IMPORTANT SAFETY INSTRUCTIONS SAFETY INSTRUCTIONS FOR INSTALLATION WARNING: To reduce the risk of fi re, electric shock, or injury to persons when using this appliance, follow basic precautions, including the following: • Properly ground dryer to conform with all governing •... - Page 6 IMPORTANT SAFETY INSTRUCTIONS WARNING: To reduce the risk of fi re, electric shock, or injury to persons when using this appliance, follow basic precautions, including the following: SAFETY INSTRUCTIONS FOR CONNECTING ELECTRICITY WARNING: To reduce the risk of fi re, electric shock, or injury to persons when using this appliance, follow basic precautions, including the following: •...
-
Page 7: Features And Benefits
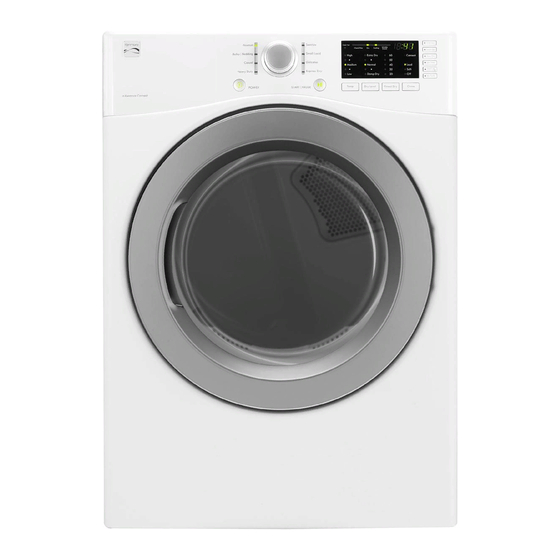
FEATURES AND BENEFITS KEY PARTS AND COMPONENTS There are several important components that are referenced in this manual. EASY-TO-USE CONTROL PANEL Rotate the cycle selector knob to select the desired dry cycle. Add cycle options or adjust settings with the touch of a button. TIME AND STATUS DISPLAY The easy-to-read LED display shows cycle status and estimated time remaining. -
Page 8: Installation Instructions
INSTALLATION INSTRUCTIONS KEY DIMENSIONS AND SPECIFICATIONS Description Dryer (Gas and Electric) Electrical Requirements Refer to the rating label Gas Requirements* NG: 4–10.5 inches WC (Water Column) Gas Requirements* LP: 8–13 inches WC Dimensions 27 in. (W) X 30 1/4 in. (D) X 38 in. (H), 51 3/16 in. (D with door open) 68.6 cm (W) X 76.7 cm (D) X 96.5 cm (H), 130 cm (D with door open) Net Weight Electric : 147 lb. -
Page 9: Installation With Optional Pedestal Base Or Stacking Kit
INSTALLATION INSTRUCTIONS INSTALLATION WITH OPTIONAL PEDESTAL BASE OR STACKING KIT IMPORTANT: If you are installing your dryer using an optional pedestal base or stacking kit, refer to the instructions included with the accessory. Required Dimensions for Required Dimensions for Installation with Pedestal Installation with Stacking Kit 6 in. -
Page 10: Gas Dryers
INSTALLATION INSTRUCTIONS GAS DRYERS GAS REQUIREMENTS (GAS MODELS ONLY) WARNING: To reduce the risk of fi re, electric shock, or injury to persons when using this appliance, follow basic precautions, including the following: • Gas supply requirements: As shipped from the •... -
Page 11: Connecting The Gas Supply
INSTALLATION INSTRUCTIONS GAS DRYERS (continued) WARNING: To reduce the risk of fi re, electric shock, or injury to persons when using this appliance, follow basic precautions, including the following: • Installation and service must be performed by a • If necessary, the correct nozzle (for the LP nozzle kit, qualifi... -
Page 12: Electric Dryers
INSTALLATION INSTRUCTIONS ELECTRIC DRYERS ELECTRICAL REQUIREMENTS Electrical Requirements for Electric Models Only WARNING: To help prevent fi re, electrical shock, serious injury, or death, the wiring and grounding must conform to the latest edition of WARNING: the National Electrical Code, ANSI/NFPA 70 and all To reduce the risk of applicable local regulations. -
Page 13: Connecting Electric Dryers
INSTALLATION INSTRUCTIONS ELECTRIC DRYERS (continued) CONNECTING ELECTRIC DRYERS WARNING: Grounding through the neutral wire is prohibited for: (1) Connect the power cord to the terminal block. Connect new branch-circuit installations, (2) mobile homes, (3) each power cord wire to the terminal block screw that recreational vehicles, and (4) areas where local codes has the same colored wire. -
Page 14: Venting The Dryer
INSTALLATION INSTRUCTIONS VENTING THE DRYER IMPORTANT! CHECK YOUR EXHAUST SYSTEM FOR PROBLEMS The most common cause of dryer problems is poor • RESTRICTED OR DAMAGED VENT HOOD. Check exhaust venting. Before installing your new dryer, your vent hood outside. It must be clean and free of lint check the items listed below to make sure you get the buildup. - Page 15 INSTALLATION INSTRUCTIONS VENTING THE DRYER (continued) Routing and Connecting Ductwork Follow the guidelines below to maximize dryer performance and reduce lint buildup and condensation Correct Venting in the ductwork. NOTE: Transition duct (from dryer to wall) and fi ttings are NOT included and must be purchased separately. •...
-
Page 16: Leveling The Dryer
INSTALLATION INSTRUCTIONS INSTALLATION INSTRUCTIONS LEVELING THE DRYER REVERSING THE DOOR SWING The swing of the dryer door can be reversed to fi t your WARNING: installation location. WARNING: • Wear gloves during installation. • Failure to follow these instructions can result in injury. THE DRYER DOOR IS VERY LARGE AND HEAVY. -
Page 17: Final Installation Check
INSTALLATION INSTRUCTIONS INSTALLATION INSTRUCTIONS FINAL INSTALLATION CHECK Testing Dryer Heating Once you have completed the installation of the dryer and it is in its fi nal location, confi rm proper operation with the following steps and tests. Close the dryer door. Is gas turned on? (Gas models only) Press the POWER button to turn the dryer on. -
Page 18: How To Use
HOW TO USE WARNING: To reduce the risk of fi re, electric shock, or injury to persons, read this entire manual, including the Important Safety Instructions, before operating this dryer. CONTROL PANEL FEATURES POWER (ON/OFF) BUTTON CYCLE MODIFIER BUTTONS Press to turn the dryer ON or OFF. Pressing the Use these buttons to adjust the settings for the POWER button during a cycle will cancel that cycle selected cycle. -
Page 19: Operating The Dryer
HOW TO USE OPERATING THE DRYER CLEAN THE LINT FILTER If the lint fi lter has not already been cleaned, lift out the fi lter and remove the lint from the last load. This will help ensure the fastest and most effi cient drying performance. LOAD THE DRYER Load the dryer with the wet laundry from the washer. -
Page 20: Cycle Guide
HOW TO USE CYCLE GUIDE The cycle guide below shows the available options and recommended fabric types for AUTO DRY cycles. *NOTE: The default time and actual time will vary depending on the size of the load and moisture content. Auto Dry Cycles Auto Dry cycles utilize a sensor that detects moisture levels in the clothes and adjusts the drying time as needed to ensure superior results. -
Page 21: Cycle Guide
HOW TO USE CYCLE GUIDE The cycle guide below shows the available options and recommended fabric types for TIMED DRY cycles. Timed Dry Cycles Use Timed Dry cycles to select a specifi c amount of drying time and the drying temperature. When a TIMED DRY cycle is selected, the display shows the actual time remaining in your cycle. -
Page 22: Sorting Loads
HOW TO USE WARNING: To reduce the risk of fi re, electric shock, or injury to persons, read this entire manual, including the Important Safety Instructions, before operating this dryer. SORTING LOADS LOADING THE DRYER WARNING: Fabric Care Labels To reduce the risk of Most articles of clothing feature fabric care labels that fi... -
Page 23: Time And Status Display
HOW TO USE TIME AND STATUS DISPLAY The Time and Status Display shows the cycle time, cycle progress, and vent status. When the dryer is turned on, the display will illuminate. TIME DISPLAY CHECK VENT INDICATOR (DUCT BLOCKAGE SENSING SYSTEM) When a cycle is selected, the display will indicate the default time for that cycle including selected The CHECK VENT duct blockage sensing system... -
Page 24: Cycle Modifi Er Buttons
HOW TO USE CYCLE MODIFIER BUTTONS Each cycle has default settings that are selected NOTE: To protect your garments, not every dry level, automatically. You may also customize these settings temperature, or option is available with every cycle. using the cycle modifi er buttons. AUTO DRY cycles are designed to properly care for specifi... -
Page 25: Cycle Options And Special Features
HOW TO USE CYCLE OPTIONS AND SPECIAL FEATURES Your dryer features several additional cycle options and special features to meet your individual needs. DAMP DRY SIGNAL WRINKLE GUARD If you press the Damp Dry Signal, Selecting this option will tumble the the dryer will emit a chime when the clothes after the cycle ends for a few clothes are just short of completely... -
Page 26: User Maintenance Instructions
USER MAINTENANCE INSTRUCTIONS WARNING: To reduce the risk of fi re, electric shock, or injury to persons, read this entire manual, including the Important Safety Instructions, before operating this dryer. • Unplug the dryer or turn the power off before cleaning to avoid the risk of electric shock. Failure to follow this warning can cause serious injury, fi... -
Page 27: Maintaining The Exhaust System
USER MAINTENANCE INSTRUCTIONS MAINTAINING THE EXHAUST SYSTEM The most common cause of dryer problems is poor exhaust venting. Poor exhaust venting may result from the following conditions: • DIRTY OR DAMAGED EXHAUST DUCTS • WRONG VENT MATERIAL • RESTRICTED OR DAMAGED VENT HOOD •... -
Page 28: Kenmore Connect
• For best results, do not move the phone while the tones are being transmitted. • If the call center agent is not able to get an accurate recording of the data, you may be asked to try again. • Pressing the POWER button during the transmission will shut off Kenmore Connect. -
Page 29: Troubleshooting Guide
TROUBLESHOOTING GUIDE BEFORE CALLING FOR SERVICE Problem Possible Cause Solutions *CHECK VENT is Exhaust system is too long or has too Install a shorter or straighter duct run. See the blinking many turns/restrictions. Installation Instructions for details. Partial blockage of the ductwork due Ductwork should be checked/cleaned to lint buildup or other foreign object. - Page 30 TROUBLESHOOTING GUIDE BEFORE CALLING FOR SERVICE (continued) Problem Possible Cause Solutions Clothes take too long to Exhaust ducts are blocked, dirty, or Confi rm that the exhaust duct is properly duct run is too long. confi gured and free of debris, lint, and obstructions.
-
Page 31: Before Calling For Service
TROUBLESHOOTING GUIDE BEFORE CALLING FOR SERVICE (continued) Problem Possible Cause Solutions Display shows error Temperature sensor failure. Turn off the dryer and call for service. code: tE1 or tE2 Lint on clothes Lint fi lter not cleaned properly. Remove the lint from the fi lter before every load. With the lint removed, hold the fi... -
Page 32: Warranty
WARRANTY Kenmore One Year Limited Warranty When installed, operated and maintained according to all supplied instructions, if this appliance fails due to a defect in material and workmanship within one year from the date of purchase, call 1-800-4-MY- HOME® to arrange for free repair. - Page 33 NOTE...
- Page 34 INSTRUCCIONES IMPORTANTES SOBRE SEGURIDAD ... 35-38 REQUISITOS DE CONEXIÓN A TIERRA ......36 Felicidades por haber realizado una compra inteligente. FUNCIONES Y VENTAJAS Su nuevo producto Kenmore está diseñado y fabricado para ® Piezas y componentes clave ..........39 brindar años de funcionamiento fiable. No obstante, al igual INSTRUCCIONES PARA LA INSTALACIÓN...
-
Page 35: Instrucciones Importantes Sobre Seguridad
INSTRUCCIONES IMPORTANTES SOBRE SEGURIDAD LEA TODAS LAS INSTRUCCIONES ANTES DE UTILIZAR ESTE PRODUCTO Su seguridad y la de los demás es muy importante. Hemos incluido numerosos mensajes de seguridad en este manual sobre su electrodoméstico. Lea y cumpla siempre todos los mensajes de seguridad. Éste es el símbolo de alerta de seguridad. -
Page 36: Requisitos De Conexión A Tierra
INSTRUCCIONES IMPORTANTES SOBRE SEGURIDAD PRECAUCIONES BÁSICAS DE SEGURIDAD ADVERTENCIA: Para reducir el riesgo de incendio, descarga eléctrica o lesiones físicas al utilizar este electrodoméstico, siga estas precauciones básicas, entre las que se incluyen las siguientes: • No permita que los niños jueguen encima de la secadora •... - Page 37 INSTRUCCIONES IMPORTANTES SOBRE SEGURIDAD INSTRUCCIONES DE SEGURIDAD PARA LA INSTALACIÓN ADVERTENCIA: Para reducir el riesgo de incendio, descarga eléctrica o lesiones físicas al utilizar este electrodoméstico, siga estas precauciones básicas, entre las que se incluyen las siguientes: • Conecte la secadora adecuadamente a tierra según las •...
- Page 38 INSTRUCCIONES IMPORTANTES SOBRE SEGURIDAD INSTRUCCIONES DE SEGURIDAD PARA LAS CONEXIONES ELÉCTRICAS ADVERTENCIA: Para reducir el riesgo de incendio, descarga eléctrica o lesiones físicas al utilizar este electrodoméstico, siga estas precauciones básicas, entre las que se incluyen las siguientes: • Bajo ninguna circunstancia, corte o quite la clavija de •...
-
Page 39: Funciones Y Ventajas
FUNCIONES Y VENTAJAS PIEZAS Y COMPONENTES CLAVE Existen varios componentes importantes a los que se hace referencia en este manual. PANEL DE CONTROL DE FÁCIL USO Gire el mando selector de ciclo para seleccionar el ciclo de secado que desee. Añada opciones de ciclo o ajuste los valores tocando un botón. -
Page 40: Instrucciones Para La Instalación
INSTRUCCIONES PARA LA INSTALACIÓN DIMENSIONES Y ESPECIFICACIONES CLAVE Descripción Secadora (gas y eléctrica) Requisitos eléctricos Consulte la etiqueta de especificaciones. Requerimientos de gas* NG: Columna de agua (CA) de 4–10,5 pulgadas Requerimientos de gas* LP: CA de 8–13 pulgadas 51 3/16 Dimensiones 27 pulg. -
Page 41: Instalación Con Base De Pedestal O Kit De Montaje Sobre La Lavadora Opcionales
INSTRUCCIONES PARA LA INSTALACIÓN INSTALACIÓN CON BASE DE PEDESTAL O KIT DE MONTAJE SOBRE LA LAVADORA OPCIONALES IMPORTANTE: Si está instalando la secadora con una base de pedestal o un kit de montaje sobre la lavadora opcionales, consulte las instrucciones que vienen con el accesorio. Dimensiones requeridas para la Dimensiones requeridas para la instalación instalación con pedestal... -
Page 42: Secadoras A Gas
INSTRUCCIONES PARA LA INSTALACIÓN SECADORAS A GAS REQUISITOS DE GAS (SÓLO MODELOS DE GAS) ADVERTENCIA: Para reducir el riesgo de incendio, descarga eléctrica o lesiones físicas al utilizar este electrodoméstico, siga estas precauciones básicas, entre las que se incluyen las siguientes: •... -
Page 43: Conexión Al Suministro De Gas
INSTRUCCIONES PARA LA INSTALACIÓN SECADORAS A GAS (continuación) ADVERTENCIA: Para reducir el riesgo de incendio, descarga eléctrica o lesiones físicas al utilizar este electrodoméstico, siga estas precauciones básicas, entre las que se incluyen las siguientes: • La instalación y el servicio deben ser realizados por un •... -
Page 44: Secadoras Eléctricas
INSTRUCCIONES PARA LA INSTALACIÓN SECADORAS ELÉCTRICAS REQUISITOS ELÉCTRICOS Requisitos eléctricos sólo para modelos eléctricos ADVERTENCIA: Para ayudar a prevenir incendios, descargas eléctricas, lesiones graves o incluso la muerte, el cableado y la puesta a tierra deben ADVERTENCIA: cumplir la edición más reciente del National Electrical Code, Para reducir el riesgo ANSI/NFPA 70 y todas las normativas locales de aplicación. -
Page 45: Conexión De Las Secadoras Eléctricas
INSTRUCCIONES PARA LA INSTALACIÓN SECADORAS ELÉCTRICAS (continuación) CONEXIÓN DE LAS SECADORAS ELÉCTRICAS ADVERTENCIA: La puesta a tierra a través del conductor neutro está prohibida Conecte el cable de alimentación a la caja de terminales. para: (1) nuevas instalaciones de circuitos derivados, Conecte cada uno de los conductores del cable de (2) viviendas móviles, (3) vehículos recreativos y (4) zonas en alimentación al tornillo de la caja de terminales que tenga... -
Page 46: Ventilación De La Secadora
INSTRUCCIONES PARA LA INSTALACIÓN VENTILACIÓN DE LA SECADORA ¡IMPORTANTE! COMPRUEBE LA EXISTENCIA DE PROBLEMAS EN SU SISTEMA DE EVACUACIÓN La causa más habitual de problemas en la secadora es una • EXTRACTOR OBSTRUIDO O DAÑADO. Compruebe su ventilación deficiente. Antes de instalar su nueva secadora, extractor exterior. - Page 47 INSTRUCCIONES PARA LA INSTALACIÓN VENTILACIÓN DE LA SECADORA (continuación) Ventilación correcta Colocación y conexión de los conductos Siga las directrices expuestas a continuación para lograr un funcionamiento óptimo de la secadora y reducir la acumulación de pelusa y la condensación en los conductos. NOTA: Los conductos de paso (de la secadora a la pared) y las uniones NO se incluyen, por lo que deberán adquirirse por separado.
-
Page 48: Nivelación De La Secadora
INSTRUCCIONES PARA LA INSTALACIÓN INSTRUCCIONES PARA LA INSTALACIÓN NIVELACIÓN DE LA SECADORA INVERSIÓN DE LA PUERTA El sentido de la basculación de la puerta de la secadora se ADVERTENCIA: puede invertir para adaptarlo al sitio de instalación. ADVERTENCIA: • Utilice guantes durante la instalación. •... -
Page 49: Comprobación Final De Instalación
INSTRUCCIONES PARA LA INSTALACIÓN INSTRUCCIONES PARA LA INSTALACIÓN COMPROBACIÓN FINAL DE LA INSTALACIÓN Prueba de calentamiento de la secadora Una vez finalizada la instalación y colocada la secadora en su posición final, compruebe que la secadora funciona correctamente realizando los siguientes pasos y pruebas. Cierre la puerta de la secadora. -
Page 50: Instrucciones De Uso
INSTRUCCIONES DE USO ADVERTENCIA: Para reducir el riesgo de incendio, descarga eléctrica o lesiones personales, lea completamente este manual, incluyendo las instrucciones importantes sobre seguridad, antes de poner en funcionamiento la secadora. FUNCIONES DEL PANEL DE CONTROL BOTÓN POWER (ENCENDER/APAGAR) BOTONES MODIFICADORES DE CICLO Presione este botón para ENCENDER la secadora. -
Page 51: Funcionamiento De La Secadora
INSTRUCCIONES DE USO FUNCIONAMIENTO DE LA SECADORA LIMPIAR EL FILTRO DE PELUSAS Si aún no ha limpiado el filtro de pelusas, extráigalo y elimine las pelusas procedentes de la última carga. De esta manera, se asegurará la máxima eficacia y rapidez del secado. CARGAR LA SECADORA Cargue en la secadora la colada húmeda procedente de la lavadora. -
Page 52: Guía De Ciclos
INSTRUCCIONES DE USO GUÍA DE CICLOS La siguiente guía de ciclos muestra las opciones disponibles y los tipos de tejidos recomendados para los ciclos de secado automático. *NOTA: El tiempo predeterminado y real variarán dependiendo del tamaño de la carga y su contenido de humedad. Ciclos de secado automático Los ciclos de secado automático utilizan un sensor que detecta los niveles de humedad en las prendas y ajusta el tiempo de secado necesario para obtener resultados óptimos. - Page 53 INSTRUCCIONES DE USO GUÍA DE CICLOS La siguiente guía de ciclos muestra las opciones disponibles y los tipos de tejidos recomendados para los ciclos de secado manual. Ciclos de secado manual Utilice los ciclos de secado manual para seleccionar un tiempo y temperatura de secado específicos. Al seleccionar el ciclo de SECADO MANUAL, la pantalla muestra el tiempo que queda para que termine el ciclo.
-
Page 54: Clasificación De Cargas
INSTRUCCIONES DE USO ADVERTENCIA: A fin de reducir el riesgo de incendio, descargas eléctricas o lesiones personales, antes de poner en funcionamiento este electrodoméstico, lea completamente este manual, incluidas las instrucciones importantes sobre seguridad. CLASIFICACIÓN DE CARGAS CARGA DE LA SECADORA ADVERTENCIA: Etiquetas de cuidado de las prendas Para reducir el riesgo... -
Page 55: Pantalla De Tiempo Y Estado
INSTRUCCIONES DE USO PANTALLA DE TIEMPO Y ESTADO La pantalla de tiempo y estado muestra el tiempo restante estimado, el proceso del ciclo y el estado de ventilación. Al encender la secadora, la pantalla se iluminará. PANTALLA DE TIEMPO INDICADOR DE CONTROL DE VENTILACIÓN (SISTEMA DE DETECCIÓN DE BLOQUEO DEL CONDUCTO) Al seleccionar un ciclo, la pantalla indicará... -
Page 56: Botones Modificadores De Ciclo
INSTRUCCIONES DE USO BOTONES MODIFICADORES DE CICLO Cada ciclo dispone de ajustes predeterminados que se NOTA: Para proteger sus prendas, no todos los niveles de seleccionan automáticamente. También puede personalizar secado, temperatura y opciones están disponibles para todos estos ajustes utilizando los botones modificadores de ciclo. los ciclos. -
Page 57: Opciones De Ciclos Y Funciones Especiales
INSTRUCCIONES DE USO OPCIONES DE CICLOS Y FUNCIONES ESPECIALES La secadora incluye varias funciones especiales y opciones adicionales para los ciclos para adaptarse a sus necesidades particulares. WRINKLE GUARD (ANTIARRUGAS) DAMP DRY SIGNAL (SECADO HÚMEDO) Si presiona la secado húmedo, la Si selecciona esta opción, la secadora secadora emitirá... -
Page 58: Instrucciones De Mantenimiento Del Usuario
INSTRUCCIONES DE MANTENIMIENTO DEL USUARIO ADVERTENCIA: A fin de reducir el riesgo de incendio, descargas eléctricas o lesiones personales, antes de poner en funcionamiento este electrodoméstico, lea completamente este manual, incluidas las instrucciones importantes sobre seguridad. • Desenchufe la secadora antes de proceder a su limpieza para evitar posibles descargas eléctricas. Si no se cumple con esta advertencia se podrán producir lesiones graves, incendios, descargas eléctricas o muerte. -
Page 59: Mantenimiento Del Sistema De Ventilación
INSTRUCCIONES DE MANTENIMIENTO DEL USUARIO MANTENIMIENTO DEL SISTEMA DE VENTILACIÓN La causa más habitual de problemas en la secadora es una ventilación deficiente. Una ventilación deficiente puede producirse por los siguientes motivos: • CONDUCTOS DE VENTILACIÓN SUCIOS O DAÑADOS • MATERIAL INADECUADO DE LOS CONDUCTOS DE VENTILACIÓN •... -
Page 60: Kenmore Connect
• Para obtener mejores resultados, no mueva el teléfono mientras se estén trasmitiendo los tonos. • Si el agente del centro de llamadas no puede grabar con precisión los datos, quizá le pida que lo intente de nuevo. • Si pulsa el botón POWER durante la transmisión se apagará el sistema Kenmore Connect. -
Page 61: Guía De Solución De Problemas
GUÍA DE SOLUCIÓN DE PROBLEMAS ANTES DE SOLICITAR ASISTENCIA TÉCNICA Problema Causa posible Soluciones * La luz CHECK VENT parpadea. El sistema de ventilación es demasiado largo Instale un conducto con un recorrido más corto o recto. o tiene demasiados cambios de dirección/ Consulte las instrucciones de instalación para obtener obstrucciones. - Page 62 GUÍA DE SOLUCIÓN DE PROBLEMAS ANTES DE SOLICITAR ASISTENCIA TÉCNICA (continuación) Problema Causa posible Soluciones Las prendas tardan mucho en secarse. Los conductos de ventilación están obstruidos, sucios Asegúrese de que los conductos de ventilación o son demasiado largos. están instalados correctamente y libres de residuos, pelusas y obstrucciones.
- Page 63 GUÍA DE SOLUCIÓN DE PROBLEMAS ANTES DE SOLICITAR ASISTENCIA TÉCNICA (continuación) Problema Causa posible Soluciones Las prendas han encogido. No se siguieron las instrucciones de cuidado de Para evitar que las prendas encojan, consulte siempre las instrucciones de cuidado de la prenda y sígalas. Algunos las prendas.
-
Page 64: Garantía
GARANTÍA Garantía limitada por un año de Kenmore Si, tras ser instalado, operado y mantenido según todas las instrucciones del producto, este electrodoméstico sufriera averías debidas a defectos de material y mano de obra, dentro del período de un año a partir de la fecha de compra, llame al 1-800-4-MY-HOME® para solicitar su reparación gratuita. - Page 65 NOTA...
- Page 66 NOTA...
- Page 67 NOTA...
- Page 68 Get it fixed, at your home or ours! Your Home For troubleshooting, product manuals and expert advice: www.managemylife.com For repair – in your home – of all major brand appliances, lawn and garden equipment, or heating and cooling systems, no matter who made it, no matter who sold it! For the replacement parts, accessories and owner’s manuals that you need to do-it-yourself.