Table of Contents
Advertisement
Advertisement
Table of Contents
Troubleshooting

Related Manuals for Invacare Harrier Plus


Summary of Contents for Invacare Harrier Plus
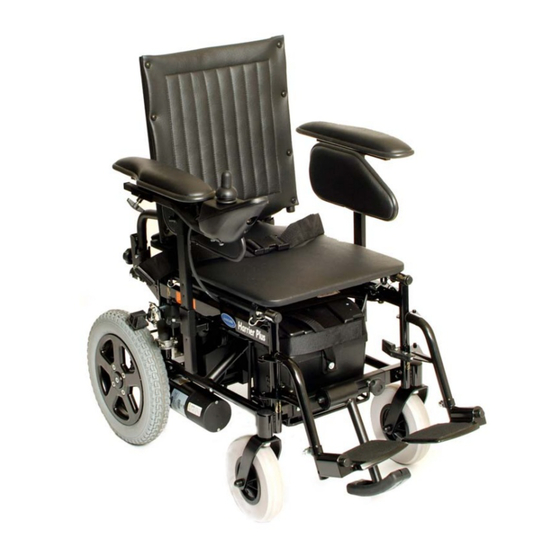
- Page 1 Invacare® Harrier Plus User Guide...
-
Page 2: Table Of Contents
Contents Page Warranty Terms & Conditions…………………………………………………….. Standard Invacare Terms………………………………………………………………………… Limitation of liability……………………………………………………………………………… Useful Symbols In This Manual…………………………………………………….. Introduction…………………………………………………………………………… 2.1 Intended Use…………………………………………………………………………………. 2.2 Type Classification…………………………………………………………………………… Safety Notes…………………………………………………………………………… 3.1 Repair or Service Information………………………………………………………………... 3.2 General Safety notes…………………………………………………………………………. 3.3 Safety Information On Electromagnetic Interference………………………………………... - Page 3 7.3 Power Reclining Backrest (where fitted)…………………………………………………….. 7.4 Tray Assembly………………………………………………………………………………... 7.5 Installing Or Adjusting Lateral Supports (where fitted)……………………………………... 7.6 Lap Belt Adjustment…………………………………………………………………………. 7.7 Armrest Adjustment…………………………………………………………………………. 7.8 Installing/Removing Or Adjusting Headrest (where fitted)………………………………….. 7.9 Seating………………………………………………………………………………………... 7.10 Installing/Removing Seat/Back Cushion (where fitted)…………………………………….. 7.11 Installing/Removing Seat Board……………………………………………………………... 7.12 Kerb Climber………………………………………………………………………………...
- Page 4 11.1 Types Of User Control …………………………………………………………………….. 11.2 Joystick Mounting Hardware………………………………………………………………... Transfers………………………………………………………………………………... Keeping Your Chair In Good Condition…………………………………………... Fault Finding…………………………………………………………………………… Waste Electrical and Electronic Equipment (WEEE) Directive 2002/96/EC... Contacting Invacare…………………………………………………………………..
-
Page 5: Useful Symbols In This Manual
Useful Symbols In This Manual WARNING! This symbol warns you of danger! Always follow the instructions to avoid injury to the user or damage to the product! EXPLOSION HAZARD! This symbol warns you of an explosion hazard, an example of which can be caused by excessive tyre pressure in a pneumatic tyre! •... -
Page 6: Warranty Terms & Conditions
Warranty Terms & Conditions Standard INVACARE Terms This is to certify that your Powerchair is warranted by INVACARE Ltd. for a period of 2 years for parts, 3 years for frames and 12 months for batteries. 1. Only INVACARE chairs purchased at full price are warranted against defective workmanship and materials. -
Page 7: Limitation Of Liability
Limitation Of Liability This Warranty does not extend to the consequential costs from fault clearance, in particular freight and travel costs, loss of earnings, expenses, etc. • Natural wear and tear • Inappropriate or incorrect use • Defective assembly or setting-up by the purchaser or third parties •... -
Page 8: Introduction
The information contained in this document is subject to change without notice. As a manufacturer of wheelchairs, Invacare endeavours to supply a wide variety of wheelchairs to meet many needs of the end user. However, final selection of the type of wheelchair to be used by an individual rests solely with the user and his/her healthcare professional capable of making such a selection. -
Page 9: Intended Use
Intended Use Indoor and outdoor configurable wheelchair offered with various options compliant with EN12184:1999 section 5 class B. The Harrier Plus powered wheelchair has been designed to provide mobility and comfort for persons with impaired mobility. The wheelchair has been designed to be used either/or by a seated user/carer/attendant in both indoor and outdoor environments. -
Page 10: Type Classification
Type Classification Your Powerchair is a Class B (EN12184) and Class 2 (Road Traffic Act) available with a maximum speed of 4mph for use only on pavements, footpaths, pedestrian zones and areas free from motor traffic. It is not allowed on the highway except for the purpose of crossing. Under no circumstance must the top speed of the Powerchair be increased, to do so will infringe the ‘The Use of Invalid Carriages on Highways Regulations 1988, Statutory Instrument 1988 No. -
Page 11: Safety Notes
Limitation of Use • WEIGHT TRAINING – Invacare DOES NOT recommend the use of its wheelchairs as a weight training apparatus. Invacare wheelchairs have NOT been designed or tested as a seat of any kind for weight training. If occupant uses their wheelchair as weight training apparatus, Invacare shall NOT be liable for injury and the warranty will become void. -
Page 12: General Safety Notes
OFF immediately and re-enter setup specifications. Repeat this procedure until the wheelchair performs to specifications. • DO NOT use parts, accessories or adapters other than those authorized by Invacare. • DO NOT stand on the frame of the wheelchair. - Page 13 CLIMATIC TESTING • Invacare has tested its power wheelchairs in accordance with ISO 7176 Part 9 ‘Climatic Test’. This provides the end user or his/her attendant sufficient time to remove his/her power wheelchair from a rain storm and retain wheelchair operation.
-
Page 14: Safety Information On Electromagnetic Interference
Safety Information On Electromagnetic Interference This electric vehicle was successfully tested in accordance with international standards as to its compliance with Electromagnetic Interference (EMI) regulations. However, electromagnetic fields, such as those generated by radio and television transmitters, and cellular phones, can influence the functions of the electric vehicles. -
Page 15: Safety Precautions/Safe Operation
Safety Precautions/Safe Operations • The day to day activities and the more advanced powerchair techniques depend, on your physical capabilities and your own specific circumstances. Our recommendations may occasionally differ from those of your Therapeutic Adviser or Physician, as they may have a better understanding of your abilities. Where this is the case, you MUST FOLLOW THEIR ADVICE, they are better placed to tell you what is suitable for you and what is not. - Page 16 • Individual wheelchair users often develop skills to deal with daily living activities that may differ from those described in this manual. Invacare recognises and encourages each individual to try what works best for him/her in overcoming environmental obstacles that they may encounter, however ALL WARNINGS and CAUTIONS given in this manual MUST be followed.
- Page 17 RECOMMENDED DRIVING POSITION • INVACARE recommends that when driving your Powerchair during normal operating conditions the following seat and back angles are maintained: • Seat Angle: - approximately 4° • Back Angle: - approximately 7° (i.e. fully raised if fitted with a recliner mechanism).
-
Page 18: Some Useful Tips
Some Useful Tips • Before you venture off on your first journey, ensure that everything is adjusted to your specific needs, read this manual to familiarise yourself with the product and its functions. DO NOT attempt to drive without an attendant on hand until you are fully proficient in using and maneuvering your powerchair. - Page 19 REACHING - BENDING BACKWARDS • Again ensure power is switched OFF. • DO NOT reach back any further than your arm will extend without changing your sitting position. • DO NOT lean over the top of the backrest as it will shift the centre of gravity, risking tipping over. •...
- Page 20 NEGOTIATING KERBS When approaching kerbs wherever possible mount and dismount pavements via ramps. Always approach the kerb head on, not at an angle. Without a Kerb Climber Your Powerchair can safely climb kerbs of up to 5cm without a kerb climber. Before negotiating the kerb, ensure the speed control setting is set to maximum.
- Page 21 3. Look out for traffic. 4. Drive forward down the kerb. The kerb climbing device should return to the climbing position after each maneuver. If you require further advice, please contact your INVACARE dealer. NEGOTIATING GRADIENTS/SLOPES Direction of Travel • The maximum safe slope is 6°.
- Page 22 SAFEGUARDING OTHERS • We want you to get the most out of your INVACARE Powerchair, ensuring that the safety of yourself and others is never in jeopardy. If you are in any doubt about safe techniques, handling or care of the...
-
Page 23: Safety Inspection Checklist
Safety Inspection Checklist Initial adjustments should be made to suit personal body structure/user capability and preference. Thereafter follow these maintenance procedures: Inspect / Inspect / Inspect / Initially Adjust Adjust Adjust 6 Weekly Monthly Monthly General Wheelchair rolls straight (no excessive drag or pull to one side) Electrics Plug and socket connections... - Page 24 Inspect / Inspect / Inspect / Initially Adjust Adjust Adjust 6 Weekly Monthly Monthly Adjustable height arms operate and lock securely Armrests Inspect for rips in upholstery Arm rest pad sits flush against arm tube Seat and back Upholstery Inspect for rips or sagging Drive Wheels Ensure axle nut and wheel mountings are not loose...
- Page 25 (e.g. rips tears, fraying) to these parts. If you have any doubts regarding the condition of any part, do not hesitate to contact your INVACARE supplier/dealer immediately. Have your vehicle checked twice every year by an authorised INVACARE dealer in order to maintain its driving safety and roadworthiness.
-
Page 26: Trouble Shooting
Trouble Shooting - Mechanical Initial adjustments should be made to suit personal body structure/user capability and preference. Thereafter follow these maintenance procedures: Chair Sluggish Castors Squeaks & Veers Turn / Solutions ‘flutter’ Rattles Left/Right Performance If pneumatic, check tyres for correct and equal pressure Check for loose stem nuts/bolts Check that both castors contact ground at... -
Page 27: Trouble Shooting - Electrical
Solutions Batteries draw excessive Battery failure Replace if necessary (see section 8) current when charging Electrical malfunction Contact Dealer/Invacare for service Battery indicator flashes the charge level is low immediately Battery failure Replace if necessary (see section 8) after charging... - Page 28 Symptom Probable Cause Solutions Joystick erratic or does not Damaged motor coupling Contact Dealer/Invacare for service respond as desired Electrical malfunction Contact Dealer/Invacare for service Controller programmed Contact Dealer/Invacare for service improperly Wheelchair does not respond Poor battery terminal to commands. Power indicator...
-
Page 29: Checking Battery Charge Level
Checking Battery Charge Level The following ‘Do’s’ and ‘Don’ts’ are provided for your convenience and safety. Don’ts Do’s Read and understand this manual and any service information Don’t perform any installation or maintenance that accompanies a battery and charger before operating the without first reading this manual. -
Page 30: Care And Maintenance
Care and maintenance NOTE: Have your vehicle checked at least twice a year by an authorised Invacare dealer in order to maintain its driving safety and roadworthiness. Cleaning the vehicle: When cleaning the vehicle, pay attention to the following points: •... -
Page 31: Adjustment
Adjustment Seat Depth & Backrest Angle Adjustment (Manual) ADJUSTING: The backrest has 3.5cm of depth adjustment and 12° of tilt adjustment (where applicable). The individual fitting of the firm backrest allows the seat depth to be adjusted by 3.5cm. The backrest angle can be adjusted from the vertical through to 12°. - Page 32 NOTE: Each backrest post must be positioned in the same plane as the other or the backrest will be twisted. To enable the chair to be more portable, the backrest can be either folded down or detached from the wheelchair base. TO FOLD THE BACKREST: 1.
-
Page 33: Tension Adjustable Back Upholstery
Adjusting Tension Adjustable Back Upholstery (where fitted) CAUTION: This adjustment should only be made when the chair is unoccupied and the joystick unit is switched off. 1. Remove backrest cushion by releasing the hook and loop fastening strips. 2. Adjust the tension of each belt by releasing the hook and loop fastening strips and repositioning as desired. -
Page 34: Power Reclining Backrest (Where Fitted)
Power Reclining Backrest (where fitted) CAUTION: It is advised that drive and/or brakes are engaged prior to operating mechanism. ADJUSTING SEAT ANGLE: To recline the backrest (this is an additional option), press the appropriate ‘DOWN’ button and release it when you have reached your desired position. -
Page 35: Tray Assembly
Tray Assembly IMPORTANT: Ensure that the joystick control unit is switched off before fitting, removing or adjusting the tray assembly. The tray assembly comes ready assembled and is designed to fit to either the left or right hand side of the wheelchair. -
Page 36: Installing Or Adjusting Lateral Supports (Where Fitted)
Installing Or Adjusting Lateral Supports (where fitted) INSTALLING: 1. Remove the required existing pan head screws from each backrest flange. 2. Line up the support rail (A) with the holes in the backrest. 3. With the longer screws provided attach the support rail to the backrest flanges and into the screw inserts –... -
Page 37: Lap Belt Adjustment
Lap Belt Adjustment TYPES OF LAPBELT: The lap belt is commonly used to assist wheelchair users to maintain an optimal sitting posture. Correct use of the lap belt is intended to help the user, especially those with limited sitting balance, to remain safe, comfortable and well positioned in their wheelchair. - Page 38 WARNING: If it is intended that your wheelchair is to be used as a seat for transportation in a vehicle Invacare recommend the use of a metal buckled type lap belt (please check that your wheelchair has been tested to ISO 7176 part 19 –...
-
Page 39: Armrest Adjustment
Armrest Adjustment CAUTION: Ensure the controller power is switched off before making armrest adjustments. The armrests are not intended for lifting/carrying the wheelchair. ARMREST HEIGHT ADJUSTMENT: 1. Pre set the height of the armrest assembly by positioning the self tapping screw (B) in one of the holes in the armrest tube. - Page 40 ARMREST WIDTH ADJUSTMENT: 1. Release locking handwheel (A) to allow the armrest assembly to slide out. 2. Set armrest assembly to the desired position and re- tighten the locking handwheel (A). TO REMOVE THE ARMREST: 3. Release locking handwheel (A) to allow the armrest assembly to slide out.
-
Page 41: Installing/Removing Or Adjusting Headrest (Where Fitted)
Installing / Removing Or Adjusting Headrest (where fitted) CAUTION: After ANY adjustments, repair or service and BEFORE use, make sure that all attaching hardware is tightened securely - otherwise injury or damage may result. INSTALLING: 1. Ensure set screws are not protruding into headrest support tube. -
Page 42: Seating
- otherwise injury or damage may result. • It is important for regular inspection to be carried out on the armrests for signs of visible damage. If any repairs are required, these should be carried out by an INVACARE dealer. 7.10... -
Page 43: Installing/Removing Seat Board
7.11 Installing / Removing Seat Board WARNING: This adjustment should only be performed when the wheelchair is unoccupied. Take care not to damage any accessories fitted to the seat board. To install/remove the seat board from the wheelchair seat frame: 1. -
Page 44: Kerb Climber
7.12 Kerb Climber REMOVAL: 1. Remove the legrests, or swing them out of the way. 2. Loosen the handwheel (A) and then slide the handwheel towards the centre of the chair. 3. Pull the kerb climber assembly away from the retaining socket on the right hand side. INSTALLING: 1. -
Page 45: Leg Rests
7.13 Leg Rests REMOVAL: Release locking lever (A), swing footrest to the side, or lift up and off. Do this before sitting in the chair. ADJUSTMENT: 1. Loosen the hex nuts on the extension tube. Use a twisting motion when sliding the telescopic tube in and out. -
Page 46: Elevating Leg Rests
7.14 Elevating Leg Rests REMOVAL: Release locking lever (B), swing footrest to the side, or lift up and off. Do this before sitting in the chair. ADJUSTMENT: 1. When lowering the legrest, support the weight of user’s leg then release the lock. 2. -
Page 47: Anti Tippers
– otherwise injury or damage may result. • The anti tipping castors, or ‘anti tippers’, are an important safety feature on the Harrier Plus wheelchair. DO NOT attempt to drive the power chair if they have been removed or damaged. -
Page 48: Batteries
• Make sure power to the wheelchair is OFF before performing this procedure. • The use of rubber gloves and chemical goggles is recommended when working with batteries. • Invacare strongly recommends that battery installation and battery replacement always be carried out by a qualified technician. - Page 49 REMOVING: 1. Ensure the joystick is switched off. 2. Follow the steps in section 7.10 to remove the seat board. 3. Disconnect both rear battery box wiring harnesses (Red and Grey connectors). 4. If fitted with a power module, disconnect all power, motor and joystick connectors. 5.
- Page 50 INSTALLING: 1. Place the batteries into the battery hangers being sure to use proper lifting technique. 2. Reconnect front and rear battery box fixing straps. 3. If fitted with a power module reconnect all power, motor and joystick connectors 4. Reconnect battery box wiring harnesses (Red and Grey connectors). 5.
-
Page 51: Disconnecting Battery Cables
Disconnecting Battery Cables WARNING: • NEVER allow any of your tools and/or battery cable(s) to contact BOTH battery terminal(s)/ post(s) at the same time. An electrical short may occur and serious personal injury or damage may occur. • The use of rubber gloves and chemical goggles is recommended when working with batteries. NOTE: Battery Perform this procedure on one (1) battery and... - Page 52 DISCONNECTING BATTERY CABLES: 1. Place the battery boxes in a well ventilated area where work can be performed without risking damage to carpeting or floor covering. 2. Disconnect strap and lift battery box lid to expose underlying cables. 3. Remove the hex screw and locknut that secures NEGATIVE (-) the NEGATIVE (-) black battery cable to the Battery...
-
Page 53: Connecting Battery Cables
Connecting Battery Cables WARNING: • NEVER allow any of your tools and/or battery cable(s) to contact BOTH battery terminal(s)/ post(s) at the same time. An electrical short may occur and serious personal injury or damage may occur. • The use of rubber gloves and chemical goggles is recommended when working with batteries. CAUTION: When connecting the battery cables to the battery (s), the battery cable(s) MUST be connected to the battery terminal(s)/post(s) depending on battery type. -
Page 54: Batteries And Charging
Batteries & Charging WARNING: • The battery charger supplied with your powerchair is for indoor use only; it must be protected from moisture and external heat sources. • Handle the battery charger with care, if it has been dropped or damaged, do not use it. •... - Page 55 For replacement batteries contact your local INVACARE supplier/dealer in order to ensure that the new batteries are of the correct type and specification and are correctly installed and connected.
- Page 56 WARNING: When you replace worn out batteries, fit the type recommended by the INVACARE supplier/dealer. If you use another type the battery gauge may be inaccurate.
-
Page 57: Disposing And Recycling Of Used Batteries
Disposing & Recycling Of Used Batteries You can help preserve our environment by returning your used rechargeable batteries to the collection and recycling location nearest to you. Batteries must always be correctly recycled. Under no circumstances should batteries be disposed of in domestic refuse. -
Page 58: Motor Locks, Wheels & Brakes
Motor Locks, Wheels & Brakes WARNING: After ANY adjustments, repair or service and BEFORE use, make sure that all attaching hardware is tightened securely - otherwise injury or damage may result. CAUTION: As with any vehicle, the wheels and tyres should be checked periodically for cracks and wear, and should be replaced. -
Page 59: Drive Wheels
Drive Wheels INFLATION: Locate air valve and remove air cap. Check the pressure rating marked on the side of the tyre and inflate as necessary. CAUTION: Do not over inflate tyres. As with any vehicle, the wheels and tyres should be checked periodically for wear. REMOVAL: •... -
Page 60: Manual Parking Brakes
Manual Parking Brakes To Activate Brake: • Locate the brake grip handle. • Pull the brake handle in an upwards direction until it engages. • Repeat for opposite side of chair. To De-Activate Brake: • Locate the brake grip handle. •... -
Page 61: Transportation
TRANSPORTATION OF WHEELCHAIRS IN VEHICLES RECOMMENDED RESTRAINT METHODS - FOR FOLDING FRAME CHAIRS: For additional information, consult your INVACARE dealer. For transportation purposes other than disassembly, the powerchairs may be used in vehicles which have been modified specifically for the purpose. The powerchair must be secured using these recommended restraint methods. - Page 62 FIG No. 2 Invacare recommend that the lap belt is used in addition to the specified tie-down/ three point occupant restraint system. However, the lap belt should be fitted under, and not be allowed to interfere with, the three...
- Page 63 CAUTION: INVACARE always advises that a Powerchair secured in a vehicle will not provide the equivalent safety level and security as bespoke seating systems and recommends transfer to the vehicle seating, but also recognises that it is not always practical for the user to be transferred. In cases where transfer is not possible then the...
- Page 64 9. INVACARE recommend the ‘Gemini System with 4-Point Heavy Duty Webbing Tie-Down System with Karabina’ plus suitable ‘D-Rings’ should be used to secure your chair within the vehicle, these restraints are available from Unwin Safety Systems (based in UK TA12 6EY, Tel: +44 (0) 1935 827740, http://www.unwin- safety.com).
-
Page 65: Disassembly And Folding
10.1 Disassembly & Folding To enable your chair to be carried in the boot of most cars, pleas follow these instructions: 1. Follow the steps in 7.1 to remove the backrest. 2. Follow the steps in section 7.7 to remove the armrests. Ensure the controller is unplugged before carrying out this operation. -
Page 66: Controls Systems
DO NOT use your Powerchair if the joystick boot shows any visible signs of damage. Please refer to your Invacare dealer regarding repairs. 11.1 Types Of User Controller Please refer to the control system user manual that has been supplied with your Harrier Plus... -
Page 67: Joystick Mounting Hardware
(L). CAUTION: DO NOT use your Powerchair if the joystick boot shows any visible signs of damage. Please refer to your Invacare dealer regarding repairs. ADJUSTMENT: 1. Unscrew the small handwheel (L) located on the underside of the armrest. -
Page 68: Transfers
Transfers Learning how to get in and out of a wheelchair safely and without injury is most important. Transferring to and from your powerchair may require practice and a good sense of balance. It is recommended that whenever possible you have assistance when transferring to and from your powerchair. It is recognised, however, that situations may occur when assistance is not available. - Page 69 Attendant assistance is recommended and the following advice is relevant: • The attendant lifting the occupant should take special precautions to avoid tipping or injuries from lifting, supporting, turning and lowering the patient. • The attendant is responsible for stabilising the wheelchair and must take precautions to prevent the wheelchair moving or sliding during the transfer, i.e.
-
Page 70: Keeping Your Chair In Good Condition
Keeping Your Chair In Good Condition Your powerchair will benefit from periodic inspection, adjustment and replacement of worn parts. Regular maintenance will enhance • Reliable performance • Safety • Extended battery life • Confidence in operation • Low operating costs You can help keep your chair in good condition by following a simple guide to home maintenance. - Page 71 BATTERIES Keep your batteries well charged (see ‘advice on batteries and battery charging’ booklet). Keep batteries in a dry, frost-proof place. Be sure battery terminals remain tight and not corroded. FOOTRESTS Footrest heights are easily adjusted, clamp nuts must be securely tightened. Do not stand on the footplates. CABLES AND CONNECTIONS On a weekly basis, inspect all plug connections to be sure they are securely attached.
-
Page 72: Fault Finding
• Check that the castors move freely, and there is no free play at castor stem. • Check joystick drive function is in line with the left and right response. One motor may be unplugged. If your chair still has a problem after making these checks, please contact your INVACARE dealer... -
Page 73: Waste Electrical And Electronic Equipment (Weee) Directive 2002/96/Ec
Waste Electrical and Electronic Equipment (WEEE) Directive 2002/96/EC This product has been supplied from an environmentally aware manufacturer that complies with the Waste Electrical and Electronic Equipment (WEEE) Directive 2002/96/EC. This product may contain substances that could be harmful to the environment if disposed of in areas (landfills) that are not appropriate according to legislation. -
Page 74: Contacting Invacare
Contacting Invacare For questions or support, please contact your authorized INVACARE dealer. They have the necessary experience, equipment, and knowledge concerning your wheelchair which enables them to offer you an all round satisfactory service. Should you wish to contact us directly, we are at your service under the following addresses and telephone... - Page 75 Ulrich Alber GmbH, Vor dem Weissen Stein 21, D-72461 Albstadt-Tailfingen Tel: (49) (0)7432 2006 0, Fax: (49) (0)7432 2006 299 info@ulrich-alber.de España: Invacare SA, c/Areny s/n, Polígon Industrial de Celrà, E-17460 Celra (Gironà) Tel: (34) (0) 972 49 32 00, Fax: (34) (0)972 49 32 20 contactsp@invacare.com France:...
- Page 76 Italia: Invacare Mecc San s.r.l., Via dei Pini 62, l-36016 Thiene (V1) Tel: (39) 0445 38 00 59, Fax: (39) 0445 38 00 34 italia@invacare.com Nederland: Invacare BV, Celsiusstraat 46, NL-6716 BZ Ede Tel: (31) (0)318 695 757, Fax: (31) (0)318 695 758 mobility@invacare.com...
- Page 77 Tel: (41) (0)61 487 70 80, Fax: (41) (0)61 487 70 81 office@mobitec-rehab.ch switzerland@invacare.com United Kingdom & Eire: Invacare Ltd, South Road, Bridgend Industrial Estate, UK-Bridgend CF31 3PY Tel: (44) (0)1656 664 321, Fax: (44) (0)1656 667 532 UK@invacare.com eire@invacare.com WWW.INVACARE.COM...