Miele B 890 Operating Instructions Manual
Rotary ironer
Hide thumbs
Also See for B 890:
- Technical information (43 pages) ,
- Operating instructions manual (36 pages) ,
- Reference manual (4 pages)

Related Manuals for Miele B 890


Summary of Contents for Miele B 890
-
Page 1: Operating Instructions
Operating instructions Rotary ironer B 890 en - GB To avoid the risk of accidents or damage to the machine it is essential to read these instructions carefully before installing and using it for the first time. M.-Nr. 05 317 871... -
Page 2: Table Of Contents
Contents Guide to the appliance ..........3 Warning and safety instructions . -
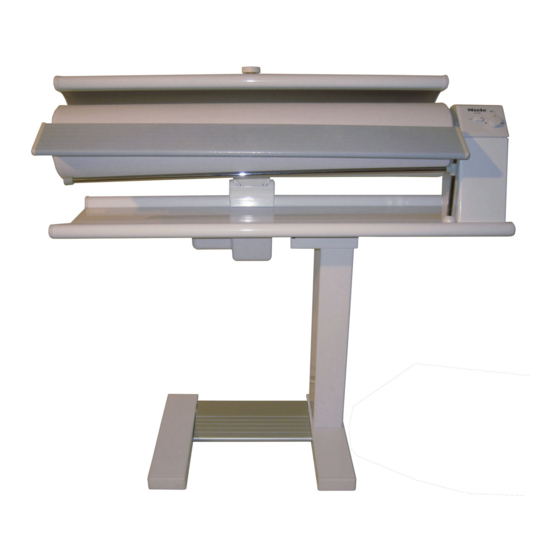
Page 3: Guide To The Appliance
Guide to the appliance Temperature selector Emergency release Finger guard Heater plate Roller Feed-in table Control panel Hanging bar Ironing table Release catch Mains connection cable Foot pedal Control panel C "Temperature" indicator light Roller speed selector "On-Off" button I-0... -
Page 4: Warning And Safety Instructions
Keep these instructions in a safe If the supply cord is damaged, it must be replaced by a Miele approved place and ensure that new users are service technician to avoid a hazard. familiar with the content. Pass them on to any future owner. - Page 5 Wide sleeves, unforeseen dangers for the user, for apron strings, ties or scarves could be which the Miele cannot accept liability. taken in by the roller. Repairs should only be undertaken by a Miele approved service technician.
- Page 6 Using accessories Accessories may only be fitted when expressly approved by Miele. If spare parts or accessories from other manufacturers are used, this will invalidate the guarantee, and Miele cannot accept liability.
-
Page 7: Caring For The Environment
Caring for the environment Disposal of the packing It should be unplugged or disconnected from the mains electricity supply by a material competent person. The transport and protective packing has been selected from materials which are environmentally friendly for disposal and can normally be recycled. -
Page 8: Moving The Ironer
Moving the ironer Safety Do not remove the safety device until the ironer has been set up on its rollers. ^ To remove it simply pull it off. Store it in a safe place for future use. It should be fitted to the ironer again before moving it (e.g. -
Page 9: Moving The Ironer
Moving the ironer The ironer is fitted with four rollers. ^ Hold the ironing table securely and pull on the release catch situated at ^ Hold the ironer by the ironing table to the back of the ironing table on the push it or to pull it towards you. -
Page 10: Before Using For The First Time
Before using for the first time Dust cover Connection cable The dust cover which protects the roller during transit has to be removed. The mains connection cable is wound round a hook underneath the ironing table. ^ First remove the feed-in table by ^ Unwind the cable. -
Page 11: Before Ironing
Before ironing Preparation of the working Preparing the laundry area Correct preparation of the laundry is essential for successful ironing. Before ironing, the laundry should be: – damped down – pulled into shape and smoothed out – sorted Damping down The laundry needs to be sufficiently damp, so that when it is passed just once through the rotary ironer at the... -
Page 12: Checking The Effectiveness Of The Finger Guard
Before ironing Checking the effectiveness of Pulling into shape and smoothing the finger guard Pull the dampened laundry into shape The finger guard is a safety feature and as usual. should be checked each time before the ironer is used. Smooth out ribbons, straps, seams and hems. -
Page 13: Ironing
Ironing Switching on and off Material Temperature symbol range ß Polyester / artificial silk temperature ßß Silk / Medium wool temperature ßßß Cottons / High linen temperature Cool The I-0 "On-Off" switch is used for switching the ironer on and off. To switch on ^ Press the button in –... -
Page 14: Select The Roller Speed
Ironing Select the roller speed Ironing There are 5 roller speed settings, from The ironing process is controlled by the low (approx. 2 m/min) to high (approx. foot pedal which has three positions: 4.5 m/min). A low speed makes it easier to iron complicated articles such as shirts and blouses. -
Page 15: Feeding Laundry In
Ironing Feeding laundry in ^ Arrange laundry along the feed-in table so that it is straight and smooth. ^ First lift it out of the right hand holder, and then pull it out to the left of the roller. Hanging bar ^ Then carefully turn the roller by hand until the laundry makes contact with Ironed laundry can be hung over the... -
Page 16: After Ironing
Ironing Power cut For small items, e.g. handkerchiefs, alternate between using the right and left hand sides of the roller. In the event of a power cut activate the emergency release. Items with raised buttons should be ironed face down on to the roller so that If there is a power cut whilst you are they are pressed into the cushioned ironing the heater plate will stay in... -
Page 17: Ironing Tips
Ironing tips The following tips are intended as helpful suggestions to get you started. With practice you will probably find alternative ways of ironing which suit your style of working. Tea towels, hand towels, handkerchiefs, serviettes etc. Place on the feed-in table with the straight grain of the fabric towards the feed-in table. -
Page 18: Duvet Covers
Ironing tips Duvet covers Pillow cases ^ First do up poppers and buttons and feed this end through the ironer first. Then iron the whole pillow case from both sides. Shirts Remove the feed-in table for ironing shirts. Iron in the following order: ^ Sleeves and cuffs ^ First do up poppers and buttons. - Page 19 Ironing tips Cuffs and sleeves Back / shoulder yoke ^ Pull sleeves smooth ready for ironing. Shirts with a shoulder yoke: Do not iron the cuff yet. ^ Fold the yoke along the back seam. ^ Iron the sleeves from the cuff seam to ^ Place the shirt side on to the roller the underarm seam.
- Page 20 Ironing tips Back Front Iron the back in two sections, from the The fronts are ironed in one pass middle to the side seams. together with the lower section of the back up to the armhole seam. ^ Start with the front left. ^ Pull the shirt over the roller as far as the yoke seam - or to the collar seam on shirts without a yoke - and smooth...
- Page 21 Ironing tips Collar Pyjamas Iron the collar from both sides. Do not Pyjamas tops should be ironed iron any buttons! following instructions for shirts. Iron trouser legs on pyjamas separately. ^ Iron one leg from the front and the other from the back. ^ Iron from the top to the bottom.
-
Page 22: Pressing Trousers
Ironing tips Pressing trousers ^ Iron each leg separately. Leave the top of the trousers hanging over the edge of the roller. ^ Cover with a damp cloth and turn the roller by hand until the trouser leg is covered by the heater plate. ^ Do the same to the other trouser leg. -
Page 23: Maintenance And Care
Cleaning the casing Ironing covers are available from your Miele dealer or the Miele Spare Parts Depending on how dirty it is, the casing Department. can be wiped down with a dry or a damp cloth. -
Page 24: Replacing The Ironing Cover
Maintenance and care Replacing the ironing cover The ironing cover should only be changed when the appliance is cold. ^ Remove the feed-in table. ^ Completely unwind the cotton undercloth attached to the roller and let it hang down smoothly. ^ Undo the ironing cover cords at each end of the roller. - Page 25 Maintenance and care ^ Switch on the ironer. ^ Insert the raw edge of the new ironing cloth into the retaining slot ^ Press the foot pedal and "iron" the with the wrong side down. Keep side cloth round. ties hanging free and smooth out. Do not let the cords get under the cloth as it turns.
- Page 26 Maintenance and care After the roller has gone through three or four revolutions and the end of the ironing cover is under the heater plate: ^ Switch off the ironer while keeping the foot pedal pressed down. The ironing cover is held firmly in place by the heater plate which is still lowered.
-
Page 27: Problem Solving Guide
Problem solving guide With the help of the following notes, minor faults in the performance of the ironer, some of which may result from incorrect operation, can be put right without contacting the Service Department. Repair work to electrical equipment should only be carried out by a suitably qualified person in accordance with local and national safety regulations. -
Page 28: After Sales Service
After sales service In the event of a fault, please contact: – your Miele dealer or – the nearest Miele Service Department, (see address on the back page). When contacting Miele, please quote the Model and Serial number of your... -
Page 29: Technical Data
Technical data Height 95.9 (folded up 105.2) cm Width 98.5 (folded up 50) cm Depth 38.0 cm Weight 38 kg max. load 372 Newton Voltage see data plate Rated load see data plate Fuse rating see data plate Test certificates awarded Radio/TV suppressed, VDE... - Page 32 Alteration rights reserved/1308 M.-Nr. 05 317 871 / 07...