Table of Contents
Advertisement
Quick Links
See also:
Manual
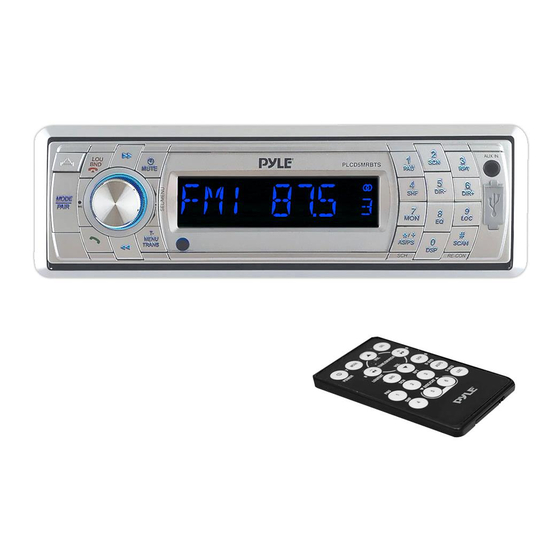
PLCD5MRBTS
OWNER'S MANUAL
Mobile Audio System
PLL Synthesizer Stereo Radio
AM/FM/MPX PLL RADIO
MP3/CD/CD-RW Compatible
Automatic Memory Storing
USB&SD/MMC Card Interface
Fold Down Detachable Panel
Auxiliary Input Function
Bluetooth Hands-free function & A2DP (Advanced Audio
Distribution Profile) Stereo Audio Transmission
www.pyleaudio.com
1
Advertisement
Table of Contents

Related Manuals for Pyle PLCD5MRBTS


Summary of Contents for Pyle PLCD5MRBTS
- Page 1 PLCD5MRBTS OWNER’S MANUAL Mobile Audio System PLL Synthesizer Stereo Radio AM/FM/MPX PLL RADIO MP3/CD/CD-RW Compatible Automatic Memory Storing USB&SD/MMC Card Interface Fold Down Detachable Panel Auxiliary Input Function Bluetooth Hands-free function & A2DP (Advanced Audio Distribution Profile) Stereo Audio Transmission www.pyleaudio.com...
-
Page 2: Table Of Contents
CONTENTS Installation...........3 USB play operation ........13 Take out screw before installation...3 SD/MMC operation ......... 13 DIN Front-Mount (Method A) ....3 Bluetooth operation ........15 Installing the unit........3 Preparing for operation ......15 Removing the unit .........4 Pairing ............ 15 DIN Rear-Mount (Method B)....5 Connect .......... -
Page 3: Installation
INSTALLATION Notes: TAKE OUT SCREW BEFORE INSTALLATION Choose the mounting location where Before install the unit, please remove the the unit will not interfere with the two screws. normal driving function of the driver. Take out screw Before finally installing the unit, connect before installation. -
Page 4: Removing The Unit
INSTALLATION back of the unit in place. Use the they will go (with the notches facing up) supplied hardware (Hex Nut (M5mm) into the appropriate slots at the middle and Spring Washer) to attach one end of left and right sides of the unit. Then slide the strap to the mounting bolt on the back the sleeve off the back of the unit. -
Page 5: Din Rear-Mount (Method B)
INSTALLATION 4. Lift the top of the outer trim ring then pull To fasten the unit to the factory radio it out to remove it. mounting brackets. 5. Insert both of the supplied keys into the Align the screw holes on the bracket with slots at the middle left and right sides of the screw holes on the unit, and then the unit, then pull the unit out of the... -
Page 6: Using The Detachable Front Panel
USING THE DETACHABLE FRONT PANEL To Detach the Front Panel 2. When the two sides fixed into place, 1. Press the release ( ) button, then the push the front panel into main unit. front panel will be folded down. OPEN 3. -
Page 7: Wiring Connection
WIRING CONNECTION ISO CONNECTION... -
Page 8: Location Of Keys
OPERATION LOCATION OF KEYS 1. MODE/PAIR 17. SCAN/# (release button) 18.0 DSP (hang up)/LOU/BND 19.*/+/ AS/PS 4. VOL / SEL/MENU (Audio knob) 20.8 EQ 21.7 MON 22.T-MENU/TRANS MUTE 7.LCD (pick up) 8. 4 SHF 25. Reset button 9. 5 DIR- 26. -
Page 9: Basic Operation
OPERATION EQUALIZATION BASIC OPERATION Press EQ button (20) shortly to turn on SWITCHING ON/OFF THE UNIT equalization function and to select desired Press button (6) to turn on the unit. audio mode. There are five kinds of mode When the unit is on, press and hold as below: button (6) to turn the unit off. -
Page 10: Auxiliary Input
OPERATION the P-VOL to 40. If the volume value is AUTOMATIC MEMORY STORING & small than 40 when you turn off the unit. PROGRAM SCANNING Next time you turn on the unit. The Automatic memory storing volume will keep the last volume value. Press AS/PS button (19) for several But if the volume value is large than 40 seconds “SEARCH”... -
Page 11: Pausing Playing
OPERATION previous/next file. File number will be The unit can be shockproof about 70 showed on display. seconds around for MP3 /WMA. Press and hold (5/23) will fast SELECTING DIRECTORY UP/DOWN reverse/forward. File play starts when you Press DIR- button (9) or DIR+ button release the button. -
Page 12: Disc Notes
OPERATION Press AS/PS (SCH) button for four TUNE/SEEK/TRACK times. The unit searches file or directory Y, Z, SPACE, 9 from current directory by button (4). The CHARACTER SHIFT PUSH SEL currently playing file name is displayed. RIGHT User can select the file by button (4). _,-,+,0 After selected a file. -
Page 13: Usb Play Operation
OPERATION In the front panel of the unit, there is an 3. Dirt, dust, scratches and warping USB interface (15). You can connect an discs will cause misoperation. USB driver through this interface (15). When you connect an USB driver through Notes CD-Rs (recordable... -
Page 14: Bluetooth Operation
OPERATION SD/MMC mode. shortly, after the current song play to the end, It will play the song in current category CAUTION in random order, and “SHF” will appear on When there are important files in the USB the display. Press it again to exit this mode. device or SD card. -
Page 15: Preparing For Operation
OPERATION 2) panel, “PAIRING” will appear on the the unit, and you want to transfer the LCD. audio to the unit, you need to 3) On the mobile phone, select the reconnection. Bluetooth set up. (Please refer to the 3) When you press button (2) to instruction manual of your mobile release the front panel, the connection... -
Page 16: Answering Manu Ansl
OPERATION number (memory 10 numbers). TALK volume MAIN volume 4) MISSED: Display the call you have missed (memory 10 numbers). 5) PHONE BK: You can copy 20 phone …………………….. numbers from mobile to the phone book 2 of the unit via Bluetooth transmitted. -
Page 17: Bluetooth Audio (A2Dp Function)
OPERATION phone, the mute of the present mode will be released at the same time. 2) When making an outgoing call, it’s not possible to transfer if the call is not being answered yet. BT reset: : In BT AUDIO mode. Press hold BND/LOU/ key for several... -
Page 18: Specification
SPECIFICATION GENERAL Power Supply Requirements : DC 12 Volts, Negative Ground Chassis Dimensions : 178 (W) x 107 (D) x 50 (H) Tone Controls Bass (at 100 Hz) : ±10 dB Treble (at 10 kHz) : ±10 dB Maximum Output Power : 4x60watts Current Drain : 15 Ampere (max.) -
Page 19: Remote Control
REMOTE CONTROL HANDSET(OPTIONAL) FUNCTION KEY & CONTROL POWER Power ON/OFF Button DSP(0) Display Button(_,-,+,0 For MP3/WMA Operation) Sound Mode Select Button (Character Shift Right For MP3/WMA Operation) Volume Up Button (Character Select (A,B~8,9,0)For MP3/WMA Operation) Volume Down Button (Character Select(A,B~8,9,0)For MP3/WMA Operation) 6. -
Page 20: Trouble Shooting
TROUBLE SHOOTING Before going through the checklist, check wiring connection. If any of the problems persist after checklist has been made, consult your nearest service dealer. Symptom Cause Solution The car ignition switch is If the power supply is No power. not on.