Table of Contents
Advertisement
Quick Links
Advertisement
Table of Contents
Troubleshooting

Related Manuals for Lennox Compact Pro


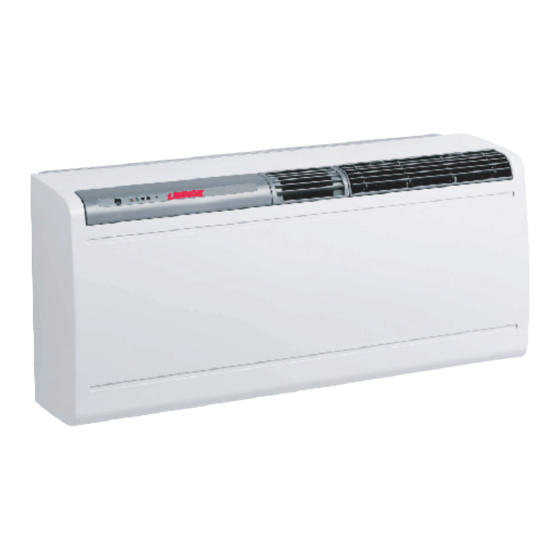
Summary of Contents for Lennox Compact Pro
- Page 1 INSTALLATION OPERATING & MAINTENANCE MANUAL Compact Pro...
- Page 2 Thank you for purchasing a Lennox Air Conditioning unit. You have bought one of the best air conditioners available today. Follow the instructions given in this booklet to obtain the very best performance from your air conditioner and to enjoy a fresh, comfortable Summer in complete...
-
Page 3: Table Of Contents
INDEX Chap. 1 GENERAL INFORMATION page 3 General information Symbols page 4 1.2.1 Editorial pictograms page 4 1.2.2 Safety pictograms page 4 Technical data page 5 1.3.1 Overall dimensions page 5 1.3.2 Technical features page 5 1.3.3 Technical notes page 5 1.3.4 Proper use page 5... -
Page 4: General Information
CHAP. 1 GENERAL INFORMATION CHAP. 1.1 GENERAL INFORMATION We wish to thank you, first of all, for purchasing an air-conditioner produced by our company. We are sure you will be happy with it because it represents the state of the art in the technology of home air conditioning. This manual serves to provide you with the instructions and explanations you need to make the best possible use of your air- conditioner. -
Page 5: Symbols
Routine maintenance of the filters and general external cleaning can be done by the user as these operations are not difficult or dangerous. During installation and maintenance, respect the precautions indicated in the manual, and on the labels applied inside the units, as well as all the precautions suggested by good sense and by the safety regulations in effect in your country. -
Page 6: Technical Data
CHAP. 1.3 TECHNICAL DATA (*) Maximum test conditions at high load 1.3.3 The powers indicated refer to the following conditions (ISO reference standards):: in cooling and dehumidifying mode: Technical notes Air entering the inside unit at 27°C b.s. and 19°C b.u. with air entering the outside cooling and unit at 35°C b.s. in heating mode: Air entering the inside unit at 21°C b.s. -
Page 7: List Of Accessories Supplied
CHAP 1.4 LIST OF ACCESSORIES SUPPLIED The unit and all necessary ancillary items that make up the air conditioner are all packed in the one carton. Packaging may be transported per single units, by hand by two authorized persons, or loaded on a trolley, even stacking up to a maximum of three packs. -
Page 8: Instructions For Installation
CHAP. 2 INSTALLATION CHAP. 2.1 INSTRUCTIONS FOR INSTALLATION To obtain the best results and optimum performance, follow the instructions for correct installation provided in this manual. Failure to follow the instructions and apply the rules indicated may cause malfunction of the appliance and relieves the manufacturer of any form of guarantee and liability for damages to persons, animals or property. -
Page 9: Installation Of The Unit
As far as possible, in any case, it is important to try and reduce major thermal loads by the following means: Large glass panes exposed to sunlight should be provided with curtains on the inside or shades on the outside (Venetian blinds, verandas, refracting films, etc.) The air- conditioned room should be closed as much of the time as possible. - Page 10 Next, drill the holes for anchoring the fastening brackets to the wall using as a first option the 4 holes on the ends of the bracket as shown on the drilling template (see fig. 6). If the wall is not very solid, it is advisable to use some extra anchor bolts.
- Page 11 2.3.2 When the machine is heating, it produces condensate Provision for that has to be eliminated through a specific drain line, draining con- otherwise the machine will not work. Drainage occurs by densate for gravity. For this reason, it is essential for the drain line to machines with have a minimum inclination of at least 3% throughout its heat pump.
- Page 12 To position the external grids, proceed as follows: - Fit the small eyelet of the spring, with the long stem, on the cap pin (on both components) (fig. 10/2). - Fit the two caps (with spring), from the front part of the external grid, on the two housings, pulling until a click is heard (fig.
-
Page 13: Introduction
2.3.5 After checking again that the fastening bracket is securely Fitting the unit fastened to the wall, and that any necessary preparations on bracket for electric connection and condensate drainage have been made, you can fasten the air conditioner to its supporting bracket. Lift it up holding the sides of the bottom (see fig. -
Page 14: Working Tests And Identification Of Possible Malfunction
2.4.3 Unscrew the bracket supporting the small circuit board with Preparation of display LED’s and reinstall it on the bottom opposite, where unit you will find two holes on the base (see fig. 18-19). Make sure the connection plate is securely fastened on the inside of the air conditioner, and apply some insulating tape if necessary. - Page 15 red LED (filter): off = UNICO on = UNICO HP (with heat pump) green LED (compr.): off = with correction of room tem- perature on = without correction of room temperature green orange green orange LED (timer): off = without correction of room temperature on = with correction of room tem- perature...
-
Page 16: Periodical Maintenance
The machine is set in the factory without correction of the temperature. In addition to the self-test (that can be made under any conditions of room temperature) we recommend that you also test the product in the various operating modes accessible to the user (see the user manual). - Page 17 CHAP 2.7 INSTRUCTIONS TO INSTALL THE FRESH AIR KIT KR100 The fresh air kit allows the outside air to enter into the room where the air conditioner is located. This device guarantees that about 90 m3/h are brought into the room, resulting in a very good change of air.
-
Page 18: Installation Of Wall Mounted Controller
INSTALLATION OF WALL MOUNTED CONTROLLER Read carefully these instructions before proceeding with any operation (installation, maintenance, use) and follow everything described in the notes below. Any warranty is not valid for problems related to wrong installation, extraordinary natural events, wrong calculation or misuse. THE MANUFACTURER DOES NOT ACCEPT RESPONSIBILITY FOR DAMAGES CAUSED BY NOT OBSERVING THE INSTRUCTIONS IN THIS MANUAL. - Page 20 INSTALLATION Only authorized and qualified personnel can make the installation. It is necessary to strictly follow the instruction of this manual. Not following the instructions may cause malfunction of the device and warranty won’t be valid anymore. B1000 can work in stand alone or in a network, by changing the set of switches. Positioning of B1000.
- Page 21 Installation Chosen the place of installation, make the hole in the wall using the drilling template (A), open the box by taking the screw on the right side out (B). To fix the box to the wall use the screws that are given in the pack (C). Attention Be very careful in order not to damage the card and its components during the fixing procedure.
- Page 22 Installation of wall control Using the drilling template, fix the wall control to the wall at 1,5m from the floor. The control can be installed in normal electrical box in the wall. To open the control box push the trigger on the left side and lift rotating towards the other side. Positioning If you put the control farer than 2m from the conditioner you have to take a loner wire.
-
Page 23: Electrical Connection
Electrical connection Follow the table “Connections” when connect all wires. CONNECTIONS Connector Function Cable Neutral Cable 3x0,75 Phase 230v 50Hz Branch input (given) CAN-L CAN-H Screened cable CAN BUS 3x0,34 mains Screening Given Not extendible Serial for the air conditioner Contact room Cable Common... - Page 24 Verify: - Use the electrical power 230V / 50 Hz K1 - Connect the cable connection to the keyboard K5 - Connect the eventual room contact K4 - Connect the supplied serial connector to the air conditioner - Connect the mains CAN-BUS K2 as specified in the instructions (if you use the mains connection).
- Page 25 The configuration of these selectors is seen on the ignition of the board; therefore it is necessary to switch off and to switch on when you modify the disposition. Find below the description of the function of each selector: SELECTOR POSITION SELECTOR FUNCTION A0-A8...
- Page 26 SIMPLIFIED WALL CONTROL 1 ON/OFF button A Automatic pilot light: It lights up when the air conditioner works in compliance with the parameters set up by the reception. B ON pilot light: It lights up when the air conditioner is working. 2 TEMPERATURE SETTING Button Pressing this button, you can change periodically the temperature set by the reception of + 2°C, - 2°C and t.
- Page 27 PROGRAMMING (STAND-ALONE FUNCTIONING) LENNOX For the stand-alone working you have to select the functioning mode, the ventilation speed and the set temperature with the remote control. Once the machine is started through the remote control in compliance with the above data, you have to press the button placed on the power board (see picture) to store on the Eprom the chosen data.
-
Page 29: Names Of Parts
CHAP. 3 USE AND MAINTENANCE (for the user) The air conditioner must not be installed in rooms where explosive gasses develop or where there are conditions of heat and humidity beyond the maximum limits indicated in the installation manual. Clean the air filter periodically, as described in the specific paragraph. -
Page 30: Control Of Air Conditioner Using The Remote Control Unit
3.3 CONTROL OF AIR CONDITIONER USING THE REMOTE CONTROL UNIT 3.3.1 The remote control supplied with the air conditioner is Remote control designed to be extremely sturdy and to ensure excellent performance in use, but it should nevertheless be handled with some care. -
Page 31: Cooling Function
External air intake switch. Night operation switch. Automatic operation switch. First operating program switch. Second operating program switch. Temperature indicator (thermometer) or time indicator (H M). The remote control is also equipped with a cover with a cursor that can be positioned so as to permit access only to the ON/OFF, AUTOMATIC MODE and NIGHT MODE buttons. -
Page 32: Dehumidifier Only
3.4.6 When used in this mode, the air conditioner only Dehumidifier only eliminates the humidity in the room, practically without changing the temperature. This function can be extremely useful between seasons, particularly on rainy days when the temperature is not uncomfortable but the excess humidity feels unpleasant. -
Page 33: Control Of Fan Speed
To adjust vertical airflow you can operate in two ways: - continuous oscillation of airflow, obtained by pressing button T9 which starts and stops the movable grille. This enables the fins on the grille to turn completely around. - stop the movable grille in the desired position by pressing button T9 again while the fins are in motion. -
Page 34: Setting Of Correct Time
3.4.12 Use button T3 to select Night comfort Mode, which includes Night Comfort the following functions: mode - Gradual increase of the temperature set for coding. - Gradual reduction of the temperature set for heating (only HP models). - Reduction of noise level. - Lower energy consumption at night. -
Page 35: Setting Of Time Schedules For 1St And 2Nd Operating Program (Progr. 1 And Progr. 2)
3.4.15 To set the times for starting and stopping the two air Setting of time conditioner programs, proceed as follows: schedules for 1st and 2nd a) Press button Time and Program Setting, as many times Operating as necessary to display the PROGR. 1 ON indicator (Time Program to start 1st program). -
Page 36: Resetting All Functions Of Remote Control
3.4.17 Press button T10 to reset all the settings on the remote control. Resetting all This will cancel all the settings of the timer and the remote control functions of will use the default settings. In addition, by pressing T10 you will remote control display all possible indications so that you can verify the proper conditions of the display. -
Page 37: Troubleshooting
3.6 TROUBLESHOOTING It is extremely important for the user to know when behaviour that seems like a malfunction really isn’t. Among these are some (that we will indicate) that the user can easily correct following our simple instructions, while in other cases it is necessary to get in touch with our service personnel. -
Page 38: Troubleshooting
CHAP. 3.8 TROUBLESHOOTING In case of malfunctions of the air-conditioner, check the items in the table below If, after making the suggested check the problem is not solved, contact your authorized service centre. - The air conditioner does not switch on. This may be due to: - lack of power;... -
Page 39: Spare Parts
Chap 3.9 Spare Parts listing COMPACT PRO AND PRO PLUS Code Description Explosion view 276311A74 REMOTE COTROL 01M0263 OUTLET AIR VOLUTE 03M0018GU17 UNIT HOOD 03M0049GU31 SCREW RUBBER COVER 05M0076 STEP MOTOR 18M0130 LED BASE 03M0035GT05 FIXED GRILLE 03M0023GT05 CONTROL BOARD... - Page 41 Lennox UK Cornwell Business Park Salthouse Road Brackmills Northampton NN4 7EX Tel: 01604 669100 Fax: 01604 669150 info.uk@lennoxeurope.com www.lennoxuk.com 07-2005...