
Related Manuals for Sun Microsystems W1100z


Summary of Contents for Sun Microsystems W1100z
-
Page 1: Sun Java
Sun Java ™ Workstation W1100z and W2100z User Guide Sun Microsystems, Inc. www.sun.com Part No. 817-6585-12 January 2005, Revision A Submit comments about this document at: http://www.sun.com/hwdocs/feedback... - Page 2 Copyright 2005 Sun Microsystems, Inc., 4150 Network Circle, Santa Clara, Californie 95054, Etats-Unis. Tous droits réservés. Sun Microsystems, Inc. a les droits de propriété intellectuels relatants à la technologie qui est décrit dans ce document. En particulier, et sans la limitation, ces droits de propriété...
-
Page 3: Table Of Contents
Contents Preface vii Introduction to the Sun Java Workstation W1100z and W2100z 1–1 Features 1–2 Operating System and Software 1–3 1.2.1 Operating System Software 1–3 1.2.2 Supplemental CD Software 1–4 1.2.3 Java Desktop System 1–4 Hardware System Overview 1–5 1.3.1 External Components 1–5... - Page 4 3.10 Exit to DOS 3–19 Maintaining the Workstation 4–1 Tools and Supplies Needed 4–1 Installation Precautions 4–2 4.2.1 ESD Precautions 4–2 4.2.2 Preinstallation Instructions 4–2 4.2.3 Postinstallation Instructions 4–3 Sun Java Workstation W1100z and W2100z User Guide • January 2005...
- Page 5 Opening the Workstation 4–4 4.3.1 Removing the Access Panel 4–4 4.3.2 Removing the Front Bezel 4–5 Location of Components 4–7 Customer Replaceable Unit (CRU) Procedures 4–8 4.5.1 Replacing or Adding Hard Disk Drives 4–9 4.5.2 Replacing a CD/DVD Drive 4–12 4.5.3 Replacing Optional Storage Devices 4–14 4.5.4...
- Page 6 Sun Java Workstation W1100z and W2100z User Guide • January 2005...
-
Page 7: Preface
Preface The Sun Java Workstation W1100z and W2100z User Guide provides a detailed description of the hardware and software applications used to support the Sun Java Workstation W1100z and W2100. This book is intended for system administrators, network administrators, or service technicians who have knowledge of workstation hardware and software. -
Page 8: Typographic Conventions
For online technical support, go to: http://www.sun.com/service/online/ If you want to create an account with http://www.sun.com, click on Register under My Online Account on the right. viii Sun Java Workstation W1100z and W2100z User Guide • January 2005... -
Page 9: Related Documentation
Accessing Sun Documentation Online You can view, print, or purchase a broad selection of Sun documentation, including localized versions, at: http://www.sun.com/documentation/ You can access the latest version of Sun Java Workstation W1100z and W2100z documentation from the Documentation link at: http://www.sun.com/w1100z http://www.sun.com/w2100z... - Page 10 Please include the title and part number of your document with your feedback. The part number of this Sun Java Workstation W1100z and W2100z User Guide is 817-6585- x Sun Java Workstation W1100z and W2100z User Guide • January 2005...
-
Page 11: Introduction To The Sun Java Workstation W1100Z And W2100Z
100 80 GB hard drives or up to four 73 GB Ultra 320 SCSI hard drives. The Sun Java Workstation W1100z and W2100z are equipped with one AGP8x slot for high-end graphics cards and one 133 MHz and four 100 MHz PCI-X slots. The workstation also includes a Gigabit Ethernet interface, two IEEE 1394 interfaces, five USB 2.0 interfaces, and industry-standard audio interfaces. -
Page 12: Features
Features TABLE 1-1 Component Description • One 64-bit AMD Opteron processor (W1100z) or two 64-bit AMD Opteron processors (W2100z). The Sun Java Workstation W1100z is not upgradable to two processors. • Processor frequencies: 1.8 GHz and faster • Up to 1 MB level 2 cache Memory •... -
Page 13: Operating System And Software
Solaris 9 on the Sun Java Workstation W1100z or Sun W2100z. If you want to run Red Hat Enterprise Linux 3 WS on the Sun Java Workstation W1100z or W2100z, you can order it from the from the following web site: http://wwws.sun.com/software/linux/index.html... -
Page 14: Supplemental Cd Software
1.2.3 Java Desktop System The Java Desktop System might be preinstalled on your system. If your Sun Java Workstation W1100z or W2100z did not come with the Java Desktop System preinstalled, you can download it from the following site: http://wwws.sun.com/software/javadesktopsystem/get/index.html... -
Page 15: Hardware System Overview
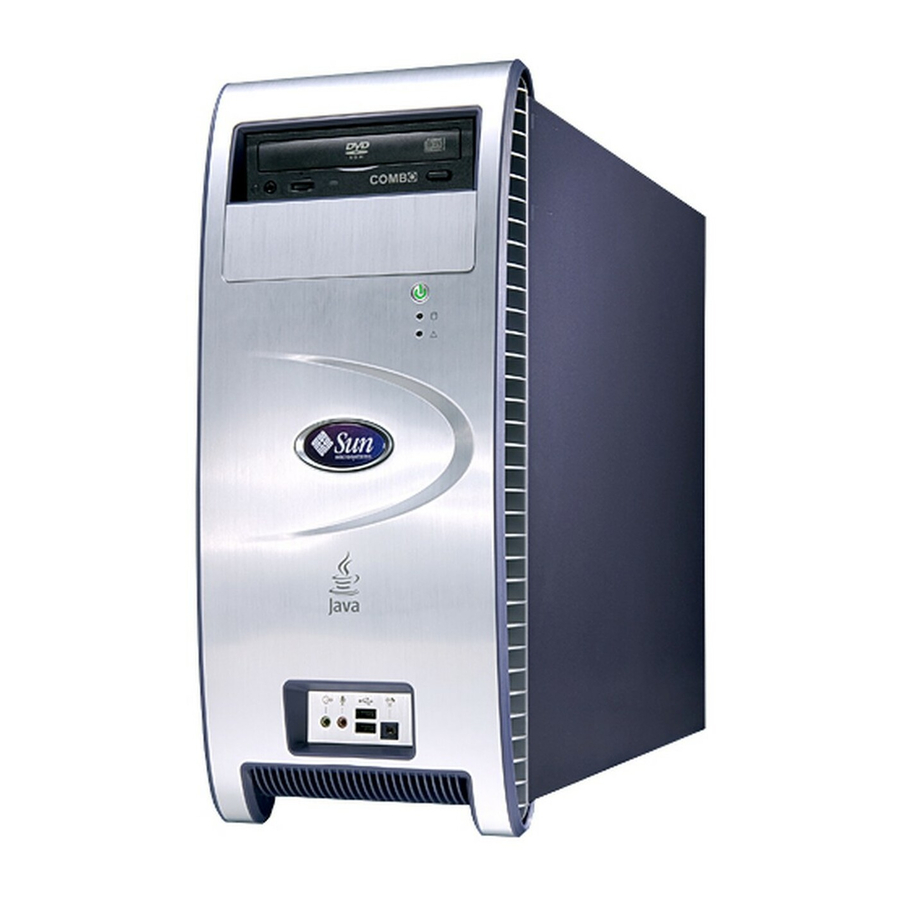
Hardware System Overview The following sections describe the hardware orientation and features of your Sun Java Workstation W1100z or W2100z. 1.3.1 External Components 1.3.1.1 Front and Rear Panels illustrates the front panel of the Sun Java Workstation W1100z and FIGURE 1-1 W2100z. -
Page 16: Front Panel Leds
Sun Java Workstation W1100z and W2100z. FIGURE 1-2 Optional graphics accelerators AC Power connector LFH 60 Parallel connector FX500 Serial connectors IEEE 1394 connector USB 2.0 connectors Gigabit Ethernet connector Unused Line-out jack PCI-X 100 Mhz... -
Page 17: Internal Components
PCI-X 100 MHz PCI-X 133 MHz PCI-X 100 MHz Extender Card AGP 8X PCI-X 100 MHz PCI-X 100 MHz CPU 0 Sun Java Workstation W1100z System Components FIGURE 1-3 Chapter 1 Introduction to the Sun Java Workstation W1100z and W2100z... - Page 18 PCI-X 100 MHz PCI-X 133 MHz PCI-X 100 MHz AGP 8X Extender Card PCI-X 100 MHz PCI-X 100 MHz CPU 0 Sun Java Workstation W2100z System Components FIGURE 1-4 Sun Java Workstation W1100z and W2100z User Guide • January 2005...
-
Page 19: Powering The Workstation On And Off
Powering On the Workstation After making sure that you have set up the system properly and connected all the required cables as shown in the Sun Java Workstation W1100z and W2100z Getting Started Guide, 817-6584-xx, you can now power on your system. -
Page 20: Powering Off The Workstation
1. Unplug the AC power cord from the workstation. 2. Wait ten or more seconds. 3. Plug the power AC cord into the workstation. 4. Power on the workstation. 1-10 Sun Java Workstation W1100z and W2100z User Guide • January 2005... -
Page 21: Customer Orderable Components
Customer Orderable Components You can order additional components and replacement parts for the Sun Java Workstation W1100z and W2100z. Some parts are only available for the Sun Java Workstation W1100z, some are only available for the Sun Java Workstation W2100z, and some are available for either system. - Page 22 1-12 Sun Java Workstation W1100z and W2100z User Guide • January 2005...
-
Page 23: Troubleshooting
Execute diagnostics test as described in Chapter “Diagnostics” on page 3-1. ■ If you are not able to resolve the problem, contact Sun technical support. Support ■ numbers are shown in Section 2.3, “Technical Assistance” on page 2-5. -
Page 24: Visual Inspection
5. Verify that the components are fully seated in their sockets or connectors and that the sockets are clean. 6. Verify that all cables inside the system are firmly attached to their appropriate connectors. Sun Java Workstation W1100z and W2100z User Guide • January 2005... -
Page 25: Troubleshooting Procedures
7. Replace the left-side panel. 8. Reconnect the system and any attached peripherals to their power sources, and then power them on. Troubleshooting Procedures contains possible problems that might arise during the use of your TABLE 2-1 workstation. Possible solutions are listed for each problem. If the solutions listed here do not fix the problem, run the appropriate diagnostic test (see Chapter Troubleshooting Procedures... - Page 26 (y splitter) power cable might not be hear a loud, steady connected properly. Refer to Section 4.5.6, “Installing a PCI or AGP noise. Card” on page 4-31 for information on properly installing AGP cards. Sun Java Workstation W1100z and W2100z User Guide • January 2005...
-
Page 27: Technical Assistance
Technical Assistance If the troubleshooting procedures in this chapter fail to solve your problem, TABLE 2-2 lists the Sun web sites and telephone numbers for additional technical support. Sun Web Sites and Telephone Numbers TABLE 2-2 Workstation Documents and Support Resources... - Page 28 Sun Java Workstation W1100z and W2100z User Guide • January 2005...
-
Page 29: Diagnostics
C H A P T E R Diagnostics This chapter assists you with using the Diagnostics section of the Sun Java Workstation W1100z and W2100z Supplemental CD that came with your system. If you are having specific problems with your system, use the Pc-Check Diagnostics software to diagnose and solve these issues. -
Page 30: Diagnostics Main Menu
Diagnostics Main Menu To access the Pc-Check Diagnostics Main Menu: 1. Insert the Sun Java Workstation W1100z and W2100z Supplemental CD into your CD-RW drive and reboot the system. The system boots to the Sun Java Workstation W1100z and W2100z Supplemental CD Main Menu. -
Page 31: System Information Menu
IDE Bus Information Shows the master/slave devices on the primary and secondary IDE controllers. PCMCIA/CardBus Info Not relevant to Sun Java Workstation W1100z and W2100z. Interrupt Vectors Details and lists device interrupt vector information. IRQ Information Shows hardware interrupt assignments. -
Page 32: Advanced Diagnostics
Section 3.3.1, “Hard Disk Testing” on page 3-6 for detailed information about testing hard disks and script information. CD-ROM/DVD Includes a CD-ROM/DVD menu to test CD-RW/DVD- ROM devices on the system. Sun Java Workstation W1100z and W2100z User Guide • January 2005... - Page 33 Includes an ATA test menu. Select the parallel ATA driver to test, as serial ATA is not yet supported on the Sun W1100 and W2100 workstations. Details information about the USB devices on the system, and includes an USB Tests menu to test the USB.
-
Page 34: Hard Disk Testing
Caution – Running the Destructive Write Test destroys any data that is on the disk. Sun Java Workstation W1100z and W2100z User Guide • January 2005... - Page 35 The Device Test options include the Mechanics Stress Test and the Internal Cache Test. These tests are relevant to testing nonmedia-related devices associated with the hard drive hardware, such as the head and internal cache. As well as choosing any of these tests, you can also define several parameters of the test.
-
Page 36: Immediate Burn-In Testing
Burn-in Testing screen opens. The screen includes the list of options shown in for running the tests. When a quick.tst, noinput.tst or full.tst TABLE 3-3 script is loaded, the defaults indicated in the third column are automatically loaded Sun Java Workstation W1100z and W2100z User Guide • January 2005... - Page 37 Continuous Burn-in Testing Options TABLE 3-3 Default Using quick.tst, noinput.tst, or Option Default - General full.tst Script All Possible Choices Pass Control Overall Time Overall Passes Individual Passes, Overall Passes, or Overall Time Duration 01:00 Enter any number to choose the time duration of the test Script File quick.tst,...
-
Page 38: Deferred Burn-In Testing
Enter one of the following: quick.tst, noinput.tst, or full.tst ■ If you have created and saved your own script, enter d:\testname.tst ■ Where testname is the name that you have created. 3-10 Sun Java Workstation W1100z and W2100z User Guide • January 2005... -
Page 39: Create Diagnostic Partition
The Create Diagnostic Partition option will install a diagnostic partition on the first bootable disk seen by the Sun Java Workstation W1100z or W2100z platform. On an IDE system, the first bootable disk is on the primary/master IDE device. On a SCSI system, the first bootable disk is the first disk found on the SCSI A channel. -
Page 40: Removing Existing Partitions On A Hard Disk
10. Repeat Step 6 through Step 9 until all partitions have been removed. 11. Press the Esc key to exit and strike any key to reboot the workstation. 3-12 Sun Java Workstation W1100z and W2100z User Guide • January 2005... -
Page 41: Adding A Diagnostic Partition To The First Bootable Disk
3. At the Supplemental CD Main Menu, type 1 to run Hardware Diagnostics. 4. Select Create Diagnostic Partition at the Main Menu. If the first bootable disk is clear of partitions then the Sun Microsystems ■ Partitioning Utility window will appear. It states: Your primary hard disk is not partitioned. -
Page 42: Creating A Log File On The Diagnostic Partition
10. At the DOS prompt, type the following: C:> d: 11. Type the following to list the contents of the Diagnostic Partition. D:> dir The noinput.jrl log will appear. 3-14 Sun Java Workstation W1100z and W2100z User Guide • January 2005... -
Page 43: Accessing The Diagnostic Partition Under Red Hat Linux
3.6.4 Accessing the Diagnostic Partition Under Red Hat Linux To access the diagnostic partition when you are running a Red Had Linux operating system: 1. Remove the Supplemental CD from the CD-RW/DVD-ROM tray. 2. Reboot the workstation and start the Linux Red Hat operating system. 3. -
Page 44: Accessing The Diagnostic Partition Under Solaris X86
The following lines should appear if the diagnostic partition is mounted successfully: Mounting Diagnostic Partition Installation Successful 10. Type the following command to list the contents of the diagnostic partition: # ls /diagpart 3-16 Sun Java Workstation W1100z and W2100z User Guide • January 2005... -
Page 45: Show Results Summary
Windows on a Sun Java Workstation W1100z or W2100z. The only way to retrieve the contents (log files) on the diagnostic partition is to attach a USB floppy drive to the Sun Java Workstation W1100z or W2100z and complete the following procedure: 1. - Page 46 Stress Test, and Internal Cache Test. Serial Port ■ This section shows the following tests conducted against the serial port: IRQ Test, Line Control Test, Handshake Test, Loopback Test, and Internal FIFO Test. 3-18 Sun Java Workstation W1100z and W2100z User Guide • January 2005...
-
Page 47: Print Results Report
■ The compare test is used to determine the machine ID for the system. This test is not available for the Sun Java Workstation W1100z and W2100z. Print Results Report This option enables you to print results of the diagnosis of your system. - Page 48 3-20 Sun Java Workstation W1100z and W2100z User Guide • January 2005...
-
Page 49: Maintaining The Workstation
C H A P T E R Maintaining the Workstation This chapter provides instructions describing how to add, replace and configure the components in the workstation after it has been set up. The following sections are included in this chapter: Section 4.1, “Tools and Supplies Needed”... -
Page 50: Installation Precautions
3. Follow the ESD precautions described above when handling a system component. See the following section for specific installation instructions. Caution – Failure to properly turn off the system before you start installing components may cause serious damage. Sun Java Workstation W1100z and W2100z User Guide • January 2005... -
Page 51: Postinstallation Instructions
4.2.3 Postinstallation Instructions Perform the following steps after installing a workstation component: 1. Ensure that all of the components are installed as described in the step-by-step instructions. 2. Reinstall any PCI cards or peripherals that you had previously removed. 3. Reinstall the system’s left-side panel and front bezel. 4. -
Page 52: Opening The Workstation
3. Slide the panel towards the rear of the workstation (2). Tilt the top edge of the panel out (3) and then up (4) to remove it from the chassis. Sun Java Workstation W1100z and W2100z User Guide • January 2005... -
Page 53: Removing The Front Bezel
Removing the Left-Side Panel FIGURE 4-1 4.3.2 Removing the Front Bezel when performing this procedure. FIGURE 4-2 To remove the front bezel from the workstation: 1. Remove the CD/DVD drive as instructed in Section 4.5.2, “Replacing a CD/DVD Drive” on page 4-12. - Page 54 4. Pull the top of the bezel away from the chassis. 5. Press the retention clips on the bottom of the bezel upward(2) to release the bezel and pull the bezel away from the chassis. (3) Sun Java Workstation W1100z and W2100z User Guide • January 2005...
-
Page 55: Location Of Components
Location of Components to locate components before performing the remove and replace FIGURE 4-3 procedures. Motherboard Memory Banks (DIMMs 1-4) Retaining Lever for Power Supply CD/DVD Drive Retaining Lever for 5.25" Devices Mezzanine Card with (optional) CPU 1 (optional) System Fan Mezzanine Card Drive Cage Memory Banks... -
Page 56: Customer Replaceable Unit (Cru) Procedures
“Replacing the Extender Card” on page 4-49) ■ Note – The motherboard should be replaced only by trained field service technicians. Motherboard (refer to “Replacing the Motherboard” on page 4-50) ■ Sun Java Workstation W1100z and W2100z User Guide • January 2005... -
Page 57: Replacing Or Adding Hard Disk Drives
Workstation W2100z. The hard disk drives must both be the same type. Therefore, in a 1P (W1100z) system, a second hard disk drive must be an EIDE drive; in a 2P (W2100z) system, additional hard disk drives must be a SCSI drive. - Page 58 Removing the Hard Disk Drive FIGURE 4-4 4-10 Sun Java Workstation W1100z and W2100z User Guide • January 2005...
-
Page 59: Adding A Hard Disk Drive
4.5.1.2 Adding a Hard Disk Drive To install additional hard disk drives when one or more hard disk drive are already installed: 1. Turn off the system and all of the peripherals connected to it, then unplug the AC power cord from the system. Caution –... -
Page 60: Replacing A Cd/Dvd Drive
1. Turn off the system and all of the peripherals connected to it, then unplug the AC power cord from the system. 2. Remove the left-side access panel. 4-12 Sun Java Workstation W1100z and W2100z User Guide • January 2005... - Page 61 3. Disconnect the power and IDE data cables from the CD/DVD drive (see (1) on FIGURE 4-6 4. Simultaneously push the drive retaining lever inward and down to release the lever from its retaining hook (2). 5. Rotate the lever towards the front of the chassis until the pin, at the other end of the lever, is freed from its hole near the retaining hook (3).
-
Page 62: Replacing Optional Storage Devices
8. Press the end of the lever down and inward, until it is captured by the retaining hook. 9. Connect the power and IDE data cables to the rear of the new drive. 4-14 Sun Java Workstation W1100z and W2100z User Guide • January 2005... -
Page 63: Replacing A Cpu
4.5.4 Replacing a CPU This section describes how to remove or replace a CPU and heatsink. The remove and replace procedures are identical for both CPU 0 (on the motherboard) and CPU 1 (on the optional mezzanine card). 4.5.4.1 Preparing for Installation Note –... - Page 64 CPU 0 CPU 0 Fan Power Connector on the Motherboard FIGURE 4-7 CPU 1 Fan Power CPU 1 CPU 1 Fan Power Connector on the Mezzanine Card FIGURE 4-8 4-16 Sun Java Workstation W1100z and W2100z User Guide • January 2005...
- Page 65 2. Choose the bullet that corresponds with the heatsink/fan assembly installed on the motherboard. 240-4589-01 or 240-4612-01: Loosen the two screws that hold the heatsink/fan ■ assembly to the motherboard (see (1) on ), then pivot the retaining clips FIGURE 4-9 outward (2).
- Page 66 Unfastening the Heatsink/Fan Assembly Retaining Clips ( 310-0020-01 FIGURE 4-10 3. Twist the heatsink/fan assembly to the right or the left, in order to break the seal with the thermal grease. 4-18 Sun Java Workstation W1100z and W2100z User Guide • January 2005...
- Page 67 4. Lift the heatsink/fan assembly straight up and withdraw it from the board (see FIGURE 4-11 FIGURE 4-12 240-4589-01 or 240-4612-01 Removing the Heatsink/Fan Assembly ( FIGURE 4-11 Chapter 4 Maintaining the Workstation 4-19...
- Page 68 CPU. Note – Failure to clean the CPU before removing it could result in the accidental contamination of the CPU or other components. 4-20 Sun Java Workstation W1100z and W2100z User Guide • January 2005...
- Page 69 7. First depress, then pull, the socket retainer lever up to the fully open, perpendicular position (see FIGURE 4-13 Unlatching the CPU Socket Retaining Lever FIGURE 4-13 8. Lift the CPU out of the socket, leaving the retainer lever in the open position (see FIGURE 4-14 Removing the CPU FIGURE 4-14...
- Page 70 Remove the 4 screws fastening the original retaining bracket to the motherboard. Keep the screws for installing the new retaining bracket. Removing the Original Retaining Bracket FIGURE 4-15 4-22 Sun Java Workstation W1100z and W2100z User Guide • January 2005...
- Page 71 b. Install the new retaining bracket onto the motherboard and fasten the four screws. Installing the New Retaining Bracket FIGURE 4-16 4.5.4.3 Installing a CPU and Heatsink/Fan Assembly To install a heatsink and CPU: 1. Observe the ESD precautions and preinstallation procedures described in Section 4.2.1, “ESD Precautions”...
- Page 72 3. Align the CPU to its socket so that pin 1 of the CPU (indicated by the notched corner) is aligned with hole 1 of the socket, (indicated by the arrow in the corner of the socket). 4-24 Sun Java Workstation W1100z and W2100z User Guide • January 2005...
- Page 73 4. Insert the CPU into the socket (see FIGURE 4-18 Installing the CPU FIGURE 4-18 Note – When correctly aligned, the CPU should drop effortlessly into the socket. Do not attempt to force the CPU into the socket in order to seat it. 5.
- Page 74 7. Connect the CPU fan cable to the connector on the motherboard (see FIGURE 4-19 4-26 Sun Java Workstation W1100z and W2100z User Guide • January 2005...
- Page 75 8. Fasten the latches on one side of the heatsink/fan assembly, then latch the other side (see FIGURE 4-20 Securing the Heatsink/Fan Assembly FIGURE 4-20 Chapter 4 Maintaining the Workstation 4-27...
-
Page 76: Replacing Or Adding Dimms
DIMM socket. Note – Place your forefingers on the top of the DIMM before pressing down on the ejector bars, to gently disengage the DIMM from the socket. 4-28 Sun Java Workstation W1100z and W2100z User Guide • January 2005... - Page 77 Removing and Installing a DIMM FIGURE 4-21 Installation is the reverse of this procedure. Note – The DIMM socket is slotted to ensure proper installation. Chapter 4 Maintaining the Workstation 4-29...
- Page 78 ■ following steps to update the BIOS. 2. Do one of the following: If you have the Sun Java Workstation W1100z and W2100z Supplemental CD V1.1 ■ or later, insert the CD into the workstation CD-ROM drive. If you do not have the Sun Java Workstation W1100z and W2100z Supplemental ■...
-
Page 79: Installing A Pci Or Agp Card
4.5.5.3 Reconfiguring the System Memory The system automatically detects the amount of memory installed. Run the BIOS setup to view the new value for total system memory and make a note of it. 4.5.6 Installing a PCI or AGP Card This procedure describes how to install a typical PCI card (including the host bus adapter) or AGP card. - Page 80 FIGURE 4-22 7. Remove the PCI or AGP card from its protective packaging. If necessary, lay the card on an anti-static surface until you are ready to install it. 4-32 Sun Java Workstation W1100z and W2100z User Guide • January 2005...
- Page 81 8. Refer to the bullet below that corresponds to the card you are installing: For a PCI card: ■ a. Position the card over the selected slot (see (1) on ). If you are FIGURE 4-23 installing a full-length card, slide the forward edge of the card into one of the indentations in the card guide, located immediately below the drive cage (see (2) on FIGURE 4-23...
- Page 82 Note – If the latch cannot be engaged with a minimum of force, the card is not correctly seated. Remove the card, reinsert it, and attempt to engage the latch again. 4-34 Sun Java Workstation W1100z and W2100z User Guide • January 2005...
- Page 83 Installing the AGP Card FIGURE 4-24 Chapter 4 Maintaining the Workstation 4-35...
- Page 84 For an FX4000 card, the dual end of the supplemental power cable connects to the ■ two power connectors on the video card. 4-36 Sun Java Workstation W1100z and W2100z User Guide • January 2005...
- Page 85 If you have a system that contains four hard disk drives and an NVIDIA ■ FX1100/3000/4000 card, connect the hard disk drives and AGP card to the power supply connectors as follows: Power Supply Connections TABLE 4-1 Power Supply Connector Component Power Connector PB4 connector HDD1 in Slot1 (Channel A)
-
Page 86: Replacing The System Battery
6. Lift up the battery to remove it (2). 7. Insert a new battery with the positive sign (+) facing up, and ensure that it is seated completely (3). Removing and Installing the Battery FIGURE 4-26 4-38 Sun Java Workstation W1100z and W2100z User Guide • January 2005... -
Page 87: Replacing The System Fan
4.5.8 Replacing the System Fan To remove the system fan (see FIGURE 4-27 1. Turn off the system and all of the peripherals connected to it, then unplug the AC power cord from the system. 2. Remove the left-side access panel. 3. - Page 88 7. Detach the fan from its frame by unclasping the four tabs on the frame before pulling the fan away. Removing the System Fan from the System Fan Frame FIGURE 4-28 Installation is the reverse of this procedure. 4-40 Sun Java Workstation W1100z and W2100z User Guide • January 2005...
-
Page 89: Replacing The Power Supply
4.5.9 Replacing the Power Supply To remove the power supply (see FIGURE 4-29 1. Turn off the system and all of the peripherals connected to it, then unplug the AC power cord from the system. 2. Remove the left-side access panel. 3. -
Page 90: Replacing The Usb Audio Card Assembly
7. Remove the two screws that hold the audio board to the metal frame (3). 8. Withdraw the audio card from the metal frame (4). Removing the USB Audio Card FIGURE 4-30 Installation is the reverse of this procedure. 4-42 Sun Java Workstation W1100z and W2100z User Guide • January 2005... -
Page 91: Replacing The Operator's Panel
4.5.11 Replacing the Operator’s Panel To remove the operator’s panel: 1. Turn off the system and all of the peripherals connected to it, then unplug the AC power cord from the system. 2. Remove the left-side access panel and the front bezel. 3. -
Page 92: Replacing System Cables
■ USB cable ■ IEEE 1394 cable ■ IDE cable (DVD drive) ■ IDE cable (Hard Disk Drive) ■ SCSI cable(s) ■ CD_IN cable from DVD drive ■ 4-44 Sun Java Workstation W1100z and W2100z User Guide • January 2005... - Page 93 Each cable connector on the motherboard and extender card is labeled to help you identify the cable to which it should be connected. To remove and install system cables: 1. Turn off the system and all of the peripherals connected to it, then unplug the AC power cord from the system.
- Page 94 To System Fan PWR_CPU To CD-ROM (To Power Drive Supply) CD_IN Extender Card Power AUDIO SCSI B (To drives) To USB Panel SCSI A (To drives) System Cables FIGURE 4-33 4-46 Sun Java Workstation W1100z and W2100z User Guide • January 2005...
-
Page 95: Replacing The Mezzanine Card
4.5.13 Replacing the Mezzanine Card To remove the mezzanine card: 1. Turn off the system and all of the peripherals connected to it, then unplug the AC power cord from the system. 2. Remove the left-side access panel. 3. Gently lay the system on its right side on a stable, non-slip surface. 4. - Page 96 Section 4.5.4, “Replacing a CPU” on page 4-15). 9. Remove the DIMMs (refer to Section FIGURE 4-21, “Removing and Installing a DIMM” on page 4-29). Installation is the reverse of this procedure 4-48 Sun Java Workstation W1100z and W2100z User Guide • January 2005...
-
Page 97: Replacing The Extender Card
4.5.14 Replacing the Extender Card This procedure describes how to remove the Extender card. 1. Turn off the system and all of the peripherals connected to it, then unplug the AC power cord from the system. 2. Remove the left-side access panel. 3. -
Page 98: Replacing The Motherboard
1. Turn off the system and all of the peripherals connected to it, then unplug the AC power cord from the system. 2. Remove the left-side access panel. 3. Gently lay the system on its right side on a stable, non-slip surface. 4-50 Sun Java Workstation W1100z and W2100z User Guide • January 2005... - Page 99 4. Remove any PCI cards installed on either the extender card or the motherboard (see Section 4.5.6, “Installing a PCI or AGP Card” on page 4-31). 5. Remove the extender card, as described in Section 4.5.14, “Replacing the Extender Card” on page 4-49.
- Page 100 Use needle-nosed pliers to release the two plastic standoffs. Note – Do not remove the four screws that secure the CPU 0 heatsink/fan assembly mounting to the motherboard. 4-52 Sun Java Workstation W1100z and W2100z User Guide • January 2005...
- Page 101 1P System 2P System Screws used on both 1P and 2P systems. Hex head standoffs used in 2P systems (replaces screws used on 1P systems). Plastic standoffs used in 2P systems (not present on 1P systems). Unfastening the Motherboard From the Chassis FIGURE 4-39 Chapter 4 Maintaining the Workstation 4-53...
- Page 102 Section 4.5.5, “Replacing or Adding DIMMs” on page 4-28 ■ Installation is the reverse of this procedure. Caution – Observe proper ESD precautions when handling the new motherboard. 4-54 Sun Java Workstation W1100z and W2100z User Guide • January 2005...
-
Page 103: System Specifications
To obtain maximum reliability and performance, install your workstation into a proper environment and ensure correct configuration as discussed in this chapter. Physical Specifications lists the physical specifications for the Sun Java Workstation W1100z and TABLE A-1 W2100z. Sun Java Workstation W1100z and W2100z Physical Specifications... -
Page 104: Power Specifications
Power Specifications The maximum continuous power for the Sun Java Workstation W1100z and W2100z is 530 W. Additional power specifications for the workstation are shown in TABLE A-2 TABLE A-3 TABLE A-4 Input Voltage Range TABLE A-2 Minimum Minimum Nominal... -
Page 105: Environmental Specifications
Environmental Specifications Environmental specifications for the Sun Java Workstation W1100z and W2100z are shown in TABLE A-5 Sun Java Workstation W1100z and W2100z Environmental Specifications TABLE A-5 Specification State British Metric Humidity Operating 10%-90% RH non- 10%-90% RH non- condensing, 80.6˚ F condensing, 27˚... - Page 106 Sun Java Workstation W1100z and W2100z User Guide • January 2005...