
Related Manuals for Panasonic NN-CF874B


Summary of Contents for Panasonic NN-CF874B
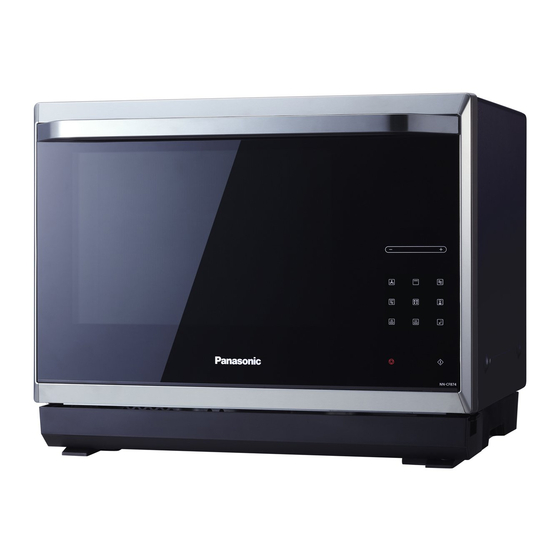
- Page 1 Operating Instructions and Cook Book Microwave, Grill & Convection Oven Household Use Only Model No. Please read these instructions carefully before using this product, and save this manual for future use.
- Page 2 We are glad you have chosen to purchase a PANASONIC microwave oven. Before operating this oven, please read these instructions carefully and completely, and keep them for further reference. If you have only used a microwave oven for reheating and defrosting, with Panasonic’s Inverter Technology you can be reassured of excellent results when cooking a variety of foods, as the ‘soft’...
-
Page 3: Table Of Contents
Quick Guide to Operation ......................39-41 Maintenance Care of your Microwave Oven ......................35 Before Requesting Service ......................36-37 Technical Specifi cations .......................37 Panasonic Warranty ........................38 Cooking Guide Microwave Recipe Techniques ....................42-44 Breakfast Basics ........................45-46 Soups, Snacks and Starters ....................47-54 Fish and Shellfi sh ........................55-58 Poultry .............................59-66... -
Page 4: Safety Instructions
Important Safety Instructions READ CAREFULLY AND KEEP FOR FUTURE REFERENCE Precautions to be taken when Practical Hints: using Microwave Ovens for Heating 1. For initial use of GRILL, CONVECTION, and COMBINATION, if you see white smoke arise, it foodstuffs is not malfunction. INSPECTION FOR DAMAGE. -
Page 5: Installation And General Instructions
Important Safety Instructions Circuits WARNING Your microwave ovens should be operated on a separate circuit from other appliances. The a) The door seals and door seal areas should voltage used must be the same as specifi ed on be cleaned with a damp cloth. The appliance this microwave oven. - Page 6 It is not intended for use inside a to ensure that meat and poultry are thoroughly cupboard. This oven may be built into a wall cooked. cabinet by using the proper trim kit, (NN-TK813CSCP, Stainless) which may be purchased from you local Panasonic dealer. – 4 –...
-
Page 7: Microwaves And How They Work
Installation and General Instructions (continued) 9. Extreme care should be taken when cooking 7. COOKING TIMES given in the Cooking Guide section are APPROXIMATE. Factors that may popcorn in a microwave oven. Cook for minimum time as recommended by manufacturer. Use affect cooking time are preferred degree of the directions suitable for the wattage of your moisture content, starting temperature, altitude,... -
Page 8: Cookware And Utensils Guide
Cookware and Utensils Guide It is important to use the correct container when Cooking Bags designed to withstand boiling, cooking in a microwave oven. The following will help freezing, or conventional heating are microwave you make the right selection. safe. Prepare bags according to manufacturer’s directions. -
Page 9: Cookware And Utensil Chart
Cookware and Utensil Chart Microwave Grill Convection Combination Aluminium foil for shielding for shielding Ceramic Plate Browning Dish Brown paper bags Dinnerware oven/microwave safe non-oven/microwave safe Disposable paperboard containers yes* yes* yes* Glassware oven glassware & ceramic non-heat resistant Metal cookware Wire shelf yes* Metal twist-ties... -
Page 10: Feature Diagram
Feature Diagram Flat Table If the fl at table is hot, allow cooling down before cleaning Do not directly place the food on the fl at table. Place it on a container or container rack special for the microwave oven. Grill Elements Convection Heater Caution Label... -
Page 11: Feature Diagram
4. After cleaning, re-connect the drip onto the legs. tray to the plastic feet. 3. Built-in Oven using a Panasonic trim kit To clean the drip tray, remove the trim kit frame by opening the door, hold onto the top frame and gently pull forward. -
Page 12: Control Panel
Control Panel Display Window Slider Bar (more/less) (pg.11, 25) Convection key Micro Power key (pg.20-21) (pg.15) Grill key Timer/Clock key (pg.18-19) (pg.13, 34) Combination key Turbo Defrost key (pg.22) (pg.16) Sensor Menu Set key (pg.25) Auto Cook & Inverter Melt/Soften Menu (pg.28, 33) Start key One touch allows oven to begin... -
Page 13: Display Window
Display Window To help you operate the oven, the following numbers/symbols will appear in the display window. Number (Time/Menu/ Temperature Display Weight/Temp.) Child Safety Lock Setting Weight Display 3-Stage Display Time Display (Minute/Second) Defrost Feature Start Feature Set Display More/Less Display Enamel Shelf Display Micro power Feature Glass Shelf Display... - Page 14 Let’s Start To Use Your Oven! Plug in Plug into a properly earthed electrical outlet. “WELCOME TO PANASONIC MICROWAVE OVEN COOKING” appears in the Display Window. (This will immediately cease when any key is pressed.) Open Door Open the door and place container with food on Flat Table in the oven. Then close the door.
-
Page 15: Operation Guide In The Display Window
Tap Timer/Clock four times. Display window To Set Clock When the oven is fi rst plugged in “WELCOME TO PANASONIC MICROWAVE OVEN COOKING” appears in display window. You can use the oven without setting the clock. E.g.: 10:30 twice “SET TIME’’... -
Page 16: Ingredient Conversion Chart
To Use Child Safety Lock This feature allows you to prevent operation of the oven by a young child; however, the door will open. You can set Child Safety Lock when colon or time of day is displayed. To set Colon or time of day is displayed Press 3 times. -
Page 17: To Cook/Reheat/Defrost By Micro Power By Time Setting
Micro Power Time Setting To Cook/Reheat/Defrost on This feature allows you to set the desired power and time for cooking by yourself. Touch once Touch to select "Micro Power". Tap “+”/“-” or swipe the slider bar to select Micro Power level Touch once Touch the Set key to verify your selection Micro Power level. -
Page 18: To Defrosting
To Defrosting Turbo Defrost This feature allows you to defrost meat, poultry and seafood automatically by just setting the weight of the food. Touch once Touch to select "Turbo Defrost". Tap “+”/“-” or swipe the slider bar to set defrost weight The shape and size of the food will determine the maximum weight the oven can accommodate. -
Page 19: Defrosting Tips And Techniques
Defrosting Tips and Techniques Preparation for Freezing: 1. Heavy-duty plastic wraps, bags and freezer wrap are suitable. 2. Freeze meats, poultry and fi sh in packages with only 1 or 2 layers of food. To aid in separating layers, place two pieces of wax paper between them. 3. -
Page 20: To Cook On Grill By Time Setting
To Cook on Grill by Time Setting There are three power levels for grill. When grilling, heat is radiated from two heaters. It is especially suitable for thin slices of meat and seafood as well as bread and meals. Most foods require turning halfway during cooking. -
Page 21: To Cook On Grill By Time Setting
To Cook on Grill by Time Setting (continued) With Preheating: Touch once Touch to select "Grill". Tap “+”/“-” or swipe the slider bar to select Grill level Power Level WATTAGE Type of Food Grill 1 (High) 1300 W Garlic Bread, Toast Grill 2 (Medium) 950 W Seafood... -
Page 22: To Cook On Convection By Time Setting
To Cook on Convection by Time Setting The oven can be used as a conventional oven using the CONVECTION mode which incorporates a heating element with a fan. For best results always place food in a preheated oven. The grill will come on when the oven is preheating. -
Page 23: To Cook On Convection By Time Setting
To Cook on Convection by Time Setting (continued) With Preheating: Touch once Touch to select "Convection". Tap “+”/“-” or swipe the slider bar to select desired temperature. (40 °C, 100 °C~230 °C) The oven offer a choice of convection temperatures 40 °C and 100 °C ~ 230 °C in 10 °C increments. For quick selection of the most commonly used cooking temperatures, the temperatures start at 150 °C. -
Page 24: To Cook On Combination By Time Setting
To Cook on Combination by Time Setting There are three power levels for combination. It's a good way for roasting foods by combining microwave and grill effectively. It's suitable for roasting poultry, meat and seafood. This function can ensure the foods even cooking and keep the crispness of certain foods. -
Page 25: 3-Stages Setting
3-Stages Setting This feature allows you to program 3 Stages of cooking continuously. E.g.: Continually set [Medium Power] 2 minutes, [Combination 1] 3 minutes and [Grill 1] 2 minutes. 1. Touch to select 2. Tap “+”/“-” or swipe 3. Touch the Set key to verify Micro Power the slider bar to select your desired power level. -
Page 26: To Cook Using The Recipe Store
To Cook using the Recipe Store This feature allows you to pre-program your oven for regular reheating or cooking tasks. You are able to preprogram your oven for a specifi c power level and time that is convenient for you. You are able to preprogram three memory tasks. -
Page 27: To Cook Food Using Sensor Reheat/Cook
Sensor Reheat/Cook To Cook Food Using Sensor Cook/Reheat allows you to cook foods without selecting times and power levels. The sensor detects the heat and humidity generated by the food and cooks your food automatically. Place food into an appropriate sized dish for the volume of food you are cooking. Cover securely with plastic wrap or a securely fi... - Page 28 Sensor Reheat/Cook To Cook Food Using (continued) 1. Sensor Reheat (uses microwave only) It may be necessary to adjust the water to your Reheating by Sensor is suitable for pre-cooked personal preference. Using a large size dish will foods. There is a setting for frozen and refrigerator prevent the rice from boiling over.
- Page 29 Sensor Reheat/Cook To Cook Food Using (continued) 7. Casserole (uses microwave only) 9. Steam Frozen Fish (uses microwave only) Suitable for cooking casserole with less tender cut Suitable for most varieties of fi sh fi llets, steak sand soft meat combined with liquid and vegetables. Cut cutlets that have been frozen in individual portions.
- Page 30 Auto Cook To Cook Food Using This feature allows you to cook most of your favourite foods by setting the weight only. The oven determines the Microwave power level and/or Combination setting, then the cooking time automatically. Select the category of food and then just enter the weight. Do not include the weight of any added water or the container weight.
-
Page 31: To Cook Food Using Auto Cook
To Cook Food Using Auto Cook (continued) For Menu with preheat, please operate as follows: Touch Once The menu appears in the Display Window. Select desired menu Tapping “+”/“-” or swipe the slider bar until the desired menu appears in the Display Window. Touch once Touch the Set key to verify the selection. - Page 32 To Cook Food Using Auto Cook (continued) Accessory and Menu Weight Recommended Container wire shelf in middle position with 12. Grill chicken pieces 400 g 600 g 800 g 1000 g glass shelf in lower position wire shelf in middle position with 13.
- Page 33 To Cook Food Using Auto Cook (continued) 12. Grill Chicken Pieces (uses combination + grill) 16. Roast Lamb (uses convection only) Suitable for most cuts of chicken pieces. Pieces Suitable for roasting joints of lamb, legs, boned and can be marinated or plain. Place marinated chicken rolled loin, rack of lamb and shoulder roasts.
-
Page 34: To Cook Food Using Auto Cook
To Cook Food Using Auto Cook Menu (continued) 20. Fresh Crispy Top 23. Sponge Pudding (uses microwave only) (uses convection only) For cooking individual steamed sponge puddings. Use for heating and crisping the top of foods like Use packet mixes available from supermarkets or pasta bake, macaroni cheese, cottage pie and individual recipes. -
Page 35: To Use Inverter Melt & Soften
To Use Inverter Melt & Soften This feature allows you to melt/soften food. There is no need to select the power level or cooking time as the microwave does this for you. Touch Once The menu appears in the Display Window. Select desired menu Tapping “+”/“-”... -
Page 36: To Use Timer
To Use Timer This feature allows you to program standing after cooking is completed and to program the oven as a minute or 10 seconds timer or program delay start. To Use as a Kitchen Timer Touch once. Set desired amount of time. Touch Start.