Hotpoint SH103PX S Operating Instructions Manual
Hotpoint oven
Hide thumbs
Also See for SH103PX S:
- Operating instructions manual (16 pages) ,
- Operating instructions manual (16 pages)

Related Manuals for Hotpoint SH103PX S


Summary of Contents for Hotpoint SH103PX S
-
Page 1: Table Of Contents
SH103PX S KSO103PX S English Operating Instructions OVEN Contents Operating Instructions,1 Warnings,2 Description of the appliance,3 Installation,4 Electrical Connection,5 Start-up and use,6 Modes,7 Precautions and tips,11 Maintenance and care,11 Troubleshooting,14 Afetr Sales Service,15 Guarantee,16... -
Page 2: Warnings
Warnings Before initiating the automatic cleaning cycle: WARNING: The appliance and its accessible parts become hot during use. Care should be taken to avoid touching from the inside of the oven using a damp heating elements. Children less than 8 years of age shall be kept away unless continuously supervised. -
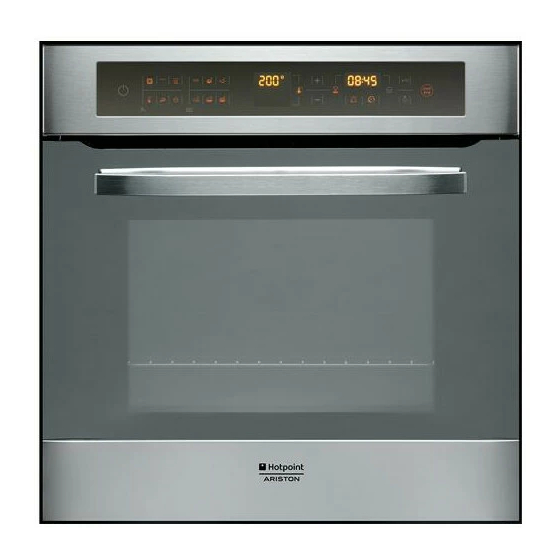
Page 3: Description Of The Appliance
Description of the appliance Overall view 1. POSITION 1 2. POSITION 2 3. POSITION 3 4. POSITION 4 5. POSITION 5 6. GUIDES for the sliding racks 7. DRIPPING PAN 8. GRILL 9. Control panel Control panel 1. MANUAL COOKING MODE Icons 2. -
Page 4: Installation
Installation Ventilation To ensure adequate ventilation, the back panel of the cabinet must be removed. It is advisable to install the oven ! Please keep this instruction booklet in a safe place for so that it rests on two strips of wood, or on a completely future reference. -
Page 5: Electrical Connection
Electrical Connection Unplug the appliance before all operations, even when replacing the oven lamp. Using the appliance without correct earthing is highly The electrical connection to the mains must be made on dangerous. the appliance. The power voltage and frequency are as indicated on the rating plate. -
Page 6: Start-Up And Use
Start-up and use 1. Press button 2. Set the desired time using buttons and . ! When inserting the shelf 3. Once you have reached the desired value, press the make sure the backstop is button again. at the rear of the cavity (see image). -
Page 7: Modes
Cooling ventilation Manual cooking modes ! All cooking modes have a default cooking temperature In order to cool down the external temperature of the oven, a cooling fan blows a stream of air between the control panel and the oven door, as well as towards the bottom of the oven door. 30°C and 250°C as desired (300°C for GRILL mode). -
Page 8: Automatic Cooking Modes
ECO mode BREAD mode The rear heating element and the fan are switched on, Use this function to bake bread. To obtain the best results, we thus guaranteeing the distribution of heat in a delicate and recommend that you carefully observe the instructions below: uniform manner throughout the entire oven.This energy saving mode is recommended for small dishes, ideal for remember to pour 50 g (0,5 dl) of cold water into the... -
Page 9: Programming Cooking
Programming cooking Practical cooking advice ! A cooking mode must be selected before programming ! Do not place racks in position 1 and 5 during fan-assisted can take place. cooking. This is because excessive direct heat can burn temperature sensitive foods. ! Once a cooking mode has been selected, the button ! In the GRILL and FAN GRILLING cooking modes,... -
Page 10: Cooking Advice Table
Cooking advice table Rack position Recommended Cooking Modes Foods Weight Preheating Temperature duration (in kg) (°C) (minutes) Standard Sliding guide guide Manual rails rails Multilevel* 2 and 4 1 and 3 210-220 20-25 2 and 4 1 and 3 30-35 2 and 4 1 and 3 160-170... -
Page 11: Precautions And Tips
Precautions and tips Disposal legislation so that the packaging may be reused. ! This appliance has been designed and manufactured in compliance with international safety standards. The Electrical and Electronic Equipment (WEEE), requires following warnings are provided for safety reasons and that old household electrical appliances must not must be read carefully. -
Page 12: Sliding Rack Kit Assembly
Sliding rack kit assembly each use, while it is still lukewarm. Use hot water and detergent, then rinse well and dry with a soft cloth. Do To assemble the sliding not use abrasive products. racks: 1. Remove the two frames, - can be washed like everyday crockery, and are even lifting them away from the dishwasher safe. -
Page 13: Automatic Cleaning With The Fast Clean Function
Automatic cleaning with the FAST CLEAN 3. Press the button to activate the programmed mode. function 4. When the selected time has elapsed, “END” appears on With the FAST CLEAN mode, the internal temperature of the the TEMPERATURE display and a buzzer sounds. oven reaches 500°C. -
Page 14: Troubleshooting
Troubleshooting Problem Possible cause Solution The appliance has just been Set the clock. The “Clock button” and the connected to the electricity digits on the display flash. mains or there has been a blackou A programmed cooking mode There has been a blackout. Reprogram the cooking mode. -
Page 15: Afetr Sales Service
Afetr Sales Service No one is better placed to care for your Hotpoint appliance during the course of its working life than us – the manufacturer. Essential Contact Information Hotpoint Service We are the largest service team in the country offering you access to 400 skilled telephone advisors and 1000 fully qualified engineers on call to ensure you receive fast, reliable, local service. -
Page 16: Guarantee
5 Year Parts Guarantee Hotpoint also offers you a free 5 year parts guarantee. This additional guarantee is conditional on you registering your appliance with us and the parts being fitted by one of our authorised engineers. There will be a charge for our engineer’s time.